Installed Assets and Incremental Synchronization
The following section discusses:
Example: Entering an Installed Asset from CRM HelpDesk
Example: Integrating an asset from FSCM to CRM
The following presents an example of entering an installed asset from CRM HelpDesk:
Log on to the CRM database. Access the Installed Products Configuration – Set Up Options page (Set Up CRM, Product Related, Installed Product, Configuration.)
This example illustrates the fields and controls on the Installed Products Configuration - Set Up Options page (CRM).

Select the Show Serial Number check box and the Enable Asset Integration with PeopleSoft Financials check box. Save.
Enter an asset. Access the Installed Assets page (HelpDesk, Installed Assets):
This example illustrates the fields and controls on the Installed Assets page.
Click the Add Installed Asset button and enter the following information:
This example illustrates the fields and controls on the Add Installed Asset Button Page.

Select the SetID from the list, enter the Installed Asset ID, and click the Add Installed Asset button:
This example illustrates the fields and controls on the Installed Assets (Installed Product) Page.
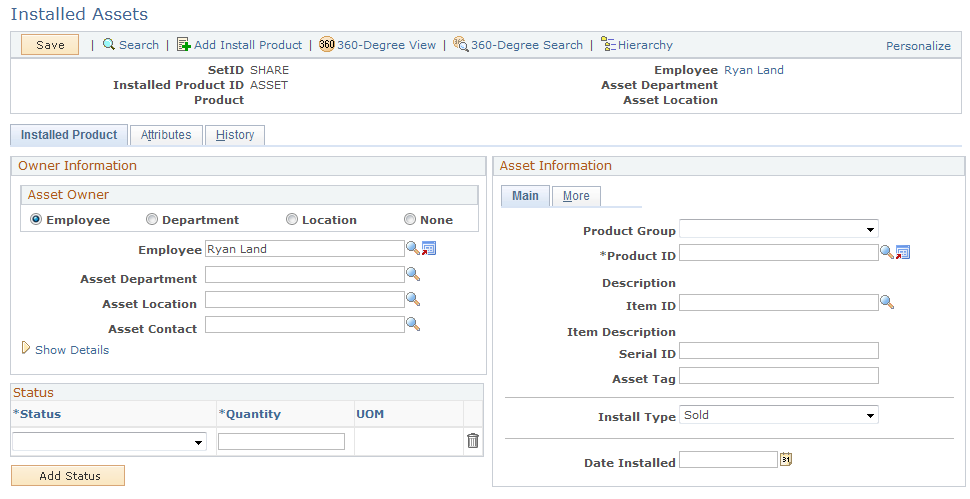
Enter a First Name value (Ryan, in this example) and click the Search button. Enter data as shown below:
This example illustrates the fields and controls on the Installed Assets (Installed Product) Page with data. You can find definitions for the fields and controls later on this page.

Enter the following values:
Product ID = IUT-01
Serial ID and Asset Tag = SERIAL123
Asset Type = IT Hardware
Asset Subtype = DESKTOP
Status = Installed; Quantity = 1.0000
Click the Save button.
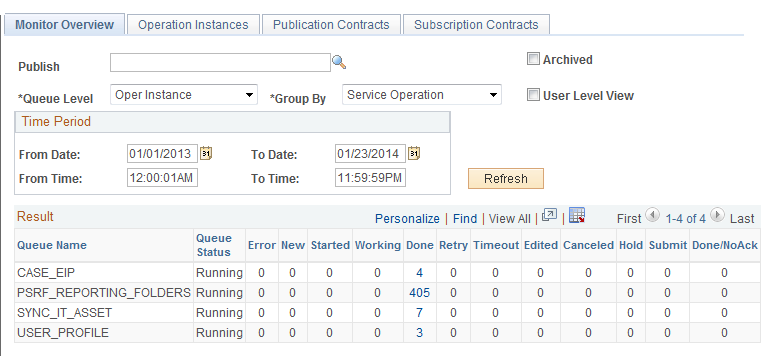
Access the Integration Broker Asynchronous Services – Monitor Overview page (PeopleTools, Integration Broker, Service Operations Monitor, Monitoring, Asynchronous Services, Monitor Overview):
This example illustrates the fields and controls on the Asynchronous Services Monitor Overview Page.

Click the Done hyperlink for the Service Operation, SYNC_IT_ASSET:
This example illustrates the fields and controls on the Asynchronous Serious — Operation Instances Page.
Click on Details link and ensure that the Publication Contract has a Status of Done.
This example illustrates the fields and controls on the Asynchronous Details (SYNC_IT_ASSET) Publication Contracts Subscriber Node.

Click on View XML link and confirm that this is the Installed Asset that you entered by scrolling through the XML and finding your Serial ID.
This example illustrates the fields and controls on the Asynchronous Details (IB XML) Publication Contracts.

The Done status indicates that it published the XML successfully.
Log into the Financials database and confirm that the asset was integrated and added successfully. Access the Asynchronous Services page in PeopleTools Integration Broker (PeopleTools, Integration Broker, Service Operations Monitor, Monitoring, Asynchronous Services, Monitor Overview):
This example illustrates the fields and controls on the Asynchronous Services Page in PeopleTools Integration Broker.
Click on the link in the Done column of the SYNC_IT_ASSET Service Operation. Confirm that the Status = Done.
Click on View XML link:
This example illustrates the fields and controls on the Service Operation (IB XML SYNC_IT_ASSET) Subscription Contracts Page.

Scroll through the XML and verify that it is the Installed Asset entered in the CRM database (C920P20 in this example).
Find the asset in PeopleSoft Asset Management. Access the Search for an Asset page (Asset Management, Search for an Asset):
This example illustrates the fields and controls on the Search for an Asset Page.

Enter the Serial ID of the Installed Asset that was created in C920P20 (in this example) and click on Search button. If the asset was created successfully, you should see it in the Search Results section.
Assumption: Integration Broker Nodes for the Financials and CRM database are already created (previous steps).
Add a new routing to the service operation, SYNC_IT_ASSETS. Access the Service Operations - Routings page for the SYNC_IT_ASSETS service (PeopleTools, Integration Broker, Integration Setup, Service Operations. Find the SYNC_IT_ASSETS service operation and click the Routings tab):
This example illustrates the fields and controls on the Service Operations (SYNC_IT_ASSET) Routings Page.

Create a Routing called ITAM2 (for example) from the Financials to the CRM database. Enter ITAM2 for the Routing Name field and click the Add button (ITAM2 pictured as already created above):
This example illustrates the fields and controls on the Create Routing (Financials to CRM) Page. You can find definitions for the fields and controls later on this page.
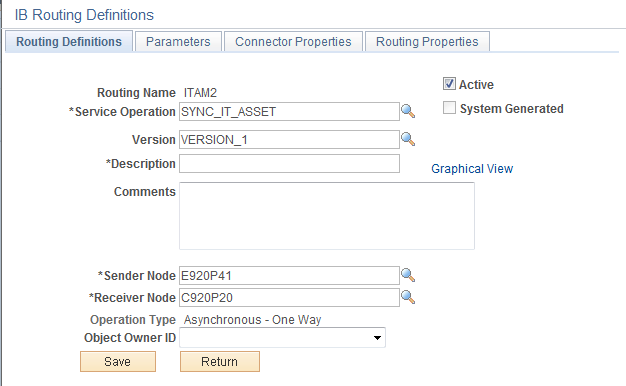
Enter the following information:
Service Operation = SYNC_IT_ASSET
Sender Node = E920P41 (in this example)
Receiver Node = C920P20 (in this example)
Save
Log in to the CRM database and add a new Routing from E920P41 to C920P20 (values in this example) for the SYNC_IT_ASSET Service Operation:
Access the Service Operations - Routings page for the SYNC_IT_ASSETS service (PeopleTools, Integration Broker, Integration Setup, Service Operations.)
Find the SYNC_IT_ASSETS service operation and click the Routings tab):
This example illustrates the fields and controls on the Routings (SYNC_IT_ASSET) Page.

Enter a Routing Name (for example, IT_ASSETS_FROM_FSCM) and click the Add button (shown above as already created):
This example illustrates the fields and controls on the Add Routing Name (IT_ASSETS) on Routing Definitions Page
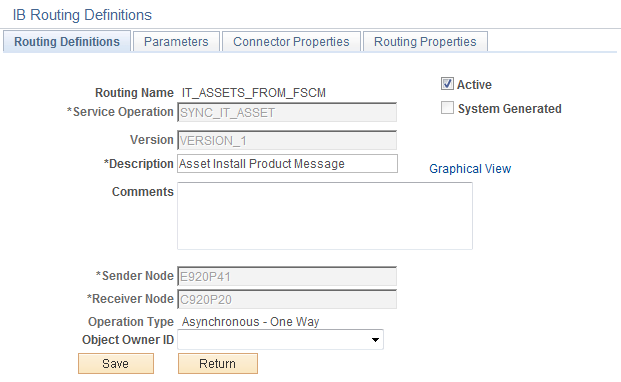
Click the Save button.
Click on the Parameters tab
This example illustrates the fields and controls on the Parameters (INST_PROD_SYNC) Page. You can find definitions for the fields and controls later on this page.

Enter the following information:
External Alias: SYNC_IT_ASSET.VERSION_1
Message.Ver into Transform 1: SYNC_IT_ASSET.VERSION_1
Transform Program 1: RF_AM_IN
Message.Ver out of Transforms: INSTALLED_PRODUCT_SYNC.VERSION_1
Test the integration by entering a new asset in the Financials database:
Access the Asset Management Basic Add page and add a new value (Asset Management, Asset Transactions, Owned Assets, Basic Add). Enter an Asset Identification (for example: TEST_1) and click the Add button:
This example illustrates the fields and controls on the Asset Management — Basic Add Page. You can find definitions for the fields and controls later on this page.

Enter the following information:
Description: TEST_1
Short Description: TEST_1
Tag Number: TEST_1
Asset Type: Hardware
Asset Subtype: DESKTOP
Click the Operation/Maintenance tab:
This example illustrates the fields and controls on the Asset Management Operations Maintenance Page.
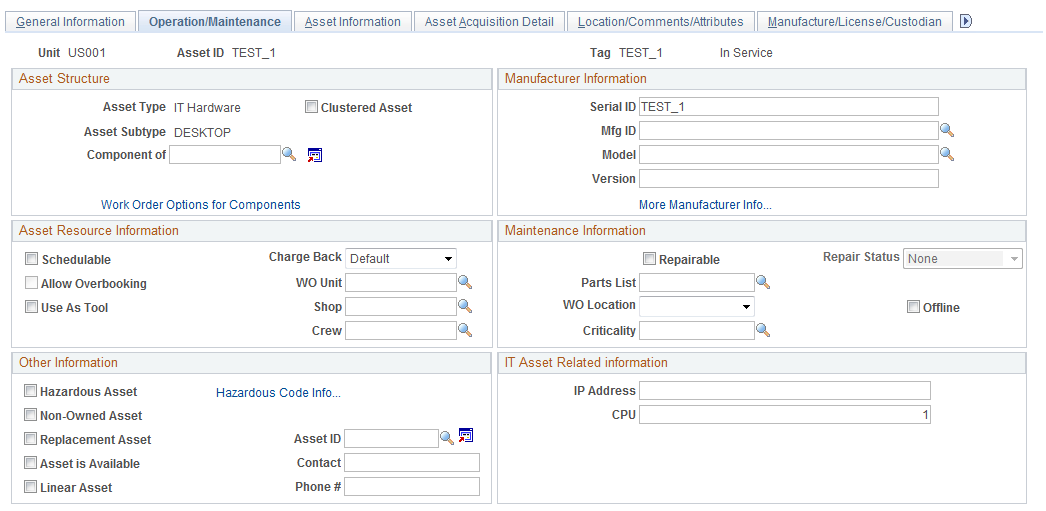
Enter a Serial ID value (ex: TEST_1) and save the asset.
Access the Asynchronous Services - Publication Contracts page (PeopleTools, Integration Broker, Service Operations Monitor, Monitoring, Asynchronous Services, Publication Contracts):
Enter SYNC_IT_ASSET and click the Search button:
Click the Details link for your transaction:
This example illustrates the fields and controls on the Asynchronous Details (SYNC_IT_ASSET) Publication Contracts Subscriber Node C920P20.

The Publication Contract status should be Done.
Click the View XML link:
This example illustrates the fields and controls on the Asynchronous Details (IB XML) Asset ID Page.
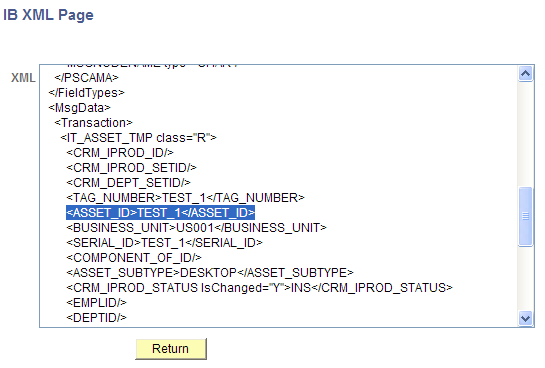
Scroll through the XML and locate the ASSET_ID tag. Verify the Asset ID value.
Log in to the CRM database and access the Asynchronous Services - Subscription Contracts page (PeopleTools, Integration Broker, Service Operations Monitor, Monitoring, Asynchronous Services, Subscription Contracts):
On the Subscription Contracts page, click the Details link.
Verify that the transaction status is Done.
Click the View XML link:
This example illustrates the fields and controls on the Asynchronous Details (SERIAL_ID) IB XML Page.
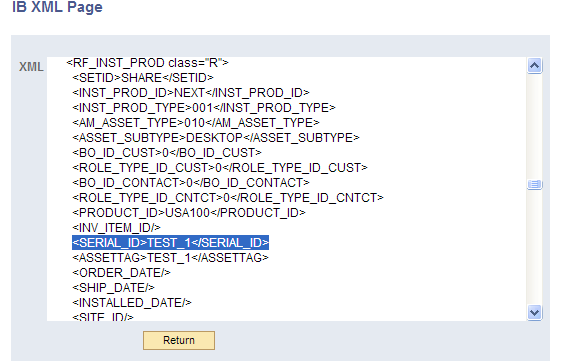
Scroll through the XML and find the Asset ID/Serial ID that was created in the Financials database.
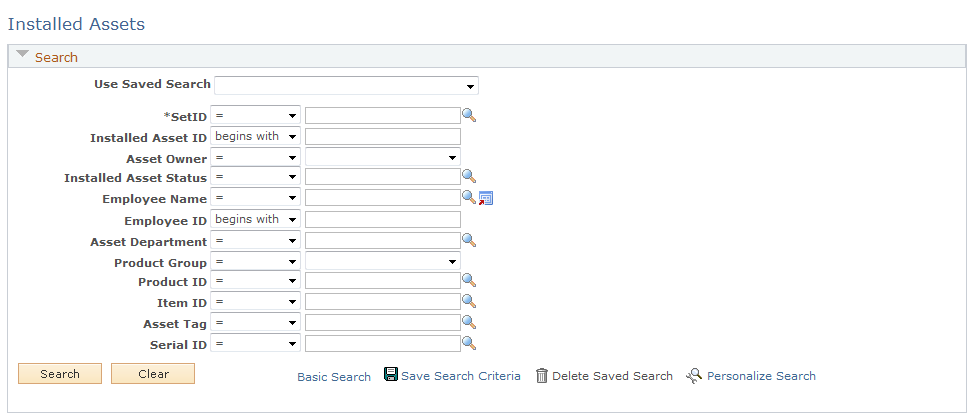
Search for the Asset by Serial ID (TEST_1 for the SHARE SetID) from the Installed Assets page (HelpDesk, Installed Assets):
This example illustrates the fields and controls on the Search for Asset on Installed Assets Page.

Note that the check mark in the Validated check box on this page indicates that the displayed CRM installed asset has been validated (synchronized) with the data from the Financials asset system.