Creating Project Requests Using PeopleSoft Fluid User Interface
The Project Request activity guide provides a list of sequential tasks that need to be completed by the requester to create new projects and activities.
Use the Project Request activity guide template to setup the activity guide. For additional information on developing and deploying Activity Guides, see PeopleTools: Portal Technology.
|
Page Name |
Definition Name |
Usage |
|---|---|---|
|
PTS_NUI_SEARCH |
To view existing project requests or create a new request. |
|
|
PTAI_TMPLQUESPGNUI |
To launch the activity guide. Answers to the questions on this page determine the tasks displayed in the activity guide. |
|
|
EOQF_QSTNR_PRVW_FL |
Configurable by the customer in the Questionnaire Framework, these questions provide additional detail about the request. |
|
|
PC_PRQ_PROJ1_FL |
To enter information related to the project. |
|
|
Project Request Activity Guide Step 3 of 4: Project Activity |
PC_PRQ_PROJACT2_FL |
To enter information related to project activities. |
|
PC_PRQ_PRJTM_FL |
To enter information related to the project team. |
Use the Project Request tile to access the View Project Request page and view existing project requests or create a new project request.
Navigation:
The Project Request tile is delivered as part of the Project Management home page, but the location can change if you change the delivered home pages or if administrators personalize their home pages.
This example illustrates the Project Request tile
View Project Request Page to view existing project requests or create a new request.
Navigation:
This example illustrates the fields and controls on the View Project Request page. You can find definitions for the fields and controls later on this page.
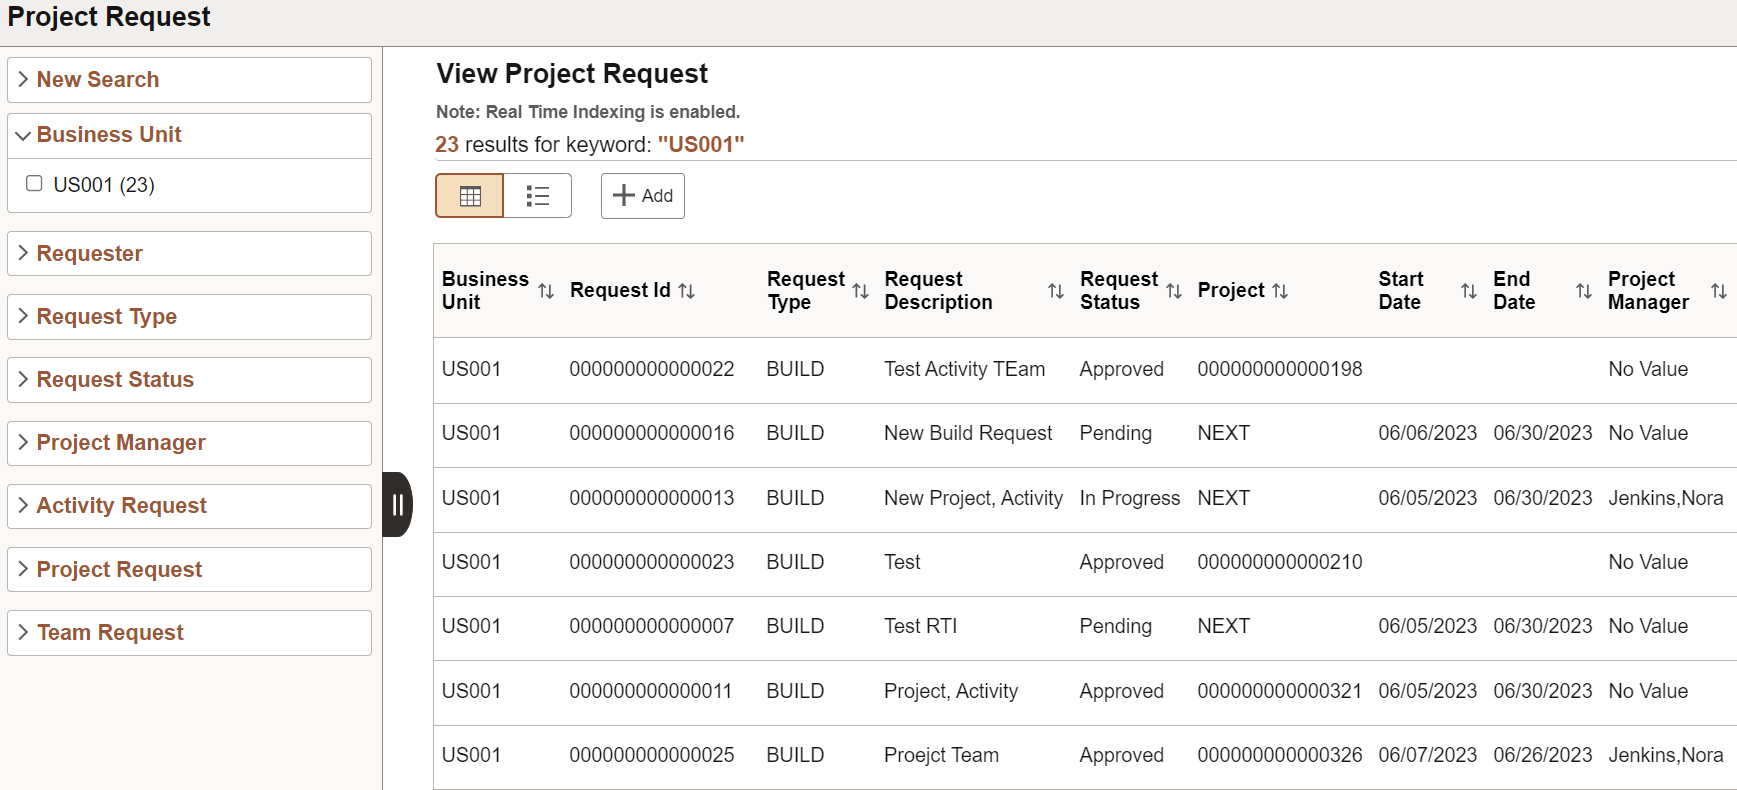
Note: Keyword Search is the default search mechanism for the Project Request component. The search definition must be built before the feature can be used. See Understanding Financials and Supply Chain Search.
Note: To view requests in the search results, customers on PeopleTools 8.59.13 and later should use Real Time Indexing. If Real Time Indexing is not in use then the Project Request index needs to be refreshed on a frequent basis to view new project requests and updates to existing requests. See Understanding Real Time Indexing in FSCM.
|
Field or Control |
Description |
|---|---|
|
|
Click the Add button to create a new request. |

This example illustrates the fields and controls on the Add Project Request page
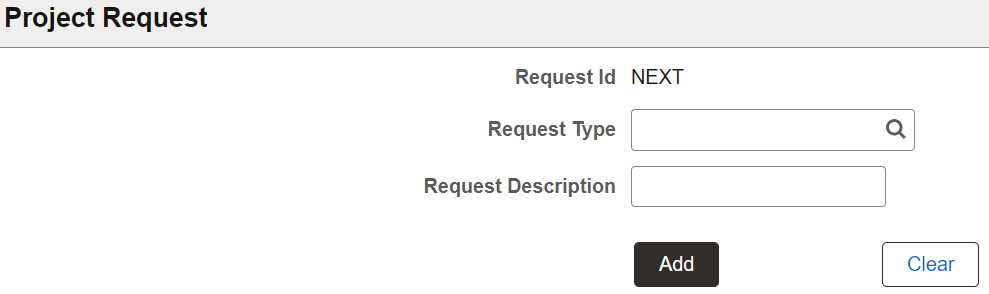
For more information on request types, see Setup Project Request Types.
Use the Activity Guide Questionnaire page (PTAI_TMPLQUESPGNUI) to answer the questions that determine which steps are displayed in the activity guide. The questions to be displayed on this page are set on the Activity guide template. See "Defining an Activity Guide Questionnaire" section in PeopleTools: Portal Technology documentation.
Note: The pages on the activity guide might be displayed differently based on the steps selected on the Questionnaire page.
Navigation:
. Click the Add button.
This example illustrates the fields and controls on the Project Request - Questionnaire page.

|
Field or Control |
Description |
|---|---|
|
Yes or No |
Select Yes or No to determine if the related step is displayed in the activity guide or hidden. Answers cannot be changed after selecting Next. |
|
Next |
Select to initiate the activity guide. |
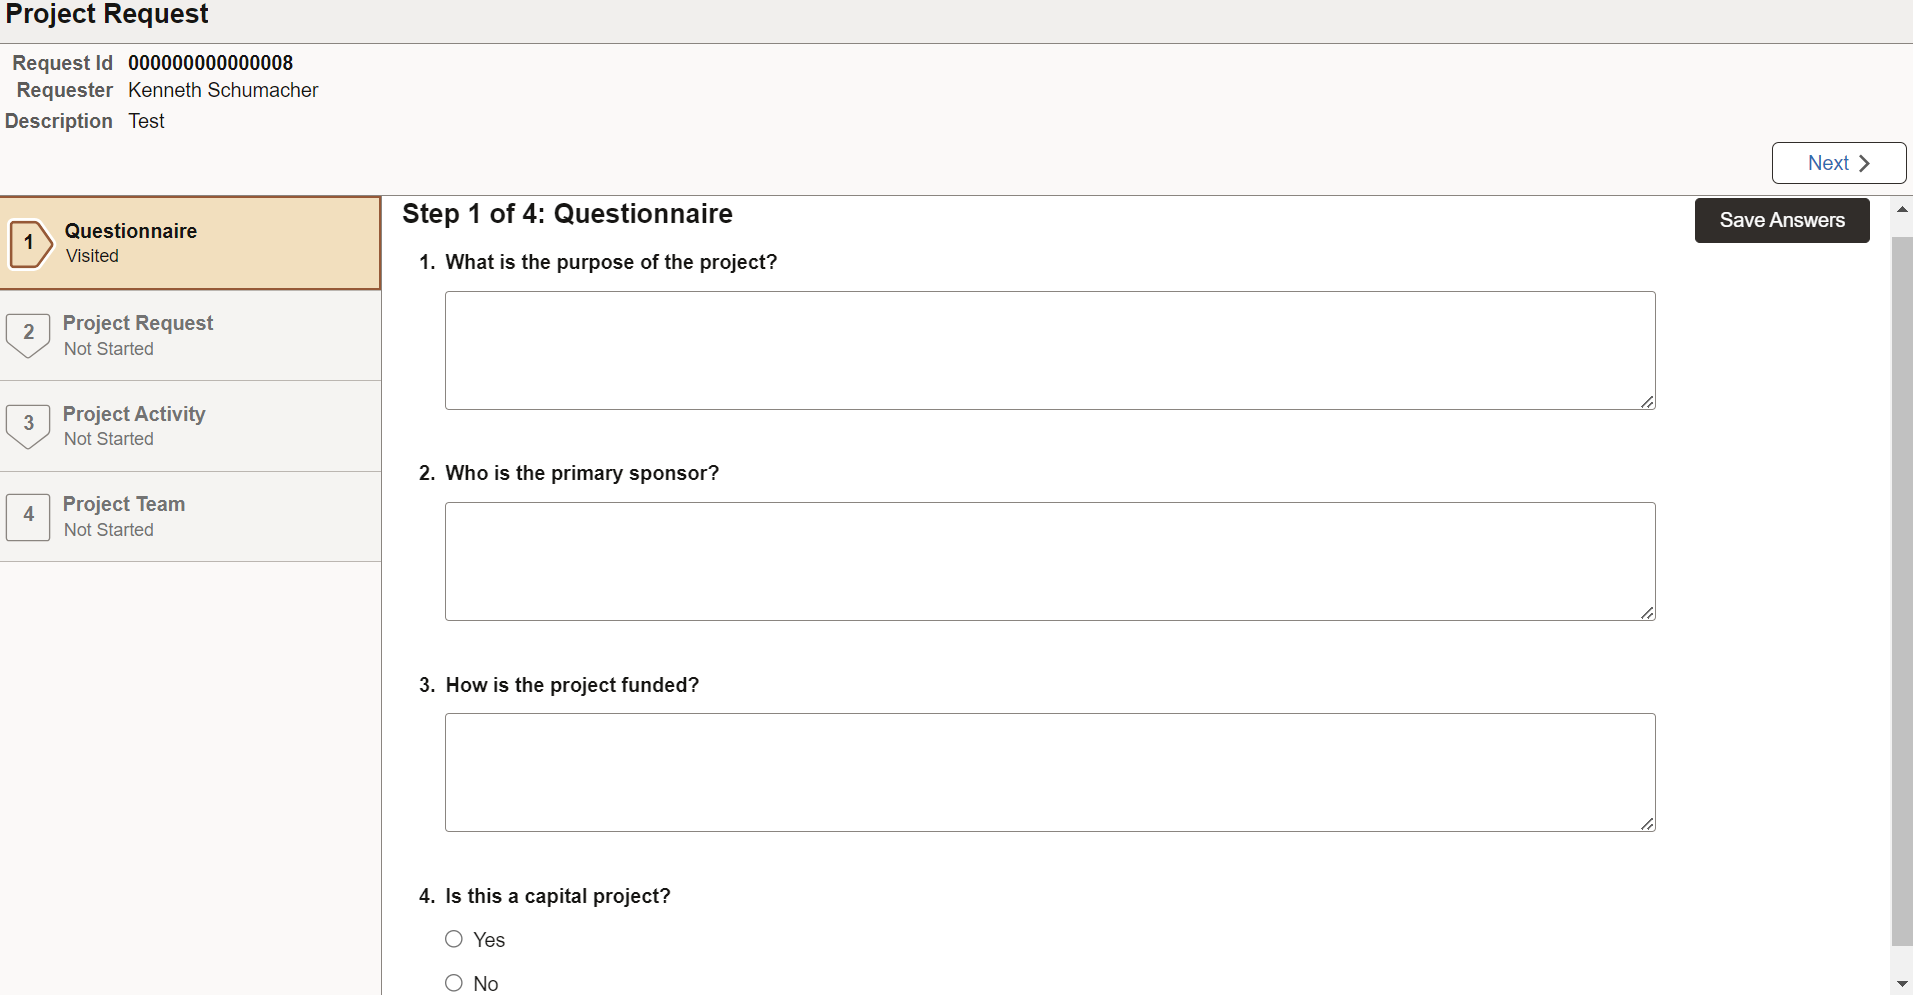
Use the Questionnaire page (EOQF_QSTNR_PRVW_FL) to answer questions related to the request. Configurable by the customer, these questions are provided through the Questionnaire Framework provided through Enterprise Components. See Understanding Questionnaire Framework.
Navigation:
Select the Project Request tile. From the View Project Request page, select the Add button. Answer all questions on the Questionnaire page and select the Next button.
This example illustrates the fields and controls on the Activity Guide Step 1 of 4: Questionnaire page.
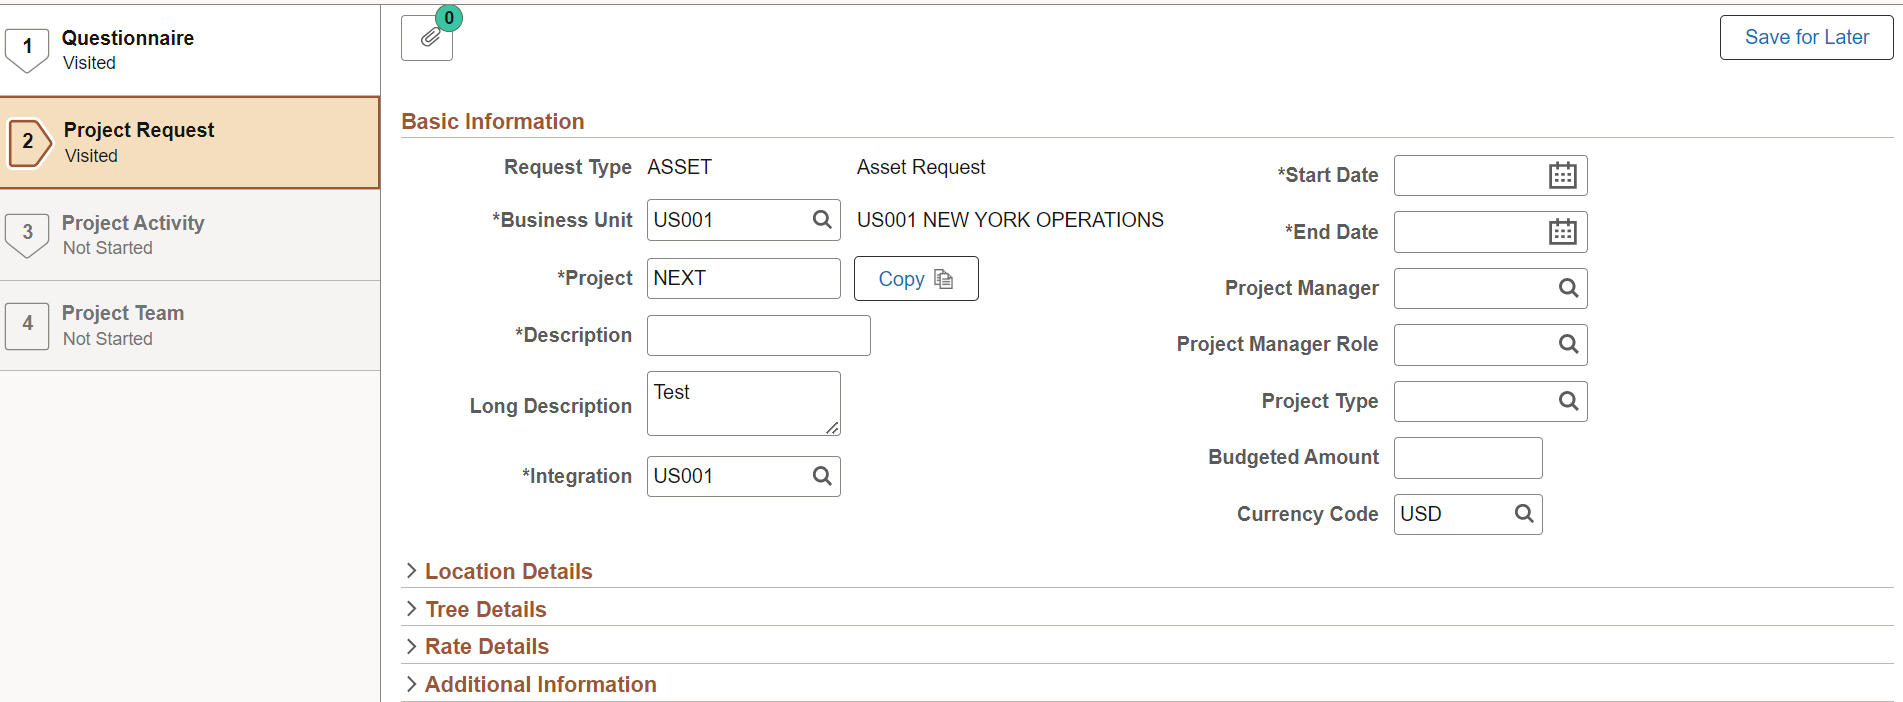
Use the Project Request page (PC_PRQ_PROJ1_FL) to enter the project information.
Navigation:
From the Project Request activity guide, select Project Request.
This example illustrates the fields and controls on the Activity Guide Step 2 of 4: Project Request page.
|
Field or Control |
Description |
|---|---|
|
|
Select to add multiple attachments to the project. |
|
Business Unit |
Displays the business unit. The business unit from the Project User Preferences is displayed as the default value. |
|
|
Select to copy information from an existing project or project template into the project request. |
|
Start Date and End Date |
Enter a start date and an end date. The dates entered here are used as the default date in other tasks of the activity guide. |
|
Integration and Currency Code |
Displays the values from Project User Preferences as the default option. |
|
Standard Activities |
Select Yes to include a prompt for Activity ID on the Project Activity step. |
|
Grants Projects |
For customers who license the Grants application. |
|
Project Category |
For customers who license the Project Management application. |
|
Organization |
Displayed if Project Organization configuration has been created by the organization. |


Note: The fields displayed on each page can be configured using the Page and Field Configurator. For more information, see Using Page and Field Configurator.
Careful consideration should be given when using Page and Field Configurator to hide fields. If all fields are hidden in a group box, then the group box will be hidden. If a separate editable field is changed by the user that triggers a hidden field in the group box to be required, the required field will not be displayed immediately. The field is displayed only after the page is refreshed.
Use the Project Activity page (PC_PRQ_PROJACT2_FL) to enter the project activity details.
Navigation:
From the Project Request activity guide, select Project Activity.
This example illustrates the fields and controls on the Activity Guide Step 3 of 4: Project Activity page.

|
Field or Control |
Description |
|---|---|
|
Activity and Description |
Enter an Activity ID and Description. Auto-numbering using NEXT is not permitted. If standard activities are in place for the project then Activity is a prompt. |
Rate Set and Rate Plan information defaults from the Project step but can be changed.
Use the Project Team page (PC_PRQ_PRJTM_FL) to enter the project team members.
Navigation:
From the Project Request activity guide, select Project Team.
This example illustrates the fields and controls on the Activity Guide Step 4 of 4: Project Team page.

|
Field or Control |
Description |
|---|---|
|
Save |
Select to save the project request. If there are any validation issues, an error message will be displayed. After fixing the error, the requester should Save and Submit the request to clear the error message. Requests that have been submitted and in the process of being approved will display a separate button to validate the request. If error exists, the approver can fix the error and then select the Validate button. |
|
Submit |
Select to submit the project request for approval and view the Project Request Status page. |
Note: The project manager should not be entered on this page. When the project is successfully created, the project manager from the Project Request step is added to the project team component.
This example illustrates the fields and controls on the Project Request Status page.
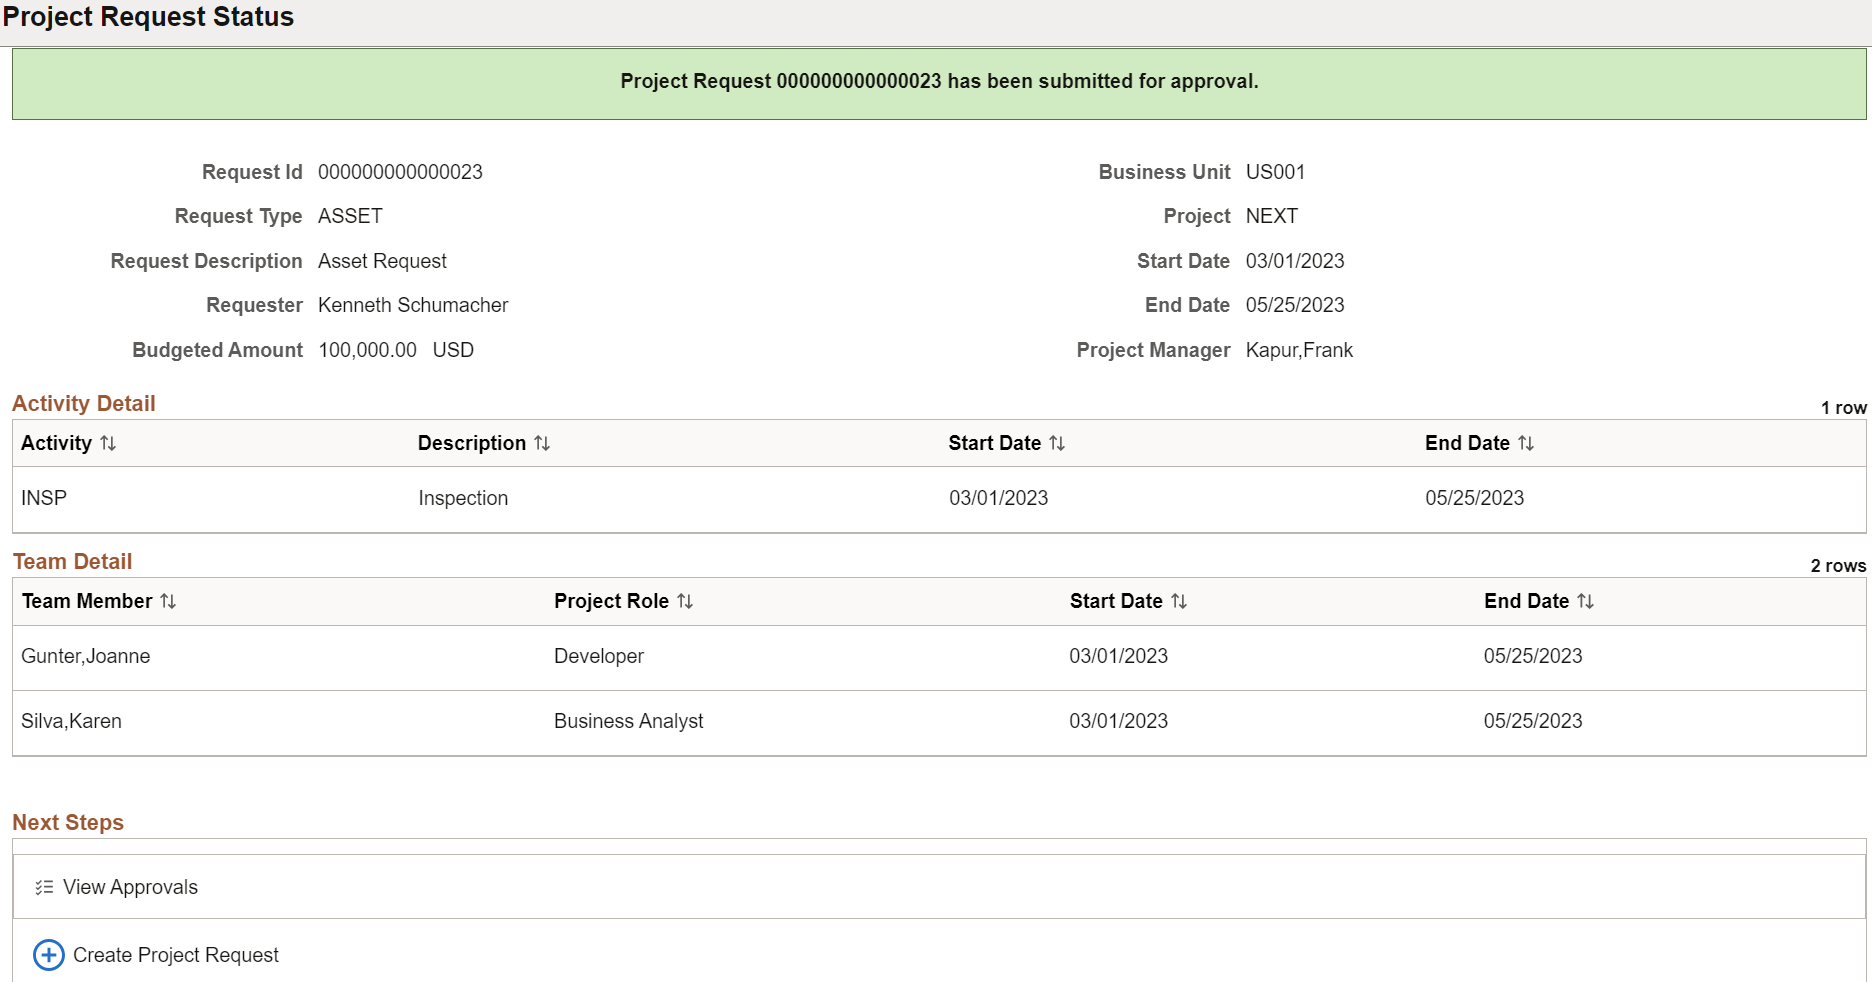
The Project Request Status page allows you to view the approval chain and also to create a new project request. Requests that bypass approvals will have additional links to open the Project, Project Activities and Project Team component.