Entering Data to Create New Applicant Records
This topic describes the data entry process for creating applicant records. A customer service representative completes the pages with information that is supplied by applicants. When it is complete, a recruiter or supervisor can add additional information, such as responses to interview questions, and move to other related pages from within the application by clicking the links on the various pages.
Applicants or customer service representatives, on behalf of the applicant, can use the pages in the self-service component to apply to the organization. The self-service component can be configured to show or hide the applicable pages.
|
Page Name |
Definition Name |
Usage |
|---|---|---|
|
FO_APP_PERS_DATA1 |
Enter contact information. |
|
|
Compose Mail Page |
FO_SND_EMAIL |
Send an email to the applicant. |
|
Applicants for Attachment Page |
FO_RES_ATTACH |
Search for candidates with resumes uploaded to the database and attach the resumes to the email. |
|
Customer Information for Attachment Page |
FO_CUST_SNDMAIL |
Allows users to add customer related information to the email. |
|
Applicants Page |
FO_PROFILE_APP |
Allows the user to enter an applicant ID and the desired placement. When you click the Upload Profile button, the system runs the Generate Candidates Resume process (FO_APP006) and the generated profile is then attached to the email. |
|
FO_APP_PERS_DATA2 |
Enter personal information. |
|
|
FO_APP_JOB_DATA |
Enter job information. |
|
|
FO_APP_AVAIL |
Enter placement and preference information. |
|
|
FO_APP_RESUME |
Attach resume or enter resume text. Attach additional items to the Applicant. |
|
|
FO_APP_QUALIFS |
Add and update competencies and qualifications. |
|
|
Competencies Page |
FO_APP_COMPS |
Add and update competencies. |
|
School Education Page |
FO_APP_SCHOOL |
Add and update school information. |
|
Professional Education Page |
FO_APP_EDUC |
Add and update professional education information. |
|
Licenses/Certificates Page |
FO_APP_LIC |
Add and update licenses and certifications. |
|
Languages Page |
FO_APP_LANG |
Add and update language qualifications. |
|
Memberships Page |
FO_APP_MEM |
Add and update membership information. |
|
Honors and Awards Page |
FO_APP_HON |
Add and update honors and awards. |
|
Test Results Page |
FO_APP_TEST |
Add and update test results. |
|
FO_APP_PRIWRK |
Enter prior work experience information. |
|
|
FO_APP_REF |
Enter reference information. |
|
|
FO_APP_SRC_DATA |
Enter recruitment source information. |
|
|
FO_APP_FORMS |
Add or view pre-defined forms to enter information about the applicant. |
|
|
Forms Page |
FO_APP_FORM_DTL |
Enter data about the applicant or employee by using pre-defined forms. |
|
FO_APP_RESET_STAT |
Reset applicant status from Hire Pending to Active in cases where the FO_APP_HIRE application message fails. |
Use the Contact Information page (FO_APP_PERS_DATA1) to enter contact information.
Navigation:
This example illustrates the fields and controls on the Contact Information page (1 of 2). You can find definitions for the fields and controls later on this page.

This example illustrates the fields and controls on the Contact Information page (2 of 2). You can find definitions for the fields and controls later on this page.

When you create and save the applicant record, the system automatically assigns the next applicant number in the sequence to the applicant. If the applicant becomes an employee, the system assigns an employee ID.
Warning! Although you can override the automatic numbering feature, it is recommended that you either use the feature as designed or assign applicant ID numbers manually, but not both.
Field or Control |
Description |
|---|---|
Applicant Status |
Available statuses are:
|
Status Codes |
Available status codes are:
|
Candidate Overview |
Click to access the Applicant Overview page to view an overview of the applicant previous order information and qualification details. |
Hire as Employee |
Enter the hire date and click this button to hire the applicant as an employee. Note: This button is available only if the applicant has a status of Active. |
Hire as Non-Employee |
Enter the hire date and click this button to hire the applicant as a non-employee (or contractor). Note: This button is available only if the applicant has a status of Active. |
Make Valid |
For individuals with an Applicant (Pending) or Invalid status, click this button to change the status to Active. After it is clicked, the button becomes unavailable. |
Make Invalid |
For individuals with an Active or Applicant Pending status, click this button to change the status to Invalid. After it is clicked, this button is unavailable and the Make Applicant Valid button becomes available. |
Hot List Categories |
Click to assign the applicant to a different hot list category. |
Add To Hot List |
Click to add the applicant to the Applicant Hot List pagelet. After it is clicked, the button becomes unavailable. |
Remove from Hot List |
Click to remove the applicant from the Applicant Hot List pagelet. This button is only available if the applicant is listed on the Applicant Hot List pagelet. |
Contact Information
Enter the effective date for the person information. Complete all the Person Name fields for which you have information.
If the applicant has a mailing address that is different from his or her home address, click the Mailing Address link and then enter the mailing address.
Note: Because HCM does not provide the Use Home Address as Mailing functionality, the system creates two addresses in HCM during the hire process: one for home and one for mail. When the employee is hired, the system hides the Mailing Address link and the Use Home Address as Mailing field to avoid conflicts with data changes in PeopleSoft HCM. Users must click the Edit Address button on the Employee page to view addresses in PeopleSoft HCM.
The Country field is automatically populated from the user's personal preferences, but you can change it. Other address fields may change depending upon the country that is selected.
Phone Numbers, Email Addresses, and Web Addresses
Complete the group box fields for which you have information. At least one phone number must be entered.
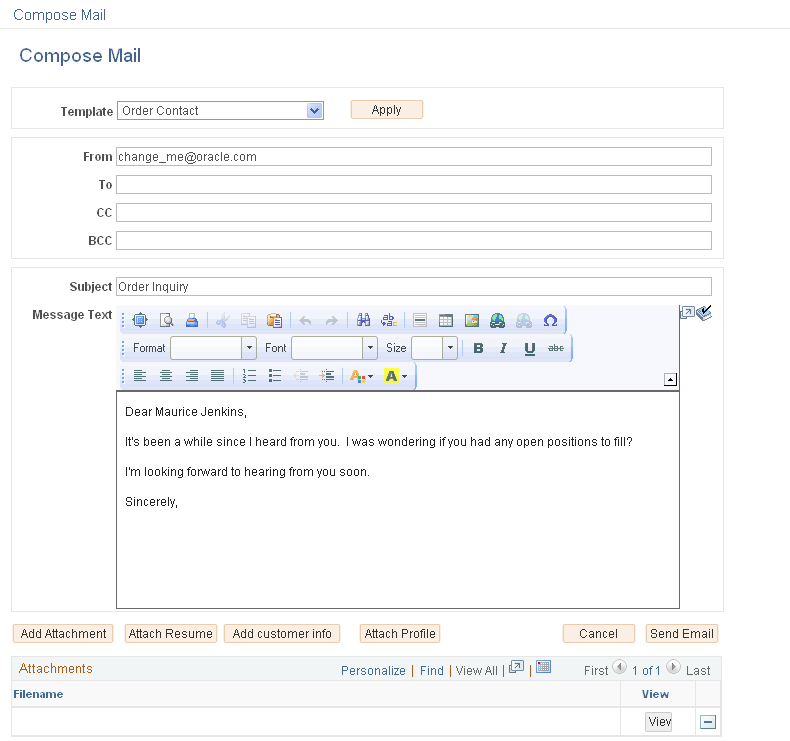
Compose Mail Page
Use the Compose Mail page (FO_SND_EMAIL) to send an email to the applicant.
Navigation:
Click the email icon on the Contact Information page.
This example illustrates the fields and controls on the Compose Mail Page. You can find definitions for the fields and controls later on this page.
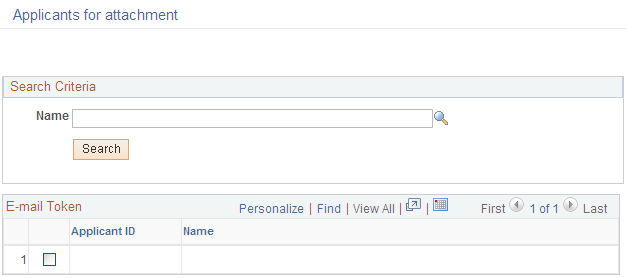
Applicants for Attachment Page
Use the Applicants for Attachment page (FO_RES_ATTACH) to search for candidates with resumes uploaded to the database and attach the resumes to the email.
Navigation:
Click the email button on the Contact Information page.
Click the Attach Resume button on the Compose Mail page.
This example illustrates the fields and controls on the Applicants for Attachment Page. You can find definitions for the fields and controls later on this page.
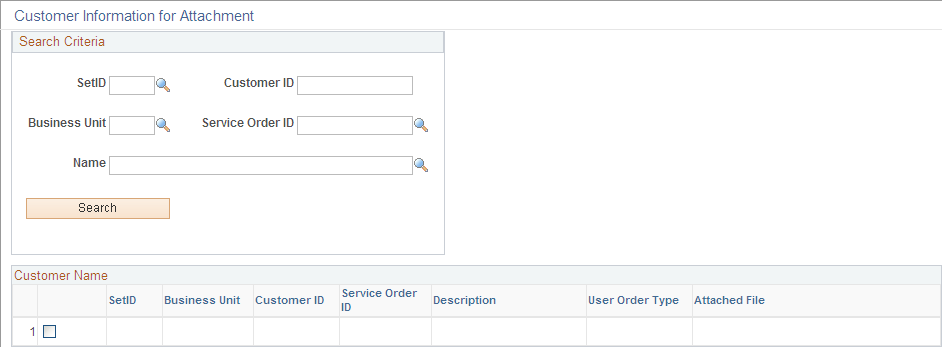
Customer Information for Attachment Page
Use the Customer Information for Attachment page (FO_CUST_SNDMAIL) to allows users to add customer related information to the email.
Navigation:
Click the email button on the Contact Information page.
Click the Add Customer Info button on the Compose Mail page.
This example illustrates the fields and controls on the Customer Information for Attachment Page. You can find definitions for the fields and controls later on this page.
Applicants – Applicants Page
Use the Applicants page (FO_PROFILE_APP) to allows the user to enter an applicant ID and the desired placement.
When you click the Upload Profile button, the system runs the Generate Candidates Resume process (FO_APP006) and the generated profile is then attached to the email.
Navigation:
Click the email button on the Contact Information page.
Click the Attach Profile button on the Compose Mail page.
Additional Links
These links are accessible from all pages in the component.
Field or Control |
Description |
|---|---|
Propose Candidate |
Click the Propose Candidate link to access the Send Email component. |
Add Agenda |
Click the Add Agenda link to add an agenda item. |
Add History |
Click the Add History link to add a history item. |
Opportunity Search |
Click the Opportunity Search link to search for opportunities for this applicant. |
View History |
Click the View History link to view history items for this applicant. |
Orders |
Click the Orders link to access the Orders component. |
Use the Personal Data page (FO_APP_PERS_DATA2) to enter personal information.
Navigation:
This example illustrates the fields and controls on the Personal Data page. You can find definitions for the fields and controls later on this page.

Status and Eligibility
Field or Control |
Description |
|---|---|
Marital Status |
Select a marital status for the applicant. Values are:
|
If your organization does VETS-100 reporting, enter a value in the Military Status field in the Status and Eligibility group box. Values are:
Actv Resv (active reserve)
Inactv Resv (inactive reserve)
No Mil Svc (no military service)
Not Indic. (not indicated)
Other Vet (other protected veteran)
Retired (retired military)
Viet Vet (veteran of the Vietnam era)
Misc. Vet (veteran (VA Ineligible))
Both Vet (Vietnam & other protected vet)
Pre VEV (pre-Vietnam-era veteran)
Not VEV (not a Vietnam-era veteran
Post VEV (post-Vietnam-era veteran)
Vietnm Vet (Vietnam vet)
Non Vet (not a veteran)
Field or Control |
Description |
|---|---|
Eligible to Work in U.S. |
Select this check box if the applicant can prove that he or she is eligible to work in the United States. |
Highest Education Level |
Enter the level that is most closely associated with the highest educational level that the applicant has achieved. |
Citizenship (Proof 1) and Citizenship (Proof 2) |
Enter the types of proofs of citizenship, such as DRIVER LIC (driver's license) or PASSPORT, that were provided when filling out the I-9 form. |
I9 Date Completed |
Enter the date when the identifying documents that are required under the Immigration Reform and Control Act are provided by the applicant. |
Alt Doc Expiration (alternate document expiration) |
Enter the date that the employee's employment eligibility verification documentation expires. This field pertains to an employee's eligibility to work and is applicable for both citizens and noncitizens. |
Personal Information
Complete this section only if you are hiring the applicant and the person will be paid through the company payroll system. Complete all the payroll fields for which you have information.
Field or Control |
Description |
|---|---|
Date of Birth |
Enter the applicant's date of birth. Note: If you add someone under age 16, the system displays a warning message when you save the record. |
Birth Country |
Enter the applicant's birth country. |
Birth State |
Enter the applicant's birth state. Note: Birth Country and Birth State are required if you are using PeopleSoft HCM and entering a candidate with a national ID country of France or Belgium; otherwise, they are optional. |
Gender |
Select the applicant's gender. A value of Male or Female must be entered for this field to hire the applicant as an employee or non-employee. |
Country |
Enter the country that issued the applicant's national ID. |
National ID Type |
Enter the type of national ID that was issued to the applicant. |
National ID |
Enter the applicant's national ID number. For example, for the United States it would be the person's Social Security Number. If a national ID is not entered for the applicant, the system displays a warning message. National ID is required when an applicant is hired. |
Primary ID |
Select to indicate that this is the primary ID for the applicant. |
Ethnic Group, and Visible Minority |
If your organization is subject to U.S. Affirmative Action or Equal Employment Opportunity laws and regulations, select the applicant's ethnic group. This may be required for reporting purposes. Values include:
If the applicant's country (national ID country) is CAN, select a value in the Visible Minority field. Values include:
|
Person Type |
This is used by the HCM system to determine how to process the individual. This information is necessary only if the applicant is being converted to an employee in the HCM system. Values include:
|
High Profile Candidate |
Select to indicate that the applicant is an exceptional candidate for placement on job assignments. |
Ownership Information
Field or Control |
Description |
|---|---|
Supplier ID and Supplier Location |
If this applicant is a contractor, enter the supplier information for the applicant. |
Priority Code |
Select a priority that represents the applicant's status in terms of his or her ability to fill a job order. The system administrator can define the selections that appear in this drop-down list box. |
Commissions |
Enter the user ID and the percentage of the earned commission that each user will receive. The commission percentages that you enter must add up to 100. Select the Primary User ID check box to indicate that the user who will be primarily responsible for the applicant. |
Branches |
Enter the branch and the percentage of the earned commission that each branch will receive. The commission percentages that you enter must add up to 100. Select the Primary Branch check box to indicate the branch that manages the applicant. |
Use the Job Data page (FO_APP_JOB_DATA) to enter job information.
Navigation:
This example illustrates the fields and controls on the Job Data page. You can find definitions for the fields and controls later on this page.
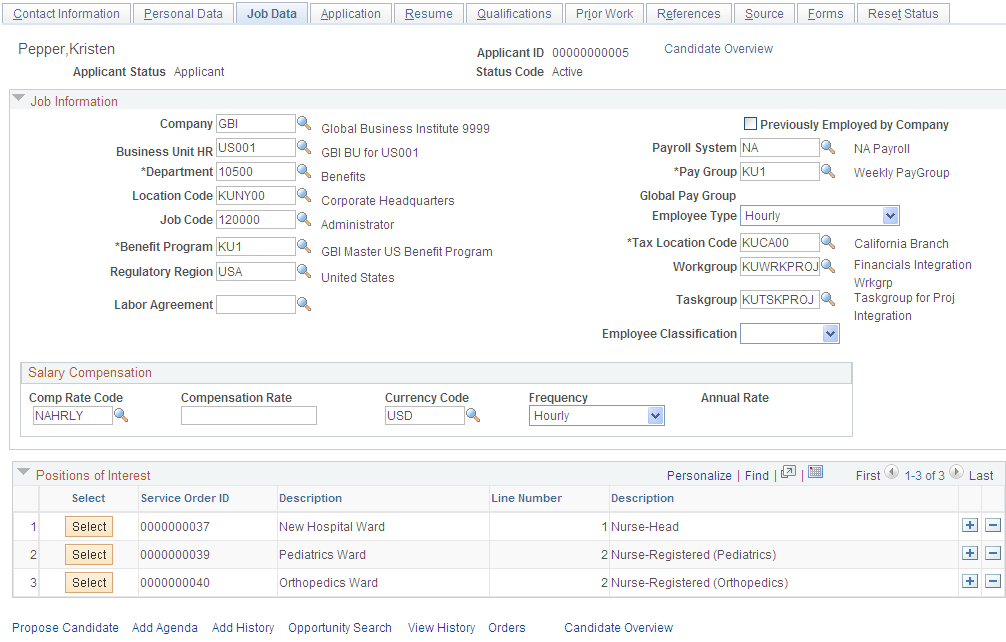
Note: You do not need to enter information in most of these fields until you are about to hire the applicant. Many of the values on this page can be supplied by default based upon user preferences. Your system administrator can set up the defaults.
Job Information
Field or Control |
Description |
|---|---|
Company |
Enter the company with which the applicant or employee is associated. If a company is associated with a department, the company value will be supplied by default when the department is entered. |
Previously Employed by Company |
Select this check box if the applicant or employee was previously employed by the company. |
Business Unit HR |
Enter the HCM business unit for this applicant. This field appears only if Pay/Bill Management is installed. |
Payroll System |
Enter the payroll system that your organization will use to process payroll, such as NA Payroll (North American Payroll) or Global Pay. |
Department |
Enter the department for this job. |
Pay Group |
Enter the pay group under which you want to classify the applicant or employee. Pay groups are associated with companies. |
Location Code |
Enter the location where the applicant or employee will be employed. |
Employee Type |
Enter the type that best represents the employee or applicant, such as Hourly or Salaried. This value may be supplied by default when you enter the pay group. |
Job Code |
Enter the job code that is most closely associated with the duties being performed by the applicant or employee. |
Global Pay Group |
If the applicant is paid using global payroll, enter a global pay group. Note: This field appears only if Pay/Bill Management is installed. This field is required if you select Global Pay as the Payroll System value. |
Benefit Program |
Enter the benefit program under which the applicant or employee will be covered. |
Tax Location Code |
Enter the tax location from which the applicant or employee will be paid. |
Regulatory Region |
Enter the regulatory region under which you want to classify the applicant or employee. This field appears only if PeopleSoft Pay/Bill Management is installed. . |
Workgroup |
Enter the workgroup under which you want to classify the applicant or employee for PeopleSoft Time and Labor. This field appears only if PeopleSoft Pay/Bill Management is installed. |
Taskgroup |
Enter the task group under which you want to classify the applicant or employee for PeopleSoft Time and Labor. This field appears only if PeopleSoft Pay/Bill Management is installed. |
Labor Agreement |
Select an entry from the available options. Values originate in the HCM application and are linked to a country. This field appears only if PeopleSoft Pay/Bill Management is installed. |
Employee Classification |
Enter a classification for the employee, such as Apprentice, Consultant, or Contractor. |
Salary Compensation
This section appears only if Pay/Bill Management is installed.
Field or Control |
Description |
|---|---|
Comp Rate Code (compensation rate code) |
Enter the code that represents a pay component that will be used to calculate the employee's pay in the payroll system. For PeopleSoft Staffing Front Office, this is normally the code that is associated with the employee's base pay. |
Compensation Rate |
If the employee is to be paid a base salary, enter an amount in this field. If the employee is paid hourly per assignment, this data is entered on the assignment (or agreement item). In such cases, leave this field blank. |
Currency Code |
Enter the currency in which the employee will be paid. |
Frequency |
Select the frequency at which the employee's compensation rate is stated, such as Hourly, Monthly, or Weekly. |
Annual Rate |
Displays the employee's annual rate of pay based on the entries in the Salary Compensation fields. |
Positions of Interest
Select service orders that are of interest for the applicant. When applicant status changes to valid the candidate is automatically added to the selected candidate grid for the service order.
Use the Application page (FO_APP_AVAIL) to enter placement and preference information.
Navigation:
This example illustrates the fields and controls on the Application page. You can find definitions for the fields and controls later on this page.

Availability
Field or Control |
Description |
|---|---|
Placement Type |
Select the type of placement that the applicant prefers, such as Career or Temp. |
Application Date |
Select the date that the applicant applied with your organization. The default value for this field is the current date. |
Desired Start Date |
Select the first date that the applicant is available for an assignment. |
Last Date Available |
Select the last date that the applicant is available for an assignment. Note: The availability dates on this page are not affected by assignment status. You can search for and make offers to all active applicants and employees, even if they are already on assignment. |
Full/Part-Time |
Select Either, Full-Time, or Part-Time. |
Assignment Duration |
Select the duration of the assignment that is preferred by the applicant, such as Long Term, Moderate, or Short Term. |
Notice Required |
Select the type and length of notice that the applicant prefers when the employer terminates her or his assignment. |
Desired Hours Per Week |
Enter the number of hours per week that the applicant wants to work. |
Overtime OK? |
Select this check box if the applicant will work overtime. |
Layoff/Recall |
Select this check box if the applicant will work in a situation in which a layoff or recall has occurred. |
Full-Time Student |
Select this check box if the applicant is a full-time student. |
Desired Work Days |
For each day of the week, select the shift that the applicant wants to work, such as First Shift, No Shift, Second Shift, or Third Shift. The system administrator can define the valid values for this field. Note: After you select a shift for Monday, you can use the Replicate icon to copy the same shift selection to Tuesday through Friday. |
Geographic Preferences
Field or Control |
Description |
|---|---|
Location 1 and Location 2 |
Enter the top two locations that are preferred by the applicant. |
Geographic Preference |
Enter the region that is preferred by the applicant. |
Travel
Field or Control |
Description |
|---|---|
Willing to Commute, Willing to Relocate, Willing to Travel, and Willing to Travel Overnight |
Select the Willing to Commute check box and then enter the number of travel minutes and maximum travel distance that the applicant is willing to commute. Select Kilometers or Miles. Select Willing to Relocate if the applicant is willing to relocate to secure a position. Select Willing to Travel if the applicant is willing to travel, and enter the maximum percentage travel to which the applicant is willing to commit. Select Willing to Travel Overnight if the applicant is willing to travel overnight. |
Percentage Travel |
Enter the percent the applicant is willing to travel. |
Maximum Travel Distance, Kilometers, or Miles |
Enter the maximum distance the applicant is willing to travel. Select Kilometers or Miles. |
Home Airport |
Enter either the name of the airport or the abbreviation of the airport nearest the applicant, such as SFO, JFK, or CHI. |
Travel Minutes |
Enter the minutes the applicant is willing to travel. |
Transport Availability |
Select the availability of transportation that is used most often by the applicant. |
Restrictions |
Enter any restrictions that the applicant may have regarding travel. |
Comments |
Enter any comments that you may have regarding the applicant's capacity for commuting or overnight travel. |
Minimum Acceptable Pay Rate
Enter the minimum amount of pay for which the applicant is willing to work.
Field or Control |
Description |
|---|---|
Amount |
Enter the minimum pay amount that the applicant will accept. |
Currency Code |
Enter the currency to use when calculating the annual rate. |
Pay Frequency |
Select the frequency that the amount represents, for example, an hourly rate, a monthly rate, or an annual rate. The frequency will also affect how the annual rate is calculated. |
Annual Rate |
Displays the annual rate of pay that the applicant or employee wants to be paid. The system uses the frequency table and assumes full-time employment when calculating the annual rate. The system calculates it based upon the amount and the frequency. |
Use the Resume page (FO_APP_RESUME) to attach resume or enter resume text.
Attach additional items to the Applicant.
Navigation:
Applicants and employees can submit multiple resumes, each of which focuses on different skills and strengths. They can also include samples of their work, letters of reference, or documents explaining special circumstances, such as medical requirements. You associate multiple documents to one person, as well as track multiple documents for individual applicants or employees, by assigning a unique file name to each resume.
Note: The search index creation occurs more rapidly when information has been pasted into the Resume Text field, as opposed to the information being in an electronic attachment.
Field or Control |
Description |
|---|---|
Language Code |
Enter the language in which the resume is composed. |
Resume Text |
Paste the body of the resume here. |
Add Resume Attachment |
Click to browse for and attach additional resume items. If you are using resume parsing, the system will populate several fields in the Applicant component with information from the resume. The system will display a message indicating that any existing data in these fields will be overwritten. The system also creates a log indicating any errors that occurred during parsing. |
Additional Attachments |
Click to attach items to the applicant in addition to the resume. |
Delete Resume Attachment |
Click to delete the previously attached resume. |
Use the Qualifications page (FO_APP_QUALIFS) to add and update competencies and qualifications.
Navigation:
This page displays a variety of qualification information about the applicant. You can add or update information for each of the categories in the first eight group boxes by clicking the respective update link and accessing specific update pages. For the last two categories, Job Titles and Lines of Business, you can look up and add the information directly from the Qualifications page.
Competencies Page
Use the Competencies page (FO_APP_COMPS) to add and update competencies.
Navigation:
Click the Update Competencies link on the Qualifications page. From the Competencies page (FO_APP_COMPS), enter the competency description or a partial description, and click Search. Select the check box for the competency that you want to add, and then click the Select button to add it to the Competencies group box at the bottom of the page. Select Proficiency and Interest Level from the drop-down list boxes. Enter the applicant's relevant information in the Year Acquired, Year Last Used, and Years of Work Experience fields. Repeat these steps to add additional competencies. When all the competencies are listed, click the OK button to add the list to the Qualifications page.
School Education Page
Use the School Education page (FO_APP_SCHOOL) to add and update school information.
Navigation:
Click the Update School Education link on the Qualifications page.
You can make multiple entries for each applicant, as well as add or delete a school. PeopleSoft Staffing Front Office does not deliver the entries for the School Code field. Your system administrator must provide these during implementation. Staffing Front Office does deliver the values for the School Type and Level Achieved fields. Your system administrator, however, can modify them during implementation to reflect your requirements.
From the update page, enter values for the Country, School Type, Date Acquired, Average Grade, School Code, School Name, State, Area of Study, and Grade fields, and then click the OK button to add the information to the Qualifications page.
Field or Control |
Description |
|---|---|
Country and State |
Enter the information for the school. |
School Type |
Enter the type of school. Note: If school types have been entered into the system, but none appear when you search with the Lookupbutton, you must add a tableset ID matching the country. |
Date Acquired |
Select the date that the applicant received the degree. |
Average Grade |
Enter the applicant's average grade using one decimal place, for example 4.0. |
Completed |
Select if the applicant completed the grade level. |
School Code and School Name |
Select the school that the applicant attended. Note: When you select a value from the School field, the description appears in place of the School Name field. If the school that you are looking for is not on the list, enter the school name directly in the School Name field. |
State |
Select the state in which the school is located. |
Area of Study and Grade |
Enter the subject area in which the applicant studied and his or her grade point average. |
Professional Education Page
Use the Professional Education page (FO_APP_EDUC) to add and update professional education information.
Navigation:
Click the Update Professional Education link on the Qualifications page.
From the update page, enter degree, major, and school information, and then click the OK button to add the information to the Qualifications page.
Field or Control |
Description |
|---|---|
Degree |
Enter the degree that the applicant earned. |
Date Acquired |
Select the date that the applicant received the degree. |
Average Grade |
Enter the applicant's average grade using one decimal place, such as 4.0. |
Graduated |
Select if the applicant graduated from the degree program. |
Major Code and Major |
Select the subject in which the applicant majored. If you select a value, the description appears in place of the Major field. If the correct value does not appear in the major list, you can enter the major in the Major Code field. |
School Code and School Name |
Enter the school that the applicant attended. Note: When you enter a value from the School Code field, the description appears in place of the School Name field. If the school that you are looking for is not on the list, enter the school name in the School Code field. |
Educator |
Enter the name of the educator. |
Country and State |
Enter the country and state in which the school is located. |
Licenses/Certificates Page
Use the Licenses/Certificates page (FO_APP_LIC) to add and update licenses and certifications.
Navigation:
Click the Update Licenses/Certificates link on the Qualifications page.
From the Licenses/Certificates update page, enter license, issue date, expiration date, and location information, and then click the OK button to add the information to the Qualifications page.
Field or Control |
Description |
|---|---|
License or Certificate Code |
Select the license or certificate code. If the code is missing, your system administrator can add it to the system. The Description field is automatically populated on the Qualifications page. |
Issue Date |
Enter the date that the license or certificate was issued. |
License/Certification Number |
Enter the license or certificate number. |
Issued By |
Enter the group that issued the license or certificate. |
Expiration Date |
Enter the expiration date of the license or certificate. |
License Verified and Renewal in Progress |
Select these check boxes to indicate the status of the license or certificate. |
Country and State |
Enter the information for the license or certificate. |
Languages Page
Use the Languages page (FO_APP_LANG) to add and update language qualifications.
Navigation:
Click the Update Languages link on the Qualifications page.
From the update page, enter language and proficiency information, and then click the OK button to add the information to the Qualifications page.
Field or Control |
Description |
|---|---|
Language Code |
Select the appropriate language code. The Description field is automatically populated. |
Native Language, Translator, and Teacher |
Select all check boxes that apply. |
Speak, Read, and Write |
Select the proficiency for each of these categories. |
Evaluation Date |
Enter the date on which the language proficiency was evaluated. |
Memberships Page
Use the Memberships page (FO_APP_MEM ) to add and update membership information.
Navigation:
Click the Update Memberships link on the Qualifications page.
From the update page, enter organization and mandate information, and then click the OK button to add the information to the Qualifications page.
Field or Control |
Description |
|---|---|
Organization |
Select the organization of which the applicant is a member. The Description field is automatically populated. |
Membership Date |
Enter the date on which the applicant began his or her membership. |
Mandate |
Enter the mandate or purpose of membership. |
Mandate Position |
Enter the mandate position. |
Mandate Begin Date and Mandate End Date |
Enter the begin and end dates of the mandate. |
Honors and Awards Page
Use the Honors and Awards page (FO_APP_HON) to add and update honors and awards.
Navigation:
Click the Update Honors and Awards link on the Qualifications page.
From the update page, enter award and grantor information, and then click the OK button to add the information to the Qualifications page.
Field or Control |
Description |
|---|---|
Honor or Award |
Select the honor or award. The Description field is automatically populated. |
Grantor |
Enter the grantor of the award. |
Issue Date |
Enter the date on which the honor or award was issued. |
Test Results Page
Use the Test Results page (FO_APP_TEST) to add and update test results.
Navigation:
Click the Update Test Results link on the Qualifications page.
From the update page, enter test and score information, and then click the OK button to add the information to the Qualifications page.
Field or Control |
Description |
|---|---|
Test and Test Description |
Select the test from the predefined list. The Description field is automatically populated. |
Test Date |
Select the date that the test was administered. |
Test Score |
Enter the score that the applicant earned on the test. |
Passed Test |
Select this check box if the applicant or employee achieved a passing score on the test. |
Job Titles
For each Job Category entry that you add, enter a Job Title code.
Note: The PeopleSoft system delivers an index of job categories and job titles at the time of installation. You may want to delete this list from the database, in all or in part, and use a job title index that meets your unique business requirements. If you are not satisfied with the job titles and job categories that are available to you, consult with your system administrator.
Lines of Business
Enter as many Lines of Business entries as appropriate.
Use the Prior Work page (FO_APP_PRIWRK) to enter prior work experience information.
Navigation:
Field or Control |
Description |
|---|---|
Start Date and End Date |
Select the dates that the applicant started and ended work for the employer. |
Currency Code |
Enter the currency in which the applicant or employee was paid. |
Ending Pay Rate |
Enter the applicant's rate of pay when the job ended. |
Employer |
Enter the employer name in the Employer field. If the employer is a customer of the staffing company, then enter the relevant information in the Customer SetID and Customer ID fields. |
Pay Frequency |
Select the frequency at which the applicant's pay rate is stated. This field is used to calculate the applicant's annual rate of pay. |
Annual Rate |
Displays the applicant's annual rate of pay based on his or her ending pay rate and the pay frequency. |
Country, City, State, and Telephone |
Enter address and telephone information for the employer. |
Job Description |
Enter a brief description of the duties and responsibilities that are associated with the position. This is a free-form field. You can cut and paste descriptions directly into the field. |
Ending Job Title |
Enter the applicant's job title when he or she left the job. |
Supervisor |
Enter the name of the applicant's supervisor. |
Termination Code |
Select the entry that most closely describes the reason that the applicant separated from the employer. |
Would Return to Employer |
If the applicant or employee previously worked for an employer, and he or she would work for the employer again through your staffing organization, select this check box. |
Customer SetID and Customer ID |
Select the customer SetID and customer for whom the applicant worked. If you select a customer ID, the customer name appears in the Employer field. If you do not select a customer ID, you can enter the name of the employer in the Employer field. Note: If you select a customer ID but then change the value in the Employer field, the system clears the Customer ID field when you save the page. |
Email Address |
Enter the email address of the employer. Click the Email Address button to compose and send an email to the selected email address. Note: When entering a new email address, you must save the page before clicking the Email Address icon. |
Company URL |
Enter the website address that is associated with the employer. This is useful when you want to contact an employer to verify credentials on an applicant record. Click the URL button to launch a new page and display the website that is associated with the address that is entered in the field. Note: When entering a new website address, you will need to save the record before using the URL icon. |
Full/Part Time |
Select either Full-Time or Part-Time. |
Comments |
Enter comments about the applicant's job at the listed employer. |
Use the References page (FO_APP_REF) to enter reference information.
Navigation:
This example illustrates the fields and controls on the References page. You can find definitions for the fields and controls later on this page.
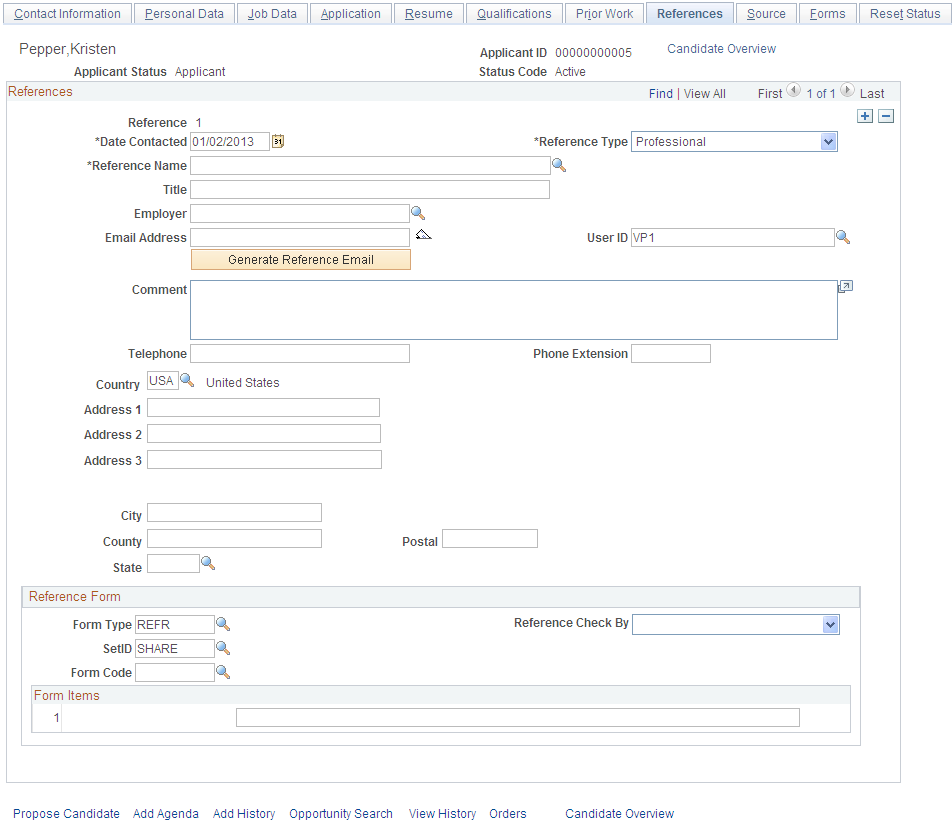
References
Field or Control |
Description |
|---|---|
Reference Number |
The system generates this number automatically. |
Date Contacted and Reference Type |
Enter the date on which you obtained the reference information and a reference type: Personal, Professional, or Both. |
Reference Name and Title |
Enter the reference's name and his or her title. If the reference is a supervisor from a prior employer that was used on the Prior Work page, his or her name appears in the prompt list. If the reference is not from the prior work page, you can enter the name directly in the field. |
Employer |
Select a previous employer. The values for this field come from the Employer field on the Prior Work page. If the reference is not from a previous employer, you can enter the employer name directly in the field. Note: If you add employers in the Prior Work page, you must save the applicant before you can see the employers on the References page. |
E-mail Address |
Enter the email address of the reference. Note: When entering a new email address, you must save the page before using the Email Address button. |
User ID |
Enter the user ID of the person performing the reference check. By default, the system displays the user ID of the person entering the information. |
Generate Reference Email |
Click to send a pre-formatted letter to the email address that is listed for the contact. Your system administrator can modify the letter for your specific requirements using reports. |
Comment |
Enter any comments that you have about the applicant's reference information. |
Telephone, Phone Extension, and Country |
Enter the telephone number and phone extension of the reference, and enter the country and other address information as well. Note: The address-related fields change depending on the country that is selected. |
Reference Form
Field or Control |
Description |
|---|---|
Form Type |
Select the type of form that you want to add to the Reference page. The system is delivered with the form type REFR (references). |
Reference Check By |
Select Customer, Recruiter, or Third-Party Service to indicate how the reference was checked. |
SetID |
Select the SetID from which to draw the Form Code. This is usually an organizational unit of your company, such as corporate headquarters or a branch. |
Form Code |
Select the form that you want to add to the page. For example, you can track the applicants' answers if you do multiple or different kinds of interviews. Selecting a specific form code returns a specific set of questions. Forms are defined by the system administrator. To make any changes to the list of available forms or to the content of the forms, consult with your system administrator. |
Use the Source page (FO_APP_SRC_DATA) to enter recruitment source information.
Navigation:
This example illustrates the fields and controls on the Source page. You can find definitions for the fields and controls later on this page.

Recruiting Sources
Field or Control |
Description |
|---|---|
Recruit Source Category |
Enter the category of the recruiting source. Examples include personal referrals, job fairs, and newspaper ads. |
Recruiting Source ID |
Enter the specific name or number for the recruiting source. This can be any relevant name or number. |
Recruiting Source |
Enter a recruiting source. For example, if the source category is a newspaper ad, select the name of the newspaper as the source. If the name of the source is not available from the prompt table, enter it directly into the field. |
Ad ID (advertisement ID) |
Enter the specific advertisement name or number for the recruiting source. This can be any relevant name or number. |
Application/Resume Source
Field or Control |
Description |
|---|---|
Source and Date Received |
Select the method by which you received the applicant's application or resume, such as Email or Web, and the date that you received it. |
Referring Name |
Enter the name of the person referring the applicant. The entry in this field can be other applicants or employees already in the system. If the person is not in the system, you can manually type in their name. Note: If you manually enter a name, it must be in PeopleSoft format: lastname,firstname with no spaces in between (for example, Smith,Jane). |
Specific Source |
Enter the source that is associated with your entry in the Source field. For example, if you selected Direct Hire as the source, enter the name of the recruiter who first spoke with the person. |
Comment |
Enter any comments that are related to how the applicant found out about your company or a specific position. |
Use the Forms page (FO_APP_FORMS) to add or view pre-defined forms to enter information about the applicant.
Navigation:
Most of the form setup activity occurs during implementation of the system. The PeopleSoft system delivers the following form types for the Applicant and Employee form pages: Employee Credit Information, Employee General Information, Employee Interview Worksheet, Employee License Information, and Interview Summary General.
You can select forms that include basic questions that are related to the application process. You can select multiple forms to track the employee's application process. You define the form codes for these form types during implementation. To make any changes to the list of available forms or to the content of the forms, consult with your system administrator.
Click a View Form link to view details of a particular form.
To collect additional information about the applicant:
Click the Add New Form button to enter a new Form type, SetID, Form code, and date. Each form has a different set of questions or fields. It is up to your organization to decide what information should be contained in these forms. Complete all the fields for which you have information.
Click the Form Summary link to return to the forms summary display.
Forms – Forms Page
Use the Forms page (FO_APP_FORM_DTL) to enter data about the applicant or employee by using pre-defined forms.
Navigation:
Click a View Form link on the Forms page.
Click the Add New Form button on the Forms page.
This example illustrates the fields and controls on the Forms – Forms Page. You can find definitions for the fields and controls later on this page.

Use the Reset Status page (FO_APP_RESET_STAT) to reset applicant status from Hire Pending to Active in cases where the FO_APP_HIRE application message fails.
Navigation:
Click the Reset button to reset an applicant's status from Hire Pending back to Active. The button will be available only if the applicant's status is Hire Pending.