Example: Setting Up Smart Tags in a Problem Tree
Some organizations assign a tag number consisting of a series of codes to an asset in PeopleSoft Asset Management to enable users to easily identify the asset. This tag number is subdivided into groups of characters, where each group represents a particular attribute or type of asset. PeopleSoft Maintenance Management refers to these tag numbers as Smart Tags.
For example, smart tag number C4BFGMTR0002. The groups of characters and the values that they represent are:
C4 – Combustion Turbine 4.
BFG – Boiler Flue Gas System.
MTR – Motor.
0002 – sequential equipment number.
Once the assets are set up in PeopleSoft Asset Management, users can set up these codes on successive levels of a problem tree in PeopleSoft Maintenance Management. When users enter a service request, they can narrow the list of eligible service request assets based on the smart code set up in the problem tree. User associate the code with a problem group, problem, service center and work order criteria on the problem tree.
Users set up a problem tree, select a problem group, problem, service center and work order criteria, and set up each level of the problem tree based on the character groups that comprise the smart tag. When users enter a service request, the problem tree setup enables the user to search for an asset based on the character group levels.
These pages demonstrate how to set up the problem tree using smart tags and how a user can enter a service request and narrow their search for an asset using smart tags.
1. Access PeopleSoft Asset Management and make sure that the assets are set up under the Asset Type of Equipment. In our example, these assets are: C4BFGMTR001, C4BFGMTR002, C4BFGMTR003.
2. Access Set Up Financials/Supply Chain, Product Related, Maintenance Management, Problem Cause Resolution Setup, Problem Tree.
3. Set up the top parent node as EQUIPMENT.
This example illustrates the fields and controls on the Problem Tree: EQUIPMENT - Top Node: EQUIPMENT. You can find definitions for the fields and controls later on this page.
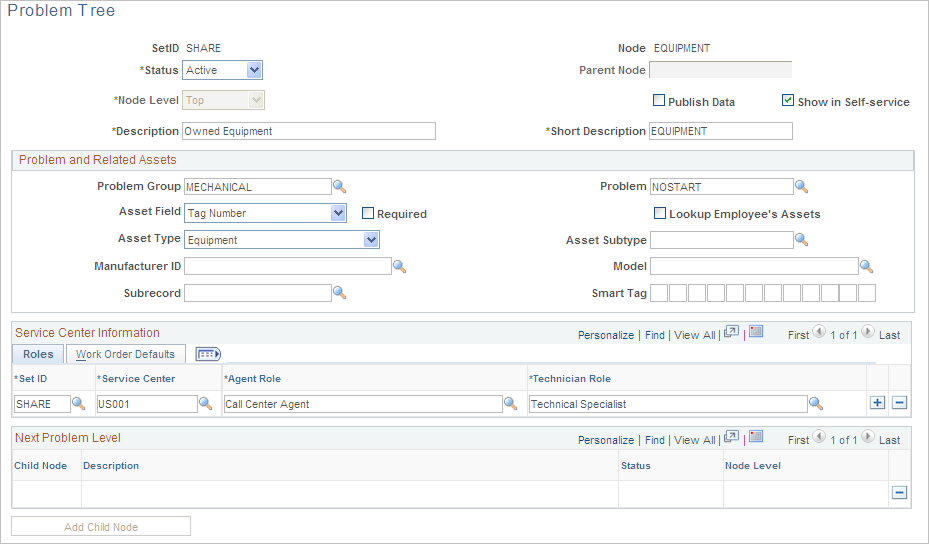
Select the following information:
Description: Owned Equipment
Short Description: EQUIPMENT
Problem Group: MECHANICAL
Problem: No Start
Asset Lookup Field: Tag Number
Asset Type: Equipment
Service Center Information:
Roles – SetID: SHARE
Roles – Service Center: US001
Roles – Agent Role: Call Center Agent
Roles – Technician Role: Technical Specialist
Work Order Defaults – Business Unit: US001
Work Order Defaults – Service Group: MAINT (maintenance)
Work Order Defaults – Work Type: CM (corrective maintenance)
Work Order Defaults – Priority: 1
Click Save.
4. Click the Add Child Node button and add TURBINE as the Middle Node.
This example illustrates the fields and controls on the Problem Tree: EQUIPMENT - Middle Node: TURBINE. You can find definitions for the fields and controls later on this page.

Notice that EQUIPMENT displays as the Parent Node.
Enter the description: Combustion Turbine 4.
Enter the short description: C4
Enter C 4 in the Smart Tag field and save the page.
5. Click the Add Child Node button and enter BOILER as the Middle Node.
This example illustrates the fields and controls on the Problem Tree: EQUIPMENT - Middle Node: Boiler. You can find definitions for the fields and controls later on this page.
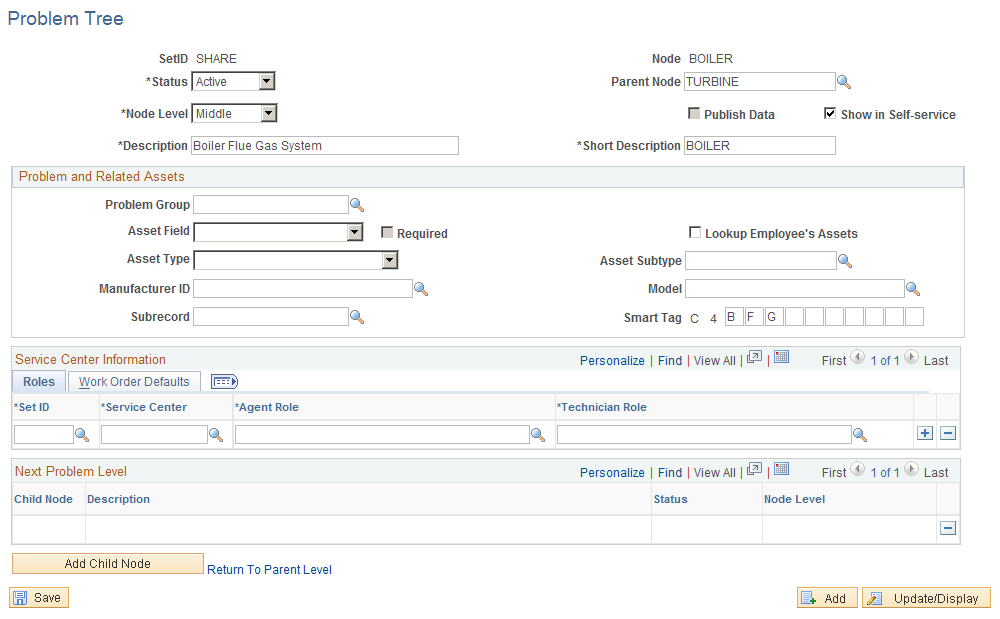
Notice that Turbine is the Parent Node.
Enter Boiler Flue Gas System as the long description and BOILER as the short description.
Enter BFG in the Smart Tag and save the page.
6. Click the Add Child Node button and enter MOTOR as the Bottom Node.
This example illustrates the fields and controls on the Problem Tree: EQUIPMENT - Bottom Node: Motor. You can find definitions for the fields and controls later on this page.
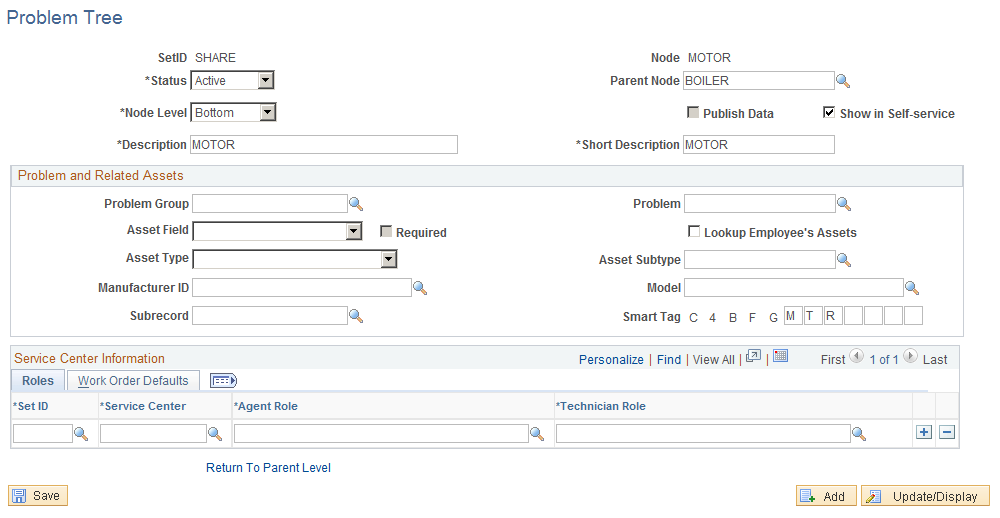
Enter the long and short descriptions as MOTOR.
Enter MTR in the Smart Tag field and save the page.
7. Let's create a service request to repair one of these C4BFGMTR assets. Access Employee Self-Service, Service Request, Service Request Wizard.
This example illustrates the fields and controls on the Service Request Requested By page. You can find definitions for the fields and controls later on this page.
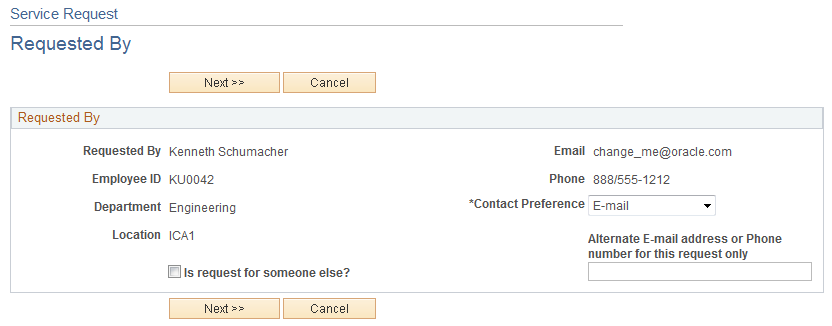
8. The Requested By page defaults the information based on the person signed on to the system. Employees and non-employees can create a service request. Click Next to continue.
This example illustrates the fields and controls on the Service Request - Request Type page 1. You can find definitions for the fields and controls later on this page.

9. Click the EQUIPMENT radio button as the type of service request and click the Next button. This field displays because EQUIPMENT as the top node of the Problem Tree has been set up.
This example illustrates the fields and controls on the Service Request - Request Type page 2. You can find definitions for the fields and controls later on this page.

10. Based on the EQUIPMENT problem tree middle node that is set up, C4 displays to narrow down the type of equipment that needs repair. Click the C4 radio button and click the Next button.
This example illustrates the fields and controls on the Service Request - Request Type page 3. You can find definitions for the fields and controls later on this page.
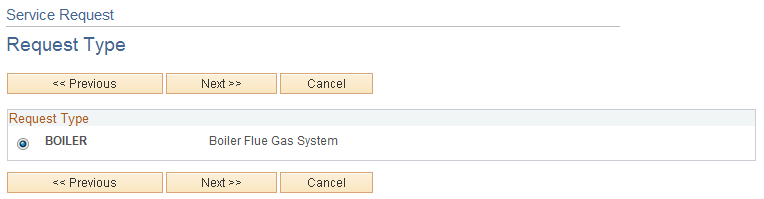
11. Based on the EQUIPMENT Problem Tree middle node that is set up, BOILER displays to narrow down the type of C4 equipment that needs repair. Click the BOILER radio button and click the Next button.
This example illustrates the fields and controls on the Service Request - Request Type page 4. You can find definitions for the fields and controls later on this page.

12. Based on the EQUIPMENT Problem Tree bottom node that is set up, MOTOR displays to narrow down the type of C4 boilers that need repair.
This example illustrates the fields and controls on the Service Request - Fulfillment Detail page. You can find definitions for the fields and controls later on this page.

13. After narrowing our search based on selecting options from the EQUIPMENT problem tree:
Select Service Center: USA-New York.
Select the Required Date for the repair: Current system date is the default value.
Enter a subject (optional): Boiler Motor.
Enter a description (optional): Does not start.
Select the Tag number search icon to search for the tag number of the asset that you repaired.
This example illustrates the fields and controls on the Asset Search page. You can find definitions for the fields and controls later on this page.
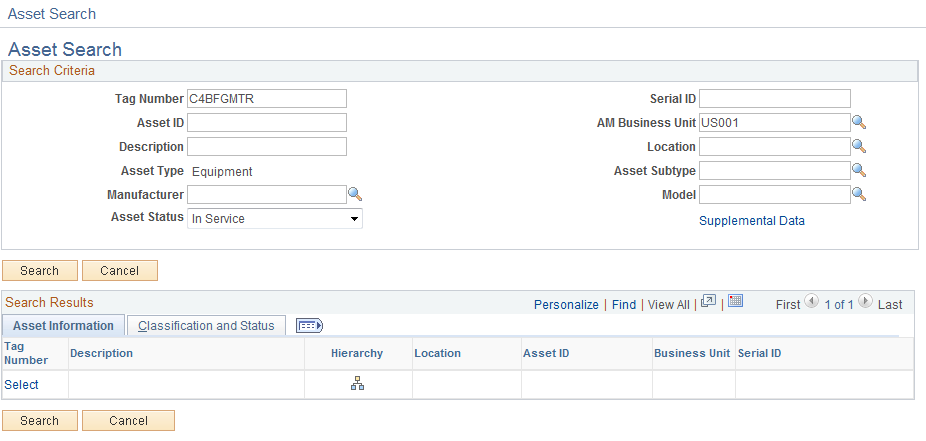
15. At the top of the Asset Search page, you can enter the asset characteristics to narrow your search for the tag number. In this case C4 is entered for the Tag Number and Search button clicked. Three assets that are set up in PeopleSoft Asset Management display as the results of the search. Select C4BFGMTR003 as the tag number for the asset that needs repair and click the Search button.
Service Request Fulfillment Detail with Tag Number page

16. The Service Request – Fulfillment Detail page displays again with in the Tag Number and Asset Location fields. Click the Next button to continue.
This example illustrates the fields and controls on the Service Request - Summary page. You can find definitions for the fields and controls later on this page.

17. The Service Request - Summary page displays. Review this page for accuracy. If there are errors, you can click the Previous button to make changes. If the information is correct, click the Finish button.
This example illustrates the fields and controls on the Service Request - Submit Confirmation page. You can find definitions for the fields and controls later on this page.
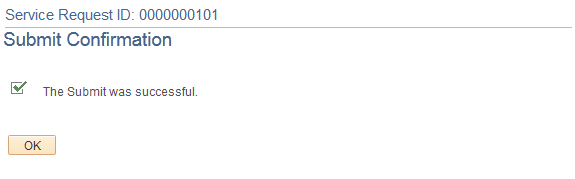
18. A page displaying the Service Request ID and check mark indicating that the submission of this service request was successful displays. Click the OK button to complete this service request. This service request will now appear in the My Service Requests component.