Allowing Self-Service Administrators to Create Additional Users
|
Page Name |
Definition Name |
Usage |
|---|---|---|
|
ACL_GENERAL |
Add a permission list to give access to users. |
|
|
ROLEDEFN |
Add a role for a new user and associate the new role with a permission list. |
|
|
USER_GENERAL |
Add a new user profile. See Creating a Template Profile Using the User Profile Page. |
|
|
CUST_REG_SETUP |
Define the template user ID and default SETID to be used when a customer contact is added. |
|
|
EB_CONTACT_SRCH_SS |
Add a new user or update an existing user. |
External administrators can create new user IDs for additional users without having to request AR or BI administrators (internal administrators) to perform the task for them.
The Customer Registration Setup component allows internal administrators to define a template User ID that can be used when external administrators add new users to the system. All properties from the template User ID are copied to the new user added. Any common role security that eBill Payment external users need should be defined in the template User ID definition.
The Administer Users component allows external administrators to add and modify user profiles. Users who are granted security permission can perform various actions (based on their security profile), such as viewing and paying invoices, viewing and paying account balances, and so on.
Use the Permission Lists page (ACL_GENERAL) to add a permission list to give access to users.
Navigation:
This example illustrates the fields and controls on the Permission Lists - General tab for the (EPEB5000) permission list.
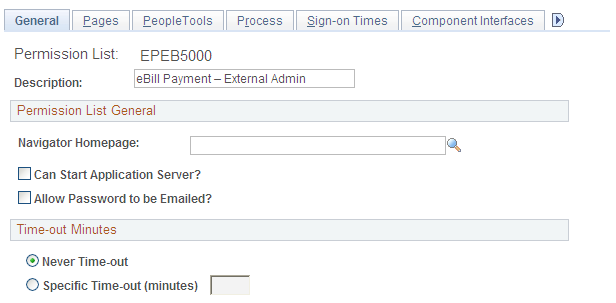
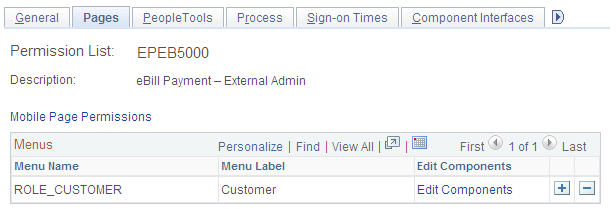
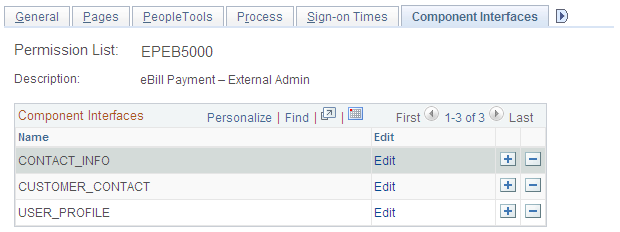
Add a permission list to give access to Administer Users (EB_CNCT_USER_ADMIN) component pages in the Customer (ROLE_CUSTOMER) menu. The new permission list must have full access to CONTACT_INFO, CUSTOMER_CONTACT, and USER_PROFILE component interfaces.
This example illustrates the fields and controls on the Permission Lists - Pages tab.
This example illustrates the fields and controls on the Permission Lists - Component Interfaces tab.
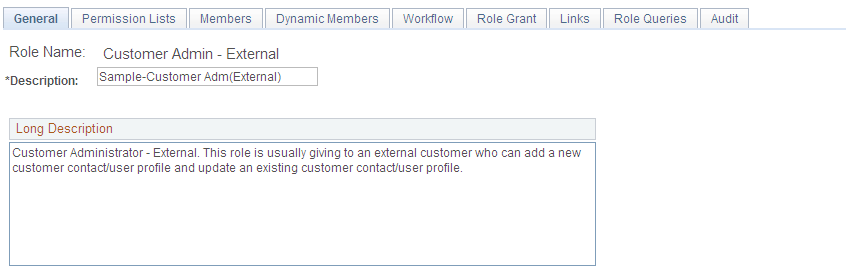
Use the Roles page (ROLEDEFN) to add a role for the new user and associate the new role with a permission list.
Navigation:
This example illustrates the fields and controls on the Roles - General tab.
Use the Permission Lists tab to link the new role to the permission list created for the external administrator.
This example illustrates the fields and controls on the Roles - Permission Lists tab.

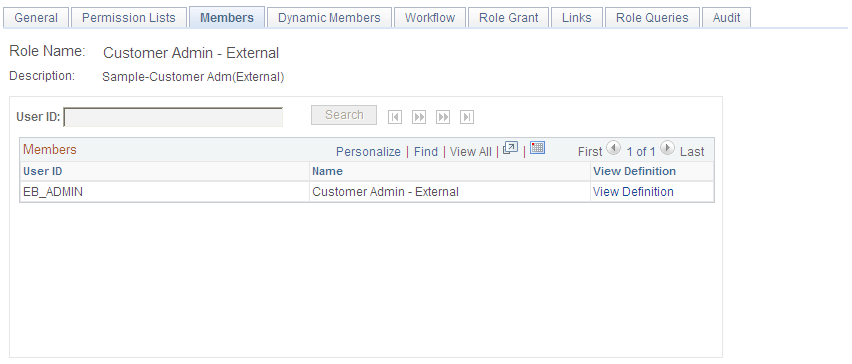
The Members list will be populated automatically when the user profile is associated with the role.
This example illustrates the fields and controls on the Roles - Members tab.
Associate the new role with other roles that can be granted by this role and the role that can grant this new role.
This example illustrates the fields and controls on the Roles - Role Grant tab.

Use the User Profiles page (USER_GENERAL) to add a new user profile.
Navigation:
This example illustrates the fields and controls on the User Profiles - General tab.
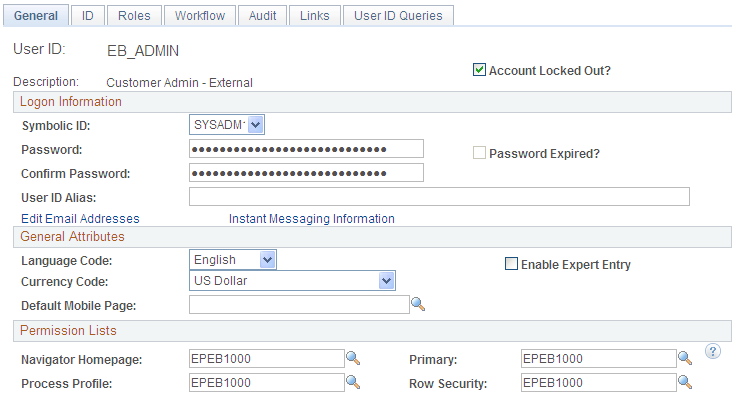
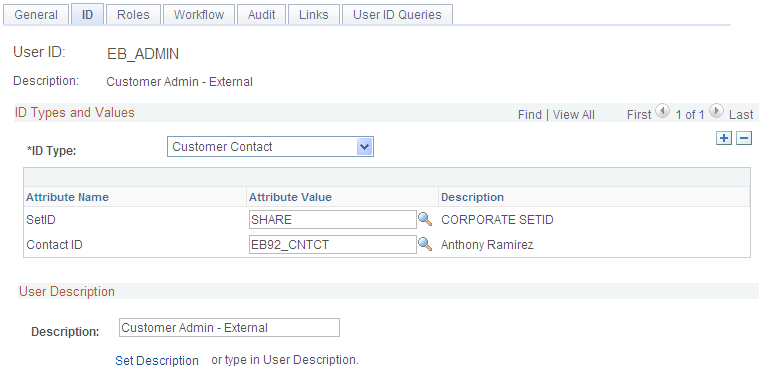
Assign permission list to the user profile and the ID Type Customer Contact. Also, associate the new user with a customer contact.
This example illustrates the fields and controls on the User Profiles - ID tab.
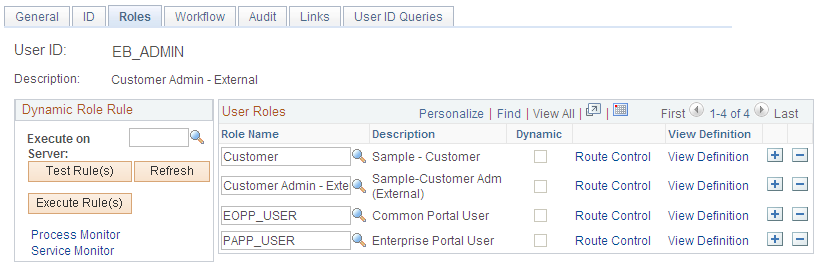
Use the Roles tab to assign roles to the new user.
This example illustrates the fields and controls on the User Profile - Roles tab.
Use the User Profile page to add a user profile to be used as a template profile.
Navigation:
All properties of this template user profile will be copied to the new user/contact that the external administrator creates.
Use the Customer Registration Setup page (CUST_REG_SETUP) to define the template user ID and default SetID to be used when a customer contact is added.
Navigation:
This example illustrates the fields and controls on the Customer Registration Setup page.
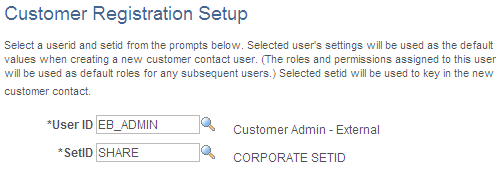
Define the template User ID and default SetID to be used when the external administrator creates a customer contact/user.
Use the Administer Users - Select Contact page (EB_CONTACT_SRCH_SS) to add a new user or update an existing user.
Navigation:
,
This example illustrates the fields and controls on the Administer Users - Select Contact page.
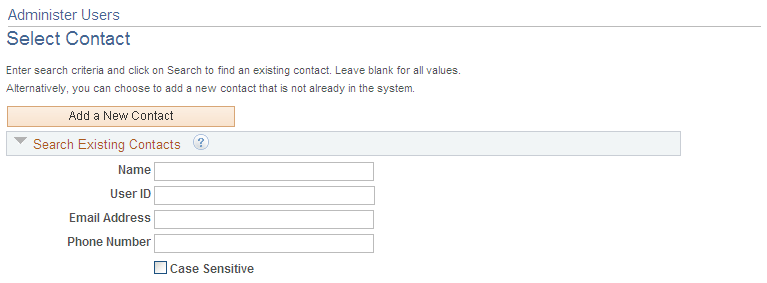
The Administer User page allows external administrators to add new user accounts. The administrator has the option to either add a new contact or perform a search to see if the contact is already defined in the system.
If the administrator chooses to add a new customer contact/user, the system will display a page where the administrator can populate the contact information and the security roles for the new customer contact/user. A grid will appear that shows all invoice-to customers for whom the administrator has security. The administrator selects the customer ID for which the new contact should be able to access data. The prompt on role will only display roles the external administrator is allowed to grant.
This example illustrates the fields and controls on the Administer Users - User Registration page.
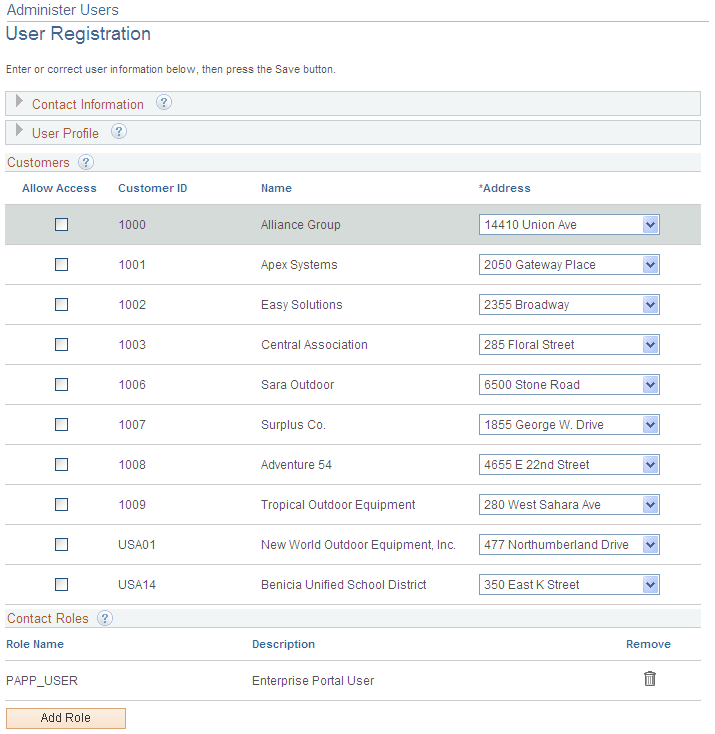
If the customer contact/user already exists in the system, then the system will display the Manage User Profile page with the fields filled out in update mode. The administrator can make updates if required. Select the Inactivate Contact check box to inactivate the customer's contact. The User ID field is display-only and cannot be updated. Select the Lock Out User ID check box to lock the user profile. This check box corresponds to the locked out check box on the Tools User Profile page. Selecting this check box will prevent the user from logging into the system.