Defining Fluid Express Forms
To define express forms, use the Express Form Profile component (PV_EXP_APP_PROFILE).
This section provides an overview of how to define express forms using SDF.
|
Page Name |
Definition Name |
Usage |
|---|---|---|
|
PV_EXP_APP_PROFILE |
To create and maintain profiles. |
|
|
PV_SDF_OPTIONS |
To set up and define supplemental data forms. |
Use the Express Form Profile page (PV_EXP_APP_PROFILE) to create and maintain profiles.
Navigation:
This example illustrates the fields and controls on the Express Form Profile page.
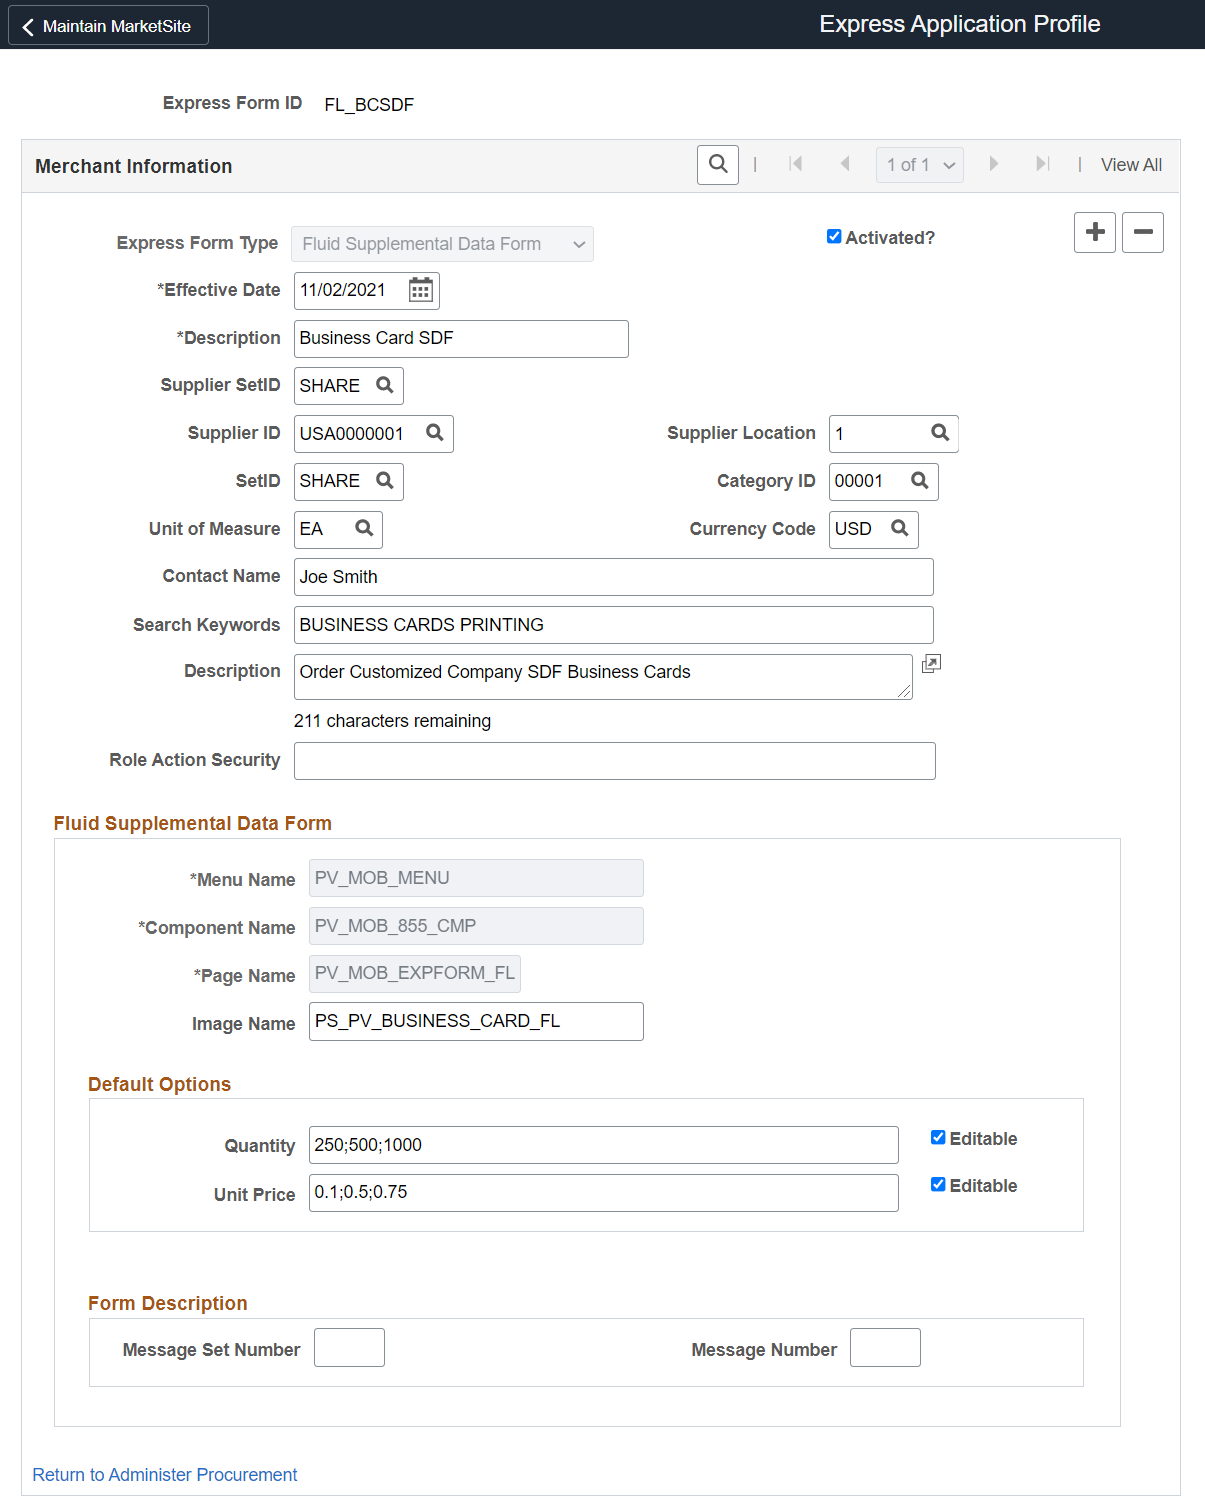
|
Field or Control |
Description |
|---|---|
|
Express Form ID |
Enter a relevant ID. Express form ID field must be 8 characters in length. |
|
Copy From |
Displays only when the express form type is Supplemental Data Form. Click this button to copy any existing classic express forms to the fluid profile. The remaining fields will be filled in automatically based on the selected profile. |
|
Express Form Type |
For the fluid version, you must select Fluid Supplemental Data Form. |
|
Activated |
Select this check box to make an express form active. |
|
Editable |
Select this check box against the Default Options fields to allow a requester to override the Quantity and Unit Price field values while creating requisition. |
After entering the values, save the form. This express form created can be used in creating requisitions using fluid.
Note: When you save an express form, it also creates a copy to be used for edit requisition. The new form ID will be concatenated with _E, indicating that this express form is used for edit requisition. Two express forms are necessary because of the fluid persistent cart. These forms should always be identical, thus the edit express form is always read only. You can find the difference in the Express Form type field. It changes to Edit Fluid Requisition Form.
Use the Supplemental Data page (PV_SDF_OPTIONS) to set up and define supplemental data forms.
There are different steps in creating a supplemental data form. You can select menus in the left pane and individually add values to the records, and save it. See PeopleTools: Portal Technology, Working with Navigation Pages and Navigation Collections
For additional information on Supplemental Data, see Establishing Supplemental Data
Navigation:
This example illustrates the fields and controls on the Sup Data Register Record page.

Sup Data Register Record
Supplemental Data framework requires a base record that shares the same buffer level and keys with the supplemental data store record. For the fluid requisition component, PV_ITM_SRCH_REC known as cart record is going to be the base record along with two new data store records. These are PV_ITM_CART_SDF and PV_ITM_EDIT_SDF. Two data store records are required for a requester. One to capture the SDF data at the cart level and one for edit requisition level.
Sup Data Register Component
Access the Register Component page by selecting the Sup Data Register Component menu. This page contains the SDF subpage and the base record to be associated to the fluid requisition component.
This example illustrates the fields and controls on the Sup Data Register Component page

Supplemental Data Record
Access the Data Record page by selecting the Supplemental Data Record menu. Use this page to define record values, field summary, and field detail for the form. The data needs to be identical for PV_ITM_CART_SDF and PV_ITM_EDIT_SDF to see fields/values pair same.
This example illustrates the fields and controls on the Supplemental Data Record page

When you define a record, its status will be Activated. However, you can change it to In Design if the record design is not complete.
Define Display Group
Access the Define Display Group page by selecting the Define Display Group menu. Use this page to define the fields and field labels to be displayed in the form. You must define a display group for cart and another display group for edit cart options, and name them as you like.
This example illustrates the fields and controls on the Define Display Group page

You can list the fields in the desired sequence, associate it to the record, enter the field name, and it's label. You can also reorder the fields.
Assign Display Group
Access the Assign Display Group page by selecting the Assign Display Group menu. Use this page to assign the display groups to the corresponding component.
This example illustrates the fields and controls on the Assign Display Group page

You can edit the sequence numbers for the display groups to reorder it. You can also define conditions for individual fields in the display group based on which the supplemental data will be displayed. Click the edit icon to associate the display group to ePro express form profile.
This example illustrates the fields and controls on the Assign Display Group - Edit page
