Receiving Items by Ad Hoc Receipt Using the PeopleSoft Fluid User Interface on a Mobile Device
This topics discusses how to receive items by adhoc receipt using a mobile device.
|
Page Name |
Definition Name |
Usage |
|---|---|---|
|
MIN_NPO_RCV_SEH_FL |
Define information for ad hoc receipts. |
|
|
MIN_NPO_RECV_FL |
Select items to receive using ad hoc receipts. |
Use the Receiving Ad Hoc- Fluid page to define information for ad hoc receipts
Navigation:
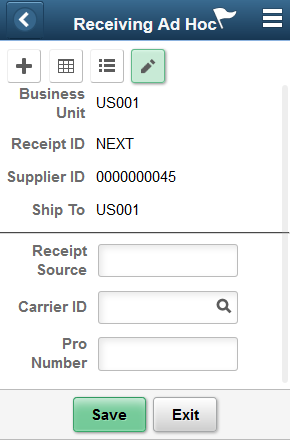
This example illustrates the fields and controls on the Receiving Ad Hoc - Fluid Page. You can find definitions for the fields and controls later on this page.
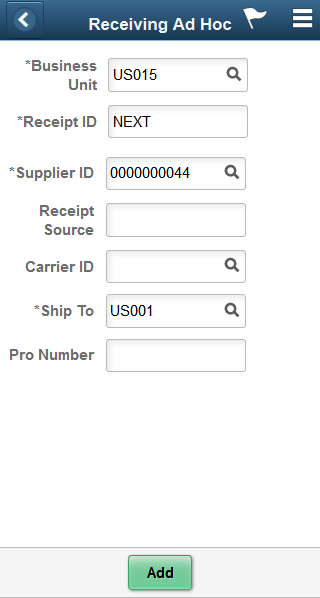
Use this page to define basic information about an ad hoc receipt and to establish processing options for ad hoc receiving.
Note: To use this transaction, ensure that the Change Non PO Receipt Price check box is selected on the Receive Setup page for your user preferences. To access the check box, select:
Note: The Receipt Accrual process does not include ad hoc receipts in its processing because the Receipt Accrual skips these receipts.
Field or Control |
Description |
|---|---|
Business Unit |
Displays the user's default business unit. You can change the business unit. A business unit is required. |
Receipt ID |
Enter the receipt number that you want to use to create the ad hoc receipt. The system assigns the number when you save the receipt. The default value for the field is Next. You do not have to enter a number if you use the default value. The number is based on the autonumbering sequence defined in the PeopleSoft system for receipts. This field is required. |
Supplier ID |
Enter the supplier identification number from whom the shipment was received. The default value for the field is based on the business unit's default supplier for Mobile Receiving Ad Hoc. The field is required. |
Receipt Source |
Enter the source of the receipt if the source is not a valid supplier ID in your PeopleSoft system. |
Carrier ID |
Enter the freight carrier identification that delivered the shipment. |
Ship To |
Enter the ship to location. The default value from user preferences initially appears in the field. You can override the value. The field is required. |
Pro Number |
Enter the tracking number assigned to the shipment in which the material arrived. |
Add |
Click the Add button to add items to receive using this ad hoc receipt. The Add feature is also initiated when you tab out of the Ship To field. For more information about the Add feature, see "Selecting Items to Receive Using Ad Hoc Receipts." |
Use the Receiving Ad Hoc - Add Item page to select items to receive using ad hoc receipts.
Navigation:
This example illustrates the fields and controls on the Receiving Ad Hoc - Add Item Fluid Page. You can find definitions for the fields and controls later on this page.
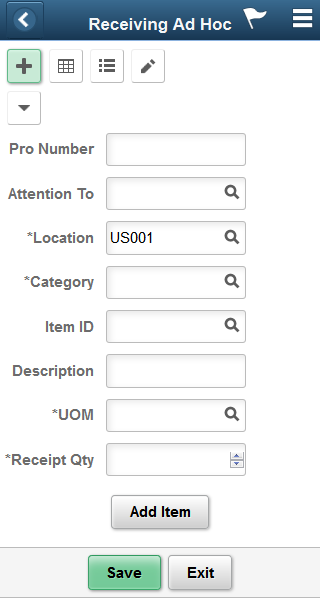
You use this page to enter items for receipt. The page displays the business unit and either the receipt ID that you entered or Next, indicating the system assigns a receipt ID when you save the mobile transaction.
When you click the Add Item button, the system adds the item and the quantity to receive in the lower section of the page. You can change the quantity and unit of measure in the section. For description only lines, the unit of measure and item category defaults from the purchase order business unit Mobile Receiving page fields.
You can also expand the Show icon to view additional information about receipt lines. The values in Show information table can vary depending on the Options settings for ad hoc receiving. You can view additional receipt line information if the Display Hide/Show in table check box is selected in the search options.
You can change the quantity of the item to receive and use the Delete button to remove the item from the ad hoc receipt. As you add items to the list, the most recent item appears at the top of the table list.
Click the Add Item button to continue adding items to the receipt. Each item that you add creates a new receipt line. When you finish adding items to the receipt, click the Save button. The system creates the new ad hoc receipt and updates the PeopleSoft system with the information.
Field or Control |
Description |
|---|---|
Pro Number (progressive number) |
Enter the tracking number assigned to the shipment in which the material arrived. Note: When this field is left blank, the default value is derived from the header page for an added item and on an added line. |
Attention To (attention to) |
Enter the person to whom, and/or place to where the services or goods are to be delivered. The system adds the value that you enter to the RECV_LN_DISTRIB record. If the person selected is a valid value in the PeopleSoft system, then the system populates the Location field. However, you can enter an value in this field that is not in the PeopleSoft system. |
Location |
Enter a location to indicate where the item is to be delivered. If a default value exists for the field, you can override the value. The Location field is required. |
Category |
Enter the category of the items to add. |
Item ID |
Enter the item ID that you are receiving. You must enter either an item ID or an item description. The item is added to the receipt as a receipt line. If you enter the item ID, the system populates the Description field with the item's description and the UOM with the item's standard UOM. Note: The Item ID field and associated filters support GSI barcode parsing such that the system automatically populates the Item ID when a barcode is scanned. |
Description (description) |
Enter a value that describes the item being received. If an item is entered, the system provides the default value for the item's description. You cannot change the description. If you do not enter an item, the Description field is required so you must enter a description. This requires you to select the Change Non PO Receipt Price option on the Receiver Setup page. When you enter an item the system does not immediately display the item's description. After you click the Add Item button, the system adds the item to the table and the item description appears with the item. |
UOM |
Enter the unit of measure used to count items to add. |
Receipt Qty (quantity) |
Enter the quantity of the item that you are receiving for this ad hoc receipt line. The Qty field is required. When you enter a quantity and tab out of the field, the system triggers the Add Item functionality. |
Add Item |
Click the Add Item button to add an item to a list of items that are being received. The Add Item feature is also initiated when you tab out of the Qty field. Once you have performed the Add Item feature, the most recent item added appears at the top of the list of items and the cursor is placed on the Pro Number field. For the Receiving Ad Hoc - Receive Item page, the Save button, Header link, and Return to Search link appear at the top of the table. When there are two or more rows, these fields appear at the top and at the bottom of the table. |
Save |
Click to save count of items added. Note: The system displays a receipt created message at the top of the page briefly. |
Exit |
Click to return to the header page. |
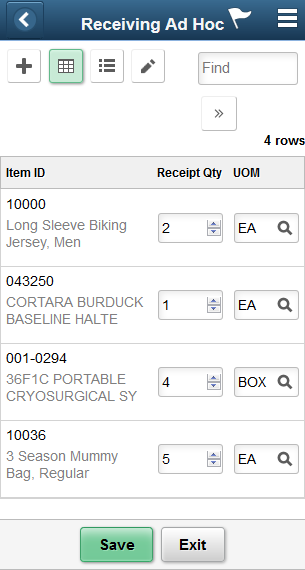
You can view item information in a grid and list views and also modify any if necessary.
This example illustrates the fields and controls on the Receiving Ad Hoc - Grid View Fluid Page.
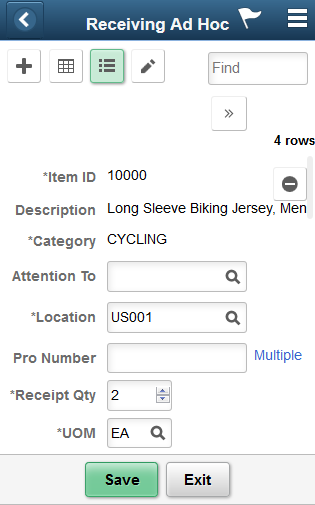
This example illustrates the fields and controls on the Receiving Ad Hoc - List View Fluid Page.
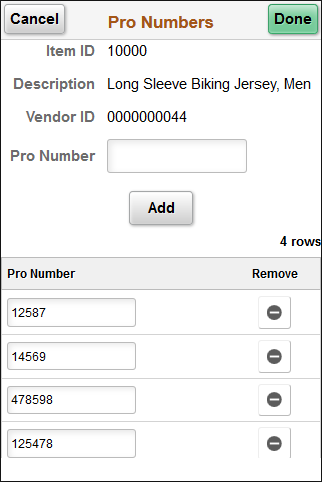
This example illustrates the fields and controls on the Receiving Ad Hoc - Multiple Pro Numbers Fluid Page.
This example illustrates the fields and controls on the Receiving Ad Hoc - Edit View Fluid.
This example illustrates the fields and controls on the Receiving Ad Hoc - Receipt Creation Fluid Page.
