Working with Fluid Homepages and Dashboards
This topic contains an overview and introduces the concepts involved with using fluid homepages and dashboards.
A fluid homepage is a PeopleSoft page that aggregates related information and displays tiles that can provide both snapshots of actionable information as well as navigation to fluid applications. A fluid homepage is displayed when you sign in to a PeopleSoft system. Fluid homepages are the equivalent of classic homepages; similarly, tiles can be compared to pagelets used in classic homepages.
A fluid homepage and the tiles it displays typically share a common purpose or apply to a specific role, such as employee, manager, clerk, and so on. When working with tiles on a homepage, you can select (click or tap) the tile to access the underlying application and perform routine tasks. Tiles typically have a graphic on them, portraying the purpose of the underlying application, which helps you to identify the tile and associate it with the application. Some tiles also display up-to-date information, making you aware of high-level information for decision making or monitoring.
Based on your business requirements, Portal Administrators can group tiles into sections and create sectionalized homepages. See Understanding Fluid Sectionalized Homepages and Dashboards.
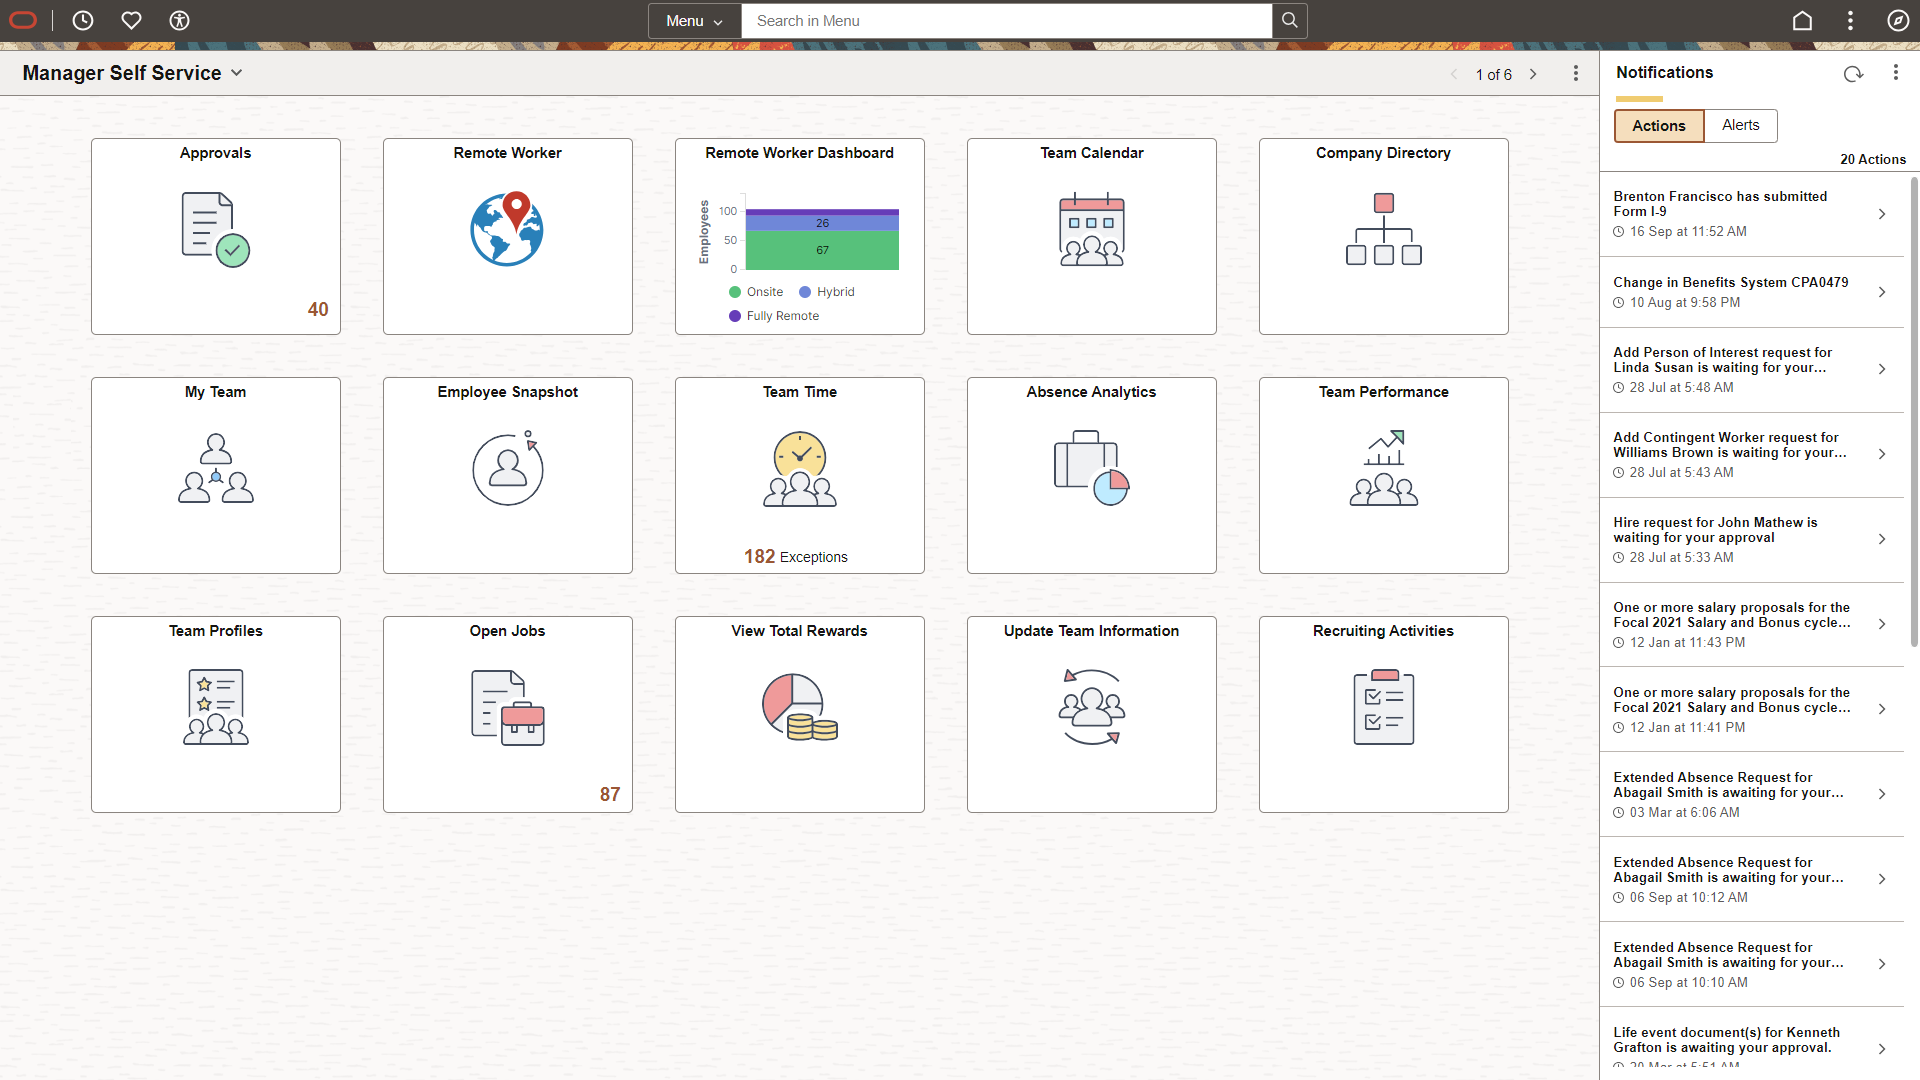
This example illustrates the appearance of a fluid standard homepage with a number of tiles that you can select to view information or complete a task. For descriptions of the elements and usage of the homepage, see Working with Fluid Homepage Controls.
Understanding Tiles
Tiles can be compared to pagelets, which are available on classic homepages. Tiles provide:
Quick navigational access to targeted transactions.
An overview of the status of a transaction (for example, your last pay date, the number of approvals requiring your attention, and so on).
A graphical overview of a pivot grid or PeopleSoft Insights dashboard.
When working with tiles, consider:
Any number of tiles can be added to a fluid homepage; dashboards are limited to just those tiles made available by the dashboard administrator.
You can personalize fluid homepages and dashboards by adding, deleting, and moving tiles.
Tiles can be used to link to fluid applications or classic applications.
A fluid dashboard is the fluid equivalent of a classic dashboard. Similar to classic dashboards, fluid dashboards do not appear automatically after sign in; instead, you access a fluid dashboard by clicking a content reference link, which can appear anywhere in the menu structure. Similar to a fluid homepage, a fluid dashboard aggregates related information and displays tiles that can provide both snapshots of actionable information as well as navigation to other applications. A fluid dashboard and the tiles it displays typically share a common purpose or apply to a specific role, such as employee, manager, clerk, and so on. While you can personalize a fluid dashboard, you can add only those tiles that have been configured for use on the dashboard by the dashboard administrator.
Based on your business requirements, Dashboard Administrators can group tiles into sections and create sectionalized dashboards. See Understanding Fluid Sectionalized Homepages and Dashboards.
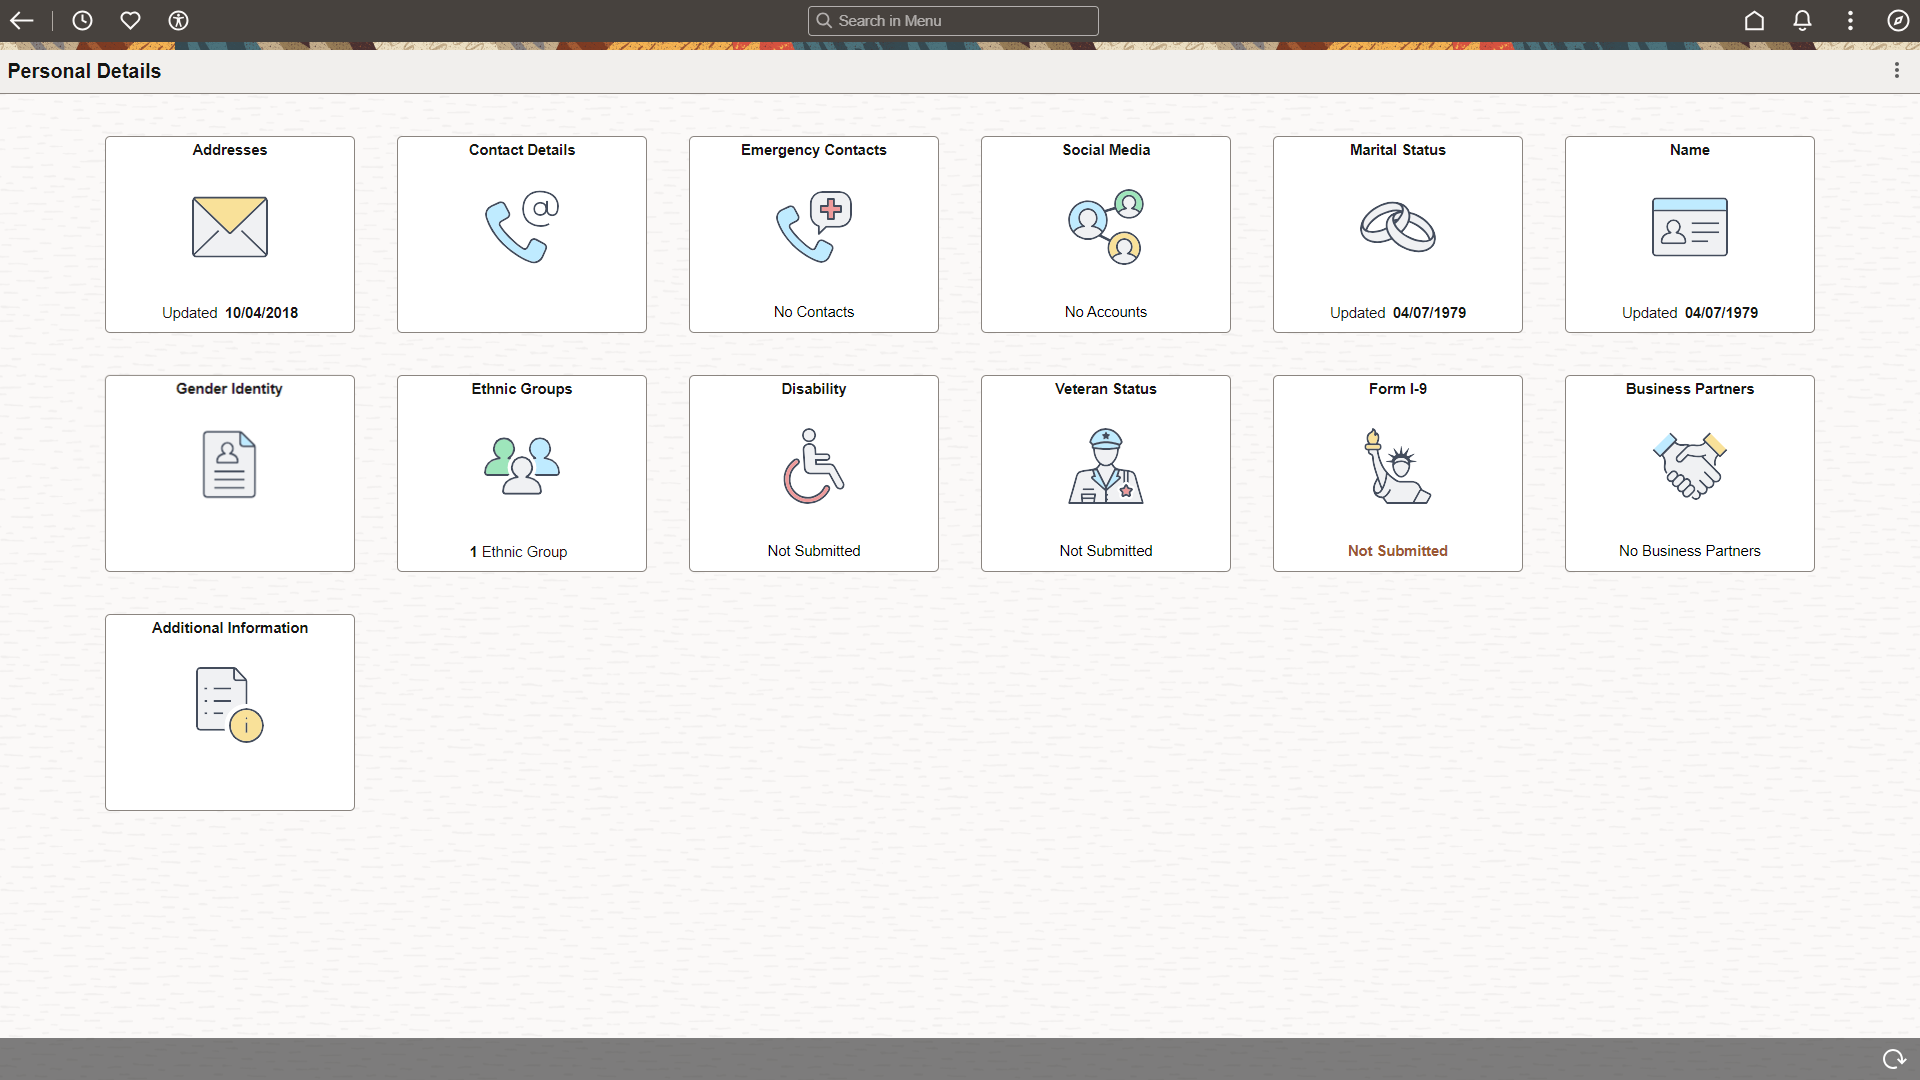
This example illustrates the appearance of a standard fluid dashboard. For descriptions of the usage of the controls in the fluid banner at the top of the dashboard, see Working with Fluid Homepage Controls.
Delivered Dashboards
This table lists PeopleTools-delivered dashboards:
|
Dashboard |
Link to Product Documentation |
|---|---|
|
My Update Manager Dashboard |
|
|
Update Manager |
Portal administrators and Dashboard administrators can sectionalize a fluid homepage and dashboard, respectively. A section is a collection of tiles under a categorization label that generalizes the purpose of the tiles in that section. It improves the usability and user experience of a homepage or dashboard. Sections provide administrators greater control over the sequence of tiles on a homepage or dashboard. A homepage can have multiple sections.
Note: Sectionalized homepages and dashboards do not allow end-user personalization. See Managing Fluid Homepages.
Sectionalized homepages and dashboards provide:
Quick navigational access to a group of tiles that serve a general purpose.
The ability to collapse and expand the sections.
When working with sectionalized homepages and dashboards, consider:
A section can contain several tiles.
If a section does not contain any tiles, the section is not displayed on the homepage.
User personalization is not available on sectionalized homepages and dashboards and considered locked. Therefore, the options to delete or add tiles are not available in these sections. However, you can copy a tile from a locked homepage. See Managing Fluid Homepages.
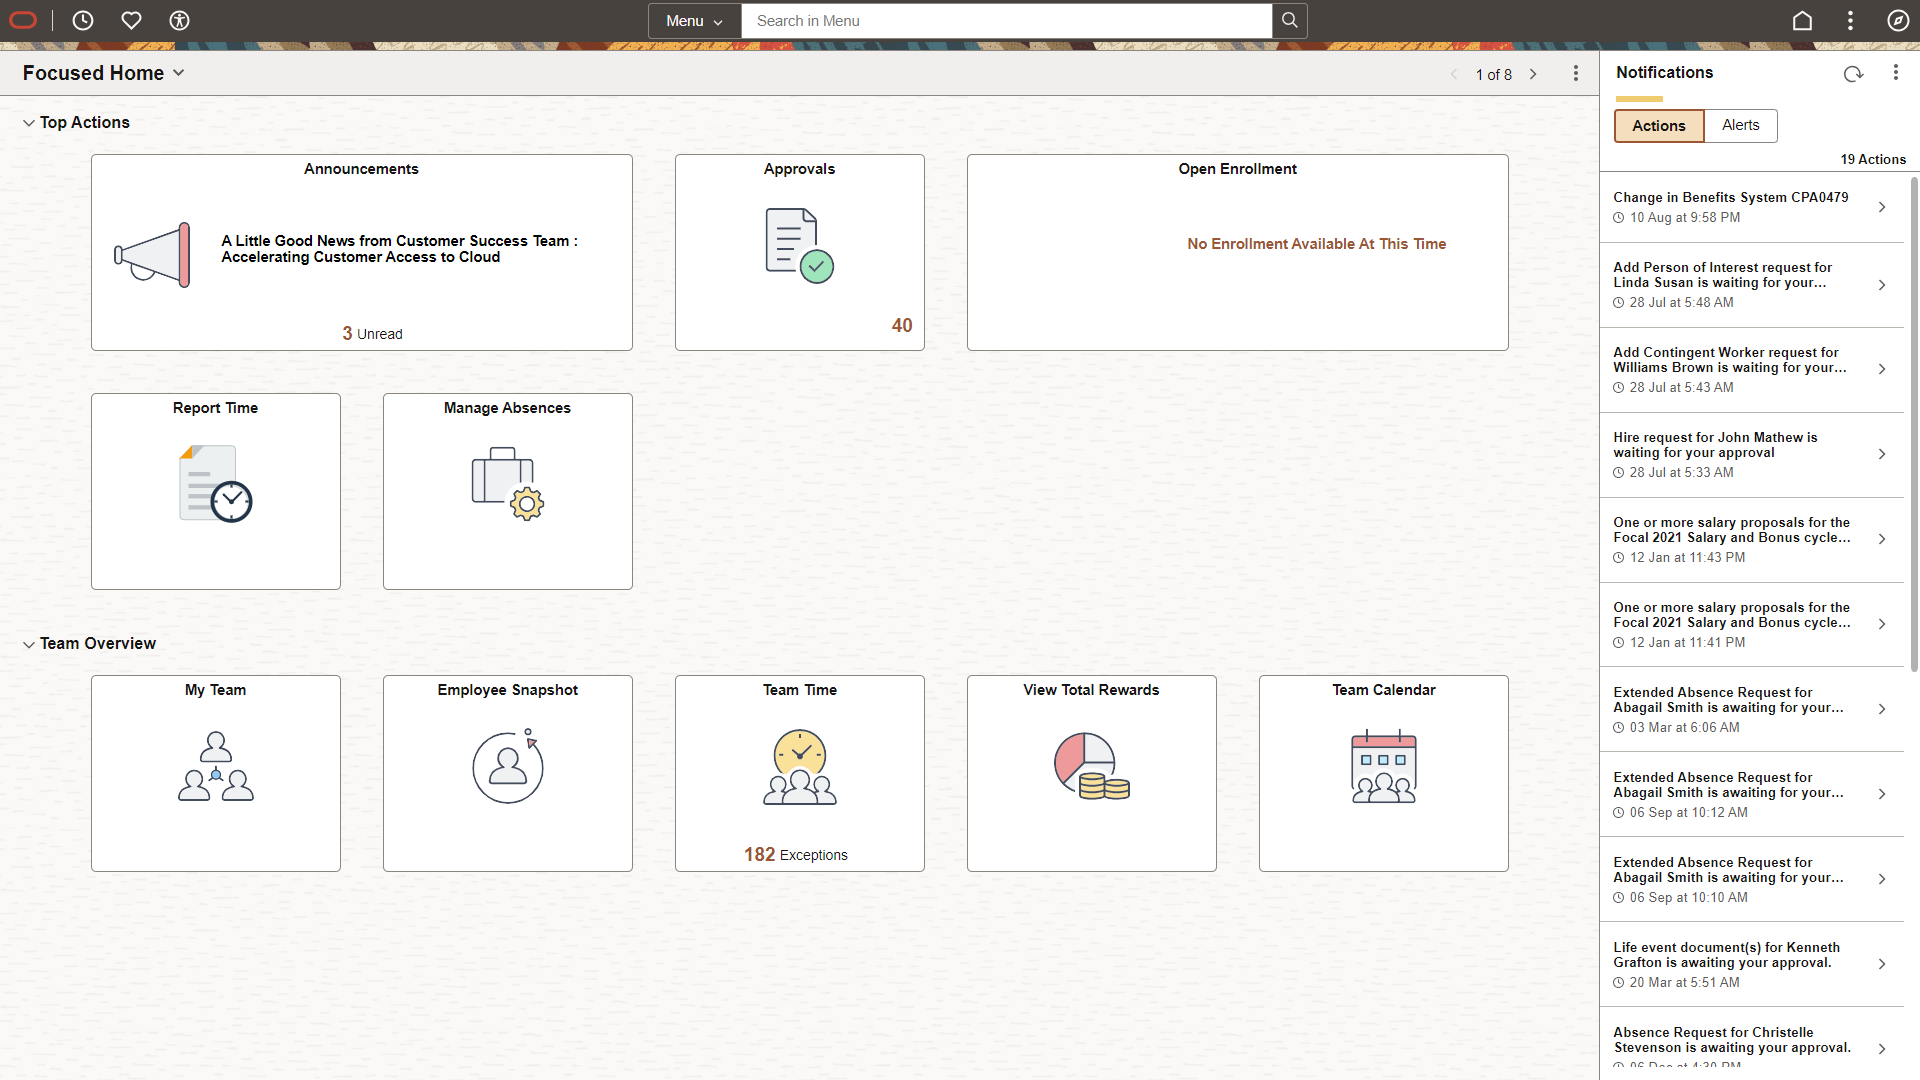
This example illustrates the appearance of a fluid sectionalized homepage.
The following list describes the controls that appear on fluid homepages and fluid dashboards. (Many of these controls are also displayed on fluid pages, classic pages, and classic homepages.) Which controls are displayed in the banner varies depending on the width of the browser window. As the width decreases, controls are moved from the banner to become links in the Actions menu.
Term |
Definition |
|---|---|
|
|
Back button (unlabeled). Use the Back button to navigate back to the previously visited component, homepage, activity guide, navigation collection, or WorkCenter. See Using the Back Button. Note: Displayed on fluid dashboards and transaction pages only; not displayed on fluid homepages. |
|
|
Use the Global Search bar to perform global searches. |
|
|
Home button. Use the Home button to return to your default homepage, which is the homepage that you arrive at directly upon signon. |
|
|
Global Search button. Displayed on small form factor devices (fluid homepages, dashboards, and other pages). Use the Global Search button to open the Global Search bar in the banner. Note: Displayed on large form factor devices (fluid homepages, dashboards, and other pages) only when the browser width does not permit display of the Global Search bar. |
|
|
Notifications button (without the new notifications indicator). Use the Notifications button to open the Notifications panel displaying any pending actions and alerts. See Using the Notifications Panel. Note: Displayed on fluid dashboards; also displayed on fluid homepages when the Notifications panel is hidden either when the browser width is 1280 pixels or less or through personalization. See Managing Fluid Homepages. |
|
|
Actions button. Use the Actions button to display the Actions menu. See Using the Actions Menu. |
|
|
Homepage Actions button. Use the Homepage Actions button to display the menu specific to the homepage. See Using the Actions Menu. Note: On small form factor devices, the Homepage Actions menu does not appear and the items are integrated in the Actions menu. |
|
|
NavBar button. Use the NavBar button to display the NavBar (sometimes referred to as the navigation bar). See Working with the NavBar. |
|
|
Homepage drop-down selector. When there are multiple homepages to which you have access, use this drop-down list to select a different homepage. Alternatively, you can use the left and right arrows of the homepage navigator to navigate through your homepages. Note: Displayed on fluid homepages only. |
|
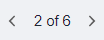
Homepage navigator. When there are multiple homepages to which you have access, use the left and right arrows of the homepage navigator to navigate through your homepages. The homepage navigator displays the numerical position of the current homepage as well as the total number of homepages. Note: Displayed on fluid homepages only. |
|
|
Recently Visited button (in the quick access bar). Use the Recently Visited button to display your recently visited items in the quick access bar. See Using the Quick Access Bar. |
|
|
Favorites button (in the quick access bar). Use the Favorites button to display your favorite items in the quick access bar. See Using the Quick Access Bar. |
 |
Accessibility button (in the quick access bar). Use the Accessibility button to enable screen reader mode, display a list of keyboard shortcuts, and access information on how to enable and use the accessibility layout features within the application. See Using the Quick Access Bar and Using the Accessibility Button in Fluid. |
|
|
Refresh button. Use the Refresh button to refresh the fluid dashboard, manually, so that all live tiles display the most current representation of the underlying data if you’ve been on the dashboard for a period of time. Note: Individual tiles can be configured to refresh at specific rates. Note: Displayed on fluid dashboards only. On fluid homepages, a Refresh link is displayed in the Actions menu. |


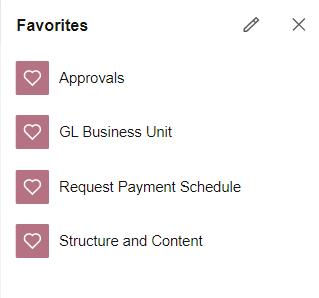
The quick access bar (QAB) appears in the banner and provides quick access to your recently visited items and your favorites. These items displayed in the quick access bar are the same as those displayed via the Recently Visited and Favorites tiles displayed in the NavBar. The quick access bar is displayed by default on all fluid homepages, dashboards, and transaction pages; however, it can be disabled system-wide by your system administrator.
On the quick access bar, you can also access the Accessibility button which you can use to enable screen reader mode, view keyboard shortcuts, and access additional Accessibility Help information configured within the application. See Using the Accessibility Button in Fluid.
Note: The Accessibility button is only available when the quick access bar is displayed on fluid pages and the component buffer is available. This feature is not available on activity guide-based components.
The quick access bar can be reverted to appear on the left of the homepage (similar to PeopleTools 8.59); however, it can be performed by your system administrator. See Assembling Branding Themes.
For example, your favorites are available in the quick access bar:
Note: On small form factor devices, the quick access bar is displayed at the bottom of the page instead of on the banner and the Accessibility button is available only on the homepage.
This section discusses these topics:
Accessing the personalization page.
Showing or hiding the Notifications panel.
Adding a fluid homepage.
Deleting a fluid homepage.
Accessing the Personalize Homepage Page
Use the Personalize Homepage page to manage your fluid homepages:
Navigate to any fluid homepage.
Select the Actions menu.
Select Personalize Homepage.
This example illustrates the options on the Personalize Homepage page, used for personalizing the content on a fluid homepage.
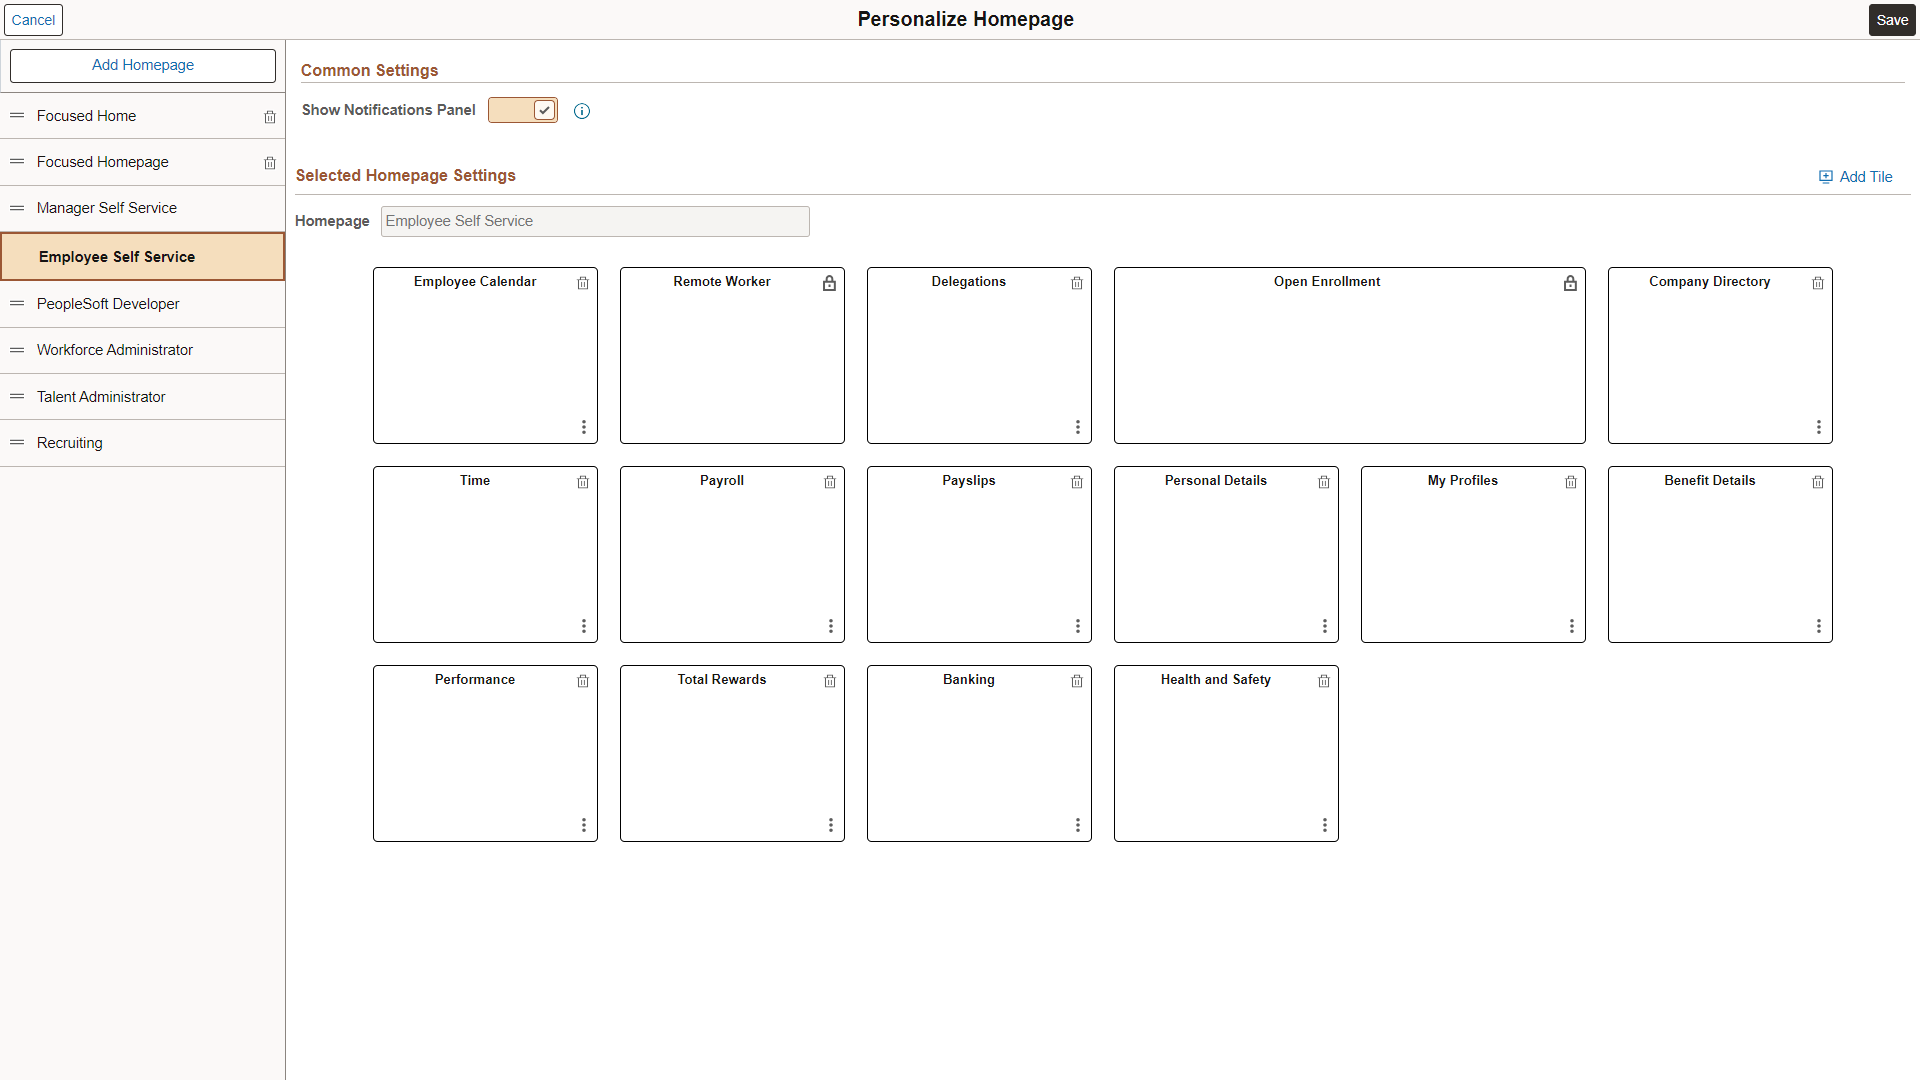
Administrators can disable end-user personalization on any homepage or dashboard. Homepages where end-user personalization is disabled are considered locked, that is, you cannot rename the homepage, add tiles to the homepage, move tiles to other homepages, and delete tiles. You can, however, reorder your homepages on the left panel. In this release, sectionalized homepages and dashboards do not allow end-user personalization.
In previous releases, you could re-order tiles directly on a homepage or dashboard, but from PeopleTools 8.61, you can personalize a homepage or dashboard only through the Personalize Homepage or Personalize Dashboard page.
Note: The labels of system-defined homepages and dashboards are translatable; however, personalized labels of homepages and dashboards are not translatable—this applies to personal fluid homepages as well as the personalized labels of fluid homepages, fluid dashboards, classic homepages, and classic dashboards.
Showing or Hiding the Notifications Panel
To show or hide the Notifications panel:
From any fluid homepage, select Personalize Homepage in the Actions menu.
Select the desired Show Notifications Panel option.
Note: The Notifications panel is displayed by default on fluid homepages unless this setting has been configured differently on your system.
Click Save.
Adding a Fluid Homepage
To add a homepage:
On the Personalize Homepage page, click the Add Homepage button.
Use the Add Homepage page to create new personal homepages or add system-defined homepages.
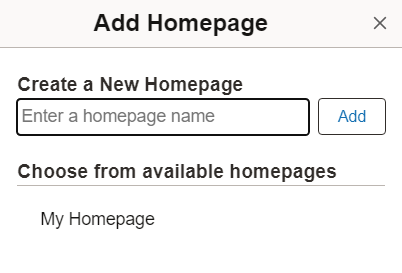
On the Add Homepage page, do one of the following:
Enter the name of your new personal homepage in the Create a New Homepage edit box, and click Add.
Note: The system imposes a limit of 10 personal homepages.
Select a system-defined homepage from the list of available homepages.
Click Save in the Personalize Homepage header.
Deleting a Fluid Homepage
To delete a homepage:
On the Personalize Homepage page, locate the homepage in the left panel.
Click the Delete button (a trash can icon) for that homepage.
Note: The Delete button is not available on homepages that are disabled for end-user personalization.
Click Save in the Personalize Homepage header.
This section contains an overview and discusses:
Adding tiles.
Using the Add To Homepage feature.
Deleting tiles.
Copying or moving tiles to other fluid homepages.
Note: You cannot copy or move tiles between fluid dashboards.
Dragging and dropping tiles to reposition them.
Adding Tiles
To add tiles to a fluid homepage or dashboard:
Navigate directly to the desired fluid homepage or dashboard.
Note: You can personalize a fluid dashboard only after navigating directly to the dashboard; it cannot be personalized when displayed inside an activity guide, fluid navigation collection, or master/detail wrapper.
From the Actions menu, select Personalize Homepage (or Personalize Dashboard).
On the personalization page, click the Add Tile button.
Note: The Add Tile button is not available on homepages and dashboards that are disabled for end-user personalization.
This example illustrates the Add Tile dialog box, which you use to find and add tiles to fluid homepages and dashboards.
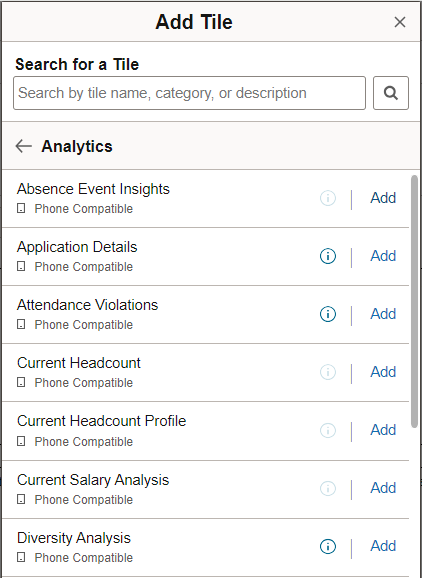
Term
Definition

Indicates that a tile is displayed on a homepage accessed from a small form factor device such as a smartphone. If this icon does not appear next to a tile, you will not be able to see the tile when accessing the homepage using a smartphone. In addition, the tile will not be available for you to add when you are personalizing the homepage using a smartphone. However, you will see the tile on other devices, such as a tablet, laptop computer, or desktop computer.
In the example above, Enter Time would not appear on the homepage if it is accessed using a smartphone and it would not appear in the Add Tile dialog box.

Selecting the Description icon opens a window with a description of the tile and indicating that it can be accessed from a small form factor device. This icon appears only if the tile is compatible with a small form factor device.
Add
Select Add to add the tile to the homepage or dashboard.
Find the desired tile using the Add Tile page. You have these options:
Enter the name or partial name of the tile in the search box, and click the Search button.
Browse through the folders to find the tile.
Select the tile to be added.
The tile is added to the end of the list of tiles on that fluid homepage or dashboard.
Optionally, move the tile to a different position on the homepage or dashboard by dragging and dropping it. See “Dragging and Dropping Tiles to Reposition Them” in a following section for more information.
Click Save on the personalization page.
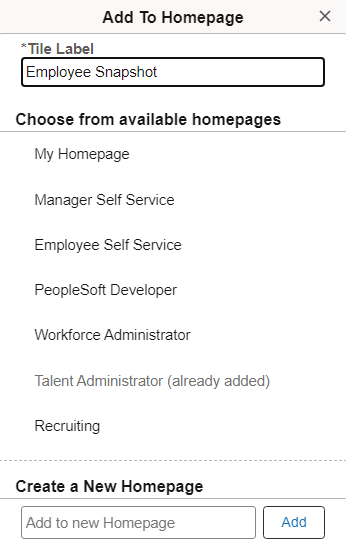
Using the Add To Homepage Feature
You can also add tiles to fluid homepages on an ad hoc basis using the Add To Homepage link in the Actions menu.
Note: No actual tile definition will be created for these tiles if one does not exist already. The information is stored in the system as personalization data only.
When you add a tile to a fluid homepage on an ad hoc basis, you can edit and personalize the label for the item. For example:
Deleting Tiles from Homepages or Dashboards
To delete tiles from a fluid homepage or dashboard:
Navigate to the desired fluid homepage or dashboard.
From the Actions menu, select Personalize.
Locate the tile you want to delete from the homepage.
Click the Delete button (the trash can icon).
Note: The Delete button is not available on tiles that are included in homepages and dashboards that are disabled for end-user personalization.
Click Save on the personalization page.
Copying or Moving Tiles to Other Fluid Homepages
Note: You cannot copy or move tiles between fluid dashboards.
To copy tiles to other fluid homepages:
Navigate to the desired source homepage.
From the Actions menu, select Personalize Homepage.
Locate the tile you want to act on.
Click the action button in the bottom, right-hand corner of the tile.
On the Select Action prompt, select either:
Copy To
Note: When you select the Copy To option on a tile, the system displays a list of possible targets where you can copy the tile. The options on this list include all the homepages where end-user personalization is enabled and where the tile is not already present.
Move To
Note: The Move To option is not available on tiles that are included in homepages and dashboards that are disabled for end-user personalization.
In the prompt, select the target homepage.
Click Save on the Personalize Homepage page
Dragging and Dropping Tiles to Reposition Them
To drag and drop tiles to reposition them on a fluid homepage or dashboard:
Navigate to the desired fluid homepage or dashboard.
Note: You can only drag and drop tiles on the homepage or dashboard if you are within the personalization page. You can no longer drag and drop directly on the homepage or dashboard presentation.
Click on the tile you want to reposition.
Drag it to the desired location—that is, the current position of another tile.
Note: You must drop a tile onto another tile for the tile to be repositioned. Dropping the tile into empty space does not trigger the drop function.
Drop the tile by releasing it.
To drag and drop tiles to move them to a different fluid homepage:
Navigate to the desired homepage.
From the Actions menu, select Personalize Homepage.
Click on the tile you want to move to a different homepage.
Drag the tile and hover it over the desired homepage in the left panel, where each homepage is listed.
When the desired homepage is highlighted, release the tile to drop it.
Click Save.
Note: Alternatively, you can use the keyboard to reposition tiles. First, highlight the tile that you want to reposition, press Ctrl + M to select the tile, use the Tab or the arrow keys to highlight the drop location, and then press Ctrl + Alt + M to drop the selected tile.
Tiles are the navigational and display construct created specifically for small form factor devices such as smartphones. Tiles provide application content from PeopleSoft systems and other sources. Designed to be more than just a navigation button, a tile leverages the ability to display dynamic information from PeopleSoft components, pivot grids, and other information sources.
Note: A tile is conceptually similar to a pagelet, previously delivered on PeopleSoft classic homepages.
This example illustrates the layout of tiles in a single column on a smartphone in portrait orientation.
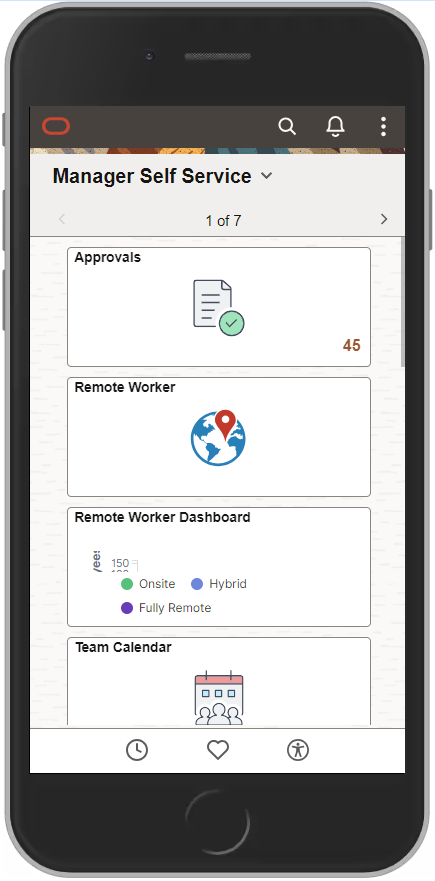
Note: On a smartphone, the quick access bar is displayed at the bottom of the page. See Using the Quick Access Bar for more information.
Note: On small form factor devices, the Accessibility button is available only on the homepage.
However, not all tiles appear on fluid homepages or dashboards when accessed by small form factor devices such as smartphones. For instance, if the application tile would not be suitable to be displayed on a smaller device—many classic applications, for example—the tile is not designated as “optimized” for small form factor. When you use the Add To Homepage feature on a classic page, the tiles you add in this ad hoc manner are not optimized for small form factor. From the Personalize page, you can determine which tiles will not display on a smartphone by looking for the following icon and message on the tile:
Term |
Definition |
|---|---|
|
Tile is not supported on this device |

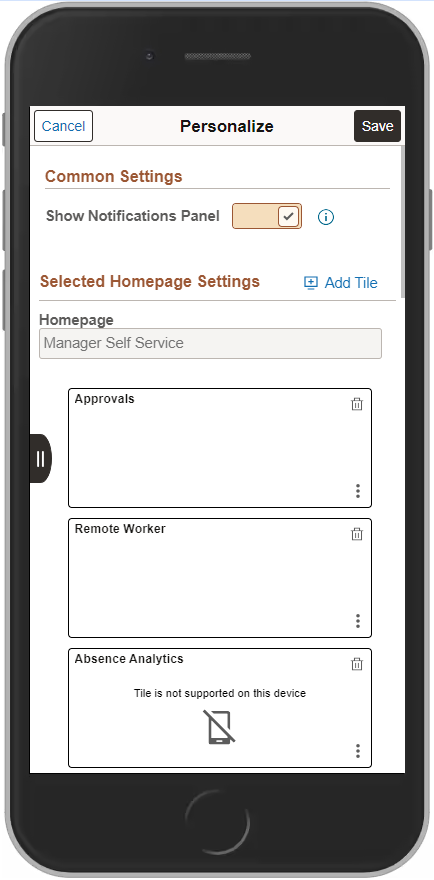
This example illustrates the Personalize homepage page when accessed by a smartphone. Note that the system is indicating that the Absence Analytics tile will not be displayed on the homepage when accessed by a smartphone.