Setting Up and Managing On-Demand Event Maintenance
To set up online printing, use the Online Printing (BAS_ODEM_PRINT_PG) component.
This section discusses how to set up and manage on-demand event maintenance.
|
Page Name |
Definition Name |
Usage |
|---|---|---|
|
BAS_ODEM_PRINT |
Set the print destination for on-demand enrollment and confirmation forms. |
|
|
BAS_PARTIC_EMPLINQ |
Review the plan types for which elections were entered or changed and the plan types that the participant is eligible to change but for which no changes have been entered. |
|
|
BAS_PARTIC_STS |
Review the plan types for which elections were entered or changed and the plan types that the participant is eligible to change but for which no changes have been entered. |
|
|
On Demand EM - Error Messages |
BAS_MESS_EMPL |
Review on-demand event maintenance error messages. |
Use the Online Printing page (BAS_ODEM_PRINT) to set the print destination for on-demand enrollment and confirmation forms.
Navigation:
This example illustrates the fields and controls on the Online Printing page. You can find definitions for the fields and controls later on this page.
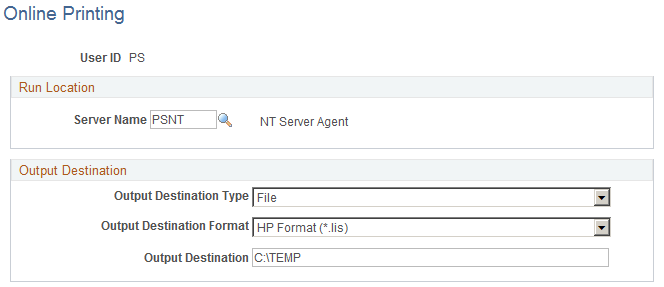
You set up print options only once for each user ID. Use the fields in the Output Destination group box to determine the output destination of the enrollment and confirmation forms that you print with the On Demand Event Maintenance facility. If you want to print the report on a printer, select Printer. If you want the system to generate the form as a text file, select File. In File/Printer, enter either the path to the directory in which you want the system to save the file (if you've selected File), or the printer to which you want the system to send the form (if you've selected Printer).
Note: Reports are always run from the client.
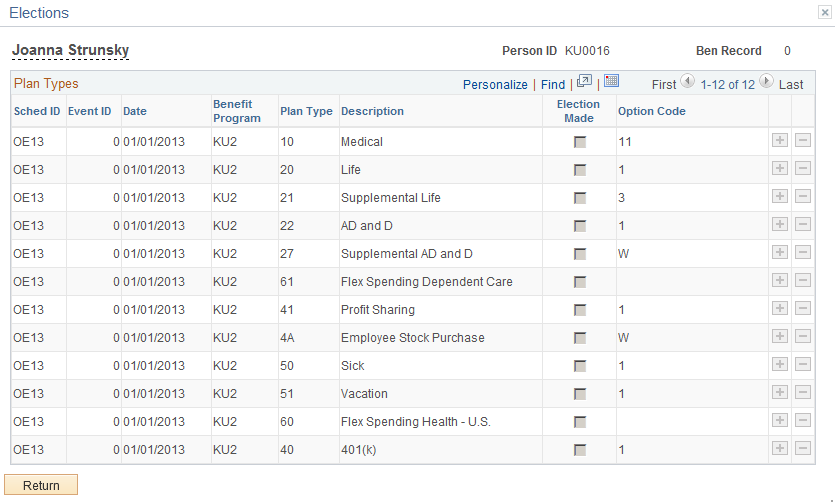
Use the Elections page (BAS_PARTIC_EMPLINQ) to review the plan types for which elections were entered or changed and the plan types that the participant is eligible to change but for which no changes have been entered.
Navigation:
Click the Show Plans button on the On-Demand Event Maintenance page.
This example illustrates the fields and controls on the Elections page. You can find definitions for the fields and controls later on this page.
Field or Control |
Description |
|---|---|
Election Made |
A value of Y indicates that election has been entered or changed. |
Option Code |
The benefit option code can also indicate that the participant has waived a certain option. |
Note: The Elections page displays only the plan types for which the participant is currently eligible to choose or change benefit option elections. It might not display all of the plan types in which the participant is currently enrolled.
Use the Update Event Status page (BAS_PARTIC_STS) to review the plan types for which elections were entered or changed and the plan types that the participant is eligible to change but for which no changes have been entered.
Navigation:
Click the Show Plans button on the On-Demand Event Maintenance page.
Click the Event Status Update button on the On-Demand Event Maintenance page.
Just as in the normal Benefits Administration process, you can use the Event Status Update page to open and close events and reprocess events. You can also use the Event Status Update page to review the participant events currently associated with the participant and benefit record number combination with which you are working.
Use the On Demand EM - Error Messages page (BAS_MESS_EMPL) to review on-demand event maintenance error messages.
Navigation:
Click the Show Errors button on the On-Demand Event Maintenance page.
The error messages generated by the last processing action that you initiated appear in the Messages area. Each time you run the Benefits Administration process, the system deletes the error messages generated by the previous run. If errors from a previous run are not corrected, the error messages are generated again with the new run of the process.