Creating Payslip Templates and Messages
To set up payslip templates and messages, use the Templates AUS (GPAU_PSLP_SETUP) and Messages AUS (GPAU_PSLP_MSG) components.
This topic discusses ways to create payslip templates and messages.
|
Page Name |
Definition Name |
Usage |
|---|---|---|
|
GPAU_PSLP |
Set up delivery and print exclusion options, column headings (labels) and column content (rows of accumulators) |
|
|
GPAU_PSLP1 |
Create sections of earnings and deductions, select description options, and set the element components that the payslip displays. |
|
|
Absence Details Page |
GPAU_PSLP2 |
Enter a sequence number and element name, and select the description type. The system extracts the balance of each entitlement or pro rata absence element and includes it on the payslip. |
|
GPAU_PSLP_EXT |
Create messages to appear on payslips for a particular calendar group. You can control which payslips display the messages. |
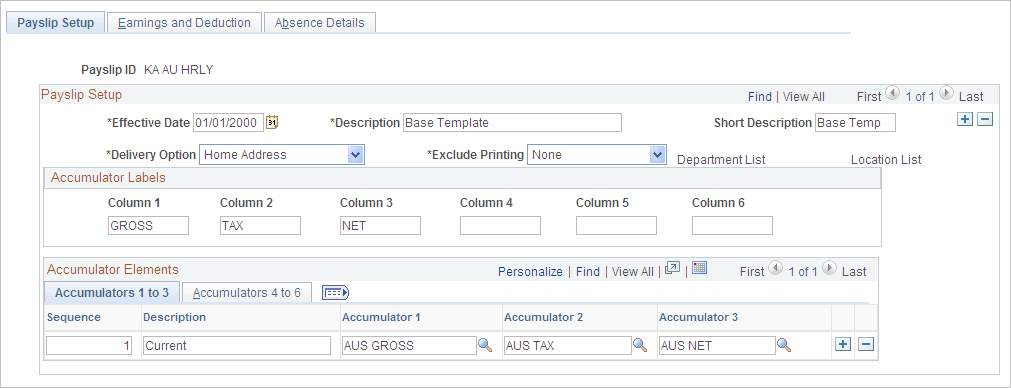
Use the Payslip Setup page (GPAU_PSLP) to set up delivery and print exclusion options, column headings (labels) and column content (rows of accumulators).
Navigation:
This example illustrates the fields and controls on the Payslip Setup page. You can find definitions for the fields and controls later on this page.
Field or Control |
Description |
|---|---|
Payslip ID |
Displays the payslip ID. A template can be attached to multiple pay groups. Note: Only one template can be attached to a particular pay group at a time. |
Delivery Option |
Select an address to receive printed payslips. It can be an internal address of Department or Location, or an external address of Home Address or Mail Address as recorded on the payee's personal data record. You can override the selection made here on the Payee Payslip Overrides page. Because this selection is effective-dated, you can override the delivery option for a period of time, if necessary. |
Exclude Printing |
Select either Department or Location to exclude departments or locations from the payslip print run. The corresponding link becomes active, so you can select departments or locations. You can override the exclusion on the Print Payslips page before you run the print program. Note: If you enter a particular pay entity for the print option on the Print Payslips page and you have excluded a location within the pay entity, the payslips are not printed. |
Accumulator Labels
Field or Control |
Description |
|---|---|
Column 1 to Column 6 |
Enter the labels that appear on the printed payslips as the column headings for the accumulators. These column headings appear in the payslip region under the heading Pay Summary. |
Accumulator Elements: Accumulators 1 to 3 Tab
Field or Control |
Description |
|---|---|
Sequence |
Enter a sequence number to set the order in which the accumulators appear. The accumulators appear in ascending order with the lowest number first. |
Description |
Enter a description of each accumulator row. |
Accumulator 1 to Accumulator 3 |
Select the accumulators that appear in the corresponding column. For example, suppose that you enter Current and YTD as the descriptions for accumulators 1 and 2. To also display quarter-to-date accumulated amounts, create a new row, enter the description QTD, and then select the accumulators that correlate to the columns headings. |
Accumulator Elements: Accumulators 4 to 6 Tab
Field or Control |
Description |
|---|---|
Accumulator 4 to Accumulator 6 |
Set up accumulators 4 to 6. There are no Sequence and Description fields because the same sequence number and description apply to all six accumulators in the row. |
This diagram shows how column numbers, sequences, and accumulator numbers appear on the printed payslip.

Use the Earnings and Deduction page (GPAU_PSLP1) to create sections of earnings and deductions, select description options, and set the element components that the payslip displays.
Navigation:
This example illustrates the fields and controls on the Earnings and Deduction page. You can find definitions for the fields and controls later on this page.
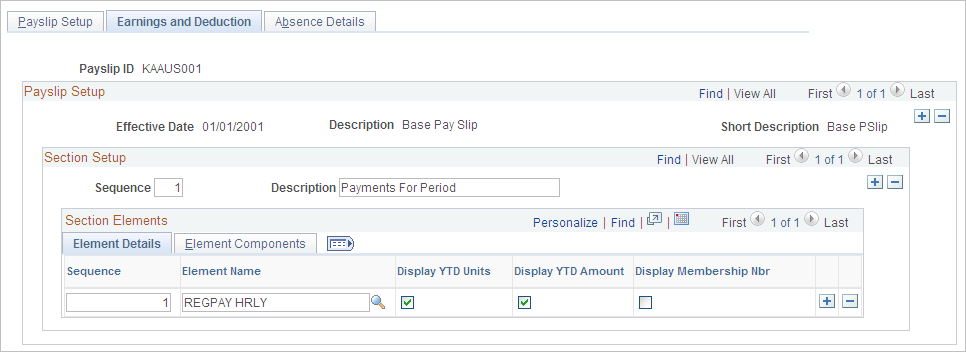
Earnings and Deductions Section Setup
Field or Control |
Description |
|---|---|
Description |
Descriptions appear as section headings under the Payment Details heading on the payslip. |
Element Details Tab
Field or Control |
Description |
|---|---|
Display YTD Units and Display YTD Amount |
Select these check boxes to have the YTD units and amounts for each element appear in the Payment Details region under the heading Year to Date Values. |
Display Membership # |
Select to display the recipient's membership ID in the Description region. |
Element Components Tab
Field or Control |
Description |
|---|---|
Description Type |
Select the type of description to appear for each earnings or deduction row in the Payment Details region of the payslip. Select from the following values: Custom: A text box appears for you to enter a description. Description: The element's description appears as entered on the element's name page in its component. Element Name: The element's name appears from its name page in its component. It also appears on the Elements Details tab. Recipient Name: The name of the recipient appears. Select this option to display the name of the superannuation fund. |
Print Unit, Base, Rate, and Percentage |
Select the components of the element's calculation rule that you want to display for each earning or deduction in the sections. You can select only the components in the element's calculation rule. For example, for an earnings with calculation rule Unit × Rate, only the Unit and Rate check boxes are available. Note: Amounts are always displayed. |
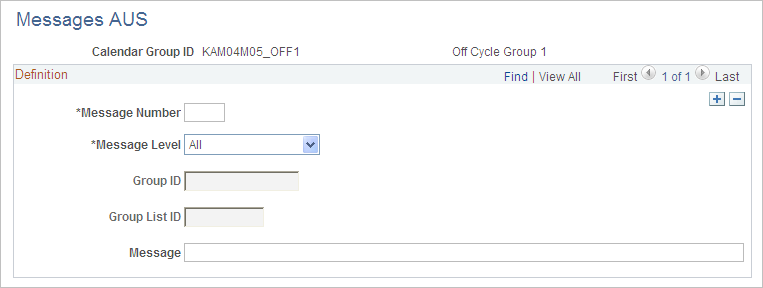
Use the Messages AUS page (GPAU_PSLP_EXT) to create messages to appear on payslips for a particular calendar group. You can control which payslips display the messages.
Navigation:
This example illustrates the fields and controls on the Messages AUS page. You can find definitions for the fields and controls later on this page.
Field or Control |
Description |
|---|---|
Message Number |
Enter a message ID to indicate the message that is appropriate for the payees. The system uses arrays, formulas, and variables to determine the correct message. |
Message Level |
Select from the following values: All: All payees identified in the calendar group. Group Build: All payees included in a group built using the Group Build – Group Definition feature, which you access by selecting If you select this option, enter a group in the Group ID field. Group List: All payees in a list built using the Group List feature. If you select this option, enter a group in the Group List ID field. |
Message |
Enter the text of the message to appear on selected payslips. |