Updating Absences for Employees
|
Page Name |
Definition Name |
Usage |
|---|---|---|
|
GPMX_ABSENCE_ENTRY |
Define absence event details for an employee and run the Absence Forecast process. Use the forecast process to evaluate the impact of a vacations take event. |
|
|
GPMX_ABS_PARAM_SS |
Define additional IMSS fields that should be displayed while requesting for an absence through the Absence Event MEX page. |
|
|
GP_ABS_EVT_FCS_SEC |
Review the results of the forecast process for a specific vacations take event and any take elements that are mapped to it. |
|
|
GP_ABS_FCST_MSG |
Review the messages that are generated during the forecast process. |
|
|
GPMX_RC_MASSABS |
Define the details for a mass absence event entry. |
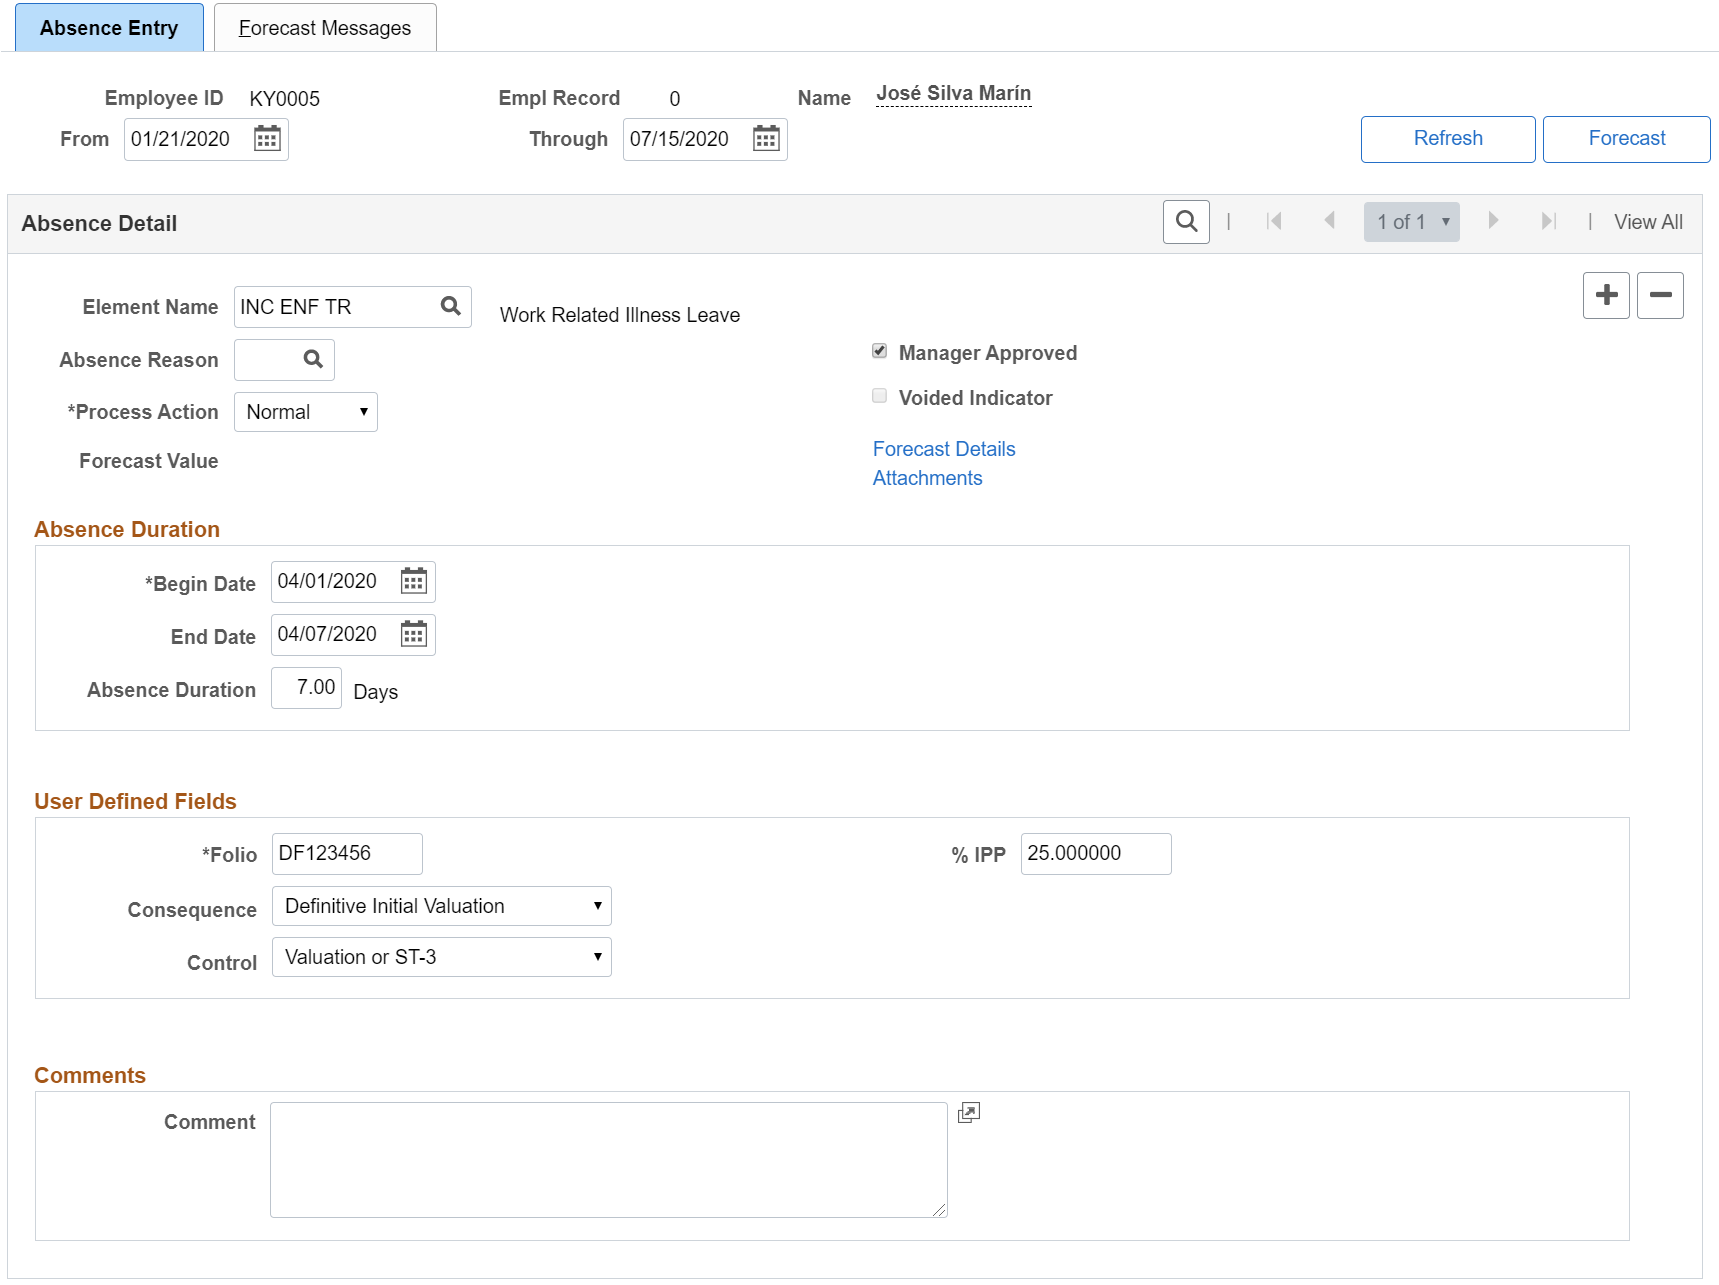
Use the Absence Entry page (GPMX_ABSENCE_ENTRY) to define absence event details for an employee and run the Absence Forecast process.
Use the forecast process to evaluate the impact of a vacations take event.
Navigation:
This example illustrates the fields and controls on the Absence Entry page. You can find definitions for the fields and controls later on this page.
Field or Control |
Description |
|---|---|
From and Through |
Specify the date range for which you want to retrieve and display absence event data on the page. |
Refresh |
Click this button to refresh the page with data based on the From andThrough dates that you specify. |
Forecast |
Click this button to run the Forecast process when entering vacation takes. You'll get a message indicating the results of the Forecast process. If necessary, correct the errors and rerun the process. |
Absence Detail
Field or Control |
Description |
|---|---|
Element Name |
Select the absence take element that corresponds to the employee's absence type. |
Type |
Displays the absence type that corresponds to the absence take element. When you define an absence take element, you assign an absence type that describes the category of the absence. |
Absence Reason |
Select the code that corresponds to the absence reason. The Absence Reason field is optional and further describes the absence take. |
Manager Approved |
Select to have the absence processed when you run the absence take process. This check box is automatically selected if you defined the absence take element as not requiring manager approval on the Absence Take - Calculation page in the core application. |
Voided Indicator |
This check box is automatically selected if you voided the event and ran the Take process. This check box can also be selected if you use the automatic priority processing feature and have assigned a priority number to your absence take elements. If you save absence entries with overlapping dates, the system voids the event with the lower priority and creates a new event for the days that do not overlap. |
Process Action |
Select the process action. For a new absence event, the default is Normal. Select Void to void an absence that has already gone through the absence take process. The event is not processed in subsequent runs. Instead, the Process Action is reset to Normal and the Voided Indicator check box is automatically selected during the absence take process. During retroactive processing, the system calculates a new version of the results without the voided event. Positive input is not generated from the voided event, and the results for earnings or deductions have deltas. |
Forecast Value |
Appears after running the Forecast process. Forecast Value is the alphanumeric value resolved by the forecasting element. You associate a forecasting formula with a take element on the Take - Forecasting page in the core application. For example, your forecast element might return a value of Eligible or Not Eligible. |
Forecast Details |
Click this link to access the Absence Forecast Results page. |
Attachments |
Click this link to add any attachments. |
Absence Duration
Field or Control |
Description |
|---|---|
Begin Date and End Date |
Enter the begin and end dates for the absence. Depending on the values entered for the Begin Date andEnd Date, the system will calculate different values. If you enter aBegin Date, the system automatically enters the same value for theEnd Dateand a value of 1 for theAbsence Duration. Then, if a value is entered for the End Date, the system will calculate theAbsence Durationvalue. If a value is entered for theAbsence Duration, then the system will calculate a value for theEnd Date. |
Absence Duration |
Enter the number of days for the absence. |
Partial Hours |
If a FALTA absence event is selected and theAllow Partial Days option is selected on the core Global Payroll Absences page, thePartial Hours field appears. |
Begin Half Day and End Half Day |
If you select the Allow Partial Days option on the Absences page in core Global Payroll, this field appears. Select a check box if the employee was absent exactly half a day. Select the top check box if the employee worked half a day on the first day or every day of an absence. Select the bottom check box if the employee worked half a day on the last day of the absence. |
Note: The Allow Partial Days option can be found on the Absences page in the core Global Payroll core application. The navigation path to the Absences page is This page is documented in the core Global Payroll documentation.
User Defined Fields
Enter data and comments on additional fields pertaining to your business processes.
Note: If you select a work-related disability absence type, the system displays one or more of the following fields as applicable: Folio, % IPP, Consequence, andControl. Enter additional information related to a work-related disability in these fields.
Field or Control |
Description |
|---|---|
Folio |
This field applies only for disability absences and refers to the Certificate number. This is a required field for all the disabilities. |
% IPP (Permanent Illness Percentage) |
Enter the percentage of permanent illness for the employee. Values are 0–100 percent. This field is only available if you selected a work-related illness absence type. |
Consequence |
Select the consequence for the absence take for SUA reporting purposes. This field is applicable to the following work related disability elements: INC RIESGO TR, INC TRAYECTO, and INC ENF TR. Valid consequence values depend on the selected element for the absence take, and indicates the final result of the work related disability. |
Control |
Select the control value of the absence take for SUA reporting purposes. This field is applicable to the following disability elements: INC RIESGO TR, INC TRAYECTO, INC ENF TR, ENC ENF GENERA and INC MATERN. Valid Control values depend on the selected element for the absence take and the selected Consequence value when available. Indicates the kind of document issued by the IMSS for the disability entered. |
If you select missing leave absence type, the system displays a Missing Leave field, wherein you can enter the date on which the employee is declared as Missing Leave.
If you select care leave absence type, the system displays a Permission Sick Cancer field, wherein you can enter the official date of registration of absence determined by the IMSS (Social Security).
Note: : You need to ensure the accuracy of data entered in these fields with the official documents. Global Payroll for Mexico will not validate these information.
To identify the employees under Missing Leave of Absence and Care Leave for Child with Cancer, you need to pre-configure the following:
Absence Entitlements:
Absence Take Types
Absence Takes
Country Take
Deduction
Sections
Element Groups
The Absence Entry page in Global Payroll for Mexico is similar to the Absence Event Entry page in the core application. The main differences are that the Absence Entry page in Global Payroll for Mexico:
Includes validations for Mexican absence rules.
Uses an end date calculation based on the begin date plus the duration days, according to the absence take setup.
If you select an absence take of INC RIESGO TR and enter data on the User Fields page, you can generate a report listing the employees who had work risk related disabilities.
Note: You can find the User Fields page through
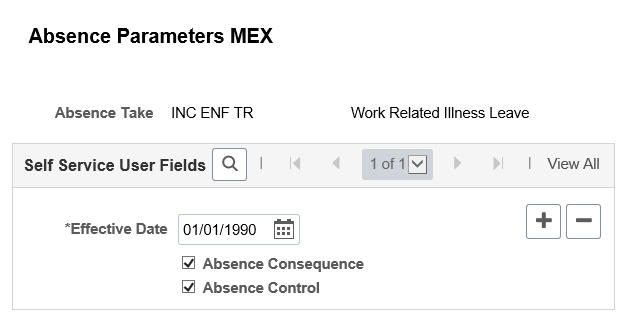
Use the Absence Parameters MEX page (GPMX_ABS_PARAM_SS) to define additional IMSS fields that should be displayed while requesting for an absence through the Absence Event MEX page.
Navigation:
This example illustrates the fields and controls on the Absence Parameters MEX page.
Field or Control |
Description |
|---|---|
Absence Consequence |
Select if Consequence field needs to be displayed in Absence Entry MEX page. |
Absence Control |
Select if Control field needs to be displayed in Absence Entry MEX page. |
Use the Absence Forecast Results page (GP_ABS_EVT_FCS_SEC) to review the results of the forecast process for a specific vacations take event and any take elements that are mapped to it.
Navigation:
Click the Forecast Details link on the Absence Entry page.
This example illustrates the fields and controls on the Absence Forecast Results page: Forecast Results tab. You can find definitions for the fields and controls later on this page.
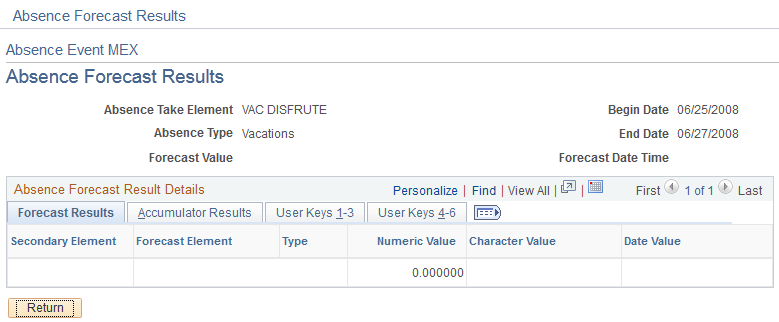
Note: The Absence Forecast Results page: Forecast Results tab in Global Payroll for Mexico is the same as the Absence Forecast Results page in the core application.
See Forecasting Absence Entitlement Balance During Absence Entry.
Accumulator Results Tab
This example illustrates the fields and controls on the Absence Forecast Results page: Accumulator Results tab. You can find definitions for the fields and controls later on this page.
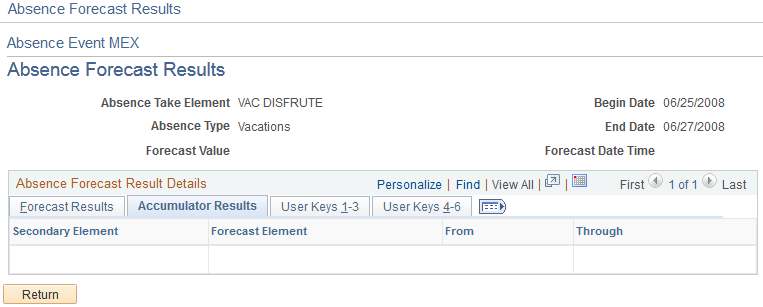
Note: The Absence Forecast Results page: Accumulator Results tab in Global Payroll for Mexico is the same as the Absence Forecast Results page in the core application.
Viewing User Keys 1-3 Tab
This example illustrates the fields and controls on the Absence Forecast Results page: User Keys 1 - 3 tab. You can find definitions for the fields and controls later on this page.
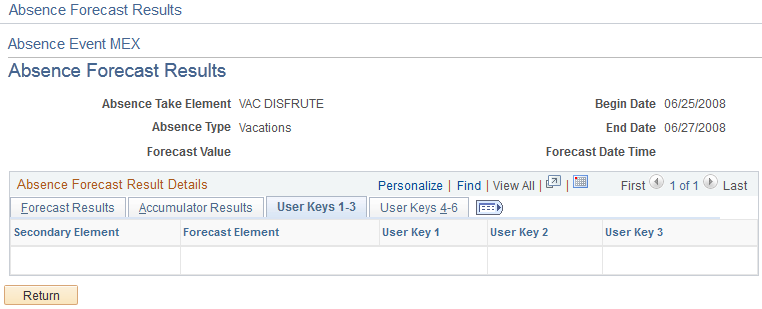
Note: The Absence Forecast Results page: User Keys 1-3 tab in Global Payroll for Mexico is the same as the Absence Forecast Results page in the core application.
Viewing User Keys 4-6 Tab
This example illustrates the fields and controls on the Absence Forecast Results page: User Keys 4 - 6 tab. You can find definitions for the fields and controls later on this page.
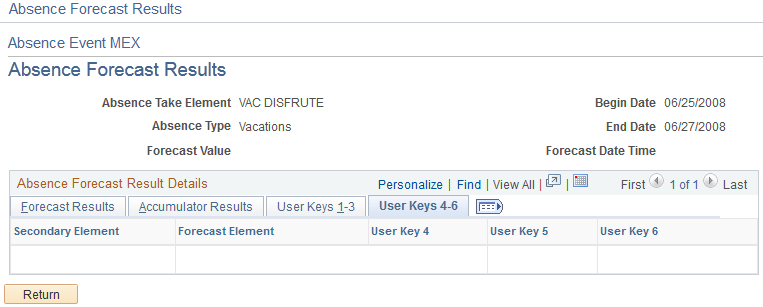
Note: The Absence Forecast Results page: User Keys 4-6 tab in Global Payroll for Mexico is the same as the Absence Forecast Results page in the core application.
Use the Forecast Messages page (GP_ABS_FCST_MSG) to review the messages that are generated during the forecast process.
Navigation:
This example illustrates the fields and controls on the Forecast Messages page. You can find definitions for the fields and controls later on this page.

Note: The Forecast Messages page in Global Payroll for Mexico is the same as the Forecast Messages page in the core application.
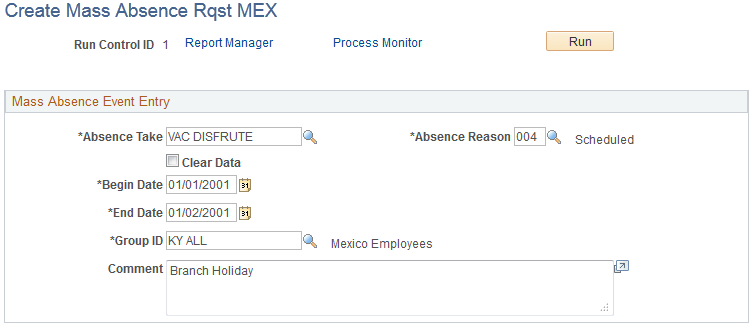
Use the Create Mass Absence Rqst MEX page (GPMX_RC_MASSABS) to define the details for a mass absence event entry.
Navigation:
This example illustrates the fields and controls on the Create Mass Absence Rqst MEX page. You can find definitions for the fields and controls later on this page.
Field or Control |
Description |
|---|---|
Absence Take |
Select the absence take element for the mass absence event. |
Absence Reason |
Select the absence reason for the mass absence event. Typical absence reasons include Regular, Forced, Scheduled, and Other. |
Clear Data |
Select to clear the data after you process a mass absence event entry. |
Begin Date and End Date |
Enter the begin date and end date for the mass absence event. |
Group ID |
Select the group ID to which the mass absence event applies. |
Comment |
Enter descriptive details of the mass absence event. |