Entering Vendor Information
To enter vendor information, use the Vendor Control (VENDOR_CONTROL), Vendor Information (VNDR_ID), Provider/Vendor Table (PROVIDER_TABLE), Payee Table (GARNISH_PAYEE_TBL), and Payee Table USF (GVT_GARNISH_PAYEE) components.
These topics provide an overview of and discuss how to set up vendor setup pages.
|
Page Name |
Definition Name |
Usage |
|---|---|---|
|
VNDR_CNTRL |
Identify the prefix assigned to the vendor in PeopleSoft Payables. |
|
|
VNDR_ID1 |
Enter basic vendor information. |
|
|
VNDR_ADDRESS |
Enter a vendor's address information. |
|
|
VNDR_ADDR_ALTN |
Enter any alternate name for use on payments. |
|
|
Phone Information Page |
VNDR_ADDR_PHN |
Enter a vendor's phone information for addresses. You can enter more than one phone number per address. |
|
Email Address Page |
VNDR_ADDR_EMAILID |
Enter a vendor's email address. |
|
VNDR_LOC |
Enter address and remittance information. |
|
|
VNDR_BANK_ACCOUNT |
Enter banking information for the vendor. |
|
|
Bank Address Page |
VNDR_BANK_ACCT2 |
Enter the bank's address information. The bank's Country defaults from the Bank Accounts page. The form of the address fields varies, depending on the country. |
|
Phone Details Page |
VNDR_BANK_ACCT3 |
Enter phone information for the bank. |
|
Comments Page |
VNDR_LOC_COMMENTS |
Enter notes or comments about locations. |
|
VNDR_PAY |
Enter payment processing rules for the vendor location. |
|
|
VNDR_CNTCT |
Enter a vendor's contact person. Enter more than one phone number if necessary. |
|
|
Phone Information Page |
VNDR_CNTCT_PHN |
Enter a contact's telephone information. |
|
VNDR_POLICY |
Enter information about policies and whom to contact about them. |
|
|
GVT_GARN_PAYEE |
Enter garnishment payee contact information for U.S. federal government. |
|
|
GVT_GARN_DIST_SEC |
Enter garnishment payee distribution information for U.S. federal government. |
To enter vendor information, complete the following pages:
AP Vendor Control
Vendor Information
Addresses
Locations
Contacts
Policy Information
AP Vendor Control
This is used only if you want PeopleSoft Payables to pay the vendor. It provides a mechanism for identifying the different types of vendors.
Vendor Information
This page creates the vendor code and identifies the name and type of vendor you are entering.
Addresses
This is a strictly address information and should not be confused with location. You can enter multiple addresses for the different sites a vendor might have.
Locations
A vendor location is not a physical address. It is a default set of rules, or attributes, which define how you conduct business with a particular vendor. A vendor's location comprises information such as payment terms, remittance information, bank account information, and so on. Although a location is not an address, it will reference addresses.
Your vendor may need only one location. If the vendor uses the same set of rules across its business, you can simply enter one location for your vendor, and you're ready to go. If, however, your vendor uses different sets of rules for different portions of its business (different branches, sites, or offices, for example) you can set up the vendor with multiple locations, each with its own unique set of business rules.
Contacts
This page is used to enter information about the people whom you contact on a regular basis. You can enter an unlimited number of vendor contacts and identify their roles so that you can easily determine whom you should contact if you have questions, or discern why a contact might want to talk to you, before you return their call.
Policy Information
Policy information is necessary for benefit providers. You will link this vendor and policy information using the Benefit Plan table in Base Benefits.
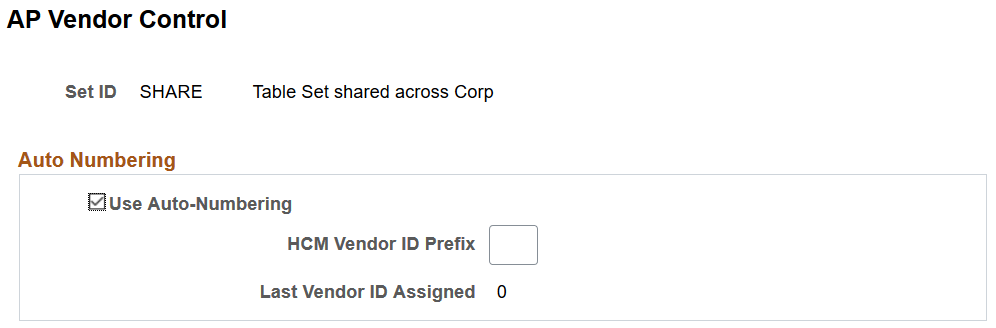
Use the AP Vendor Control page (VNDR_CNTRL) to identify the prefix assigned to the vendor in PeopleSoft Payables.
Navigation:
This example illustrates the fields and controls on the AP Vendor Control page. You can find definitions for the fields and controls later on this page.
Field or Control |
Description |
|---|---|
Use Auto-Numbering |
PeopleSoft Payables has the option of using an autonumbering feature to assign IDs to new vendors. |
HCM Vendor ID Prefix |
If you selected the auto-numbering check box, enter a prefix that is used identify HCM vendors. |
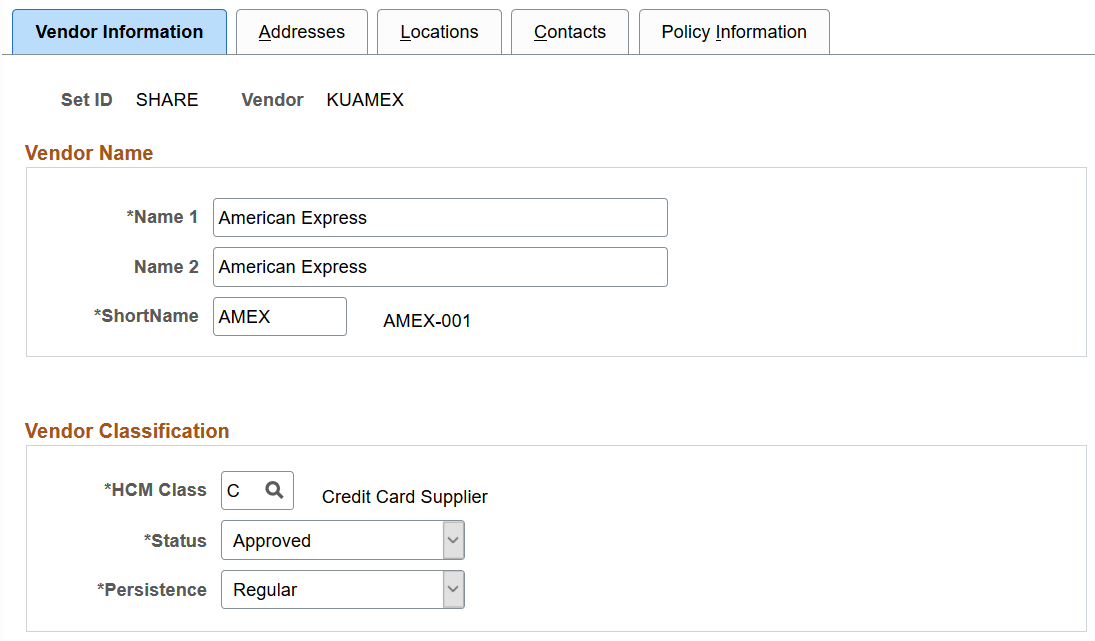
Use the Vendor Information page (VNDR_ID1) to enter basic vendor information.
Navigation:
This example illustrates the fields and controls on the Vendor Information page. You can find definitions for the fields and controls later on this page.
Field or Control |
Description |
|---|---|
Name 1 |
Enter the payee name as it should appear on the check. |
HCM Class (HCM classification) |
This field identifies the HCM classification used to create views so you see the appropriate vendors on the appropriate tables. It is also used to identify tax and non-tax deductions when the system extracts deductions to create AP vouchers. Available values are:
For benefit providers, select P for General Provider. |
Status |
For HCM vendors, select Approved. The other values are used by Payables. |
Persistence |
For HCM vendors, select Regular. The other values are used by Payables. |
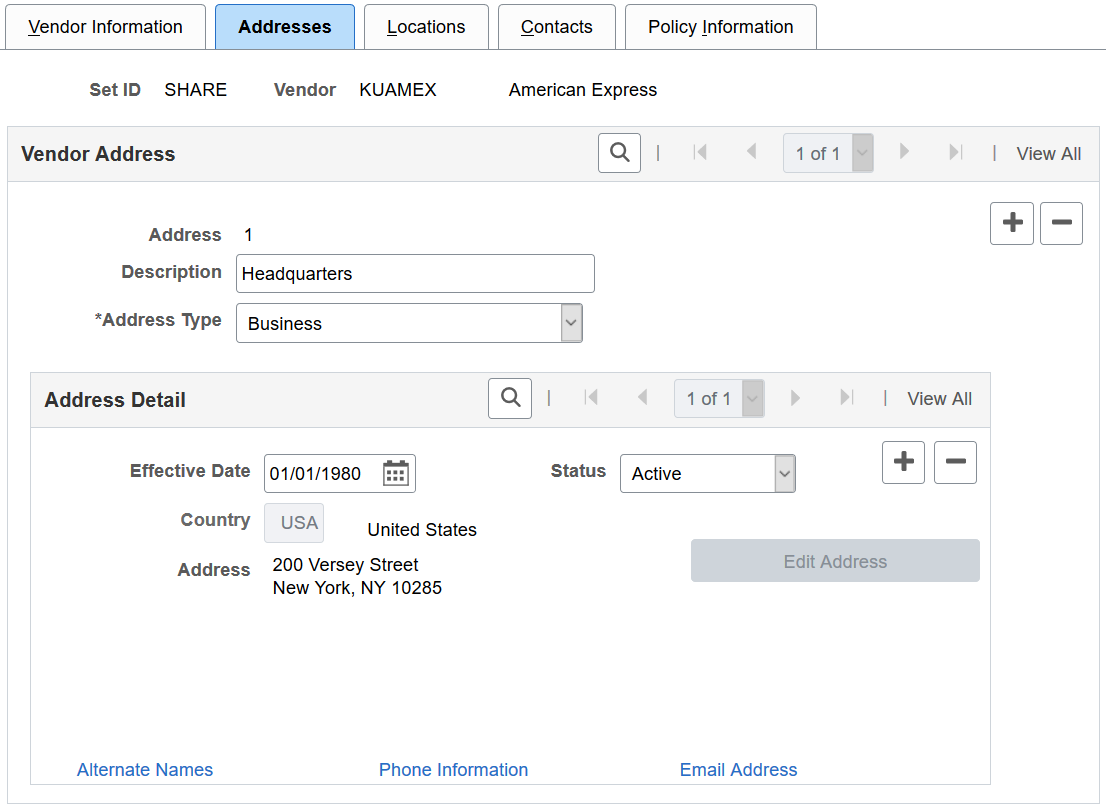
Use the Addresses page (VNDR_ADDRESS) to enter a vendor's address information.
Navigation:
This example illustrates the fields and controls on the Vendor Information - Addresses page. You can find definitions for the fields and controls later on this page.
Field or Control |
Description |
|---|---|
Address Type |
Enter the one or more addresses for the vendor. If you are using PeopleSoft Payables at least one address should be the remittance address. This is the address that is used when creating payment vouchers. Premium Payment and Remittance are the only valid address types for deduction recipients. If any other address type is displayed for this vendor, contact your Accounts Payable department. Premium Payment generally applies to benefit deductions and Remittance applies to all other types of deductions including taxes. |
|
Alternate Names |
Click to enter any alternate name for user on payments on the Alternate Names Page. |
|
Phone Number |
Enter a vendor's phone information for addresses on the Phone Information page (VNDR_ADDR_PHN). You can enter more than one phone number per address. |
|
Email Address |
Enter a vendor's email address on the Email Address page (VNDR_ADDR_EMAILID). |
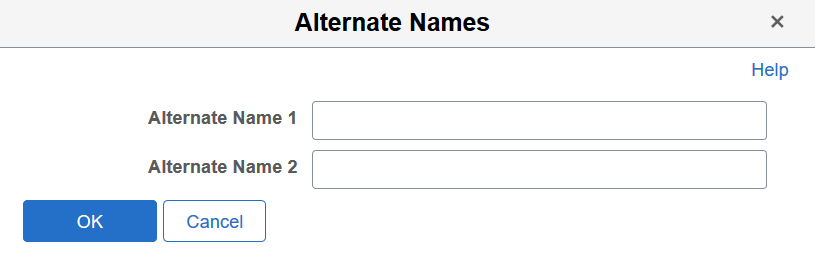
Use the Alternate Names page (VNDR_ADDR_ALTN) to enter any alternate name for use on payments.
Navigation:
Click the Alternate Names link on the Vendor Information - Addresses page.
This example illustrates the fields and controls on the Alternate Names page. You can find definitions for the fields and controls later on this page.
Field or Control |
Description |
|---|---|
Alternate Name 1 and Alternate Name 2 |
When the system generates payments for the location using this address, Payables needs to use a name different from the one entered on the Vendor Information page, enter the name here. |
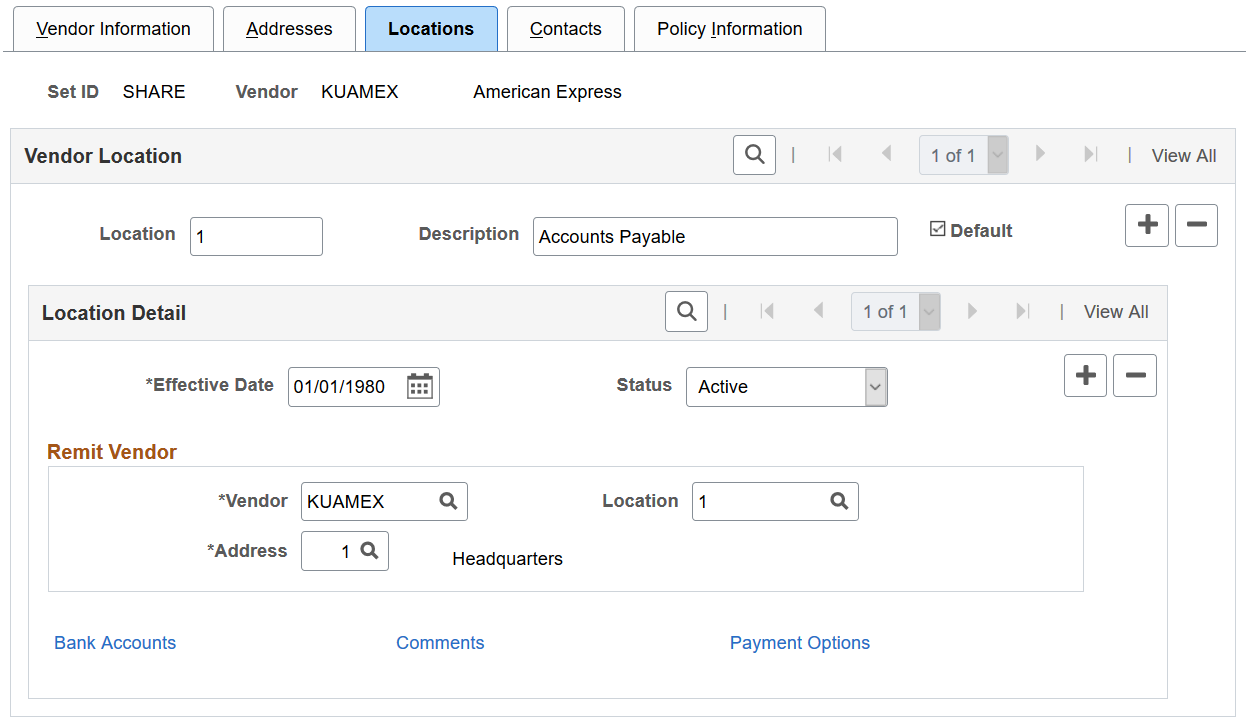
Use the Locations page (VNDR_LOC) to enter address and remittance information.
Navigation:
This example illustrates the fields and controls on the Vendor Information - Locations page. You can find definitions for the fields and controls later on this page.
Field or Control |
Description |
|---|---|
Location |
Enter an identifier for the location information you are entering. If more than one location is set up for the vendor, you can use the previous page and next page links on the Vendor Location bar to display information for the location in which you're interested. |
Default |
Select this check box if you want this location to automatically print on the vouchers for this vendor. Only one location can be selected as the default. |
Remit Vendor |
This is the information about the vendor to whom payments will be sent. You need to select the codes that identify the name of the vendor receiving the payments, vendor location, and address where the payment is sent. |
Bank Accounts |
Click this link to display the Bank Accounts page. Work with the Payroll department to set up this information. |
Comments |
Click this link to display the Comments page. |
Payment Options |
Click this link to display the Payment Options page. Work with the Payroll department to set up this information. |
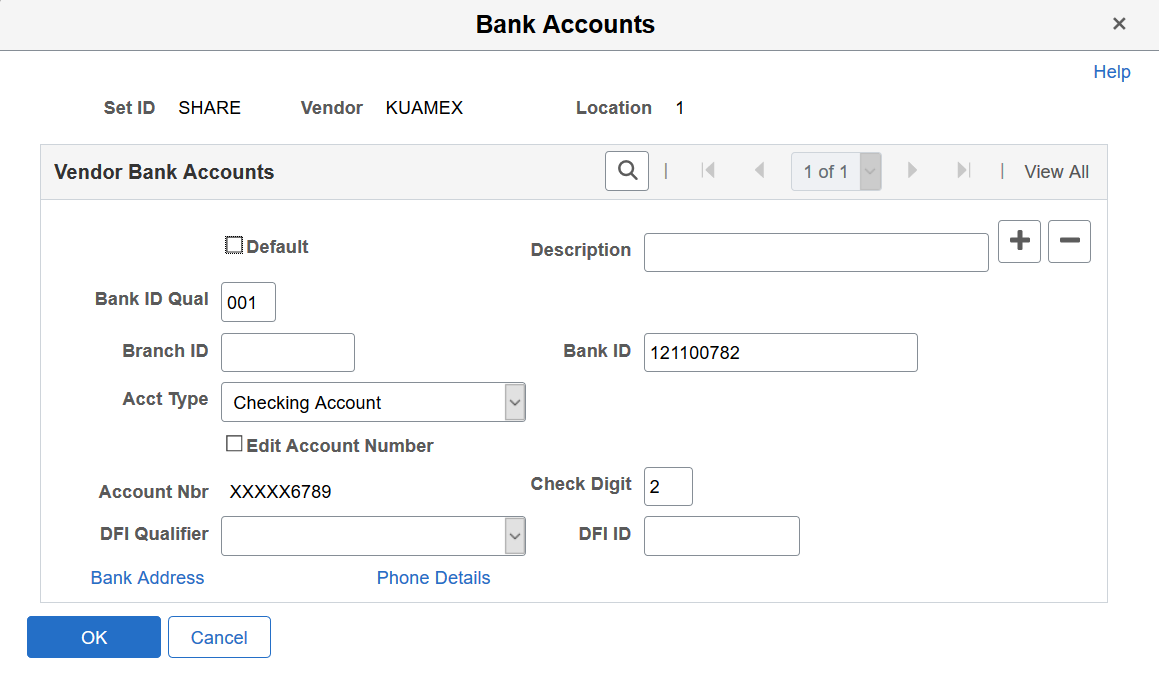
Use the Bank Accounts page (VNDR_BANK_ACCOUNT) to enter banking information for the vendor.
Navigation:
Click the Bank Accounts link on the Vendor Information - Locations page.
This example illustrates the fields and controls on the Bank Accounts page. You can find definitions for the fields and controls later on this page.
Field or Control |
Description |
|---|---|
Default |
The Default check box is selected if this is the default bank account for the location. The default bank account is copied to each payment schedule for this vendor. |
Bank ID Qual |
Enter the country-specific numeric value by which the bank/counterparty is identified. This value controls how the bank/counterparty pages edit and display bank information. |
Branch ID |
Enter the branch ID for the bank, if appropriate. |
Bank ID |
Enter the ID for the bank. |
Acct Type (account type) |
Select the account type for the bank, for example, Bond, Checking Account, and Life Insurance. |
|
Edit Account Number |
Select to update the account number. This field appears together with the Account Nbr field, when the encryption process is run and the account number currently displayed belongs to a country that is specified on the Define Country for Encryption Page. When selected, the existing read-only number is cleared from the field for you to enter a new one. |
Account Nbr (account number) |
Enter the vendor's bank account number. If data encryption is enabled and the encryption process is run for the VNDR_BANK_ACCT record, the account number is encrypted in the database if it belongs to a country that is specified on the Define Country for Encryption Page. Also, the account number appears as masked on this page. An exception to this is when the user is assigned the Bank Account Admin role, and this role is defined on the Grant Unmasked Access Page for the VNDR_BANK_ACCT record. In this case, the user sees the unmasked account number. Understanding Data Encryption for Payroll for North America. |
Check Digit |
The check digit used by the bank. |
DFI Qualifier |
If you make automatic clearing house (ACH), wire, or EFT payments to this vendor location, this field should display the appropriate DFI Qualifier: The value determines the format for the DFI ID field.
The DFI Qualifier determines the format of the bank's DFI ID. |
DFI ID |
The bank's DFI ID. The format is determined by the value displayed in the DFI Qualifier field. |
Bank Address |
Enter the bank address on the Bank Address page (VNDR_BANK_ACCT2). |
Phone Details |
Enter phone information on the Phone Details page (VNDR_BANK_ACCT3). |
Use the Payment Options page (VNDR_PAY) to enter payment processing rules for the vendor location.
Navigation:
Click Payment Options on the Vendor Information - Locations page.
This example illustrates the fields and controls on the Payment Options page. You can find definitions for the fields and controls later on this page.
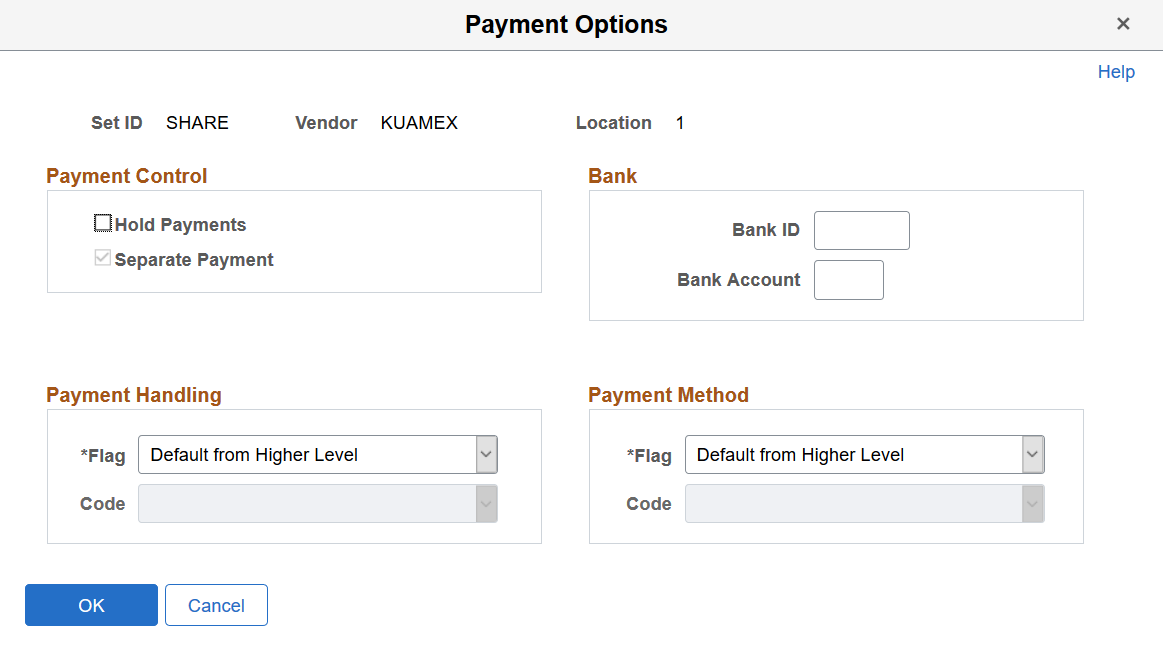
Payment Control
Field or Control |
Description |
|---|---|
Hold Payments |
If this check box is selected, PeopleSoft Payables automatically places payments for this vendor on hold. |
Separate Payment |
If this check box is selected, PeopleSoft Payables creates a separate payment for each voucher, even if the system processes multiple vouchers for the vendor in the same pay cycle. |
Bank
Field or Control |
Description |
|---|---|
Bank ID |
The code for the bank from which you want to make payments for this vendor. |
Bank Account |
The account from which payments will be made to this vendor. |
Payment Handling
Field or Control |
Description |
|---|---|
Flag |
This field determines the payment handling instructions.
|
Code |
If you select Specify at this Level in the Flag field, this field displays the payment handling instructions your accounts payable department follows when issuing payments for this vendor:
|
Payment Method
Field or Control |
Description |
|---|---|
Flag |
This field determines the payment method:
|
Code |
If you select Specify at this Level in the Flag field, this field displays the payment method for this vendor:
|
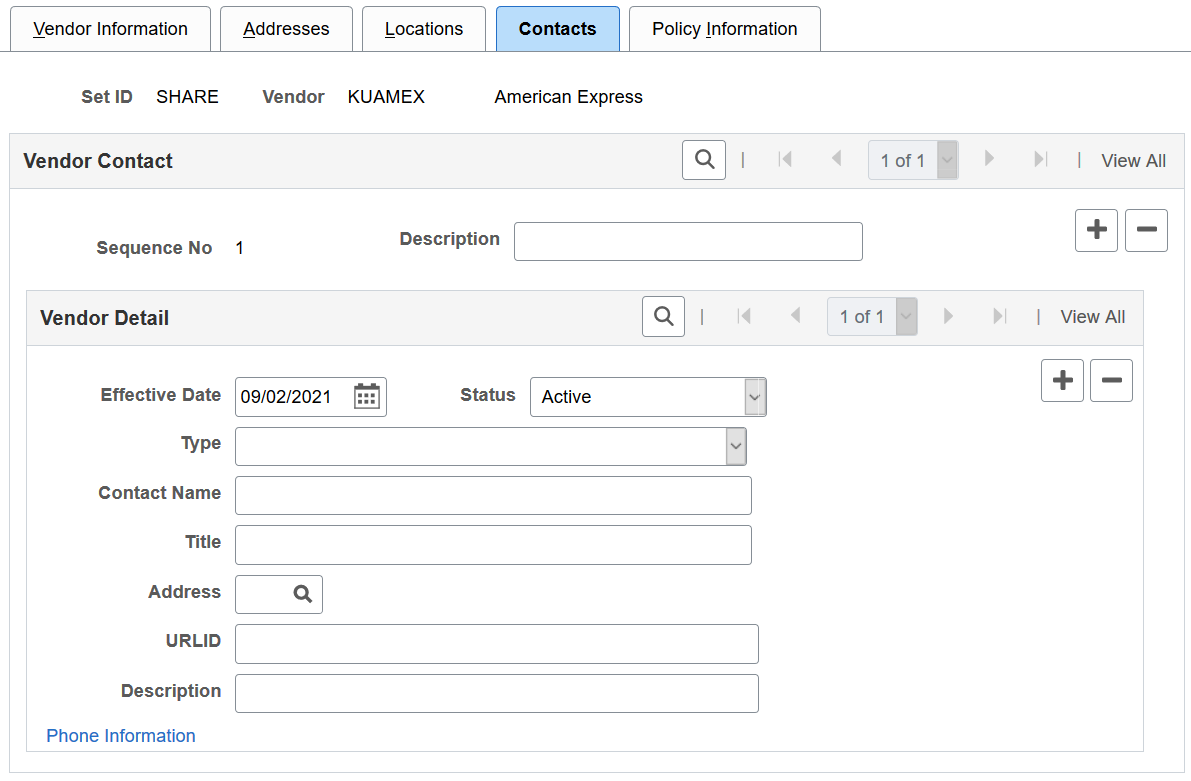
Use the Contacts page (VNDR_CNTCT) to enter a vendor's contact person.
Enter more than one phone number if necessary.
Navigation:
This example illustrates the fields and controls on the Vendor Information - Contacts page. You can find definitions for the fields and controls later on this page.
Field or Control |
Description |
|---|---|
Sequence No (sequence number) |
This number is automatically assigned to this contact. |
Type |
Select the type of contact. |
Address |
Select one of the addresses that you entered on the Addresses page. |
URLID |
Enter the contact's website address. |
Phone Information |
Click to enter phone information on the Phone Information page (VNDR_CNTCT_PHN). |
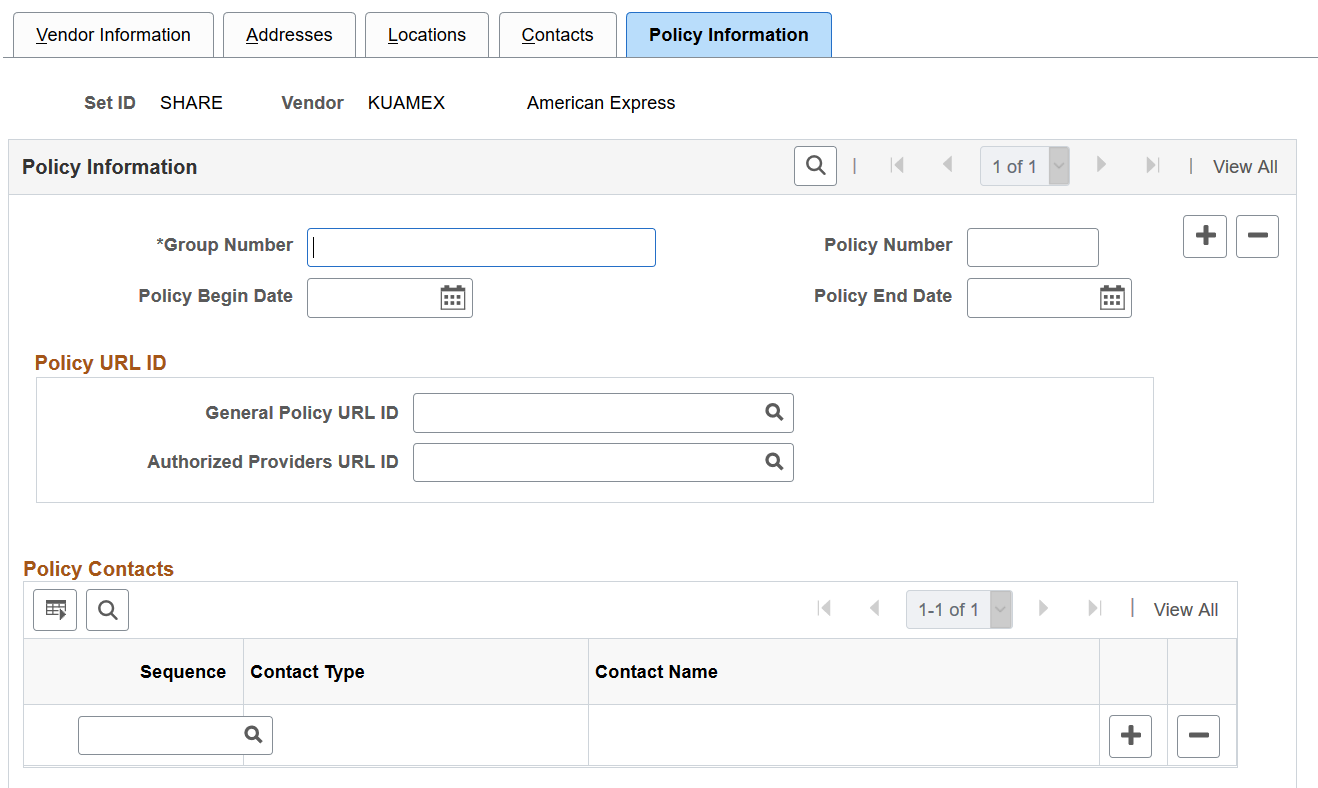
Use the Policy Information page (VNDR_POLICY) to enter information about policies and whom to contact about them.
Navigation:
This example illustrates the fields and controls on the Policy Information page. You can find definitions for the fields and controls later on this page.
Field or Control |
Description |
|---|---|
General Policy URL ID |
Select the vendor's website address that provides general policy information. |
Authorized Providers URL ID |
Select the vendor's website address that contains a list of authorized participating providers |
Sequence |
Select a contact from the list of contacts that were entered on the Provider/Vendor Table - Contacts page. After you select the contact, the Contact Name automatically appears. |
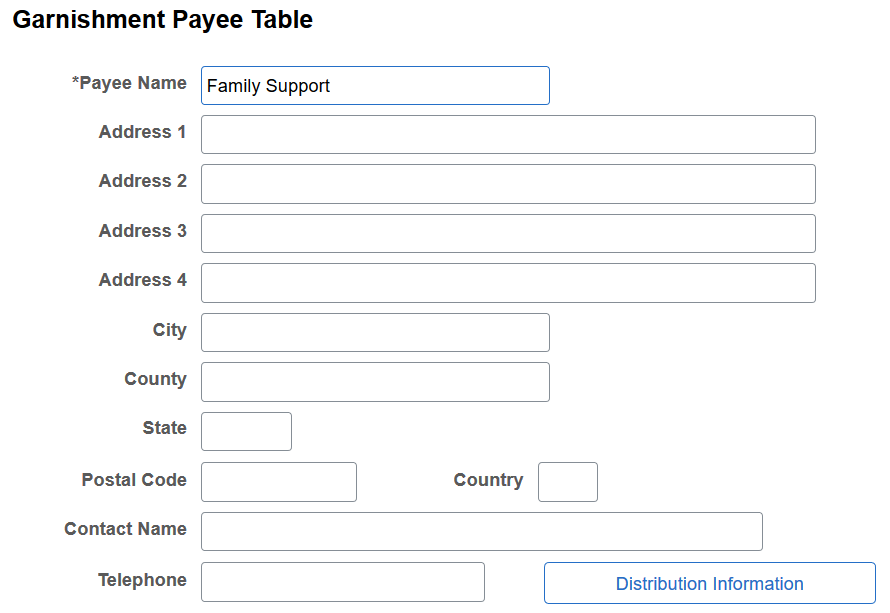
Use the Garnishment Payee Table page (GVT_GARN_PAYEE) to enter garnishment payee contact information for the U.S. federal government.
Navigation:
This example illustrates the fields and controls on the Garnishment Payee Table page. You can find definitions for the fields and controls later on this page.
Field or Control |
Description |
|---|---|
Distribution Information |
Click this button to access the GVT Employee Distribution page. |
Use the GVT Employee Distribution page (GVT_GARN_DIST_SEC) to enter garnishment payee distribution information for U.S. federal government.
Navigation:
Click the Distribution Information button on the Garnishment Payee Table page.
This example illustrates the fields and controls on the GVT Employee Distribution page. You can find definitions for the fields and controls later on this page.
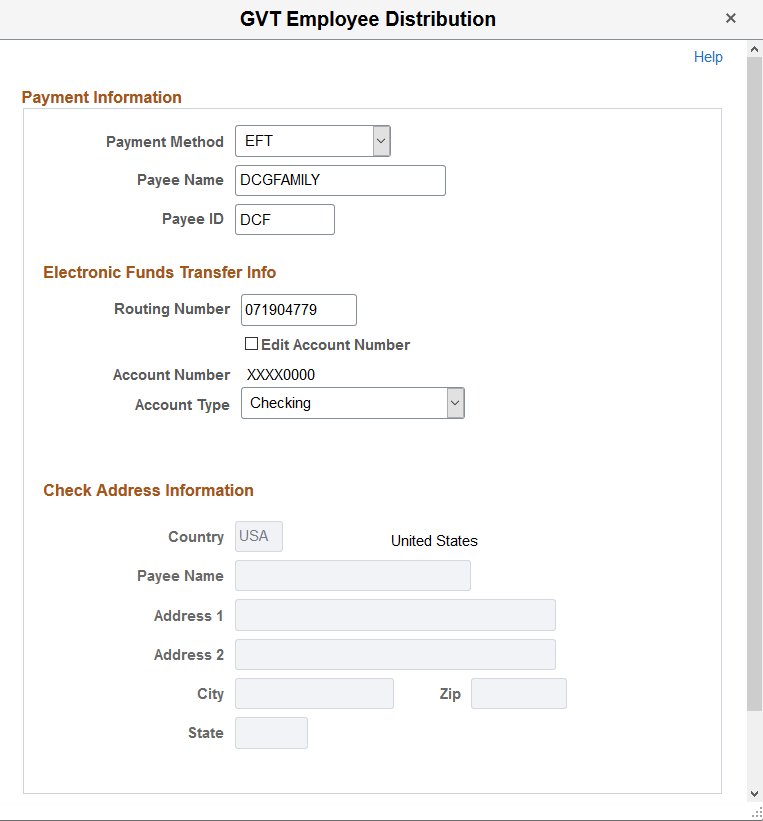
Enter the payment information.
Payment Information
|
Field or Control |
Description |
|---|---|
|
Payment Method |
Values are: Check EFT None |
Electronic Funds Transfer Info
Enter the electronic funds transfer information. This section becomes editable when the selected payment method is EFT.
All fields are required in this section.
|
Field or Control |
Description |
|---|---|
|
Edit Account Number |
Select to update the bank account number. This field appears when the encryption process has been run and the account number previously existed. When selected, the existing read-only account number is cleared from the field for you to enter a new one. |
|
Account Number |
Enter the bank account number. If data encryption is enabled and the encryption process is run for the GVT_GARN_PAYEE record, the account number is encrypted in the database if it belongs to a country that is specified on the Define Country for Encryption Page. Also, the account number appears as masked on this page. An exception to this is when the user is assigned the Bank Account Admin role, and this role is defined on the Grant Unmasked Access Page for the GVT_GARN_PAYEE record. In this case, the user sees the unmasked account number. |
Check Address Information
Enter the check address information. This section becomes editable when the selected payment method is Check or None.
All fields are required in this section for the Check payment method, except the Address 2 field.