Setting Up Gender Details
To help support organizations with their employee diversity and inclusion, the HCM system tracks gender identity and expression information for employees.
To set up gender details, use the Gender Configuration (GENDER_CONFIG) and Gender Details (GENDER_EXPR_DTL) components.
This topic provides an overview of gender identity tracking and discusses how to set up gender details.
These videos provide an overview of the gender identity functionality:
Video: Image Highlights, PeoleSoft HCM Update Image 41: Gender Identity and Expression
|
Page Name |
Definition Name |
Usage |
|---|---|---|
|
GENDER_CONFIG |
Relabel the Gender field or allow self service users to update their gender (current sex). |
|
|
GENDER_EXPR_DTL |
Define gender identity information by region such as birth sex, pronouns, orientation, and identity options. You can also enable attachments, allow a person to change their own data, and require acknowledgement. |
Employee diversity and inclusion is important to an organization because it fosters innovation, promotes better employee engagement and attracts new talented applicants.
The Gender Identity feature allows employees to self-identity their birth sex, current sex (previously called gender), pronouns, sexual orientation, and gender identity. This information is stored in Personal Data and HR administrators can manage this information from there. You can even choose to display a person's pronouns in the Company Directory.
Your organization can take advantage of the Gender Identity tracking functionality through these pages and procedures:
Enable gender identity functionality on the Installation Table - HCM Options Page by selecting the Enable Gender Identity option.
Assign the Fluid Dashboard - Person Dtls role to the employee user profiles (). This allows them to access the Personal Details dashboard, and in turn the Gender Identity pages when the functionality is enabled.
Create acknowledgement IDs using the Acknowledgement Framework, Acknowledgement Configuration Page. This information is used when employees agree to the self identification terms and conditions before they save their gender related details.
Set up gender configurations using the following tables:
Gender Configuration Page: Relabel the Gender field and allow employees to change their gender (current sex) on the self service pages.
Gender Details Page: Define gender-related field values for your regions. You also use this page to allow employees to update their own gender details, enable attachments on the employee self service Gender Details page, and identify an acknowledgement ID.
(Optional) Configure to display a person's pronouns on the Fluid Company Directory - Profile pages using the Chart and Profile Settings - Profile Content Page.
Employees view or update their gender information on the Personal Details - Gender Identity Page and Gender Details Page.
The ability for employees to update information is based on the configuration settings (see item 4 in this list).
Managers approve an employee's gender/current sex updates using the Pending Approvals - Gender Identity Change Page.
When approved, the system inserts a new Biographical History effective dated row in Personal Data with the updated gender information.
HR administrators review or update gender information for an individual on the Biographical Details Page of Personal Data.
This is particularly useful if self service users are not permitted to update their own information.
All users can view an individual's pronouns next to the name on the Fluid Company Directory - Profile pages (see Using the PeopleSoft Fluid User Interface for the Company Directory). The Company Directory will display pronouns only for those who specified them so other employees know how to address them.
Note: This functionality must first be enabled on the Fluid Company Directory configuration (see item 5 in this list) to see pronouns.
Use the Gender Configuration page (GENDER_CONFIG) to relabel the Gender field or allow self service users to update their gender (current sex).
Navigation:
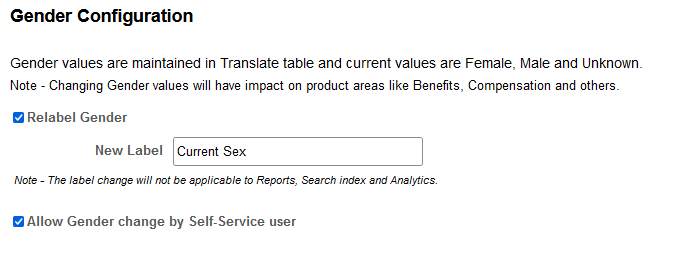
This example illustrates the fields and controls on the Gender Configuration page.
|
Field or Control |
Description |
|---|---|
|
Relabel Gender and New Label |
Select this option to display the New Label field and change the name of the Gender field label. This will change the field label throughout the HCM system. The New Label field provides Current Sex as the new label value by default, but you can overwrite this and enter one of your own. Note: If you select the Relabel Gender check box, you must provide a new label. |
|
Allow Gender change by Self-Service user |
Select to enable the Gender (Current Sex) field on the Fluid Personal Details - Gender Details Page. This allows the employee to update their current sex. Deselect this option to make the Gender field in employee self service display only. In this case, employees would need to contact the HR administrator to change their current sex. |
Use the Gender Details page (GENDER_EXPR_DTL) to define gender identity information by region such as birth sex, pronouns, orientation, and identity options. You can also enable attachments, allow a person to change their own data, and require acknowledgement.
Note: PeopleSoft HCM delivers gender identity and sexual orientation values for five regions – United States, Canada, United Kingdom, Australia and New Zealand. If your organization has a larger global presence outside of these five, you can add additional regions.
Navigation:
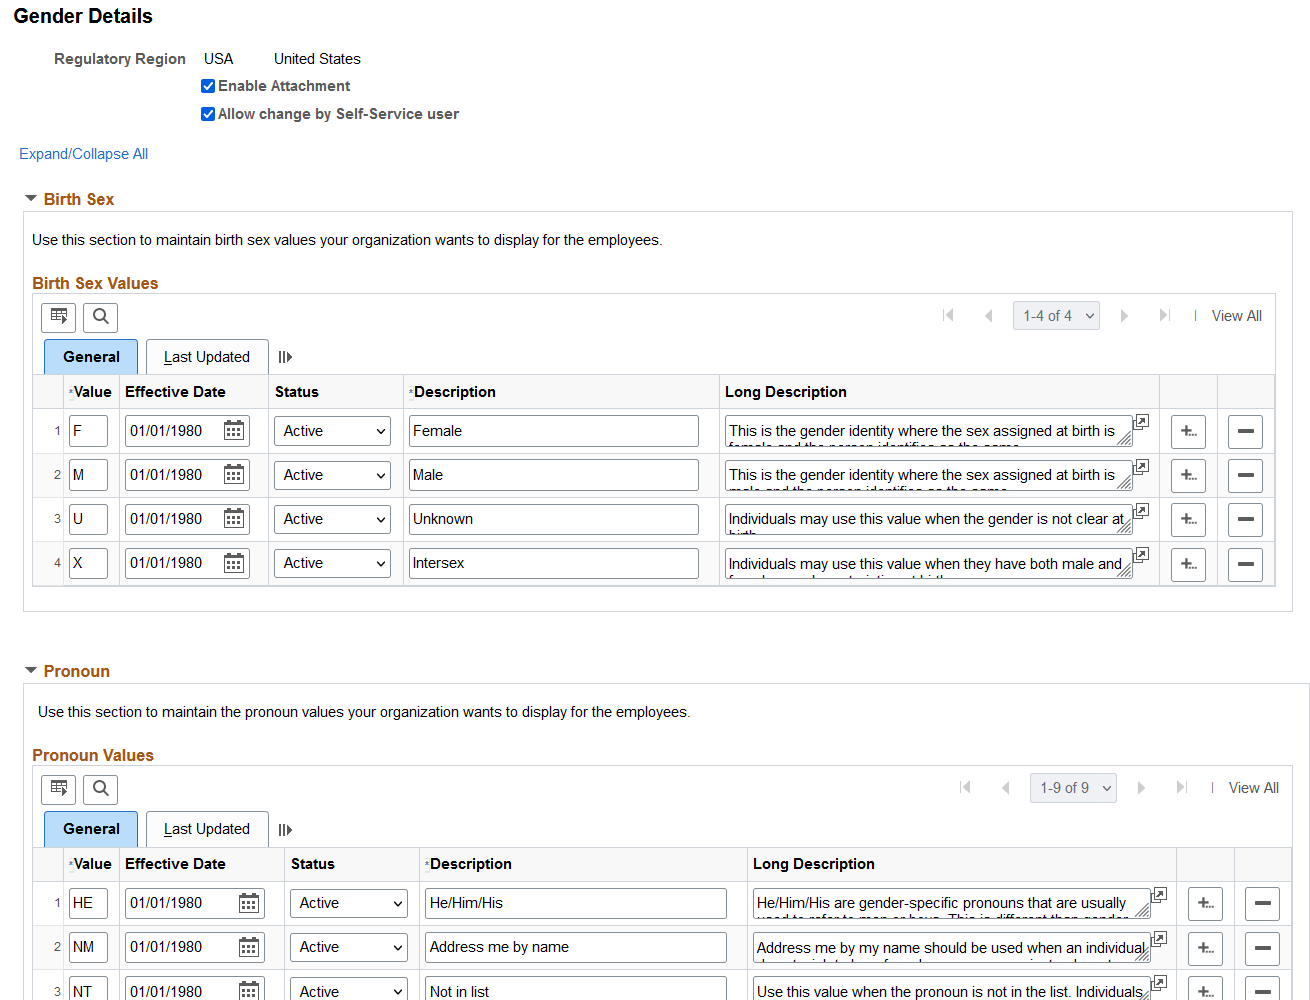
This example illustrates the fields and controls on the Gender Details page (1 of 4).
This example illustrates the fields and controls on the Gender Details page (2 of 4).
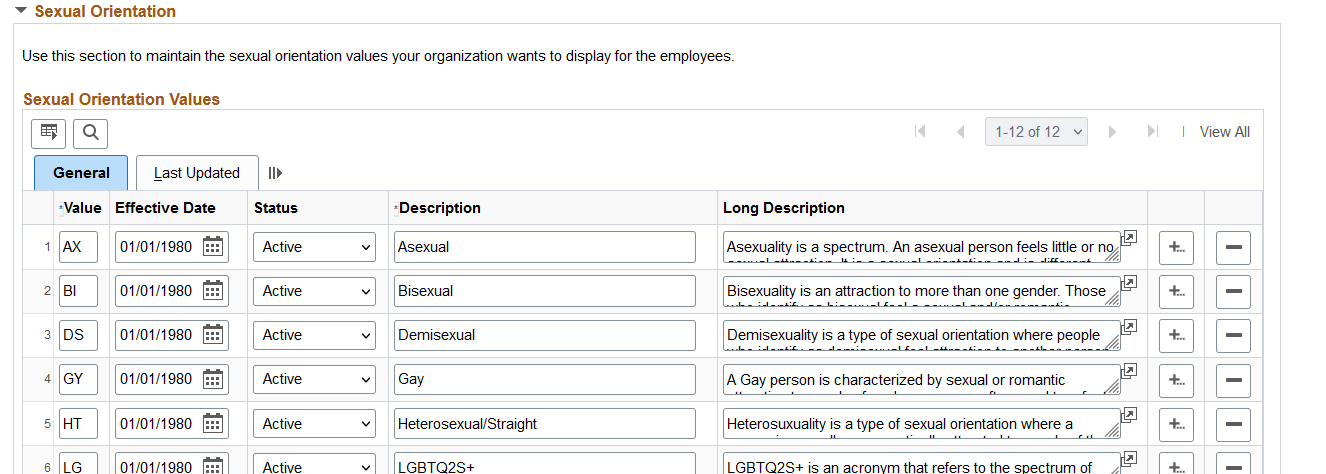
This example illustrates the fields and controls on the Gender Details page (3 of 4).
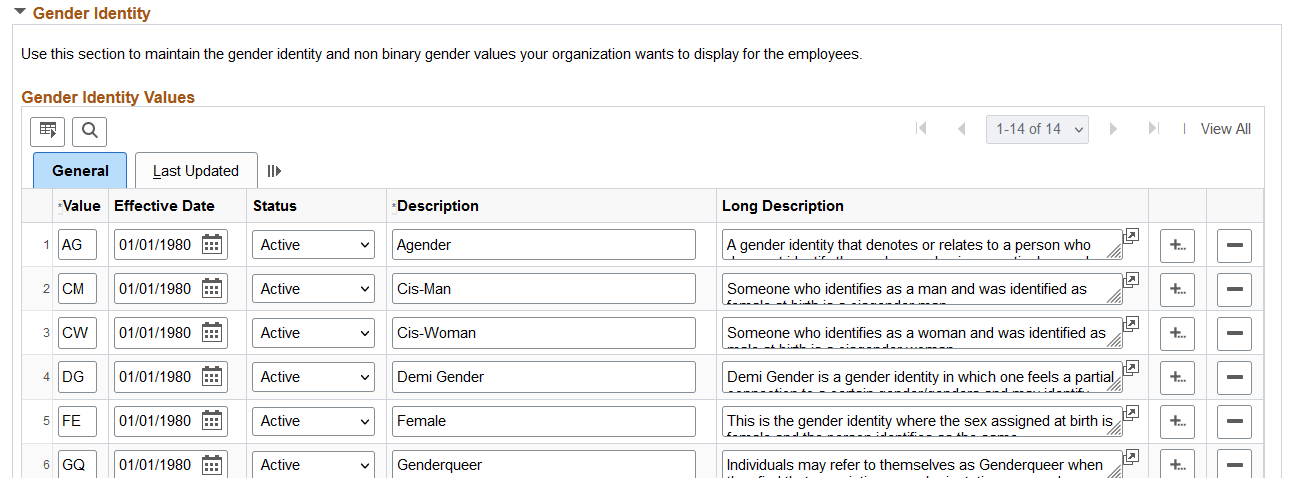
This example illustrates the fields and controls on the Gender Details page (4 of 4).

Use this page to include the valid gender-related values by region that should be available to an employee or administrator, including the status and the last time it was updated. Employee's are assigned to a regulatory region on the Job Data - Work Location Page.
|
Field or Control |
Description |
|---|---|
|
Enable Attachment |
Select this option to allow a person to add attachments, such as supporting documentation. |
|
Allow change by Self-Service user |
Select to enable the following fields on the Personal Details - Gender Details Page and allow a person to update their own information:
When you deselect this option, the gender-related fields will be display only in the Personal Details component. |
|
Expand/Collapse All |
Select the link to expand or collapse all the sections on this page. |
|
Long Description |
Enter a description that explains the meaning of a gender type value. This information will display on the <Gender Field Label> Values Page for the employee and HR administrator to aid in selecting the appropriate value for a field. |
Birth Sex
Manage values by region that identify the sex assigned at birth.
Pronoun
Manage regional pronouns that identify how others should address a person.
Sexual Orientation
Maintain regional values that describe one's inherent attraction to a sexual partner.
Gender Identity
Define regional values that would describe one's inner sense or self perception of being male, female, a blend of both, or neither.
Voluntary Self-Identification
|
Field or Control |
Description |
|---|---|
|
Require Employee Self Identification Sign Off check box |
Select to require an electronic signature on all submitted gender changes from the employee self service Gender Details Page. When you select this field, you must also specify an acknowledgement ID. |
|
Acknowledgement ID |
Enter the acknowledgement ID containing the message catalog entry for gender change acknowledgement. Note: You must first create acknowledgement IDs for gender identify on the Acknowledgement Configuration Page to add this value. See also Understanding Gender Identity Tracking. |