Setting Up Web Services for the Coexistence
The files transported between the PeopleSoft environment and the Fusion environment are single compressed .zip files. The transfer of these files to and from the PeopleSoft environment is supported by PeopleSoft Integration Broker web service messages. PeopleSoft delivers the web service message structure as part of the PeopleSoft HCM 9.2 to Fusion Talent Management and Fusion Workforce Compensation coexistence, but there are several steps you must take to complete the Integration Broker configuration.
|
Page Name |
Definition Name |
Usage |
|---|---|---|
|
IB_SERVICE |
Activate delivered service operations. |
|
|
WS_ACCESS_IB |
Set access to permission lists. |
|
|
IB_SERVICEHDLR |
Activate delivered handlers. |
|
|
IB_SERVICERTNGS |
Add routing definitions. |
|
|
IB_ROUTINGDEFN |
Activate delivered routings. |
|
|
IB_ROUTINGDEFNCON |
Configure routing connector properties. |
|
|
IB_QUEUEDEFN |
Activate delivered queue. |
|
|
IB_NODE |
Update node credentials. |
|
|
IB_NODECONN |
Configure node connector properties. |
|
|
IB_NODESECURITY |
Update node security. |
For more information on setting up web services, see the product documentation for PeopleTools: Integration Broker.
Use the Service Operations - General page (IB_SERVICE) to activate delivered service operations.
Navigation:
This example illustrates the fields and controls on the Service Operations - General page.
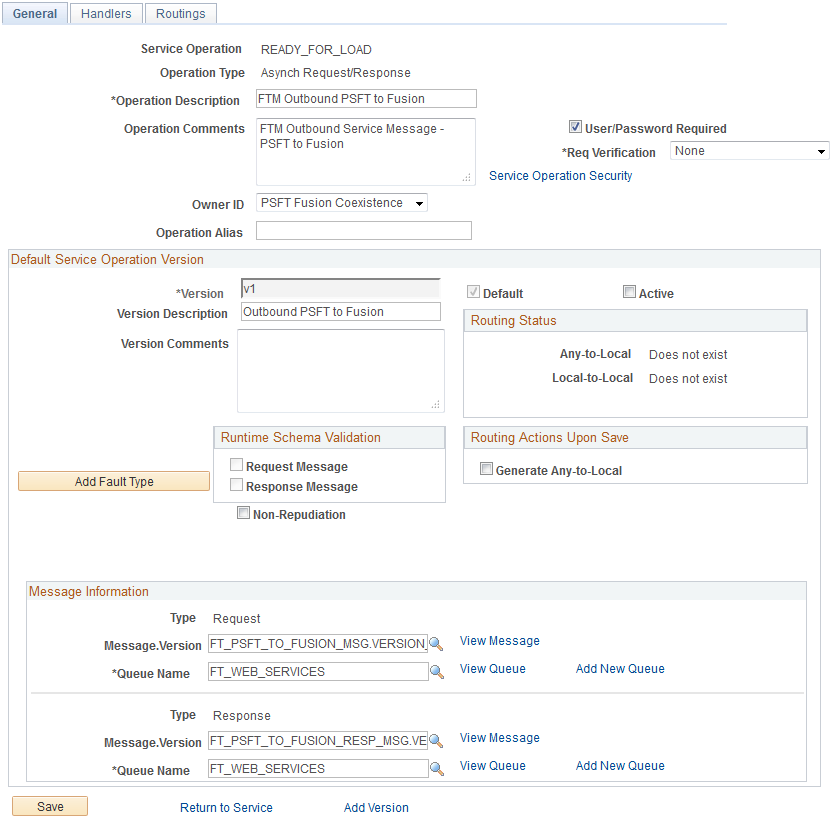
READY_FOR_LOAD and READY_FOR_TRANSMISSION
Select the User/Password Required and Active check boxes for the READY_FOR_LOAD and READY_FOR_TRANSMISSION service operations.
WORKFORCE_SYNC
Use the Web Service Access page (WS_ACCESS_IB) to Set access to permission lists.
Navigation:
Click the Service Operations Security link on the Service Operations - General page.
This example illustrates the fields and controls on the Web Service Access Page.
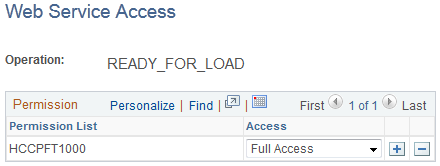
Set the Access field to Full Access for the HCCPFT1000 permission list. Do this for the READY_TO_LOAD, READY_FOR_TRANSMISSION, and WORKFORCE_SYNC service operations.
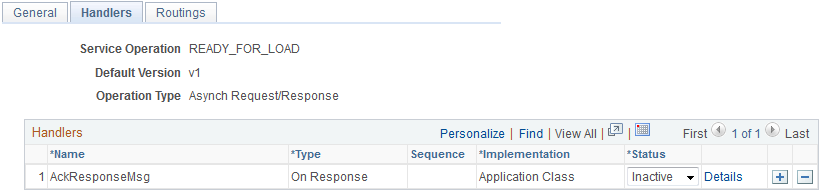
Use the Service Operations - Handlers page (IB_SERVICEHDLR) to activate delivered handlers.
Navigation:
This example illustrates the fields and controls on the Service Operations - Handlers page for the READY_FOR_LOAD service operation.
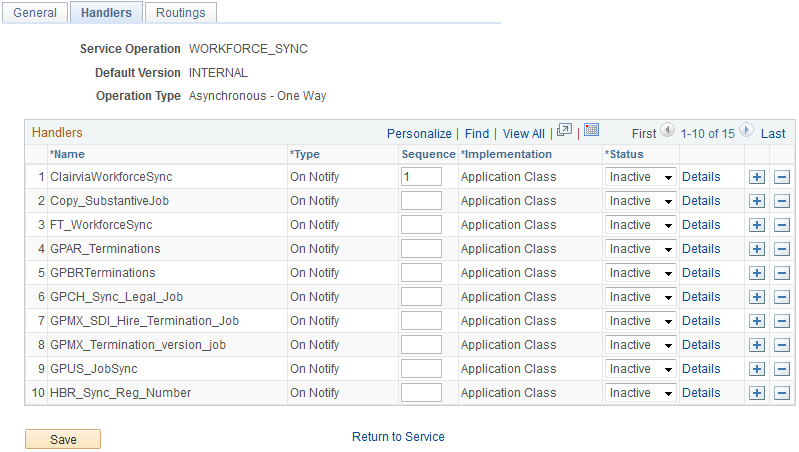
This example illustrates the fields and controls on the Service Operations - Handlers page for the WORKFORCE_SYNC service operation.
READY_FOR_LOAD and READY_FOR_TRANSMISSION
To activate the delivered handlers for the READY_FOR_LOAD and READY_FOR_TRANSMISSION service operations, select the Active value in the Status column for each handler.
WORKFORCE_SYNC
For the WORKFORCE_SYNC service operation, select Active in the Status column for the FT_WorkforceSync handler.
Use the Service Operations - Routings page (IB_SERVICERTNGS) to add routing definitions.
Navigation:
This example illustrates the fields and controls on the Service Operations - Routings Page.
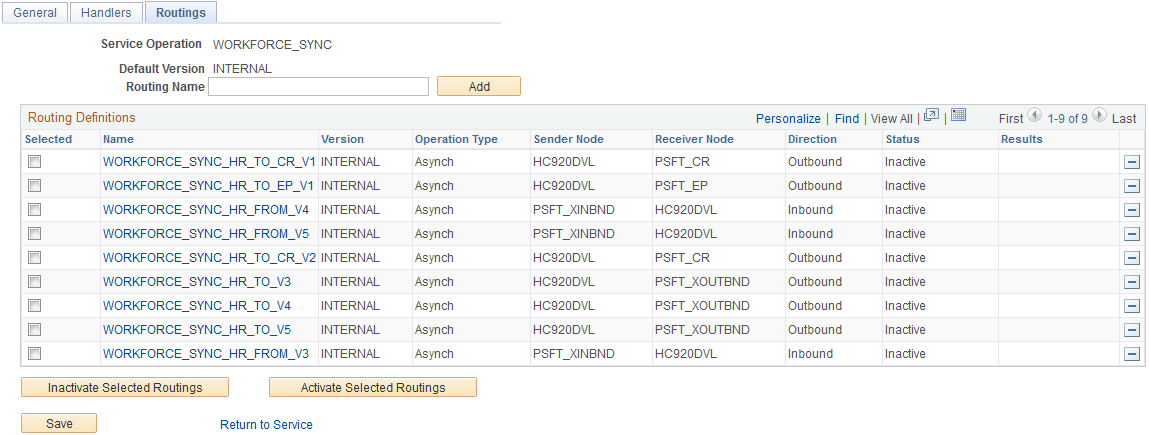
For the WORKFORCE_SYNC service operation, enter WORKFORCE_SYNC_LOCAL in the Routing Name field and click the ADD button. This takes you to the Routing Definitions page.
Use the Routing Definition page (IB_ROUTINGDEFN) to activate delivered routings.
Navigation:
Click a routing link in the Name column.
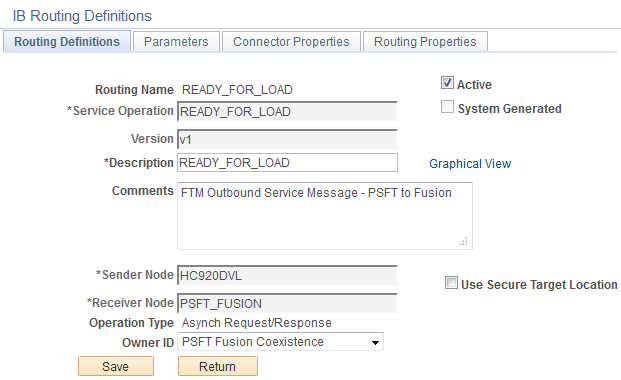
This example illustrates the fields and controls on the Routing Definitions Page for the READY_FOR_LOAD routing.
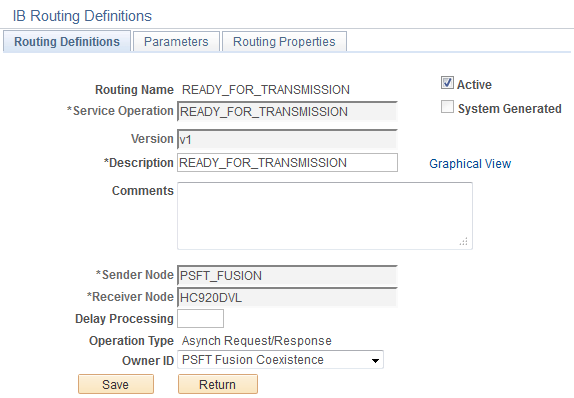
This example illustrates the fields and controls on the Routing Definitions Page for the READY_FOR_TRANSMISSION routing.
This example illustrates the fields and controls on the Routing Definitions page for the WORKFORCE_SYNC_LOCAL routing.

READY_FOR_LOAD and READY_FOR_TRANSMISSION
To activate the delivered routings for the READY_FOR_LOAD and READY_FOR_TRANSMISSION service operations, select the Active check box for each service operation’s routing.
WORKFORCE_SYNC_LOCAL
Select the Active check box to activate the WORKFORCE_SYNC_LOCAL routing. In addition, enter your local node in the Sender Node and Receiver Node fields.
Use the Connector Properties page (IB_ROUTINGDEFNCON) to configure routing connector properties.
Navigation:
Click the Connector Properties tab from the Routing Definition page.
This example illustrates the fields and controls on the Connector Properties page.
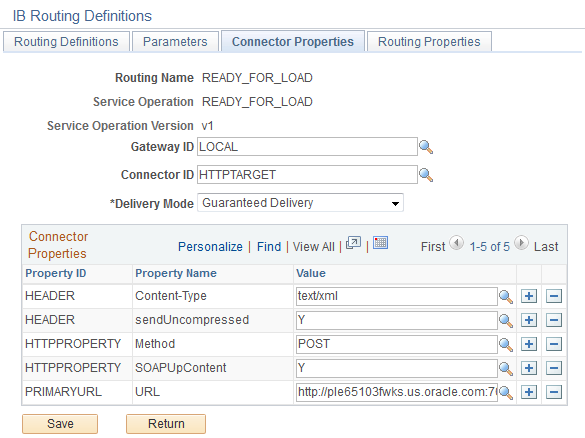
Add the following connector properties for the READY_TO_LOAD routing:
|
Property ID |
Property Name |
Value |
|---|---|---|
|
HEADER |
Content-Type |
text/xml |
|
HEADER |
sendUncompressed |
Y |
|
HTTPPROPERTY |
Method |
POST |
|
HTTPPROPERTY |
SOAPUpContent |
Y |
|
PRIMARYURL |
URL |
The URL that you use for your Fusion EndPoint URL. Note: The URL you enter here must have a location that can be pinged from your PeopleSoft system. Verify this when you set up your connection. In addition, this URL must be the Fusion end point URL, which should be provided by your Fusion cloud ops team. |
This is an example of the Fusion EndPoint URL: https://hcgg-test.hcm.us2.oraclecloud.com/soa-infra/services/default/HcmCommonBatchLoaderCoreInboundLoaderComposite/inboundloaderprocess_client_ep
Use the Queue Definitions page (IB_QUEUEDEFN) to activate delivered queues.
Navigation:
This example illustrates the fields and controls on the Queue Definitions page.
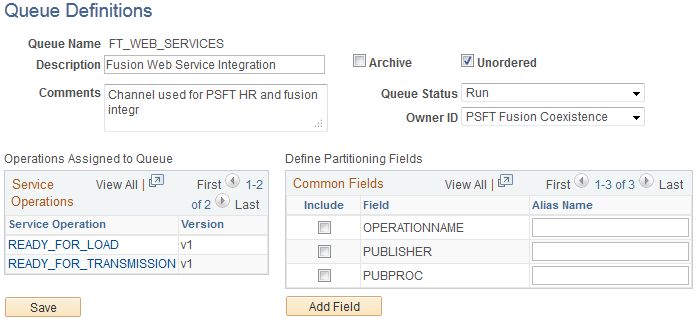
To activate a queue, select the Run value in the Queue Status field. In addition, ensure that the Unordered check box is selected. Make sure you do this for both the FT_WEB_SERVICES and PERSON_DATA queues.
Use the Node Definitions page (IB_NODE) to update node credentials.
Navigation:
This example illustrates the fields and controls on the Node Definitions page.

For the PSFT_FUSION node, make sure the values of the Authentication Option, Node Password, Default User ID, External User ID, and External Password fields match the credentials defined for your Fusion system.
Use the Connectors page (IB_NODECONN) to configure node connector properties.
Navigation:
This example illustrates the fields and controls on the Connectors page.
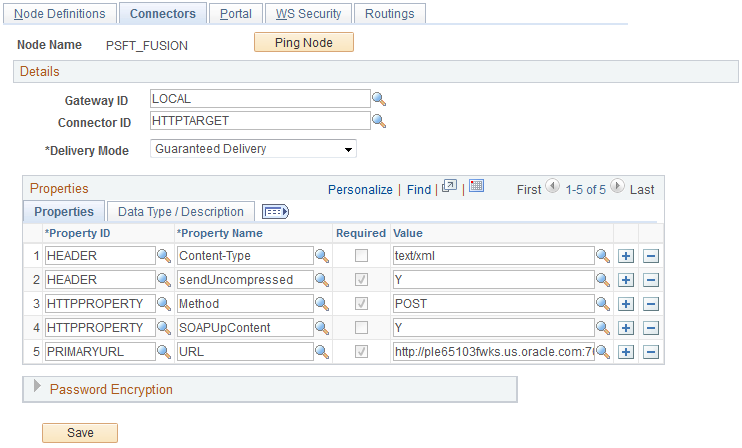
Add the following connector properties for the PSFT_FUSION node:
|
Property ID |
Property Name |
Value |
|---|---|---|
|
HEADER |
Content-Type |
text/xml |
|
HEADER |
sendUncompressed |
Y |
|
HTTPPROPERTY |
Method |
POST |
|
HTTPPROPERTY |
SOAPUpContent |
Y |
|
PRIMARYURL |
URL |
The URL that you use for your Fusion EndPoint URL. |
Use the WS Security page (IB_NODESECURITY) to update node security.
Navigation:
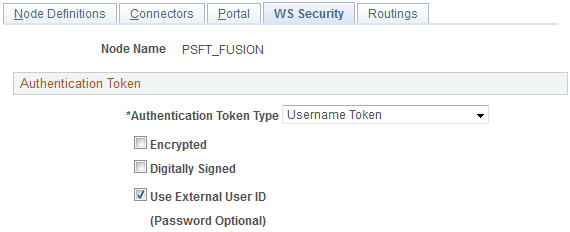
This example illustrates the fields and controls on the WS Security page.
Field or Control |
Description |
|---|---|
Authentication Token Type |
Select the Username Token value. |
Authentication Token Type |
Make sure this check box is selected. |