Updating Organizational Instance and Assignment Relationships
These topics provide an overview of organizational instance and assignment relationships and discuss how to update organizational instance and assignment relationships.
|
Page Name |
Definition Name |
Usage |
|---|---|---|
|
JOB_DATA1 |
Enter a new row on this page to modify instance and assignment relationships. |
|
|
RUNCTL_OC_PRO_ASG |
Batch process to promote assignments for multiple employees. |
|
|
Promote an Assignment - Details Page |
HCR_OC_PRO_ASG_SEC |
Review the errors and warnings returned by the component interface. |
|
HCR_OC_CHG_ASGN |
Move an additional assignment to another instance. |
|
|
HCR_OC_CHG_ASGN |
Change a controlling instance to an additional assignment under another instance. You can demote an instance to an assignment only if the instance does not have any additional assignments. |
When you promote an assignment to an instance, so that it is no longer subordinate to another organizational instance, you make an additional assignment into its own instance. For example, you might want to terminate a controlling instance, but maintain the additional assignment. If the additional assignment is subordinate to the controlling instance, they share the same organizational instance number, the additional job is terminated automatically when you terminate the controlling instance. To promote an instance for a single employee online, add a new row on the Work Location page of the Job Data component. Use the Promote an Assignment page to promote assignments for multiple employees as a batch process.
Use the Demote Instance page to make a controlling instance into an additional assignment under another instance. To demote an instance, the controlling instance should not have any additional assignments.
Use the Move Assignment to another Inst page to move an additional assignment to another instance. This is useful to correct errors. For example, when you select the wrong employee record number to be the controlling instance.
These restrictions apply to modifying organizational instance and assignment relationships:
These actions are valid only for employees and contingent workers; persons of interest are not eligible.
These actions are not valid for Japan additional appointments and temporary assignments.
You can only promote a host assignment to an instance if the host assignment is terminated and there are no future assignment rows with action ASG (Assignment) or ASC (Assignment Completion).
Assignments with future rows with action ADL (Additional Job) are ineligible.
You cannot change or delete a row after you confirm any of these actions.
The action codes that are entered on the rows for these actions are:
OCA – Promote an Assignment to an Instance.
OCI – Demote an Instance.
OCM – Move an Assignment to another Instance.
You must define action reasons that correspond to the delivered actions OCA, OCI, and OCM before using this component.
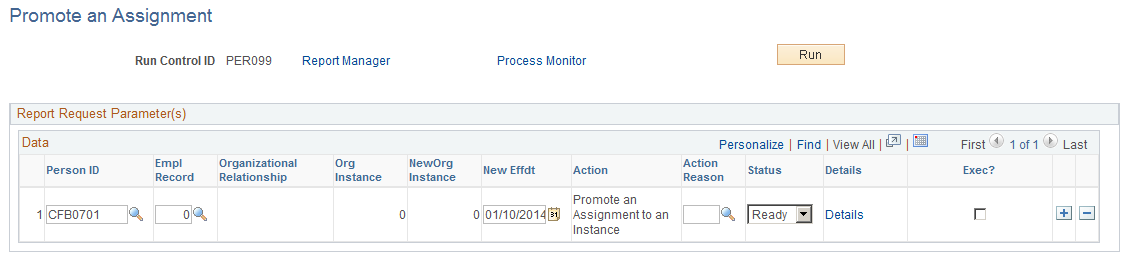
Use the Promote an Assignment page (RUNCTL_OC_PRO_ASG) to batch process to promote assignments for multiple employees.
Navigation:
This example illustrates the fields and controls on the Promote an Assignment page. You can find definitions for the fields and controls later on this page.
Field or Control |
Description |
|---|---|
Org Relation |
The organizational relationship. Valid values are EMP for employee and CWR for contingent worker. |
Org Instance |
The actual org instance. |
New Effdt |
The new effective date defaults to today's date. |
Status |
Available values are Ready, Failure, Success, and Cancelled. The default value is Ready for all rows. After the process has run to completion, you can review the status. If, for any reason, the transaction has not been loaded to the records, the status of the row is set to Failure. Otherwise the status is Success. You must determine the reasons why transactions ended in Failure and change the status back to Ready or to Cancelled before you run the process again. |
Details |
Click the link to open the Details page. Use this page to review the errors and warnings returned by the component interface. |
Exec? |
The process loads only the rows with Status set to Ready and with the Exec? check box selected. |
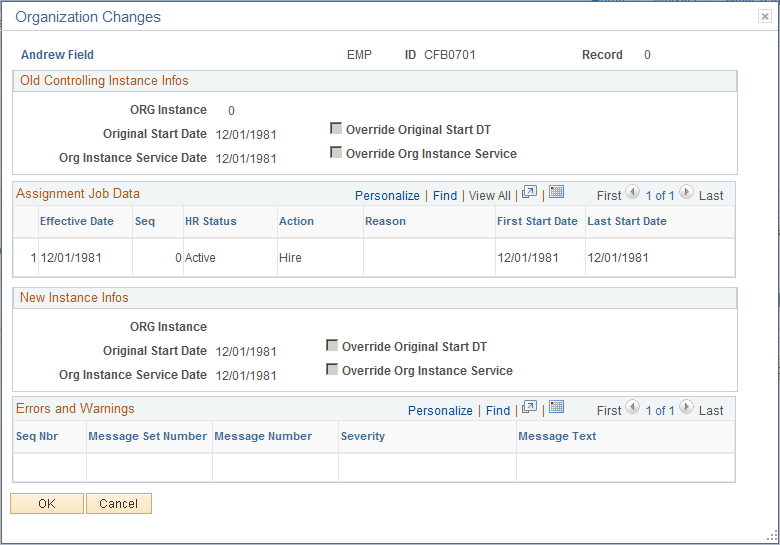
Click the Details link to access the Details page for Promote Instance.
This example illustrates the fields and controls on the Promote an Assignment - Details page. You can find definitions for the fields and controls later on this page.
Field or Control |
Description |
|---|---|
Old Controlling Instance Infos |
This information is for display only. |
Assignment Job Data |
The grid displays job data for the selected assignment, sorted by effective date in ascending order. |
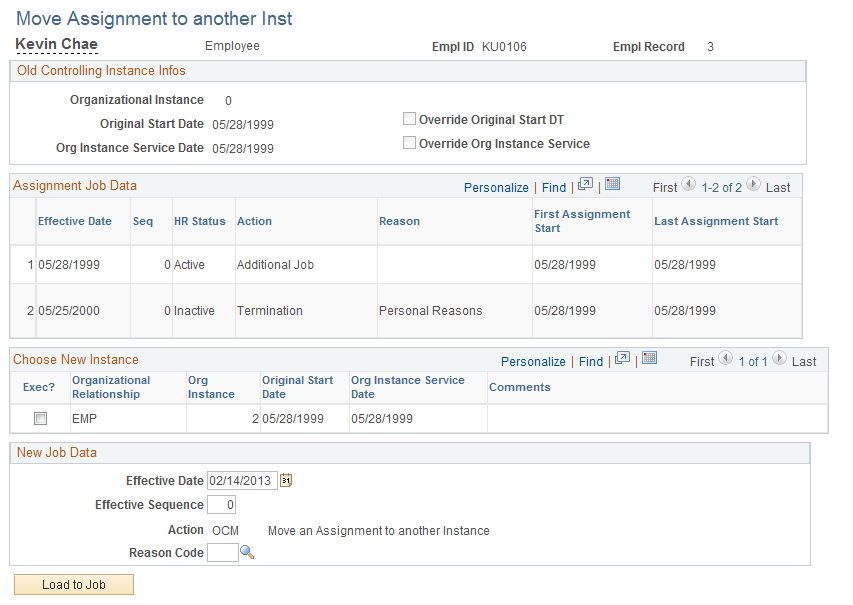
Use the Move Assignment to another Inst page (HCR_OC_CHG_ASGN) to move an additional assignment to another instance.
Navigation:
This example illustrates the fields and controls on the Move Assignment to another Inst page. You can find definitions for the fields and controls later on this page.
Field or Control |
Description |
|---|---|
Assignment Job Data |
The grid displays job data for the selected assignment, sorted by effective date in ascending order. |
Choose New Instance |
This grid lists all instances for this employee per organization. If you select an assignment that has a start date prior to the instance's first hire date, you cannot select that instance. You can only move an assignment to an instance if the active date of the assignment coincides with the dates of the instance. |
New Job Data |
Enter the job effective date, job effective sequence, the action reason for the action. The action code defaults to OCM (move an assignment to another instance), and cannot be changed. |
Load to Job |
Click this button to insert the new job data into the JOB record. |
Transfer to Job |
This button is displayed after the Load to Job process runs successfully. Click the Transfer to Job button to review the updated JOB data. If the process does not run successfully, an Errors and Warnings grid appears that lists the errors. |
Use the Demote an Instance page (HCR_OC_CHG_ASGN) to change a controlling instance to an additional assignment under another instance.
You can demote an instance to an assignment only if the instance does not have any additional assignments.
Navigation:
This example illustrates the fields and controls on the Demote an Instance page. You can find definitions for the fields and controls later on this page.

Field or Control |
Description |
|---|---|
Old Controlling Instance Infos |
This information is for display only. |
Running Instances |
The grid displays job data for the selected assignment, sorted by effective date in ascending order. |
Choose New Instance |
This grid lists all instances for this employee per organization. If you select an assignment that has a start date prior to the instance's first hire date, you cannot select that instance. You can only move an assignment to an instance if the active date of the assignment coincides with the dates of the instance. |
New Job Data |
Enter the job effective date, job effective sequence, the action reason for the action. The action code defaults to OCI (Demote and Instance), and cannot be changed. |
Load to Job |
Click this button to insert the new job data into the JOB record. |
Transfer to Job |
This button is displayed after the Load to Job process runs successfully. Click this button to review the updated JOB data. If the process does not run successfully, an Errors and Warnings grid appears that lists the errors. |