Setting Up Checklist Templates
Important! Letter Generation (Letter Gen) is a deprecated product. It is strongly recommended that you use Communication Generation (Comm Gen) instead. For more information on Comm Gen, see Understanding the Communication Generation Process
To set up checklist templates, use the Checklist Table component (CS_CHKLST_TBL).
This section discusses how to create a checklist template.
|
Page Name |
Definition Name |
Navigation |
Usage |
|---|---|---|---|
|
Checklist Table |
CS_CHKLST_TABLE |
|
Create checklist templates and assign codes to them. |
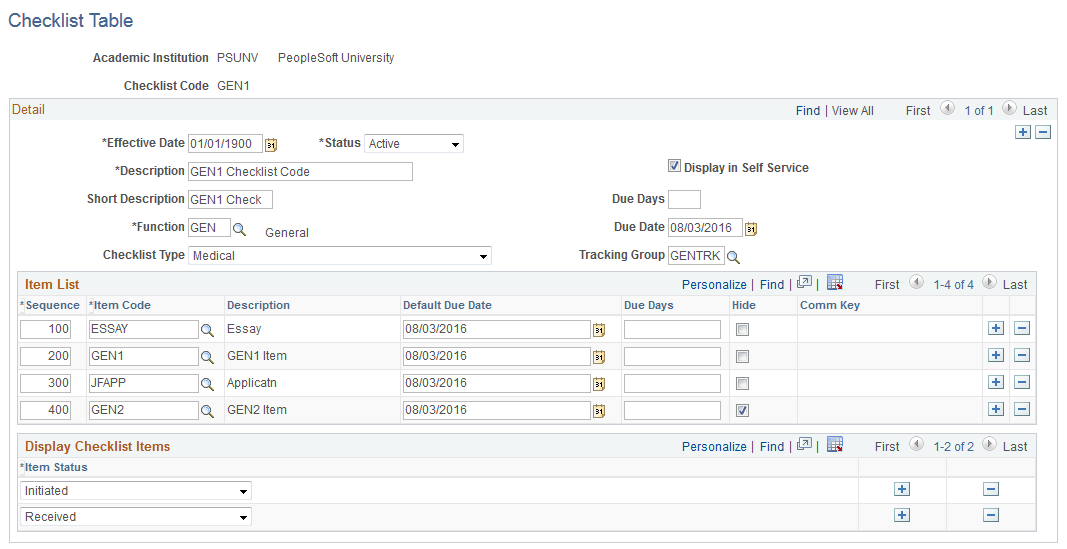
Access the Checklist Table page ().
This example illustrates the fields and controls on the Checklist Table page. You can find definitions for the fields and controls later on this page.
Detail
Field or Control |
Description |
|---|---|
Function |
Enter the code for the administrative area with which the items for this checklist are associated. The function code controls the item codes that you will be able to select. |
Checklist Type |
Select the type that best describes this checklist. The following checklist types are delivered with your system as translate values: (ADC) Condition List (CML) Communication List (HIR) Hiring (MED) Medical (PRM) Promise (RQL) Requirements List (SAL) Staff Assignment List (TER) Termination (TRN) Training (XFR) Transfer (OTH) Other You can modify these translate values. Of the delivered checklists types, the ones most relevant to the management of student administration and contributor relations are: (CML) Communication List: A list of the communications (for example, letters, brochures, and phone calls) that have occurred with a person over a period of time. (PRM) Promise: Records the amount and due dates of a person's promise-to-pay. (RQL) Requirements List: A list of items that a student must accomplish or submit to move to the next step of a process. For example, the list might specify the materials required to complete an application to your institution. You can also use items from a requirements list in the letter generation process to notify students of missing application items. (SAL) Staff Assignment List: A list of items that a staff member needs to accomplish relative to a particular student. |
|
Allow Any Term |
This appears only for the STRM administrative function. Select to allow any term to be selected in Variable Data rather than just the activated terms for the student. |
Display in Self Service |
Select to display the checklist as a To Do item on PeopleSoft Campus Self Service pages. Clear to prevent the checklist from appearing as a self-service To Do item. |
Due Days |
Enter the number of days, calculated from the assign date, by which all items on this checklist must be completed. |
Due Date |
The date by which all items on this checklist must be completed. |
Tracking Group |
(Optional) Enter the group to which this checklist should be assigned for monitoring. Available group codes are from the Tracking Groups page. |
Item List
Field or Control |
Description |
|---|---|
Sequence |
The number of this item in the list of items for this checklist. The system automatically enters the next sequential number for each checklist item that you add. You can override the number to reorder the list of checklist items. |
Item Code |
Enter the item code for this checklist item. The item codes available are those associated with the selected administrative function on the Checklist Item Functions page. |
Default Due Date |
If you know the exact date when the checklist item is due, enter it here. You can leave the field blank. If the field is blank when you save the record, the system displays the due date from the Detail area of the page as the default due date for each checklist item. You can override this date, but it must be with an earlier date so that the item due date does not exceed the overall due date of the checklist. |
Due Days |
If an item is due within a specific number of days rather than on a specific date, enter the number of days here. You can leave the field blank. If the field is blank when you save the record, the system displays the number of due days from the Detail area of the page as the default due days value for each checklist item. You can override this number, but it must be with a smaller number so that the item does not become due after the overall due date of the checklist. |
Hide |
Used for the PeopleSoft Fluid User Interface only. Select this check box to hide a particular item in the Fluid Self-Service. It is unselected by default. An item appears in the To Do List only if Display in Self Service is selected for the checklist code and Hide is not selected for the item. |
Comm Key |
When you create a checklist of the default type that is set on the Installation Default - CC page, the Comm Key field becomes available. Select a Comm Key to assign the specified communications to the individual or organization to which you are also assigning the checklist. When you run the process to generate the letter whose letter code is associated with the Comm Key selected, the process extracts the checklist items listed on the checklist tied to the Comm Key. This enables you to print a list of the items not yet completed. For example, you could list in a letter the remaining items that an applicant needs to submit to complete the application. |
Display Checklist Items |
Used for the PeopleSoft Fluid User Interface only. Define multiple Status values for the Checklist. This is similar to the institution-level setup provided in the To Do List configuration. The grid only appears if the Display in Self Service check box is selected. This setup determines if these checklist items appear in the To Do List if Status values are defined at the Checklist level. If Status values are not defined for the checklist then the setup at institution-level determines which items to display. This option is applicable to items not set to Hide. |