Connecting to the TCSI System
To use the TCSI system, you need to set up Campus Solutions (CS) to connect to TCSI. Before you set up CS, make sure your organization is registered in PRODA.
Note: You must use PeopleTools 8.57 or later.
This section describes:
|
Page Name |
Definition Name |
Navigation |
Usage |
|---|---|---|---|
|
SSR_HM_ORG |
|
Enter the organization information Oracle gave you. |
|
|
SSR_HM_DEVICES |
|
Provide the device information you registered in PRODA. |
|
|
SSR_HM_CAMPUS_GET |
|
Test whether your configuration is correct by retrieving a list of all your campuses in TCSI. |
|
|
SSR_HM_ERR_IMPORT |
|
Retrieve a list of all available errors from TCSI. |
|
|
IB_SERVICEDEFN |
|
Update test URLs to production URLs. |
Access the Organisation page ().
|
Field or Control |
Description |
|---|---|
|
Organization ID |
Enter the ID you were assigned when you registered your organization in PRODA. |
|
Organization Name |
Enter the name your organization was assigned when you registered in PRODA. |
|
Client ID |
Enter the ID that Oracle provided to your organization. There will be different IDs for test and production. |
|
Software Name |
Enter the name that Oracle provided to your organization. Oracle may provide your organization its own production client ID to minimize potential impacts from the TCSI call rate limit. |
Access the Devices page ().
Use the Devices page to enter the B2B device registration details. For information on registering a B2B device, go to the PRODA website. Once your device is active, it stays active for six months. To renew your registration, generate a new code in PRODA.
|
Field or Control |
Description |
|---|---|
|
Device Name |
Enter the name of the B2B device you registered in PRODA. You can use separate devices for each environment. |
|
Device Activation Code |
Enter the unique activation code that PRODA gave you. This code is valid for seven days, and you’re responsible for remembering the code. If you misplace your code or it expires, you can generate a new one in PRODA. |
|
Auto-Refresh Keys n Days Before Expiry |
Enter a number that’s used to determine when a new device key is automatically generated before the current key expires. If this date/time falls within the number of days from the current date, a new key is automatically generated. By default, this field is set to 3. When you run a TCSI process, it checks the TTL value. If it falls within the “Auto-Refresh Keys n Days Before Expiry” window, 3 days from expiry as shown in the screenshot, a new PRODA device key is generated. |
|
Activate Device |
Note: This button is available only when you set up your B2B device in CS for the first time. Click to switch on communication between CS and TCSI. This process establishes that the device and activation code are active. When you activate your device, PRODA sends a response with the expiry date and time of the device key. CS stores the expiry date and time, and uses this to determine when to automatically refresh your device key. |
|
Refresh Device Key |
Once you have activated your device, this button appears. When you renew registration, click to activate the new activation code you received from PRODA. Note: When you specify a value in Auto-Refresh Keys n Days Before Expiry, CS automatically refreshes your device key for you. You would only use the Refresh Device Key process if you need to manually reactivate your device. In that event, you must get a new activation code from PRODA, enter the new activation code in Device Activation Code, and then click Refresh Device Key. |
|
Authenticate Device |
Click to authenticate your device’s connection with TCSI. This process establishes that you have a valid access token. When you run the TCSI Migration, Course/Campus, and Student Data processes, the processes will authenticate the device automatically as required. The Campuses API Test and Errors API Test pages show that your device is authenticated. |
Access the Campuses API Test page ().
Use this page to test whether CS can connect to the TCSI System.
Once your device is authenticated, this page will show the authentication status, and you can click Get All Campuses to retrieve the list of campuses for your institution. In Response Message, the response from the TCSI system appears. To confirm whether the API call was successful, look in the second line for “success”: true.
Access the Errors API Test page ().
When you run the TCSI Migration, Course/Campus, and Student Data processes, you may encounter a TCSI error. When this happens, the error ID is stored with the transaction ID in the SSR_HM_TX_ERROR table. If this is the first time you come across an error, the error message details are stored in the SSR_HM__ERROR table. Over time, TCSI may change the description, details, and resolution of errors. This page lets your institution refresh all error descriptions, details, and resolutions by calling the TCSI Error API endpoint. Once your device is authenticated on the Devices page, you can click Import All Errors to retrieve the list of TCSI errors.
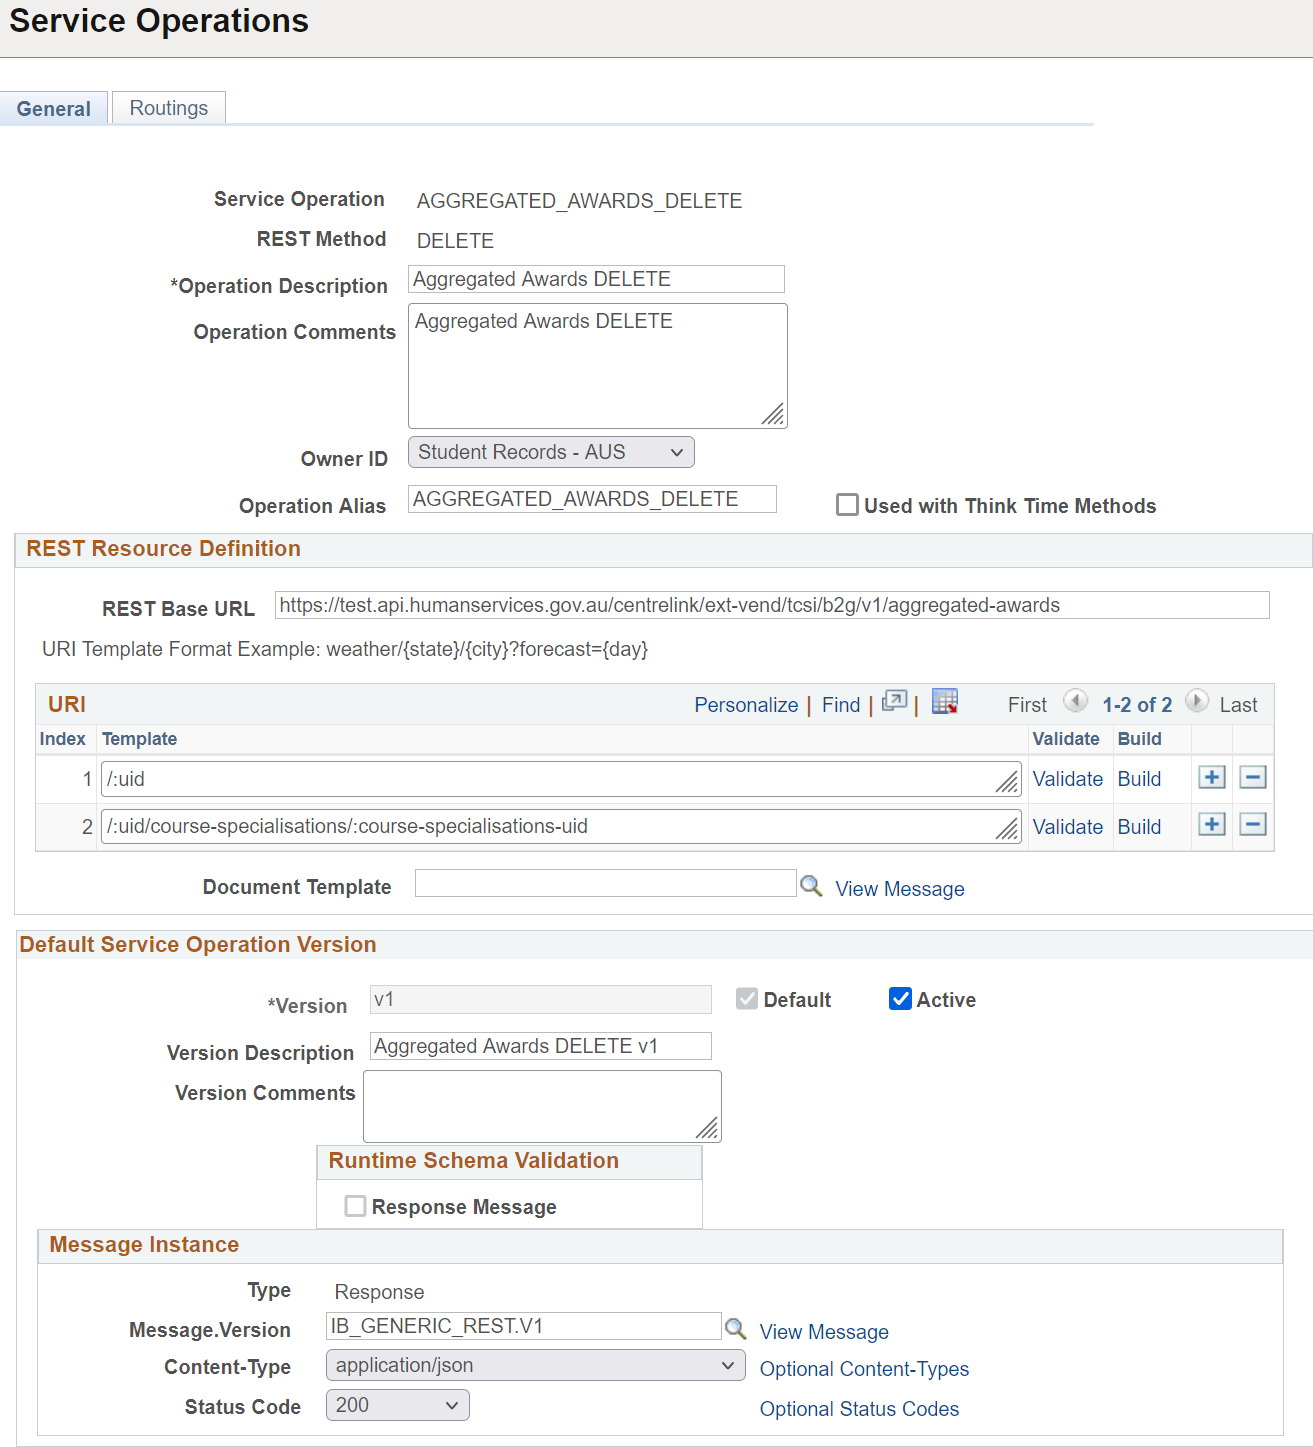
Access the Services page ().
The PUM image is configured with the test URLs that point to the TCSI REST API endpoints. Once you’re ready to move to your production environment, you must update the test URLs to production URLs.
To update the URLs in Integration Broker:
-
Navigate to the Services page.
-
In Service, enter SSR_HEIMS.
-
Select REST Service, then click Search.
-
From the list of services, click SSR_HEIMS. You should see all the service operations that correspond to TCSI endpoints.
-
In the list of existing operations, select a TCSI service operation.
-
On the General page, in REST Base URL, update the value with the production URL, then click Save.
-
Click Return to Service, then repeat steps 5-7 until you’ve updated all REST Base URLs.
Here’s the list of endpoints, their corresponding service operations, and their test and production URLs.
|
Endpoint |
Service Operations |
Test URL |
Production URL |
|---|---|---|---|
|
aggregated-awards |
AGGREGATED_AWARDS_DELETE AGGREGATED_AWARDS_GET AGGREGATED_AWARDS_PATCH AGGREGATED_AWARDS_POST |
|
|
|
campuses |
CAMPUSES_DELETE CAMPUSES_GET CAMPUSES_PATCH CAMPUSES_POST |
|
|
|
courses |
COURSES_DELETE COURSES_GET COURSES_PATCH COURSES_POST |
|
|
|
courses-of-study |
COURSES_OF_STUDY_DELETE COURSES_OF_STUDY_GET COURSES_OF_STUDY_PATCH COURSES_OF_STUDY_POST |
|
|
|
courses-on-campus |
COURSES_ON_CAMPUS_DELETE COURSES_ON_CAMPUS_GET COURSES_ON_CAMPUS_PATCH COURSES_ON_CAMPUS_POST |
|
|
|
course-admissions |
COURSE_ADMISSIONS_DELETE COURSE_ADMISSIONS_GET COURSE_ADMISSIONS_PATCH COURSE_ADMISSIONS_POST |
|
|
|
device activation |
DEVICE_ACTIVATION_PUT |
|
|
|
device authentication |
DEVICE_AUTHENTICATION_POST |
|
|
|
device key refresh |
DEVICE_KEY_REFRESH_PUT |
|
|
|
early-exit-awards |
EARLY_EXIT_AWARDS_DELETE EARLY_EXIT_AWARDS_GET EARLY_EXIT_AWARDS_PATCH EARLY_EXIT_AWARDS_POST |
|
|
|
errors |
ERRORS_GET |
|
|
|
help-balances |
HELP_BALANCES_GET |
|
|
|
loans |
LOANS_DELETE LOANS_GET LOANS_PATCH LOANS_POST |
|
|
|
notifications |
NOTIFICATIONS_GET |
|
|
|
students |
STUDENTS_DELETE STUDENTS_GET STUDENTS_PATCH STUDENTS_POST |
|
|
|
units-of-study |
UNITS_OF_STUDY_GET |
|
|
|
unit-enrolments |
UNIT_ENROLMENTS_DELETE UNIT_ENROLMENTS_GET UNIT_ENROLMENTS_PATCH UNIT_ENROLMENTS_POST |
|
|
Here are examples of updating Integration Broker URLs.
This example illustrates the fields and controls on the Service Operations page.