Designing Forms in PeopleSoft Fluid User Interface
Use Fluid forms to automate processes that include workflow-based approvals. Forms also provide an audit trail for tracking progress. You can design forms based on your business requirements.
For more information on Fluid Forms, refer the Video Feature Overview on PeopleSoft Fluid Forms and Approval Builder.
|
Page Name |
Definition Name |
Usage |
|---|---|---|
|
EOFM_DSN_SRCH_FL |
Review existing forms or add a new form. |
|
|
EOFM_DSN_FORM_FL |
Create a form and enter basic form information. |
|
|
EOFM_DSN_FLDS_FL |
Define the fields that appear on the form and configure form layout. |
|
|
EOFM_DSN_INST_FL |
Provide instructions for users that describe how to complete and submit a form. |
|
|
EOFM_DSN_APPR_FL |
Assign the approval workflow required for a form. |
|
|
EOFM_DSN_ROLE_FL |
Define security and reporting authorizations for the form. |
|
|
EOFM_CONTAINER_FL |
Access forms available to you, based on security authorizations role. |
|
|
EOAWMA_MAIN_FL |
View a list of all Fluid forms that are pending your approval. From here you can access individual forms and approve or deny the form. |
The Fluid Forms and Approval Builder enables you to design online forms, specify the approval process they require, and deploy them to users within your organization. Use this feature to convert manual procedures within your organization to paperless processes that include workflow-based approvals.
Accessing Fluid Forms and Approval Builder
The Fluid Form and Approval Builder can be accessed using the Design Form in FAB tile on the Employee Self Service home page.
Design Form in FAB Tile
Form Design
Fluid Form Designer guides you through the following steps:
Defining the basic information for a form, including the label, and status.
Specifying the fields that appear on the form and configure form layout.
Providing instructions that describe how to use the form.
Assigning the approval workflow for a form.
Defining security and reporting authorizations for the form.
You can specify which fields are required, and define the edits that a field must pass in order for the completed form to be saved. You can specify the following field types on a form:
Text
Date
Number
Signed Number
Divider
Time
Yes/No
Prompt
Code
Section
Form Status
It is important to understand the distinction between a form and a form instance. For the purposes of this documentation, when we use the term form, we are referring to the form that designers create using the Fluid Form Designer. A form instance is a deployed form that has been completed by a form user. Each form instance is automatically assigned a unique sequence number, so all completed forms can be tracked and managed independently.
The possible status values for a form are:
|
Field or Control |
Description |
|---|---|
|
In Design |
Indicates a form that is being designed, and is not active. |
|
Activated |
Indicates a form that is active and available for form users to complete. Note: Only the owner of a form can activate or inactivate a fluid form. |
|
Inactive |
Indicates a form that has been inactivated. When a form is inactive, form users are not permitted to complete the form. |
The possible status values for a form instance are:
|
Field or Control |
Description |
|---|---|
|
Initial |
When a form user accesses an activated form and begins to complete it, the status of the form instance is set to Initial. |
|
Pending |
When the form user finalizes the form instance and submits it for approval, the status changes to Pending. |
|
On Hold |
When an approver or reviewer requests more information about a submitted form, the status changes to On Hold. |
|
Approved, Denied, or Cancelled |
As the form instance flows through the required approval chain, the status subsequently updates to approved, denied, or cancelled. |
Form Reporting
Oracle-PeopleSoft enables you to report on Fluid form data. When you activate a Fluid form, Fluid Form Builder generates a runtime SQL view for Query Manager that is based on the form data. Views are automatically added to the Query Security tree under the EO_FORM_REPORT node.
Generated runtime SQL views follow this naming convention: FAB_NNNNNNNN_VW and FAB_NNNNNNNN_SC, where 'NNNNNNNN' represents the eight digit sequence number.
You can authorize access to form data in Query Manager by adding a reporting role for the form using the Form Designer - Security Page. Only users associated with the role can access the form data in Query Manager.
Oracle-PeopleSoft delivers the role "FORM_REPORT_USER." If you create your own role, ensure that it has access to the "EO_FORM_REPORT" node in the "QUERY_TREE_EO" Query Security Tree.
When a form is inactivated, the associated Runtime SQL view remains available for PS Query. To restrict users from querying against the view, you must remove all Reporting Authorizations roles associated with the form.
If you need to regenerate runtime SQL views for your forms-for example, when you migrate forms from one environment to another-run the "EO_FORM_RPTV " Application Engine process. Because runtime SQL view names are unique, it is possible the name may change during the regeneration process, depending on availability of names at the time of regeneration.
Note: Form reporting is available with PeopleTools 8.59 or higher.
Note: The Form Reporting feature is currently used by FSCM and HCM products.
Converting Classic Forms to Fluid
Forms designed in Fluid Forms and Approval Builder are not accessible in the classic version, and vice versa. However, you can convert existing classic forms to fluid forms. Once you convert classic forms to Fluid, classic forms can no longer be opened in classic. Before converting forms in your production environment, Oracle recommends you first run he conversion in a non-production environment and validate the results.
Use the System Process Requests run control page to run the Convert Classic Forms to Fluid (EO_FORM_CNVT) conversion process on your classic forms.
When you click Run, the Process Scheduler Request page appears, showing the job and process that you have the security to run.
Process Scheduler Request

For more information on submitting and scheduling process requests, refer to the PeopleTools Process Scheduler documentation.
Note: All open pending transactions for Classic Forms should be completed (Approved or Denied) before running the forms conversion process EO_FORM_CNVT. Configure the Approval Monitor for Process ID “FormApproval” and User Role “FORM_ADMIN” and use the Monitor Approvals page to review pending approvals and take appropriate action. For more information on configuring and reviewing using Approval Monitor, see PeopleBooks, Approval Framework, Using the Approval Monitor.
Note: If your classic forms have attachment templates attached, post conversion same cannot be removed in fluid forms. Take appropriate action before running conversion process. Once converted, the attachments are read-only. You may need to realign the form based on their requirements.
Security and Delivered Roles
User roles determine who has permission to access, design, and administer forms. The following table lists the delivered roles and associated permission lists for Form and Approval Builder.
|
Role Name |
Description |
Permission Lists |
Access Rights |
|---|---|---|---|
|
FORM_USER |
Form user: Can complete and submit forms. |
EOFM1000 |
The form user has add/update/display access to forms that have been created with Fluid Form Designer. |
|
FORM_DESIGNER |
Form designer: Can complete and submit forms, design forms, and manage forms that they are assigned to as the owner. |
EOFM1000 EOFM2000 |
The form designer has add/update/display access to forms that have been created with Fluid Form Designer. Form designers have update/display access to only their forms when using the Manage Forms (FORM_RPT) component. |
|
FORM_ADMIN |
Form administrator: Can complete and submit forms, design forms, and manage all forms. |
EOFM1000 EOFM2000 EOFM3000 EOSD2000 |
The form administrator has the same access as the form designer, and additionally, has update/display access to all forms when using the Manage Forms (FORM_RPT) component. |
|
FORM_CI_DEVELOPERS |
Form to component interface (CI) developer: Can complete and submit forms, design forms, manage all forms, and map forms to component interfaces (integrate forms). |
EOFM1000 EOFM2000 EOFM3000 EOFM4000 EOSD2000 |
The form to CI developer has the same access as the form administrator, and in addition can set up form integration by mapping forms to component interfaces using the Forms to CI Mapping page. |
|
FORM_REPORT_USER |
Form report user: Can create and run PS Query on form Runtime Reporting View to fetch form instance data. |
EOFM5000 |
The form report user can access the reporting view in PS Query Manager. The user can also create and run PS Query on form Runtime Reporting View to fetch form instance data. |
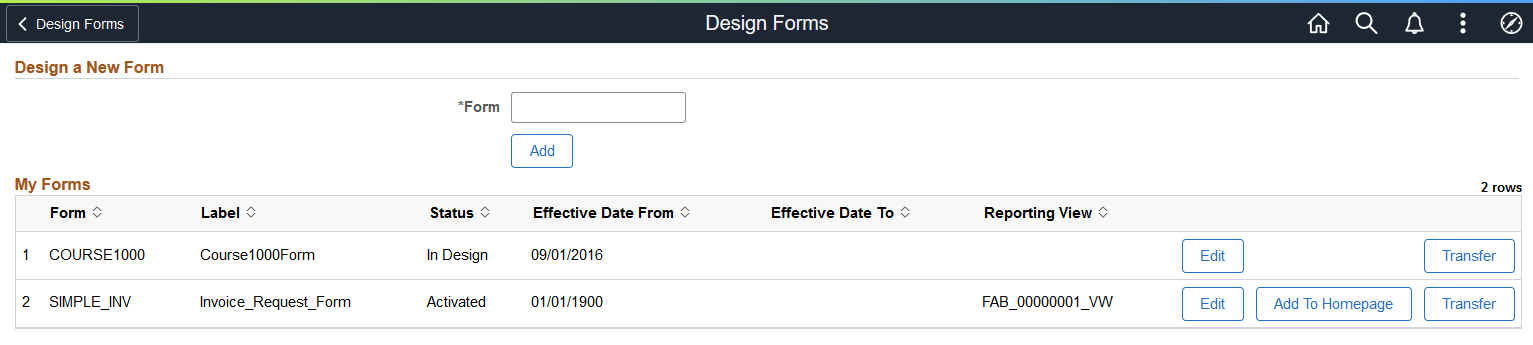
Use the Design a New Form page (EOFM_DSN_SRCH_FL) to add a new form or review existing forms. You can only view existing forms with a status of Activated or In Design.
Navigation:
This example illustrates the fields and controls on the Design a New Form page. You can find definitions for the fields and controls later on this page.
Field or Control |
Description |
|---|---|
Form |
Enter a unique value. The form name can contain letters, digits or underscore. A validation is performed to ensure the value is not used by an existing form or any other supplemental data record. |
Add and Edit |
Select to access the Fluid Form Designer component. |
Add To Homepage |
Select to add the selected form to the home page as a tile. You cannot have multiple tiles of the same form on the home page. For additional information about adding a tile to a PeopleSoft Fluid Home page, see the topic 'Working with Fluid Homepages and Dashboards' in the PeopleTools Application User's Guide documentation. |
Transfer |
Click to transfer the ownership of the form to another user. |
|
Actions List |
Select Show Inactive Forms to view inactive forms in the table. |
Note: You can only view existing forms if you have the FORM_DESIGNER role assigned to you.
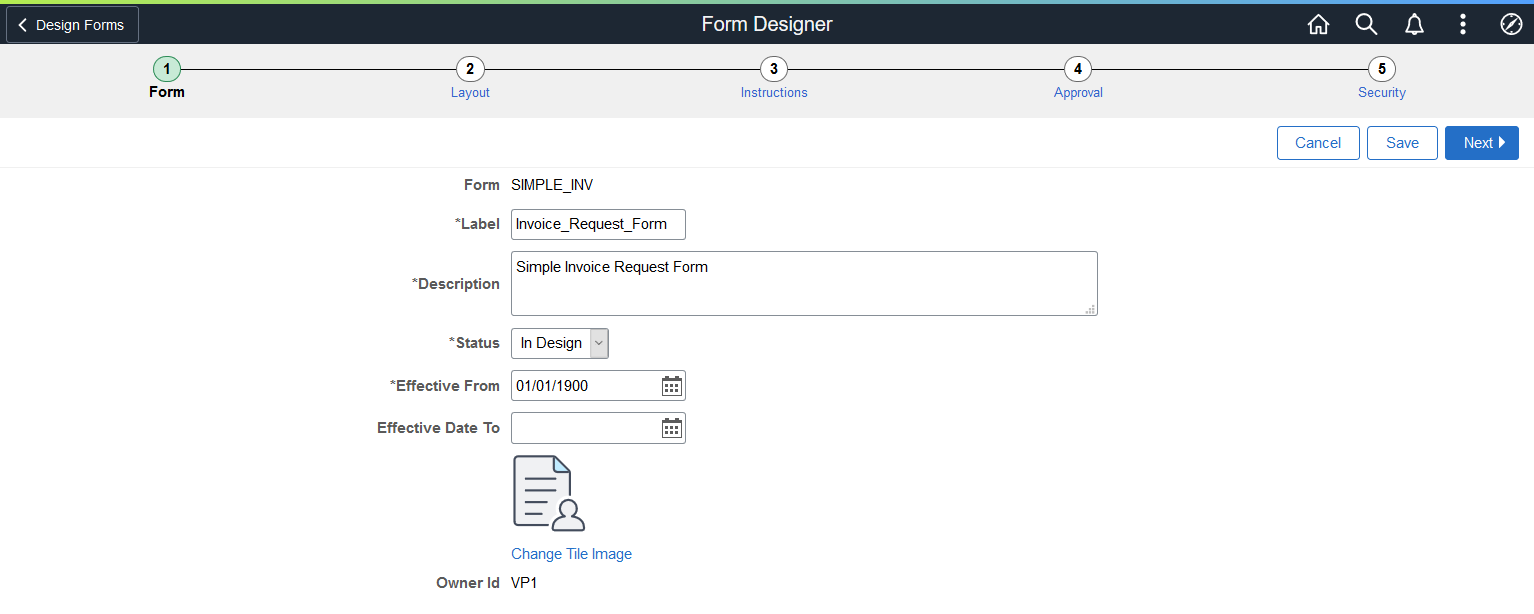
Use the Form Designer - Form page (EOFM_DSN_FORM_FL) to create a form and enter basic form information.
Navigation:
This example illustrates the fields and controls on the Form Designer - Form page. You can find definitions for the fields and controls later on this page.
Field or Control |
Description |
|---|---|
Label |
Enter a name for the design. |
Status |
The available status options are
|
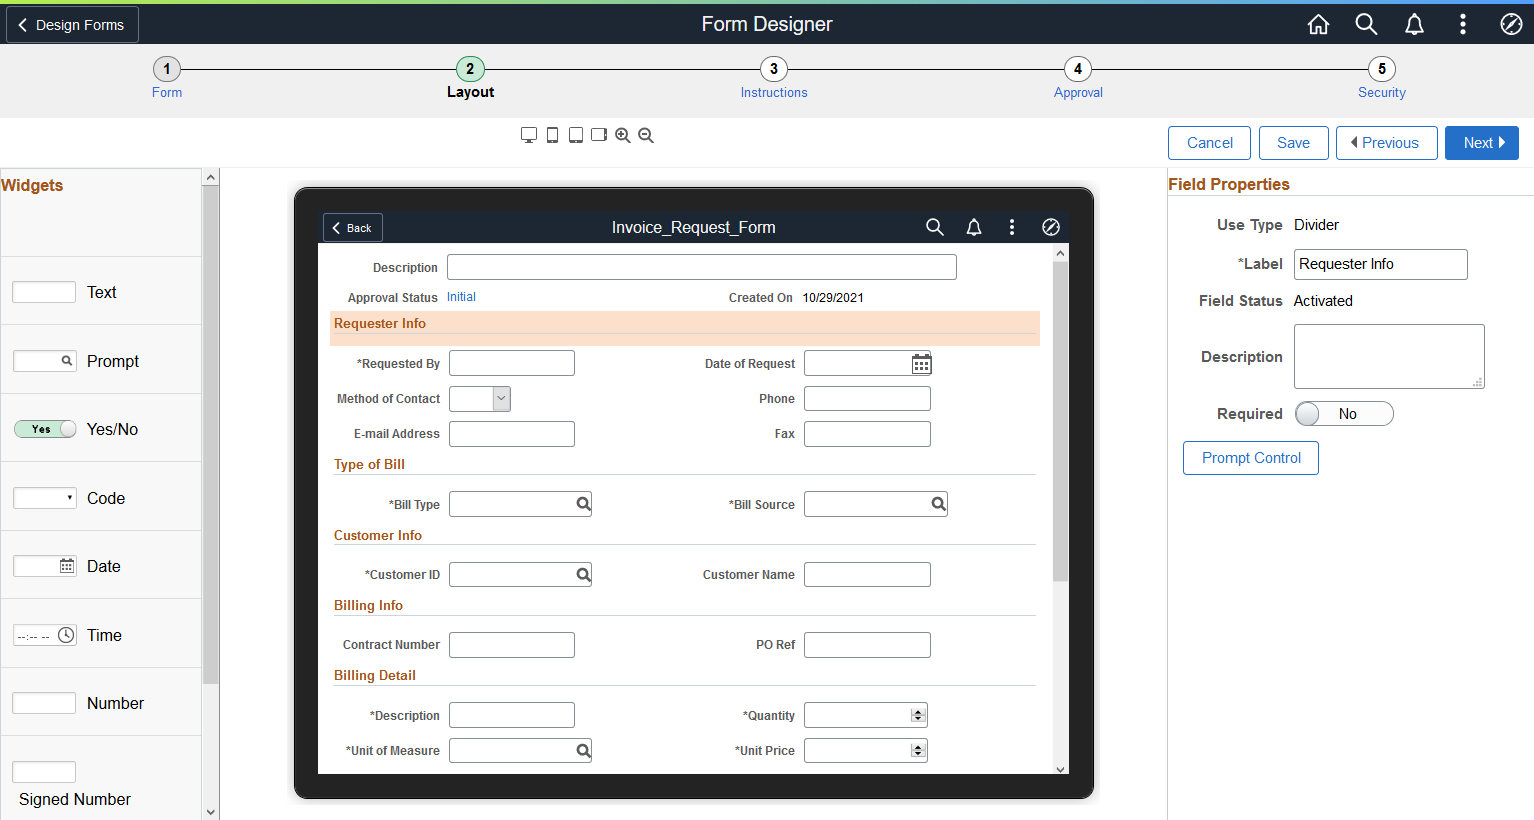
Use the Form Designer - Layout page (EOFM_DSN_FLDS_FL) to define the fields that appear on the form and configure form layout.
Navigation:
Navigation:
This example illustrates the fields and controls on the Form Designer - Layout page. You can find definitions for the fields and controls later on this page.
|
Field or Control |
Description |
|---|---|
|
|
Use the form factor icons to preview the form appearance on a specific device. Available options are Laptop/ Desktop, Phone, Tablet Portrait, and Tablet Landscape. Note: Form factor is for preview purposes only. |
|
|
Select to zoom in or zoom out the design form. |
|
Widgets |
Drag and drop the desired widget to the design form field. The widgets available are the following:
|


Note: Rich Text Editor is not available for fluid form designer. You can perform rich text editing using the Supplemental Data Record - Record Page
See also Defining Prompt Records.
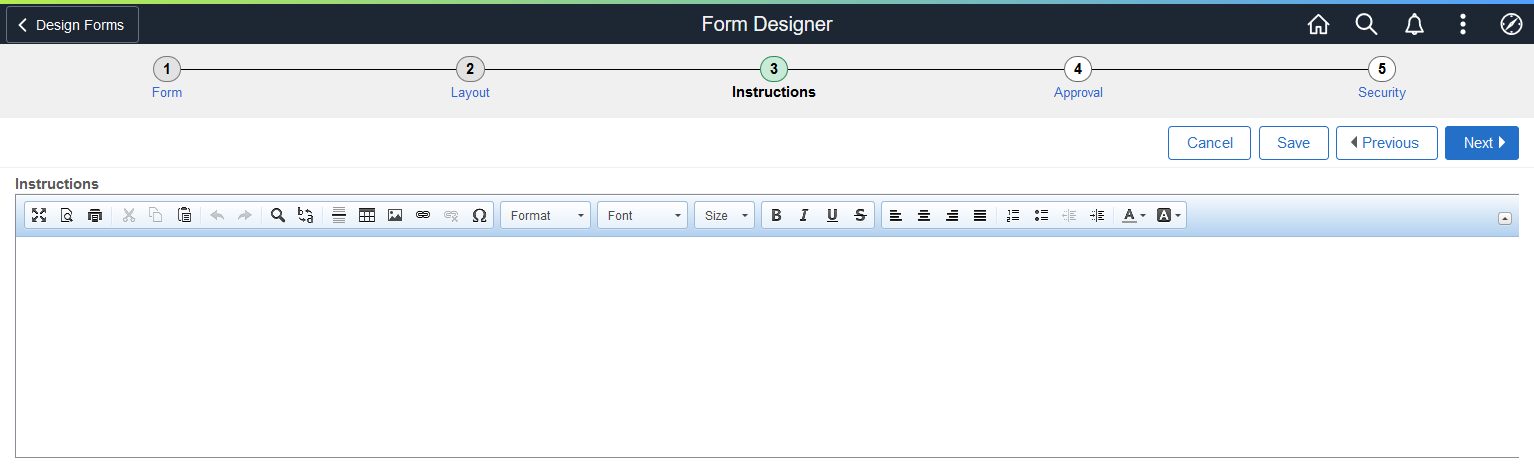
Use the Form Designer - Instructions page (EOFM_DSN_INST_FL) to provide instructions for users that describe how to complete and submit a form.
Navigation:
This example illustrates the fields and controls on the Form Designer - Instructions page.
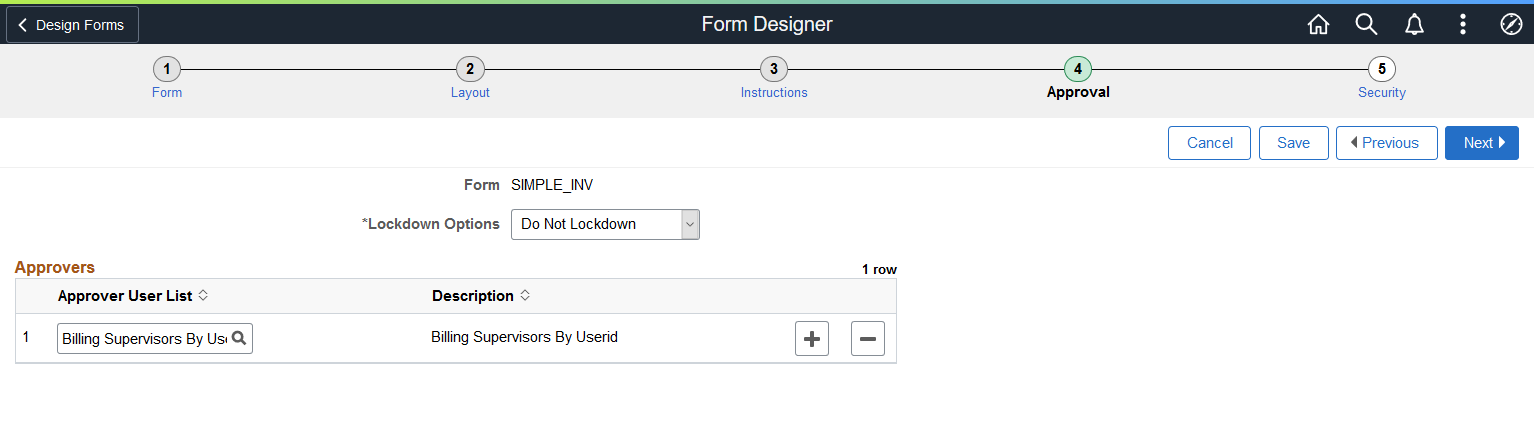
Use the Form Designer - Approval page (EOFM_DSN_APPR_FL) to assign the approval workflow required for a form.
Navigation:
This example illustrates the fields and controls on the Form Designer - Approval page. You can find definitions for the fields and controls later on this page.
|
Field or Control |
Description |
|---|---|
|
Lockdown Options |
Select the lockdown option. The available options are:
|
|
Approver User List |
Add an approver. The approver is synchronized with the Approval Workflow Engine (AWE) setup. For more information about defining user lists, see the User List Definition Page. |
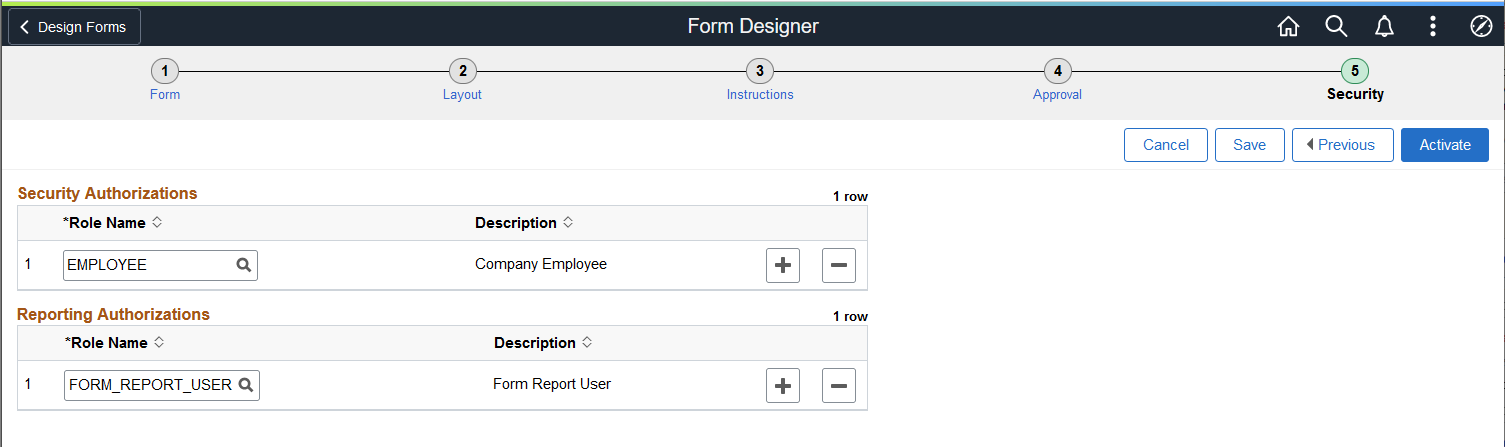
Use the Form Designer - Security page (EOFM_DSN_ROLE_FL) to define security and reporting authorizations for the form.
Navigation:
This example illustrates the fields and controls on the Form Designer - Security page. You can find definitions for the fields and controls later on this page.
Note: The Form Reporting feature is currently used by FSCM and HCM products.
|
Field or Control |
Description |
|---|---|
|
Role Name (Security Authorizations) |
Authorize access to the form by adding a security role. Only users associated with the role can access the form. |
|
Role Name (Reporting Authorizations) |
Authorize access to form data in Query Manager by adding a reporting role. Only users associated with the role can access the form data in Query Manager. For more information about Query Manager, see the PeopleTools Query documentation. |
|
Activate |
Click to activate the form. When you activate a form, Fluid Form Builder generates a runtime SQL view for Query Manager that is based on the form data. Views are automatically added to the Query Security tree under the EO_FORM_REPORT node. For more information about Query Manager, see the PeopleTools Query documentation. |
Use the My Forms page (EOFM_CONTAINER_FL) to access forms available to you, based on security authorizations role.
Navigation:
This example illustrates the fields and controls on the My Forms page. You can find definitions for the fields and controls later on this page.

Field or Control |
Description |
|---|---|
View By |
Select to sort the forms by the Approval status or Form names. The available options are: Form and Status. |
Fill out a new form |
Select to view available forms and fill out a form. |
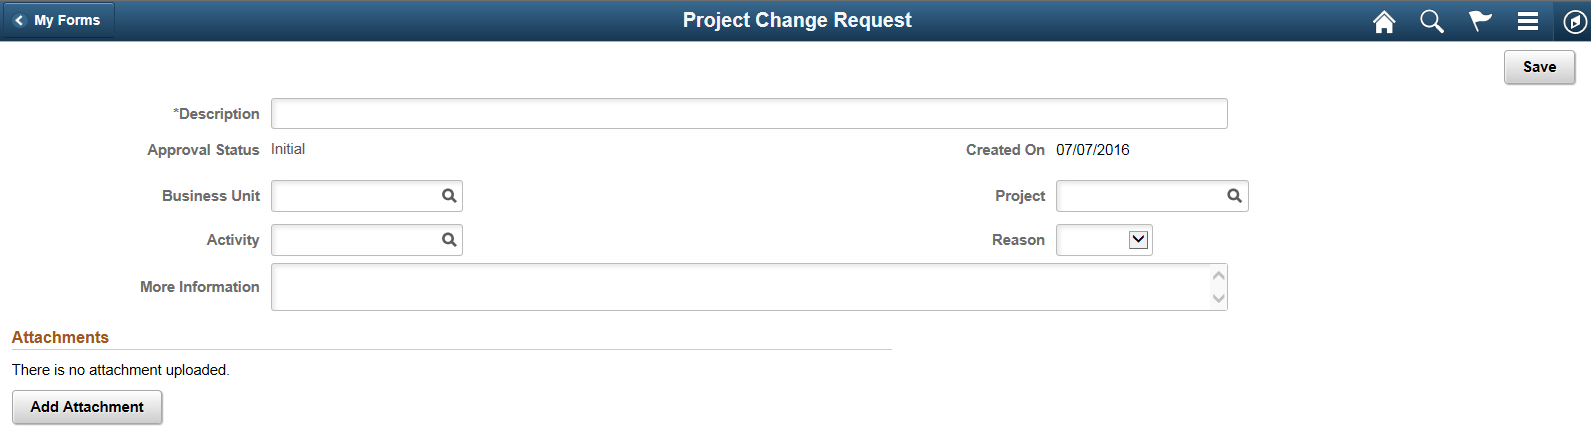
Filling Out a New Form
Fill out a form that is available to you.
Navigation:
On the My Forms page, select a form (row), then the Fill out a new form button.
This is an example of a form (EOFM_FORM_FL) when accessed from the My Forms page, Fill out a new form
|
Field or Control |
Description |
|---|---|
|
Add Attachment |
Click to add an attachment to the form. |
|
Preview Approval |
Click to view the approval hierarchy. The Preview Approval button appears only when you save the form. |
|
Submit |
Click to submit the form. The Submit button appears only when you save the form. |
Use the Pending Approvals - Form page (EOAWMA_MAIN_FL) to view a list of all Fluid forms that are pending your approval. From here you can access individual forms and approve or deny the form.
Navigation:
Approvers can login and click the Approvals tile on the home page to access the form to be approved. Click the Forms link on the Fluid Approvals page to list the forms to be approved or reviewed.
This example illustrates the fields and controls on the Pending Approvals - Form page.
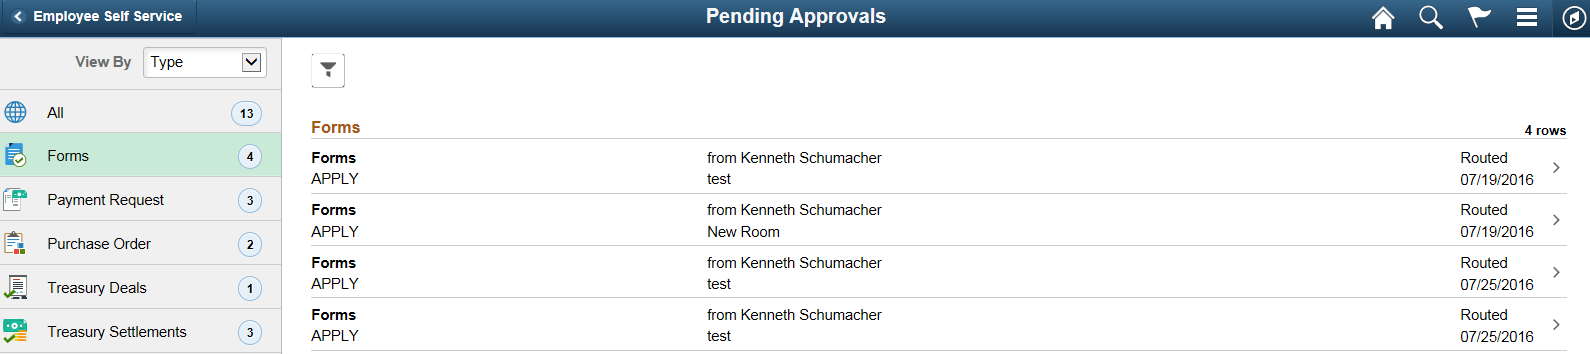
Click the required form link on the Fluid Approvals page to access the form to be approved or reviewed. Click the Approve or Deny button and enter any comments if required to submit the form and complete the approval process.
Note: Only Fluid forms are supported for fluid approvals.
For more information about approvals, see Using the PeopleSoft Fluid User Interface to Work with Approvals