Creating Project Trees
|
Page Name |
Definition Name |
Usage |
|---|---|---|
|
PSTREEDEFN |
Create and define a new project tree structure. |
|
|
PSTREEROOTLEVELS |
Define the levels and root node of the tree. |
|
|
Tree Levels Page |
PSTREELEVEL |
Add tree levels to a specific tree. To access this page, click Add Level in the Enter Root Node for Tree page. |
|
Tree Level Information Page |
TREE_LEVEL_PIA |
Add status and description details to a tree level. To access this page, click View Detail in the Enter Root Node for Tree page. |
To create a new tree:
Define the properties of the tree.
Add and define the levels of the tree and the root node.
Project trees can also be created, appended, and updated using data from third-party applications.
Use the Tree Definition and Properties page (PSTREEDEFN) to create and define a new project tree structure.
Navigation:
. Click Create New Tree in the Tree Manager component search page.
Click Tree Definition in the Tree Manager page.
This example illustrates the fields and controls on the Tree Definition and Properties page. You can find definitions for the fields and controls later on this page.
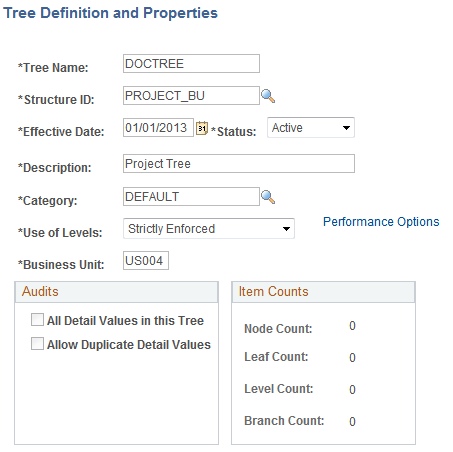
To create a new project tree, begin by defining its unique fields.
Field or Control |
Description |
|---|---|
Structure ID |
Enter PROJECT_BU (project business unit) as the structure ID. This designates that this is a project tree and identifies the page and record definitions associated with this tree. |
Category |
Select PROJECT. |
Use of Levels |
Select Strictly Enforced to ensure that the ranking of a project node in the tree hierarchy is tied to its horizontal position in the tree. This ensures that a node at one level can be rolled up into a node at a higher level. |
Business Unit |
Enter a business unit. The business unit that you enter must be the same one as the projects that you add to the tree. |
Use the Enter Root Node for Tree page (PSTREEROOTLEVELS) to define the levels and root node of the tree.
Navigation:
Click OK in the Tree Definitions and Properties page after defining the properties for a new tree.
This example illustrates the fields and controls on the Enter Root Node for Tree page. You can find definitions for the fields and controls later on this page.
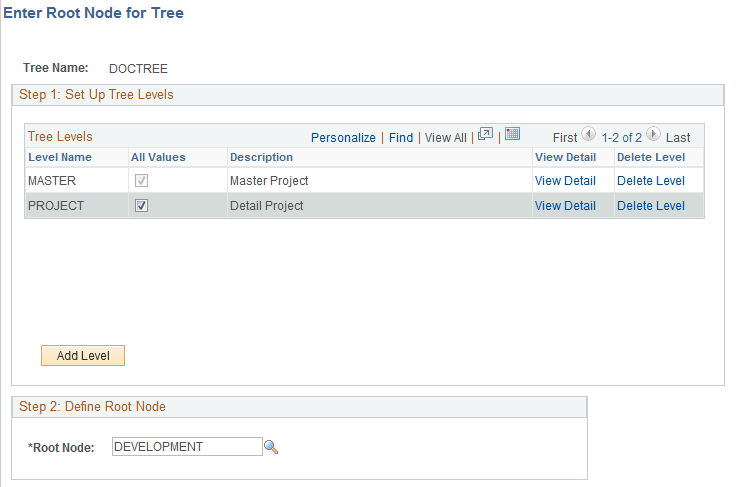
You must add the first tree level before you add any nodes to a tree. After you add this first level, you can add a project node or additional levels. Add each level below the previous level.
To add levels and project nodes:
Access the Enter Root Node for Tree page.
Click Add Level.
On the Tree Levels page, enter a level name and click Save.
In the Enter Root Node for Tree page, click View Detail to further define the newly created level and click OK when finished.
The level name and description appear in the first row of the Enter Root Node for Tree page.
Create additional levels by repeating steps 1-4.
Once you have created all the necessary levels, enter the project ID in the Root Node field, then click OK. The PeopleSoft Tree Manager opens and enables you to add project nodes to the tree.
Note: Level descriptions are stored in the Tree Level table. If the level that you are adding has been used in other trees, the Description field in the Tree Level Definition page defaults to the description already specified for that level name. Changing the description here affects all trees using this level.
To help identify the level, you can view the description in your tree, as well as in various prompt lists (when inserting nodes, selecting detail values in reports, defining summary trees, and so on).
See PeopleTools: PeopleSoft Tree Manager