Third Party Integration of Leases
You can create pending leases by entering the lease details and financial terms to the interface tables. Validations are done to the data in the interface tables and pending leases are created if there are no errors. You can also activate multiple leases at once.
The PeopleTools Excel to Component Interface utility enables you to enter the lease transactions into the interface tables.
See also PeopleTools: Component Interfaces
|
Page Name |
Definition Name |
Usage |
|---|---|---|
|
RE_RUN_LS_IMPORT |
Process the leases in the interface tables. |
|
|
RE_INTFC_LS |
Review interface lease details and financial term details. |
|
|
RE_INTFC_TRM |
Review and make corrections to lease term details. |
|
|
RE_INTFC_OTHR |
Review and make corrections to lease details. |
|
|
RE_INTFC_ERR |
Review error details from the Excel to Component Interface import process. |
|
|
RE_LS_MASS_ACT |
Activate multiple leases at once. |
|
|
RE_RUN_MAS_LOG_SEC |
View processing and validation error information for the lease activation en mass process. |
The PeopleSoft system provides a template to import and add lease details and financial data from the spreadsheet to Lease Administration tables with the Excel to Component Interface utility.
Here is an overview of the steps to add lease information using import data from an Excel spreadsheet:
Connect to the database by entering the database connect information on the template Connect Information tab.
You need the PeopleSoft web server name, port, PeopleSoft Pure Internet Architecture or portal name, and default local node.
Select the predefined component interface (RE_LS_IMPORT_CI) to populate the template on the Template tab.
Select the fields that are used to enter data.
Select New Data Input to format the Data Input tab with the selected data fields for the component interface.
Input data for all identified and selected record levels on the Data Input tab.
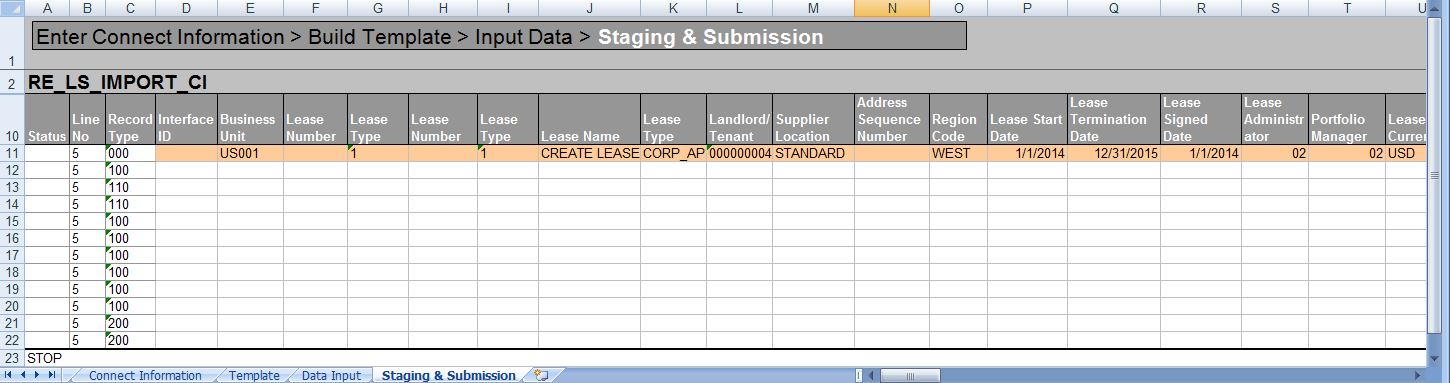
Stage the input data to the Staging & Submission tab.
Review the data that is ready for staging on the Staging & Submission tab.
Submit data for error-checking and transmission to the database, if successful.
Errors are returned to the Staging & Submission tab; select the Post Results option to return processing errors to the Data Input tab for reworking.
Submit data to the PeopleSoft Lease Administration database as needed to successfully transmit all input data to Lease Administration.
Preview the lease and financial terms data, using the menu option for reviewing lease interface.
Run the Process Lease Interface process to add leases to the database.
This example illustrates the fields and controls on the Example of Input Data page – Staging & Submission sheet.
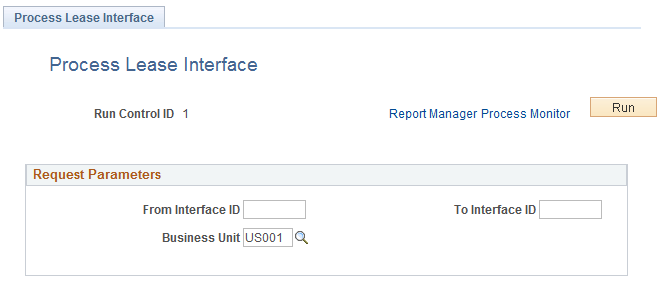
Use the Process Lease Interface page (RE_RUN_LS_IMPORT) to process the leases in the interface tables.
Navigation:
This example illustrates the fields and controls on the Process Lease Interface page. You can find definitions for the fields and controls later on this page.
Field or Control |
Description |
|---|---|
From Interface ID and To Interface ID |
Enter the interface IDs to process the interface transactions from the interface tables. Note: The process selects only the interface transactions with processing status as New. |
Use the Review Lease Interface - Lease Details page (RE_INTFC_LS) to review and update the transactions in error status. You can also use this page to create Interface Leases.
Navigation:
This example illustrates the fields and controls on the Review Lease Interface - Lease Details page.
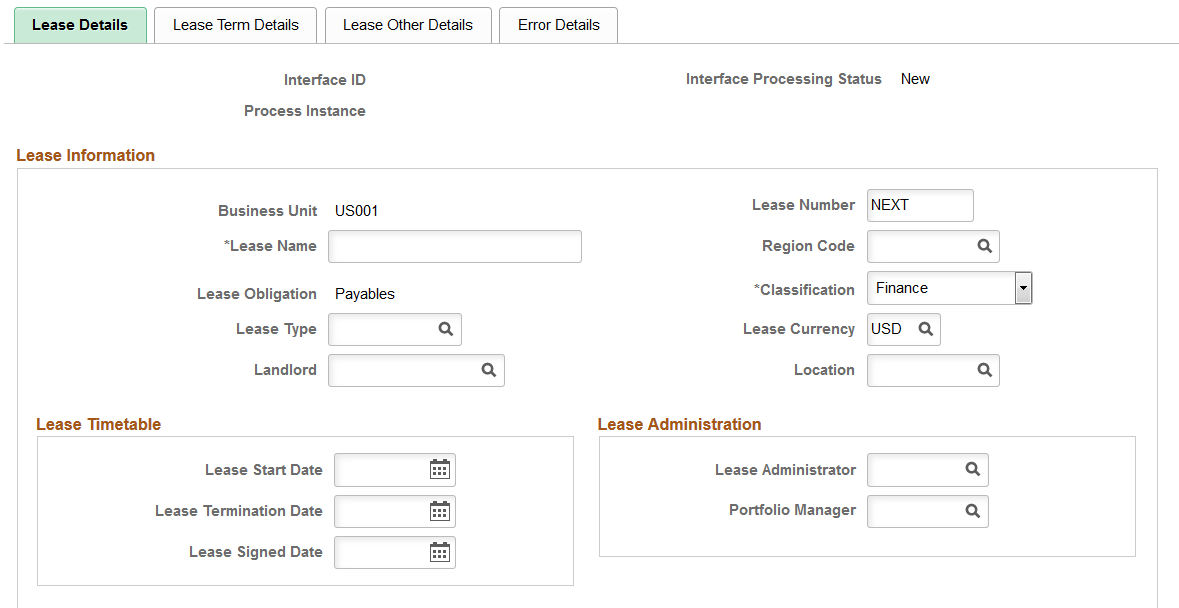
This example illustrates the fields and controls on the Review Lease Interface - Lease Details page.
Field or Control |
Description |
|---|---|
Lease Obligation |
Select Payables or Receivables from the drop down list. |
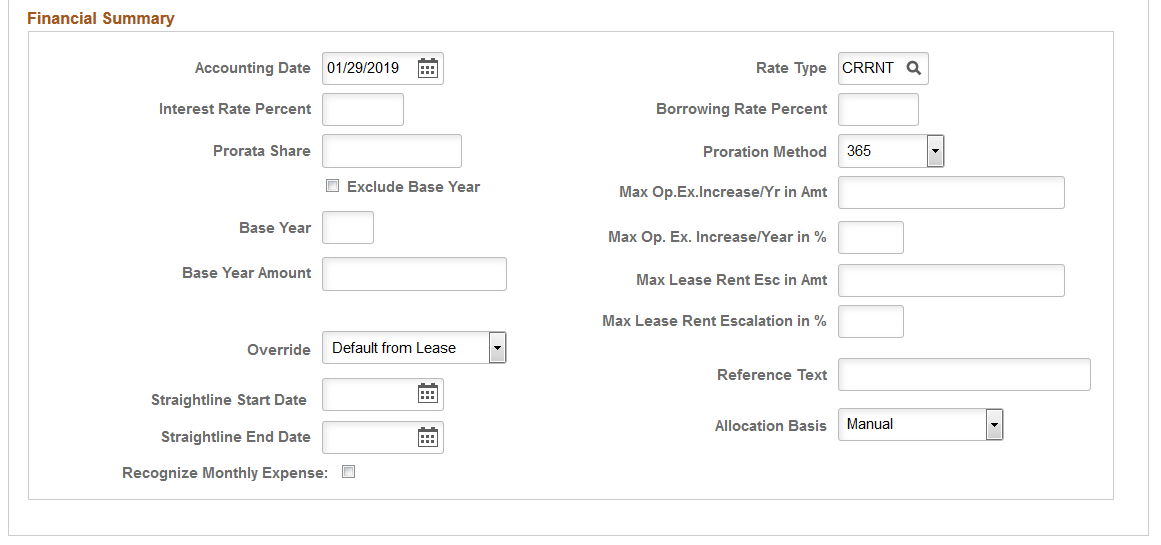
Recognize Monthly Expense |
Select this option to create monthly lease interest accounting entries for finance lease assets and monthly right-of-use (ROU) amortization for operating lease assets. This option is available only when you select the Apply ASC 842, IFRS 16 and GASB 87 Accounting option on the Installation Options - Lease Administration page. |
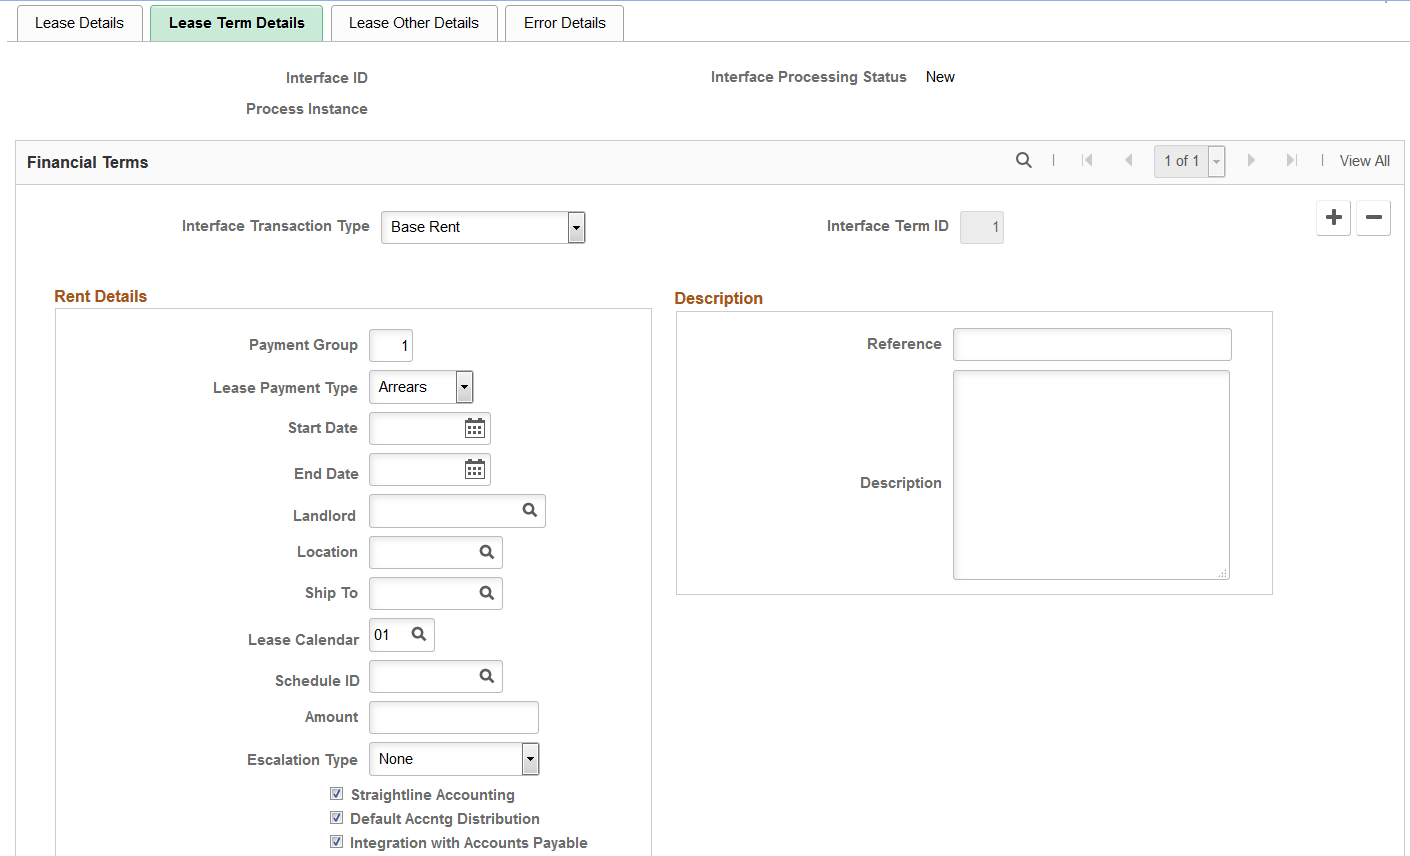
Use the Review Lease Interface - Lease Term Details page (RE_INTFC_TRM) to review and make corrections to lease term details.
Navigation:
This example illustrates the fields and controls on the Review Lease Interface - Lease Term Details page.
Field or Control |
Description |
|---|---|
Interface Transaction Type |
Select the type of interface transaction. The available options are:
|
Interface Term ID |
Identifies each Lease Term and is unique for each financial term like Base Rent/ Opex/ Misc Rent. All the transactions that relate to a particular financial term have the same Interface Term ID. |
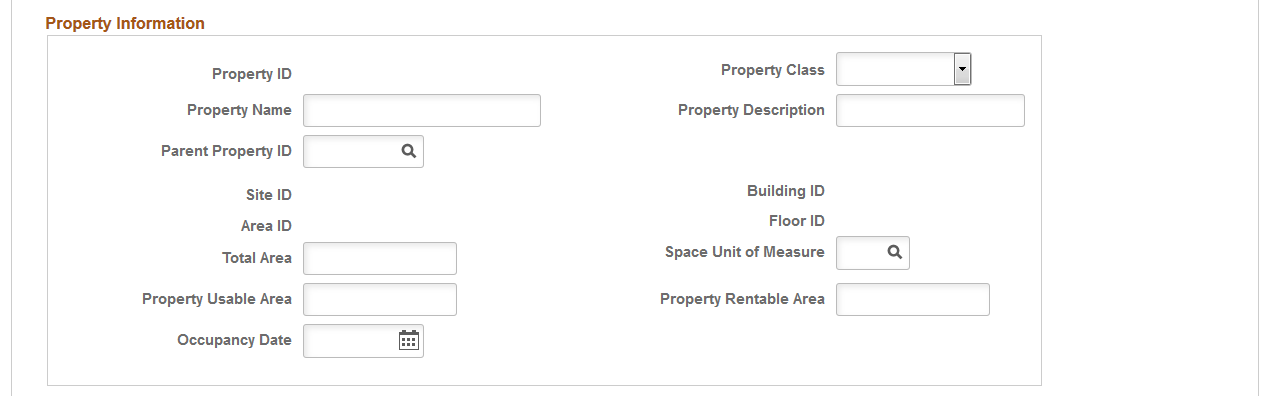
Use the Review Lease Interface - Lease Other Details page (RE_INTFC_OTHR) to review and make corrections to lease details.
Navigation:
This example illustrates the fields and controls on the Review Lease Interface - Lease Other Details page.
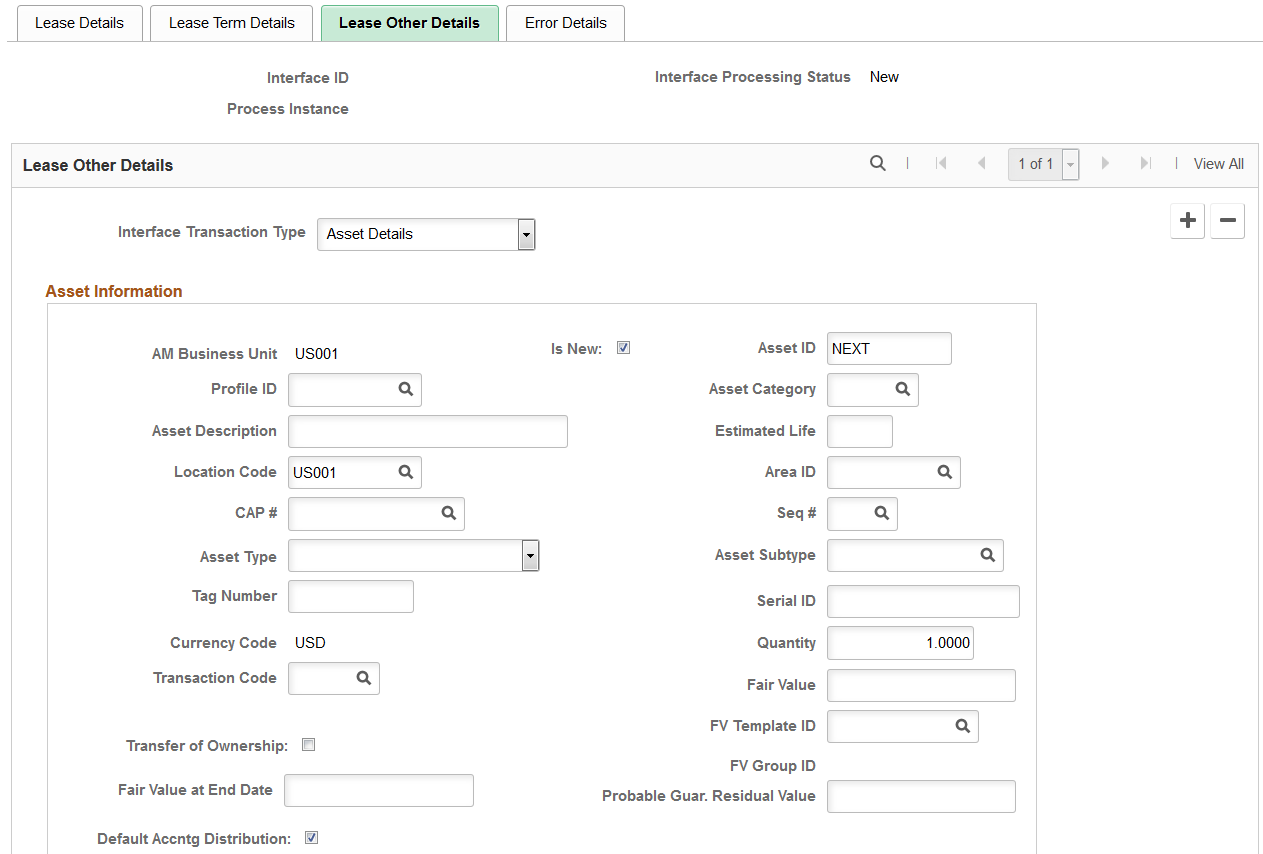
This example illustrates the fields and controls on the Review Lease Interface - Lease Other Details page.
Field or Control |
Description |
|---|---|
Interface Transaction Type |
Select the type of interface transaction. The available options are:
|
Default Accounting Distribution |
Select this option to use the default accounting distribution. If you deselect this option, the Accounting Distribution grid appears, where you can modify distribution values. |
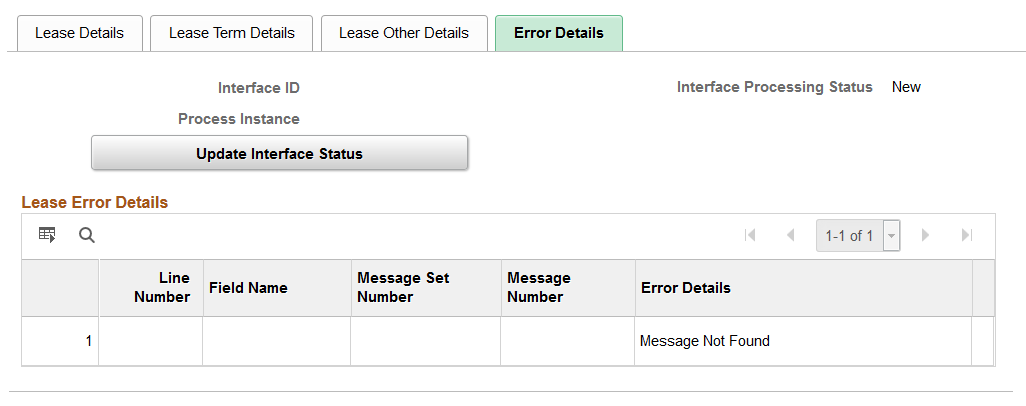
Use the Review Lease Interface - Error Details page (RE_INTFC_ERR) to review error details from the Excel to Component Interface import process.
Navigation:
This example illustrates the fields and controls on the Review Lease Interface - Error Details page.
Field or Control |
Description |
|---|---|
Update Interface Status |
Click the Update Interface Status button to set the processing status to New after reviewing and correcting the errors to enable the lease interface process to process the lease again. |
Use the Lease Activation en Masse page (RE_LS_MASS_ACT) to activate multiple leases at once.
Navigation:
This example illustrates the fields and controls on the Lease Activation en Masse page.
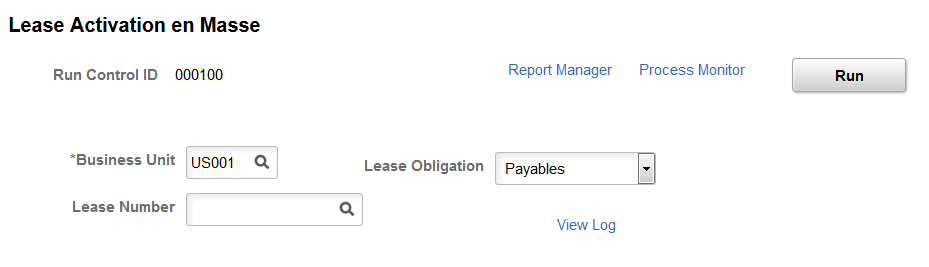
This page enables you to activate multiple leases at once by business unit or lease obligation type. You can also activate an individual lease by lease number.
Use the Lease Activation en Masse Log page (RE_RUN_MAS_LOG_SEC) to view processing and validation error information for the lease activation en mass process.
Navigation:
This example illustrates the fields and controls on the Lease Activation en Masse Log page.
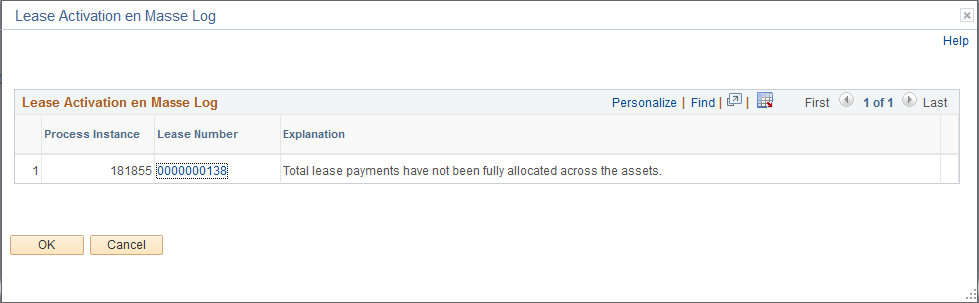
The log only displays leases that were not activated due to a validation error. If a lease is activated without an issue, it does not appear in the log.
The Lease Number link enables you to access the Maintain Lease - General page.