Setting Up Resource Pools
Use the Pool Administrators component (RS_POOL_ADM) to add pool administrators. Use the Create Resource Pools component (RS_RES_POOL) to create and modify resource pools.
This topic discusses how to set up resource pools.
|
Page Name |
Definition Name |
Usage |
|---|---|---|
|
RS_POOL_ADM |
Define resource pool administrators. |
|
|
RS_RES_POOL |
Add or modify resource pools. |
|
|
RS_POOL_HRCHY |
Establish the resource pool hierarchy. |
Use the Set Up Pool Administrators page (RS_POOL_ADM) to define resource pool administrators.
Navigation:
Field or Control |
Description |
|---|---|
Pool Administrator Id |
Add at least one pool administrator during implementation to create pools and the pool hierarchy. You can choose any operator ID in the system. You can define any number of pool administrators, but it is recommended that you define no more than three. |
Use the Resource Pool page (RS_RES_POOL) to add or modify resource pools.
Navigation:
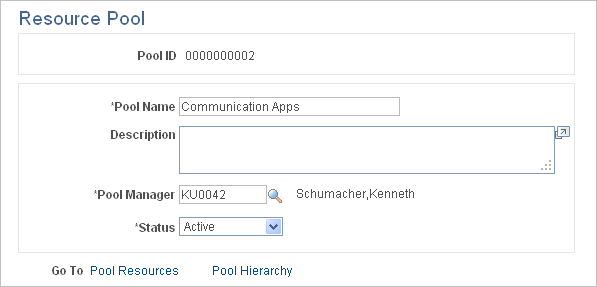
This example illustrates the fields and controls on the Resource Pool page. You can find definitions for the fields and controls later on this page.
Field or Control |
Description |
|---|---|
Pool ID |
Displays the system-generated pool identifier. This key field is assigned sequentially when you add a pool. |
Pool Name |
Enter a name for the pool, which you can modify when necessary. |
Pool Manager |
Enter the pool manager. You can select any employee in the system, even if the employee is not established as a resource in PeopleSoft Resource Management. Pool managers can receive workflow to approve assignments or allocations for resources in their respective pools. |
Status |
Select Active or Inactive. Pool managers can change the status of their own pools and any child pools. You can change inactive pools to an active status at any time. Only active pools appear in the pool hierarchy. |
Pool Resources |
Click to access the Pool Resources - Manage Pool Resources page to view and modify the resources of the selected pool. |
Pool Hierarchy |
Click to access the Pool Hierarchy page to establish the pool organization and relationships. |
Use the Pool Hierarchy page (RS_POOL_HRCHY) to establish the resource pool hierarchy.
Navigation:
This example illustrates the fields and controls on the Pool Hierarchy page. You can find definitions for the fields and controls later on this page.
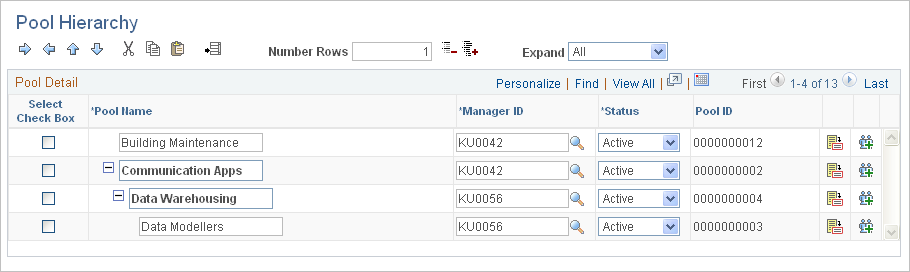
Select the check box in the first column of the grid to identify the row that you want to modify. You can indent or outdent the selected row, move the selected row up or down in the hierarchy, or add rows below the selected row.
Field or Control |
Description |
|---|---|
|
Click the Indent icon to indent a row. This action makes the previous row a parent pool. You can not indent on the first pool in the list, and you can not indent more than one level from its parent row. Indenting a summary pool also indents all of its child pools. |
|
Click the Outdent icon to outdent a pool, which moves the selected row down one level. You cannot outdent a row that is already at the most outdented level. Outdenting a summary pool also outdents all of its children. Outdenting a row with siblings makes the selected row the parent of its siblings; the selected pool becomes a parent pool. |
|
Click the Move Up icon to move a row above the previous row. If the selected row is a parent pool, all of its child pools also move up. The pool that you move up inherits the more indented hierarchy level of the pool above and below the moved pool. |
|
Click the Move Down icon to move a pool below the following row. If the selected row is a parent pool, all of its child pools also move down. The pool that you move down inherits the higher hierarchy level of the pool above and below the moved pool. |
Number Rows |
Enter the number of rows that you want to insert below the selected row and click the Add icon to add the rows. The default number of rows is 1. |
Pool Name |
Enter the pool name. Only a pool administrator and the pool manager can modify this field. Pool names are indented or outdented based on their relative hierarchical position. |
Manager ID |
Enter the pool manager's employee ID. Only a pool administrator can modify this field. |
Status |
Select Active or Inactive as the pool status. Note: When you inactivate a pool, the system checks to see if any open resource requests specify the pool that you want to inactivate. Inactivating the pool triggers the system to remove the pool from all resource requests with a status of Open that specify the pool. |
|
Click the View Pool Details icon to access the Resource Pool page and modify pool details. Only the pool manager, the administrator, or a pool manager from a higher pool in that branch of the hierarchy can access and modify this page. |
|
Click the View Pool Resources icon to access the Pool Resources - Manage Pool Resources page to view and update the selected pool's resources. Only the pool manager, the administrator, or a pool manager from a higher pool in that branch of the hierarchy can access and modify this page. |


