Entering and Reviewing Conversations
This section provides an overview of conversation components, lists common elements, and discusses various steps involved to handle conversations.
|
Page Name |
Definition Name |
Usage |
|---|---|---|
|
CONVER_DATA1_SS |
Enter details for a conversation, including review information, reference amount, keywords, and the customer contact. Enter multiple conversation entries for a conversation. |
|
|
CONVER_DATA2_SS |
Link a conversation with a reference, such as an invoice, purchase order, or receivables item. |
|
|
Item Activity Page |
ITEM_DATA2 |
Review or update details for a receivables item. See References Page |
|
CONVER_DATA5_SS |
Add, view, or delete conversation attachments, such as Microsoft Word™ documents, Microsoft Excel™ spreadsheets, and images. |
|
|
CONVER_DATA7_SS |
Define a payment plan and generate installments. |
|
|
PT_WF_NOTIFY |
Create an email notification with a link to the conversation. |
|
|
COPY_PLAN |
Copy existing payment plan information and apply it to a new plan. |
|
|
SEL_ITEM_PLAN |
Select items to include in the payment plan. |
|
|
RUN_AR38000 |
View detailed payment plan information for a customer. |
PeopleSoft provides several components to access the conversation pages. Each component provides different search criteria to help you locate conversation entries. This table describes the components for each menu option:
|
Menu Option |
Description |
|---|---|
|
Update Conversations |
Use to create new conversations and to update existing ones. This component enables you to search by customer, conversation date, status, and a reference linked to the conversation, such as an invoice, receivables item, or purchase order. |
|
Associate Keywords |
Use to review or update conversations. This component enables you to search by customer, conversation status, and the keyword that is assigned to the conversation. |
|
Define Follow Up Actions |
Use to review or update conversations. This component enables you to search by customer, conversation status, and a follow-up action that is assigned to the conversation. |
|
Select Conversation to Review |
Use to review or update conversations. This component enables you to search by customer, conversation date, and status. |
|
Need Supervisor Review |
Use to review or update conversations. This component enables you to search by customer, conversation date, status, the supervisor review status, and the user ID of the individual who should review the conversation. |
Field or Control |
Description |
|---|---|
Status |
Select the current status for the conversation. Values are: Closed: Select when you complete the dialog with the customer. This status is informational only. You can change a closed conversation. New: The system automatically assigns this when you create a new conversation, before anyone reviews or responds to it. Open: Select when you review or respond to a new conversation. |
Date |
View the date that you entered the conversation. |
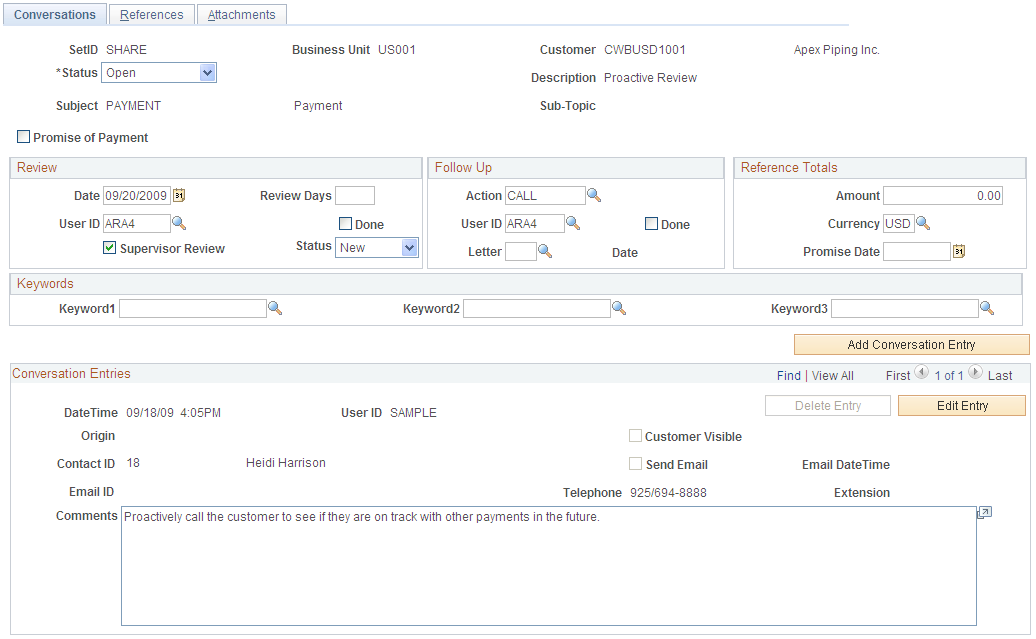
Use the Conversations page (CONVER_DATA1_SS) to enter details for a conversation, including review information, reference amount, keywords, and the customer contact.
Enter multiple conversation entries for a conversation.
Navigation:
Numerous other navigation paths are available for this page.
This example illustrates the fields and controls on the Conversations page, with the Promise of Payment check box deselected. You can find definitions for the fields and controls later on this page.
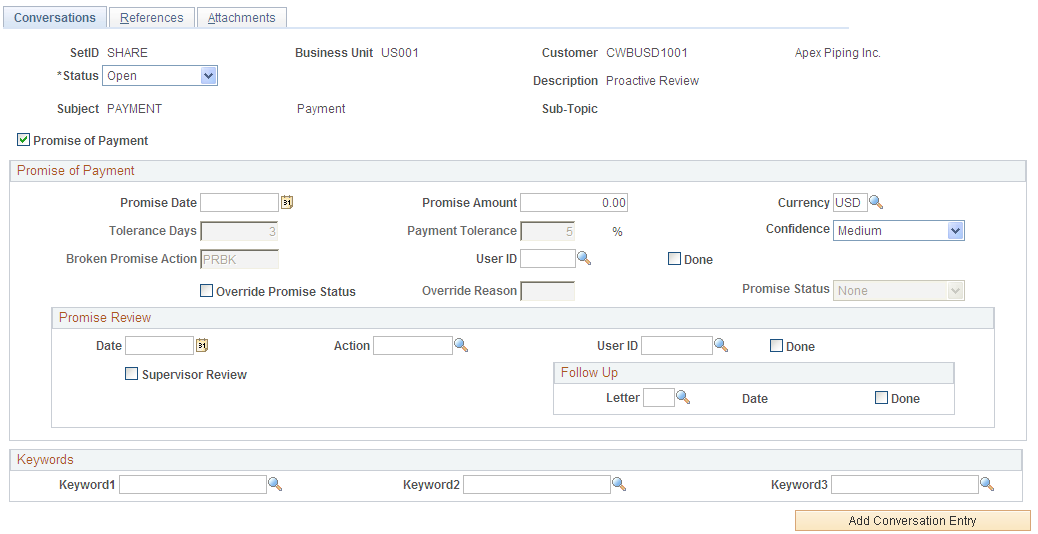
This example illustrates the fields and controls on the Conversations page, with the Promise of Payment check box selected (1 of 2). You can find definitions for the fields and controls later on this page.
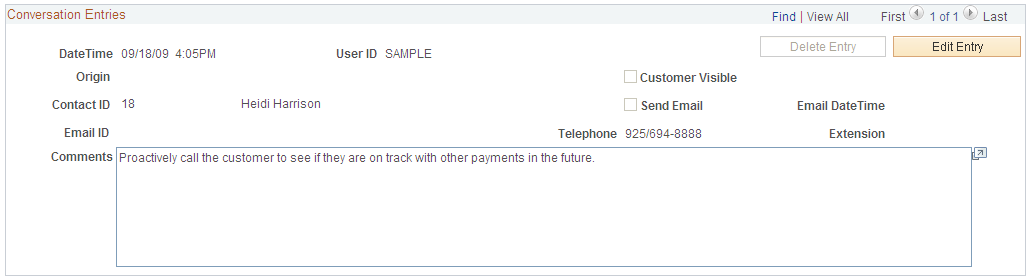
This example illustrates the fields and controls on the Conversations page, with the Promise of Payment check box selected (2 of 2). You can find definitions for the fields and controls later on this page.
Field or Control |
Description |
|---|---|
Attachments Exist |
Click to access the Attachments page, where you can view an attached file. This link is available only if the conversation has existing attachments. |
Status |
Displays the current status of the conversation. The conversations statuses are:
|
Description |
Enter a description of the conversation to help identify a conversation when searching for conversations. |
Subject and Sub-Topic |
(Optional) Select a subject and subtopic from the available options that you set up on the Conversation Subject Topics page and the Conversation Subject page. This detail helps you identify the conversation when searching for conversations. |
Promise of Payment |
Select this check box to indicate that this conversation is a promise date conversation. The promise status will be set to Open. Once a conversation is marked as a promise of payment conversation, the collections analyst must enter a promise date and the amount that the customer promised to pay in order to save the conversation. A promise conversation, once saved, cannot be converted back to a regular conversation. The selection of this check box determines the group boxes that display on the Conversations page.
|
Promise of Payment
Field or Control |
Description |
|---|---|
Promise Date |
Enter the date that the customer promised the collections analyst to make the payment. This is a required field if you selected the Promise of Payment check box. |
Promise Amount |
Enter the amount that this customer has promise to pay on the selected Promise Date. This is a required field if you selected the Promise of Payment check box. |
Currency |
Displays the currency associated with the selected customer. You can override this currency. |
Tolerance Days |
Displays a default value, which is derived from the days that you entered on the Promise Date Options page for a Setid and customer or SetID and customer group. (Set Up Financials/Supply Chain, Product Related, Receivables, Credit/Collections, Promise Date Options) Tolerance days are used by the Condition Monitor to determine whether a promise has been kept, is still open, or has been broken. If you did not enter a value in this field on the Promise Date Options page, there will be no tolerance for promised payments that are late. The Condition Monitor will add the tolerance days to the promise date to determine if the promise has been kept or broken. |
Payment Tolerance |
Displays a default value, which is derived from the Payment Tolerance percentage that you entered on the Promise Date Options page for a Setid and customer or SetID and customer group. (Set Up Financials/Supply Chain, Product Related, Receivables, Credit/Collections, Promise Date Options) Payment tolerance percentage is used when a customer sends a payment for an amount that is less than the promised amount. This percentage Payment tolerance determines if the payment that is received from the customer, which is less than the promised amount, satisfies the promise. If the payment is not satisfactory, further action will be taken. |
Confidence |
Select the degree of confidence that you have that this customer will make this payment from one of these values:
|
Broken Promise Action |
If the Condition Monitor determines that a promise has been broken, it triggers the broken promise action. If the action is assigned to a specific user, an action item will be created for the broken promise user id that appears on this page. |
User ID |
Displays the userid of the user assigned to the broken promise action. You can override this field value. |
Done |
Select this check box indicate when a broken promise action has been completed and removed from the action list for this user. This indicates that the promise has been broken and closes the promise. |
Override Promise Status |
The promise status field is updated only by component logic or the Condition Monitor. You can override the promise date by selecting this check box, which this action will be recorded in the conversation record when it is saved. The user could override the override and thereby erase the record of a manual update. This is a corner case and will be acceptable. |
Override Reason |
Select your reason for manually overriding the promise status. |
Promise Status |
Displays a default status of Open when you create a conversation with a promise date. Condition Monitor updates this promise status as either Kept or Broken depending on the actions of the user. You must select the Override Promise Status check box to access this field. Once the field is enabled, you can select:
|
Promise Review
Field or Control |
Description |
|---|---|
Date |
Select a date to review this promise. |
Action |
Select a follow up action to perform based on a review of this promise. |
User ID |
Select the user id of the user that you want to assign to the selected review action. |
Done |
Select this check box when the action is completed. The user id assigned to the action selects this check box after completing the selected action. Once the user selects this check box, Condition Monitor will not create action items for the user id selected for the review. |
Supervisor |
Select this check box if the promise payment needs to be reviewed by a supervisor. If this check box is selected, this promise conversation will appear in the Supervisor Review Needed component. |
Status |
Displays a default value of New when you select the Supervisor Review check box. Select a status of either Incomplete or Reviewed depending on the actions of the supervisor. |
Follow Up |
Refer to Follow Up section in this topic. |
Review
Field or Control |
Description |
|---|---|
User ID |
View an ID, which is the user ID by default, when you enter either a number of days or a date. You can change the user ID of the reviewer if necessary. |
Done |
Select when the review is complete. When you select the Done check box in the Review region and there is an associated action list item for the conversation, the system automatically sets the action to complete. The action can be verified on the Action History page (Accounts Receivable, Customer Accounts, Customer Information, Account Overview, Customer Action, and click the Action History link). Note: The eBill Payment-generated online actions (ALRT, CALL, and FEBN) do not have a corresponding active Done check box on the Conversations page, as is normally seen in system-generated actions. An eBill customer may have multiple open conversation entries that require separate responses. |
Supervisor Review |
Select to create an action for the individual whose user ID you entered in the User field. If you have Receivables, the Condition Monitor process creates the action the next time that you run the process and sends the user notification. |
Date and Review Days |
Enter either a date in the Date field or the number of review days in the Review Days field to indicate the period in which a review should take place. If you enter a Review Days value, the Date field will show the current date plus the number of review days. |
Status |
Select a status for the review. Values are New, Incomplete, and Reviewed. This field is available only if you selected Supervisor Review. |
Follow Up
Field or Control |
Description |
|---|---|
Action |
Select the type of follow-up action for the customer, such as CALL or VERIFY. When you press tab to exit this field, the system populates the User ID field with the user ID, and the Done check box becomes available so that you can specify whether the task is complete. You define follow-up actions on the Follow-Up Action page. If you have Receivables, you can define rules for the Condition Monitor process to create an action on the customer action list for the follow-up action and to send a notification to the owner who is specified in the rule. |
User ID |
Enter the user ID of the person who creates the follow-up letter. |
Done |
This option is selected by the Follow Up Letter process (AR_FOLLOWUP) when all items that are associated with a correspondence are paid and the letter is printed. |
Letter |
If you are responsible for receivable activities, you can follow up a conversation by mail. Select F for the letter code. The system marks it as Done when it creates the letter. You create the letters by running the Follow Up Letters Extract process (AR_FOLLOWUP) and printing the Follow Up Letter report (ARX33004). Note: To print the standard text within a follow-up letter, you must enter a promise amount, a promise date, and a review date on the Conversations page. |
Date |
View the date that you created the follow-up letter. |
Reference Amount
Field or Control |
Description |
|---|---|
Amount |
Enter the amount associated with the referenced items for this conversation. This is an open field because all items being referenced in the conversation can be different that all outstanding items. In addition, the currency can be changed and the field is used for forecasting. Therefore, it is up to the user and the business process to determine how to populate the amount and currency fields. |
Currency |
Enter the currency for the value in the Amount field. The system automatically populates this field with the customer's base currency. You can change this value if the promise amount currency and the base currency are different. |
Promise Date |
Enter the date by which you expect to receive payment. When a value is present in this field, the system no longer updates the Amount field if you change the referenced items. |
Confidence |
Select a confidence level for receiving the payment by the promise date. Values are High, Medium, and Low. |
Keywords
Field or Control |
Description |
|---|---|
Keyword1, Keyword2, and Keyword3 |
Enter up to three keywords to categorize conversations for easier retrieval. You define keywords on the Keywords page. |
Conversation Entries
Add conversation entries for each conversation that you have with a customer and for each issue that is related to a conversation.
Field or Control |
Description |
|---|---|
Origin |
Displays the origin of the conversation entry. If the conversation entry is generated because a customer creates a Contact Us note in eBill Payment, the origin shows eBill. If the conversation entry is created in Receivables, the origin shows Internal. You must have eBill Payment installed to see this field. |
Add Conversation Entry |
Click to add a new row to the Conversation Entries scroll area. |
Contact ID |
Enter the customer contact information to record with whom you spoke. When you move out of the field, the system automatically populates the Telephone and Extension fields based on the information that you entered on the Contact Phone and Type page. |
Send Email |
Select to send a notification by email, upon saving the conversation entry, to the Email ID associated with the Contact ID. After sending the notification, the system deselects the Send Email check box. When you make updates to the same conversation entry in the future, you can opt to send an email notification at that time. You must have eBill Payment installed to see this field. You must select the Customer Visible check box and enter a Contact ID value for this field to be active. |
Customer Visible |
Select if you want self-service users (customers, brokers, and salespeople) to view the conversation on the Receivables self-service pages. |
Comments |
Enter the text that you want to record for the conversation. |
|
Click this icon to check the spelling of the comments entered. |
Delete Entry |
Click this button to delete a saved entry. The Delete Entry button is available only if the conversation entry was created through Receivables, the Visible check box is deselected, and the entry creator's user ID matches the user ID of the user deleting the entry. The button is inactive once you have assigned a Contact ID. In addition, you cannot delete or edit an entry that the customer created in eBill Payment. |
Edit Entry |
Click to edit existing comments. |

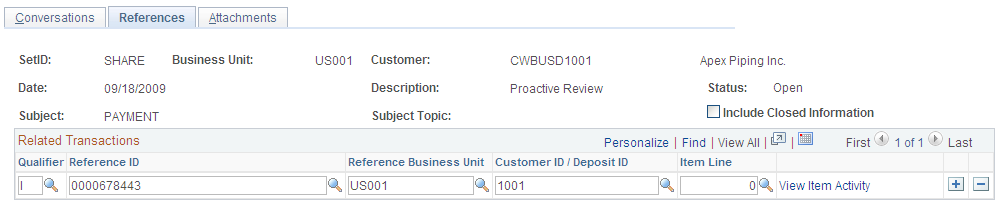
Use the References page (CONVER_DATA2_SS) to link a conversation with a reference, such as an invoice, purchase order, or receivables item.
Navigation:
Numerous other navigation paths are available for this page.
This example illustrates the fields and controls on the Update Conversations - References page. You can find definitions for the fields and controls later on this page.
Field or Control |
Description |
|---|---|
Include Closed Information |
Select to associate closed items in Receivables with the conversation. |
Qualifier |
Select the type of reference to link to the conversation. Depending on the selection, additional fields appear where you enter the reference information. Values are: BA: Enter a buying agreement ID. BI: Enter an invoice, business unit, and customer. CT: Enter a contract number, business unit, and customer. D: Enter a document number in the Reference ID field. I: Enter an item ID, business unit, and customer ID. Also enter an item line number if applicable. L: Enter a bill of lading in the Reference ID field. P: Enter a purchase order number in the Reference ID field. PY: Enter a payment ID in the Reference ID field and also prompt for the business unit and customer. QU: Enter a quote and prompt for an order number, business unit, and customer. RM: Enter an RMA number, business unit, and customer. SO: Enter a sales order number, business unit, and customer. |
View Item Activity |
Click to access the Item Maintenance component. Use the Item Activity page (ITEM_DATA2) to review or update details for a receivables item. This link is available only if you select I for the qualifier. |
Note: If you link items to conversations on the Item List page or on the Item Maintenance component and you have selected an item or multiple items, the system automatically populates the reference information.
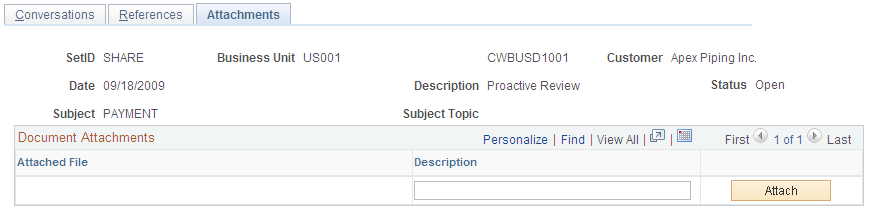
Use the Attachments page (CONVER_DATA5_SS) to add, view, or delete conversation attachments, such as Microsoft Word™ documents, Microsoft Excel™ spreadsheets, and images.
Navigation:
Numerous other navigation paths are available for this page.
This example illustrates the fields and controls on the Update Conversations - Attachments page. You can find definitions for the fields and controls later on this page.
Field or Control |
Description |
|---|---|
Attach |
Click to attach a file to a conversation. After you select a file by using the Browse field, click Upload. The file name appears in the Attached File field. Enter a description for the file, if needed. |
Field or Control |
Description |
|---|---|
Delete |
Click to remove a file attachment from the conversation. |
View |
Click to open the attached file. |
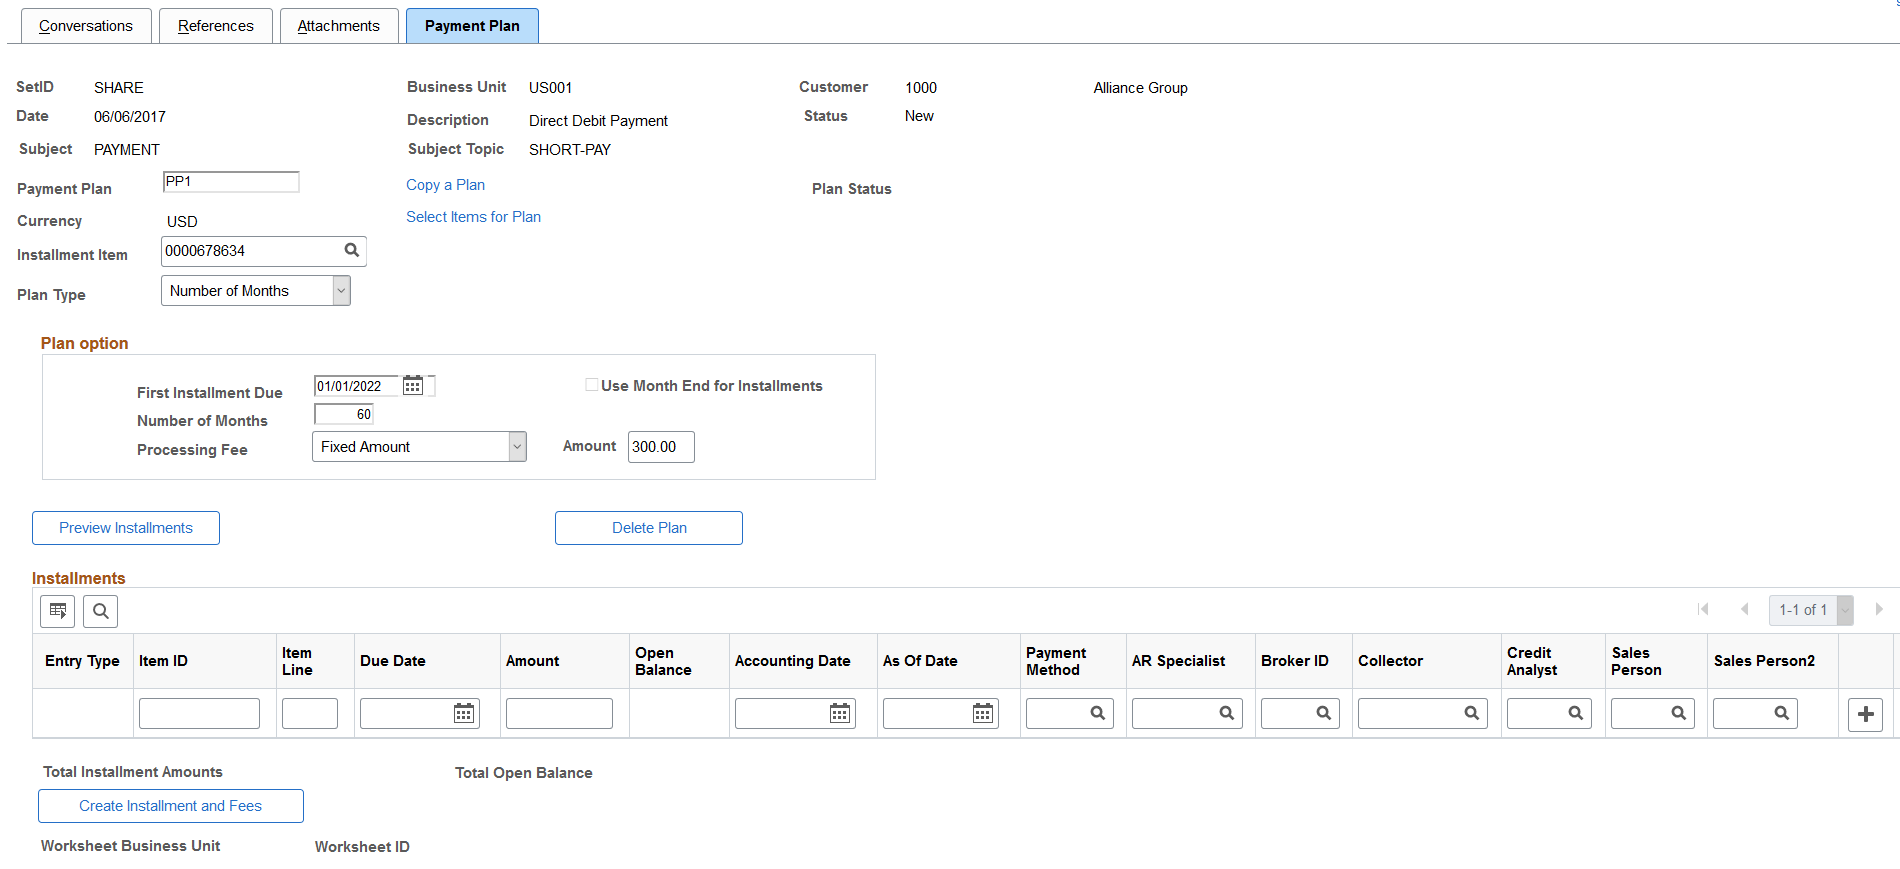
Use the Payment Plan page (CONVER_DATA7_SS) to define a payment plan and generate installments.
Navigation:
Payment Plan page
|
Field or Control |
Description |
|---|---|
|
Payment Plan |
Enter an ID for the payment plan. |
|
Copy a Plan |
Click the link to access the Copy a Plan page and copy existing payment plan information to apply to a new plan. |
|
Plan Status |
Displays the plan status. Values include:
|
|
Select Items for a Plan |
Click the link to access the Select Items for Plan page and select individual items to include in the payment plan. |
|
Installment Item |
Enter an installment item ID for the plan. |
|
Plan Type |
Select a payment plan type. Values include:
|
Plan Option
|
Field or Control |
Description |
|---|---|
|
First Installment Date |
Select a date for the first installment of the payment plan. Note: This field does not display when you select Custom payment plan type. |
|
Use Month End for Installments |
Select this option to create month end installments for the payment plan. Note: This field does not display when you select Custom payment plan type. |
|
Number of Months |
Enter the number of months to include in the payment plan. Note: This field does not display when you select Custom payment plan type. |
|
Processing Fee |
If you want to include a processing fee for the payment plan, select Fixed Amount or Percentage of Plan Balance. This field is optional. Note: This field does not display when you select Custom payment plan type. |
|
Amount/Percent |
Enter an amount or a percentage for the processing fee. |
|
Preview Installments |
Click this button to populate the Installments grid with monthly installment entries. The entries are created based on the plan type and other parameters you entered on this page. You can modify individual installment entries before you formally generate installment items (using the Create Installment and Fees button). |
|
Delete Plan |
Click this button to delete a payment plan. |
Installments
Use the Installments group box to enter or review installment plan information, such as Item ID, Due Date, Amount, and Payment Method.
When you select Custom plan type, you must enter installment plan information. When you select Fixed Monthly Amounts or Number of Months plan types and click the Preview Installments button, the installment plan information is populated automatically. You can still modify individual installment entries before you create them.
Click the Create Installment and Fees button to generate the installment and fee items based on the information in the Installments group box.
Note: Once you commit to generating the installment and fee items, you cannot reverse the action. With the exception of the Due Date and Plan Option fields, data on the page becomes display only. You cannot edit, insert, or delete installment rows.
Use the Send Notification page (PT_WF_NOTIFY) to create an email notification with a link to the conversation.
Navigation:
Click the Notify button on the Conversations, References, and Attachments pages.
Field or Control |
Description |
|---|---|
To, CC (copy), and BCC (blind copy) |
Enter the email addresses of the individuals to whom you want to send a URL for the conversation. The URL provides a link to the conversation. |
Message |
Enter text for the email message. |
Use the Copy a Plan page (COPY_PLAN) to copy existing payment plan information and apply it to a new plan.
Navigation:
Click the Copy a Plan link on the Payment Plan page.
Copy a Plan page
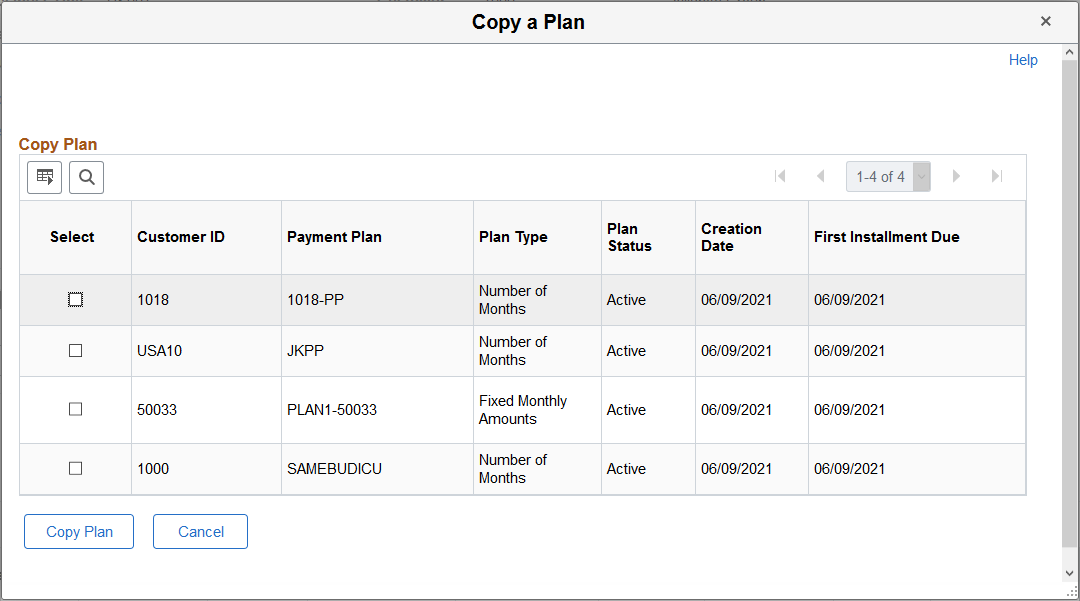
Use the Select check box to select an existing payment plan. Click the Copy Plan button to apply existing plan information to the new plan.
Use the Select Items for Plan page (SEL_ITEM_PLAN) to select the items you want to include in the payment plan.
Navigation:
Click the Select Items for Plan link on the Payment Plan page.
Select Items for Plan page
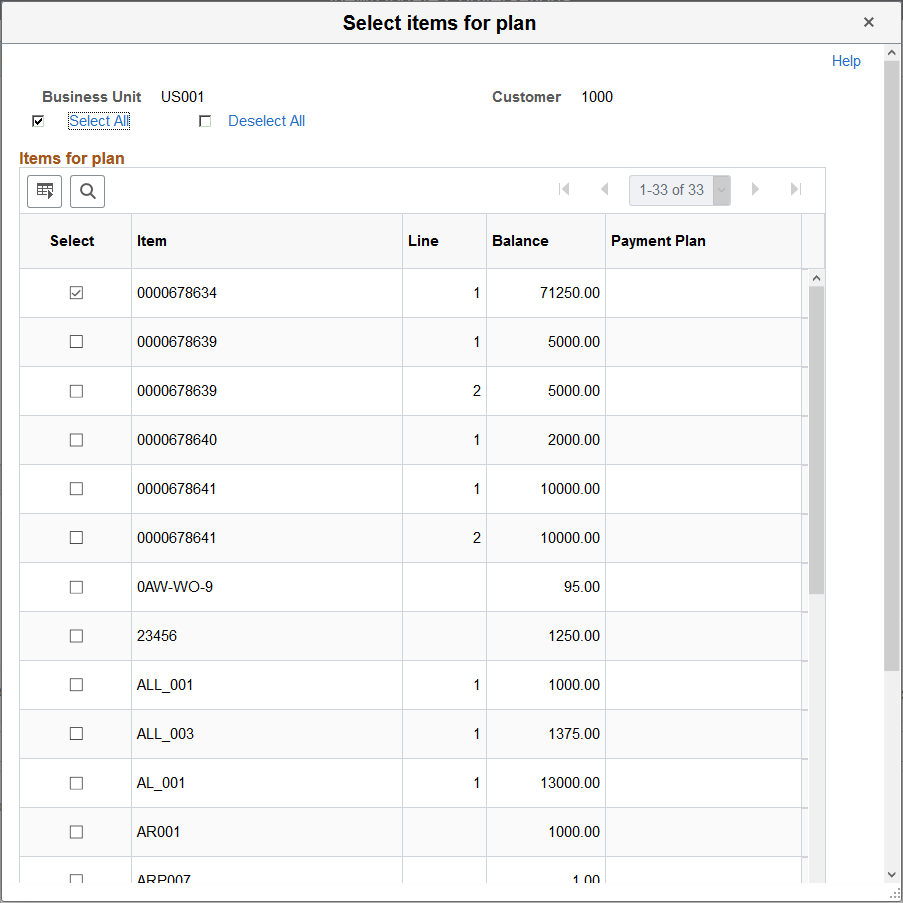
This page displays available items from the selected business unit, along with Item Line, Balance, and Payment Plan information. Use the Select check box to select items from the list. Click OK to include the items in the payment plan.
Note: Payment Plan source items are marked as conversation reference items for payment plan conversations. If you remove an item from a payment plan, that item is also removed from the conversation reference.
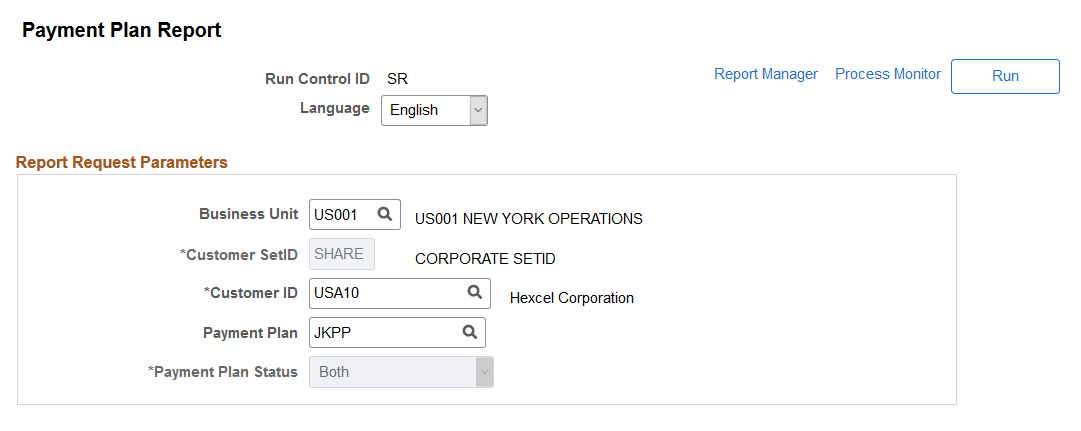
Use the Payment Plan Report page (RUN_AR38000) to view detailed payment plan information for a customer. The report provides a detailed view of items included in a payment plan and installments.
Navigation:
Payment Plan Report page
|
Field or Control |
Description |
|---|---|
|
Payment Plan |
Select a payment plan ID. If you leave this field blank, the report provides information for all payment plans for the customer. |
|
Payment Plan Status |
Select a payment plan status. Values are Active, Both, and Paid. |