Setting Up Public Access to Supplier Registration
This topic provides guidelines for setting up public access for supplier and bidder registration. All permission lists and roles referenced in this document are for informational purposes only.
In general, to set up public access to registration pages you must do the following:
Configure permissions for pages that a public user will need to access.
Create and test public supplier and bidder templates.
See also information about setting up email templates for external users.
To configure public access to registration pages:
Create a permission list that includes pages that need public access on the Permission Lists – Pages page ().
The following screen shot illustrates a permission list created on the Permission Lists – Pages page, where AUC_ADMINSTRATION is used for bidders and SUP_OB_MENU is used for suppliers. The permission list varies with each installation.
This example illustrates the fields and controls on the Permission Lists – Pages page for a sourcing guest.
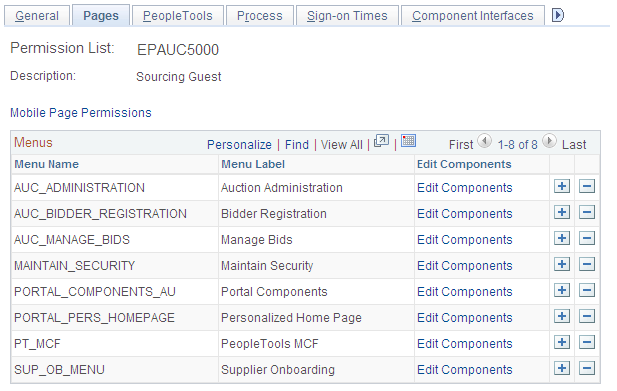
Note: All PeopleSoft portal components are needed for access.
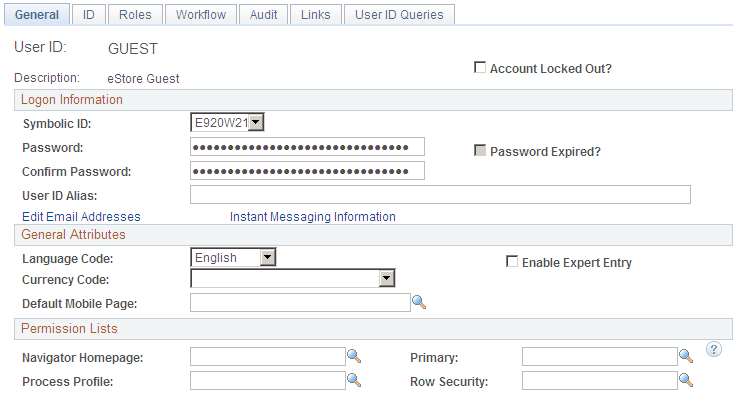
Create a user ID that can be assigned public access on the User Profiles – General page (). For detailed information about setting up permission lists and setting up security for user IDs and roles, see PeopleTools: Security Administration.
This example screen shot shows the attributes assigned on the User Profiles – General page:
This example illustrates the fields and controls on the User Profiles – General page for an eStore guest.
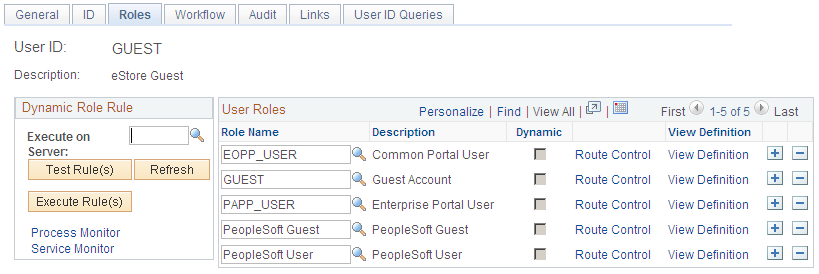
Assign user roles to the User ID, and verify login access to the PeopleSoft system on the User Profiles – Roles page ().
This example screen shot shows the Onboarding Registration role assigned to the GUEST user ID on the User Profiles – Roles page:
This example illustrates the fields and controls on the User Profiles – Roles page for an eStore guest.
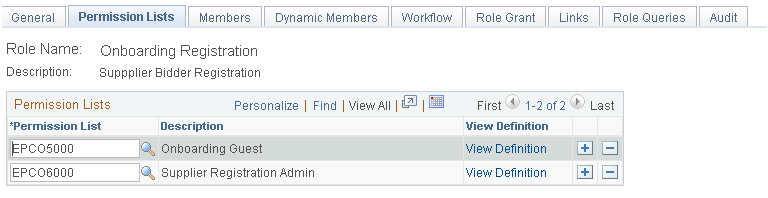
Associate the relevant permission list with the user role name on the Roles – Permission Lists page ().
This example screen shot shows the Onboarding Guest permission list has been associated with the Onboarding Registration role:
This example illustrates the fields and controls on the Roles – Permission Lists page for onboarding registration.
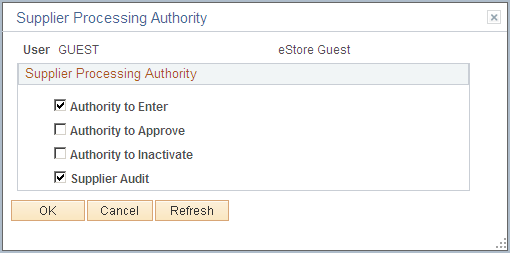
Give the user ID authority to enter suppliers into the PeopleSoft Procurement system on the Supplier Processing Authority page (, and click the Supplier Processing Authority link).
Use the Procurement User Preferences setup pages to provide access to create suppliers, as shown in this example:
This example illustrates the fields and controls on the Supplier Processing Authority page.
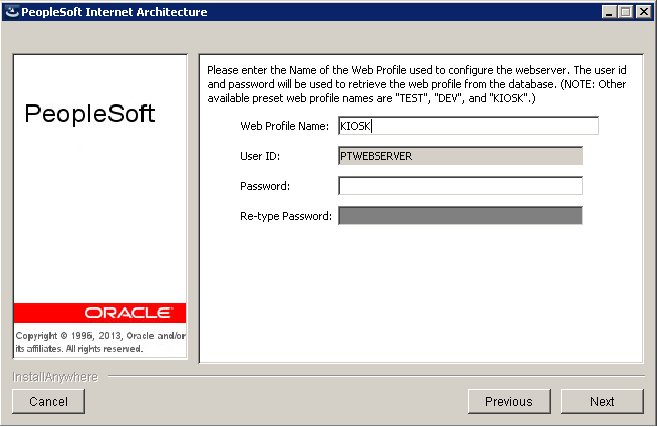
Create a new or designate an existing user web profile that can be dedicated to external access on the Web Profile Configuration – Security page (PeopleTools > Web Profile > Web Profile Configuration > Security).
For example, select the Allow Public Access check box for the KIOSK profile name and enter the User ID and Password created for external access in Step 2, as shown in this screen shot:
This example illustrates the fields and controls on the Web Profile Configuration – Security page for external access.

Set up an application server in the classic user interface using the Web server created for automatic login, as shown in this screen shot:
This example illustrates the fields and controls on the classic user interface that designates the Web server created for automatic login.
To create and test public supplier and bidder registration templates:
Log into setup pages as a supplier administrator and create public supplier and bidder templates. For detailed instructions, refer to Creating Templates for Online Registration.
For each template ID, enter an access code on the Registration Template Setup – General page (Set Up Financials/Supply Chain > Product Related > Procurement Options > Suppliers > Registration Template Setup > General).
Test the link to see if the URL works with the template. The URLs can also be secured servers (https).
For suppliers, the URL will use this format:
http://<apserver><supplierportal>SUP_OB_MENU.AUC_BIDDER_REGISTRATION.GBL?Action=U&SUP_OB_TEMPLATE=< public supplier template >For example, http://slc00tch.us.oracle.com/psp/ps_3/SUPPLIER/ERP/c/SUP_OB_MENU.AUC_BIDDER_REGISTR.GBL?Action=U&SUP_OB_TEMPLATE_ID=SUPPLIER.
For bidders, the URL will use this format:
http://<apserver><supplierportal>AUC_BIDDER_REGISTRATION.AUC_BIDDER_REGISTRATION.GBL?Action=U&SUP_OB_TEMPLATE=< public bidder template >
See also the product documentation for Oracle’s Weblogic and PeopleTools: System and Server Administration ().
Based on the public access setup and the template setup, the user is logged in automatically, and the supplier and bidder registration pages appear, as shown in this example:
This example illustrates the fields and controls on the Online Registration: Welcome page.
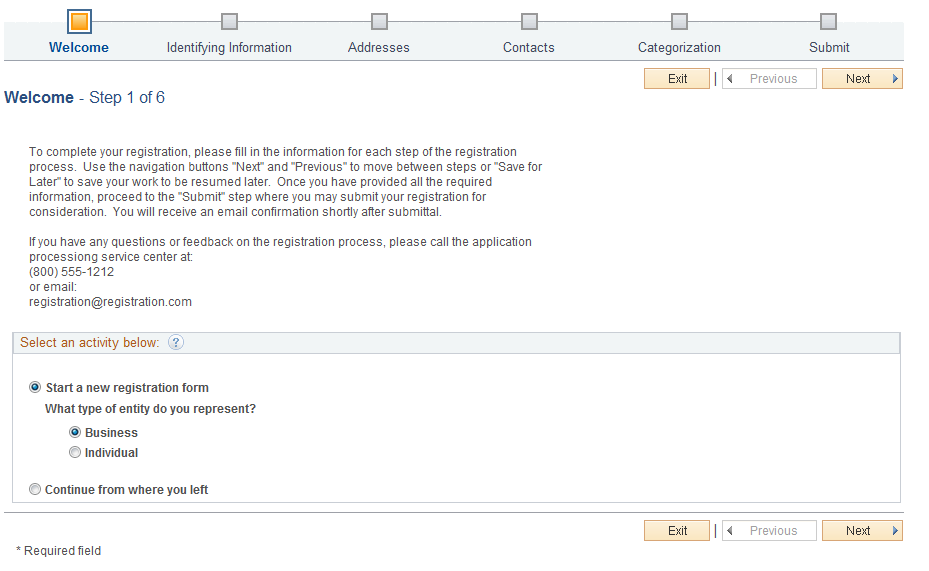
For more information about registering online and sample pages, see Registering Online.