Setting Up Calendar and Weight Profiles
This section provides an overview of calendars and discusses how to define calendar patterns, create and maintain calendars, and define calendar periods.
|
Page Name |
Definition Name |
Usage |
|---|---|---|
|
DP_CALENDARPATTERN |
Define calendar patterns. |
|
|
DP_CALENDARS |
Create and maintain calendars. |
|
|
DP_CALENDARS_2 |
Define calendar periods. |
|
|
DP_WEIGHTPROFILES |
Define calendar weight profiles that include assigning a pattern code and start and end dates to a calendar. |
|
|
DP_CALENDARWGTS |
Change daily calendar weights for a specific calendar. |
|
|
Copy Weight Profile Page |
DP_COPYWTPROFILE |
Create weight profiles for a new or existing calendar by using profiles from an existing calendar. |
A calendar in PeopleSoft controls forecast and inventory policy parameters for each day of the year by using weights. The system stores weights for each day and distributes raw data into different period buckets based on the weights.
Note: Some calendar attributes are used by PeopleSoft Inventory Policy Planning and not in conjunction with Demantra Demand Management integration.
Here are some key factors for working with calendars:
Establish an overall time frame that might extend over several years.
A calendar should start at a date that is equal to or prior to the earliest date of the demand history that you want the application to populate and recognize. The calendar should extend beyond the end of the forecast horizon.
Set up a standard calendar which includes the generally observed corporate holidays or vacations. You can then copy this calendar to other calendars as a starting point when setting up calendars to reflect local operating conditions.
Define multiple calendars that cover the same date ranges.
Change days within a specific calendar to contain various elements of data.
Calendar patterns are week-long templates that you use to maintain calendar weights for each day in a weight profile. The week is from Monday through Sunday. Use patterns to set up daily weights attributes quickly for calendar weight profiles and apply them to a range of dates within the weight profile.
Weight profiles are templates that you use to create and maintain daily weights. The default weight profile typically has a normal weight distribution across a given date range.
Here are some examples of weight profiles that can be set up for customer ordering patterns:
Orders are placed on the 1st and the 15th of the month.
Orders are placed toward the end of the month.
Orders are placed toward the end of the quarter.
Periods define time buckets for a calendar. Each calendar period is numbered within a year, either based on a calendar or fiscal year, and has a start date and an end date.
The definitions also allow the system to associate fiscal years and periods with underlying calendars, based on calendar years. For example, suppose that an organization's fiscal year runs from July to June on a monthly basis and you associate month one with July. The calendar period definition runs from July 1 of the starting year to June 30 of the ending year. In turn, the definition associates period one in each fiscal year with the month of July.
You cannot overlap start and end dates within a single period definition. However, the same day can belong to a different period in another period definition. The period definitions are independent of the daily weight attributes and therefore, the same day within the same calendar has identical attributes even if it is contained in multiple period definitions.
Note: When deciding whether to base period definitions on calendar or fiscal years, consider which period that forecasters and collaborators consider as period one. When the forecast is published for use by PeopleSoft Inventory Policy Planning, Supply Planning or Inventory, the system uses dates to determine the period to which the forecast is assigned.
The system copies the data setup for a pattern code to the appropriate day in the weight profile. You can apply different pattern codes for different date ranges to change daily attributes or weightings for days that are in a selected date range. The pattern code is not stored in the weight profile; rather, the system copies attributes from the pattern code to each day in the weight profile. Therefore, you can reapply the pattern-code data to parts of the weight profile at any time.
You can also:
Create new pattern codes and apply them to weight profiles that are already in use.
Assign pattern codes to weight profiles by using the Weight Profiles page. To access the page, select
Change details for an existing pattern code at any time.
This does not change the details on a weight profile where the pattern code has been used. To change the weight profile details, you must maintain the individual weight profile by reapplying the new pattern code to it or by changing the weight details manually on the weight profile.
Use the Define Calendar Patterns page (DP_CALENDARPATTERN) to define calendar patterns.
Navigation:
Field or Control |
Description |
|---|---|
Pattern Code |
Enter a code for use when you apply the pattern to a period of data. You assign pattern codes to weight profiles by using the Weight Profiles page. You can add a new calendar pattern at any time, and you must define at least one calendar pattern before you add a new weight profile. |
Demand Weight |
Enter the relative weight for each day. For Demantra integration, the demand weight is used to determine whether a day is a working or a nonworking day when the system creates the calendar flat file. |
Use the Define Calendar Structure page (DP_CALENDARS) to create and maintain calendars.
Navigation:
Field or Control |
Description |
|---|---|
Calendar ID |
Enter a code for identifying the calendar. This field is required. |
Start Date |
Enter a date that is early enough to cover the entire period of historical data that you plan to use in the system. The date is required and cannot be changed after you save the calendar. |
End Date |
Enter a date that is far enough in the future to cover all future planning periods. PeopleSoft recommends that you start and end the overall calendar on the first and last day of a year even if the organization's fiscal year is different. The system requires the date and can extend it during the life of the calendar. |
Use the Periods page (DP_CALENDARS_2) to define calendar periods.
Navigation:
Select the Periods tab.
You can define multiple period codes for a calendar along with varying date ranges that increase the flexibility of the calendar. To create calendar periods:
If you are creating additional periods, click the Add Row button.
If this is the first time that calendar periods are added for the calendar, you do not need to perform this step.
Enter the period code that you want to use for the calendar, and a description.
Select a period type that determines which periods per year the calendar uses.
The system inserts the default value for the selected period type in the Periods Per Year field. You can override that value; however, if you want to customize the periods per year, select the Periodic period type.
If you previously added a period code, the system enters default values in the Start Date, End Date, and Forecast Period/Year start and end fields. You can override these values as needed.
Enter a start date and end date to set up the date range for the period code.
The system provides a default start and end date from the calendar. Values are required for both fields.
Enter values in the Forecast Period/Year fields for the start and end date to define a starting period other than the system default.
Use this feature to distinguish between a yearly calendar and a fiscal calendar. Yearly calendars match the start date, but you offset the date by entering the period that matches the start of the fiscal year. Values are required for both fields. If you are setting up weekly periods codes, you must indicate what week is the first week of the year.
Click the Recreate button.
If this is the first time that periods are defined for the calendar, click the Create button.
The system populates the lower portion of the page with more detailed period information.
You can change the details for an existing period definition at any time; however, you cannot change all of the fields. To change the period type or the starting date or starting period year, you must delete the period definition and recreate it. You can change the end date, end period, and year, as well as any of the individual period start and end dates.
The system can re-create period date ranges automatically. This process deletes existing period data and creates new periods and ranges that are based on the date and period details that you provide. If you need to extend the period definition end date, select a new end date, period and year; then click the Extend button to create new periods at the end of the existing periods, extending the periods through to the new end date.
Field or Control |
Description |
|---|---|
Period Code |
Enter a unique code that the system uses to retrieve data that you define for this period definition. Periods cannot overlap or have gaps between them. Within a single definition, you must include each day in a period, and a day cannot belong to more than one period. |
Period Type |
Select a value that determines the type of periods that make up the calendar. The formats for all period types are recurring through the end date for the calendar. The field is required. Values include:
|
Periods Per Year |
Enter the number of periods that occur in one year for the period type that you selected. The system provides a default value that is based on the period type that you select. |
Total Periods |
Displays the total number of periods in the calendar horizon when periods are created. |
Start Date and End Datecalendar start and end dates |
Enter a start and end date to define a subset of periods within the calendar, or change the start date to match the period one start date. The start and end dates must be within or equal to the start and end dates that you define on the Calendars page. Note: When adding weekly periods based on a calendar year, make sure that the start date is at the beginning of the week that you want to have as week one. For example, suppose that the week runs from Sunday to Saturday and January 1 is a Friday. Set the start date to January 3 and include the prior two days in the last period of the previous year. Refer to the ISO 8601 (International Standards Organization) standard for determining the first week of the year. Also, the ISO calendar standards indicate which years have 52 weeks (short ISO calendar year) and which years have 53 weeks (long ISO calendar years). For example, 1998, 2004, and 2009 might be within the calendar horizon and if you are establishing weekly periods. Then you should refer to the ISO standard to determine the beginning dates for the weeks in those years. |
This table lists actions if the monthly period type is based on a calendar year or a fiscal year:
|
Calendar Type |
Start Date |
Period Action |
Year Action |
|---|---|---|---|
|
Calendar Year |
1/1/2003 |
The system uses the default value of 1 as the start period. |
The system uses the default value of 2003 as the year. |
|
Calendar Year |
7/1/2003 |
The system uses the default value of 7 as the start period. |
The system uses the default value of 2003 as the year. |
|
Fiscal Year: July 1-June 30 |
1/1/2003 |
You must enter 7 (January) as the forecast period to show the middle of the fiscal year. |
You must enter 2003 as the fiscal year for the forecast. |
|
Fiscal Year: July 1-June 30 |
7/1/2003 |
You must enter 1 as the forecast period to show the start of the fiscal year. |
You must enter 2004 as the fiscal year for the forecast. |
After you are enter data and re-create it, review the record of periods to enter any changes that you want to make to the start and end dates. If you change an end date, the system automatically updates the next start date. If you change a start date, the system automatically adjusts the previous end date. If there are insufficient days between the start and end date or too many days to split into periods, an error message appears.
Field or Control |
Description |
|---|---|
Forecast Period/Year |
The system populates these start and end values based on the information that you enter in the Start Date and End Date fields. Enter either a forecast period, a year, or both to create or maintain the start and end date of the calendar manually. |
Recreate |
Click to rebuild period definitions if you change the forecast date, period, or year. |
Extend |
Click if you want the system to calculate the start and end period dates automatically for the period of time that you add. This increases the time over which the period code is valid by extending the end date. Note: If you click the Extend button, you must recalculate the trading days to populate the trading days value for those extended periods. |
Use the Calendar Weight Profiles page (DP_WEIGHTPROFILES) to define calendar weight profiles that include assigning a pattern code and start and end dates to a calendar.
Navigation:
The Calendar ID and Year fields are display-only. You can change the month field and enter data in each of the daily boxes. You must create a weight profile for each calendar. The system requires that you have a weight profile for the calendar that is associated with a forecast that is designated as the default weight profile.
Field or Control |
Description |
|---|---|
Calculate Trading Days |
Select this option to indicate that the system should use this weight profile to calculate trading days. If you select to calculate trading days, then when you maintain calendar period information, you can also view the total number of trading days for each period. Use the Periods page to view the number of trading days. Note: This feature is not used with the Demantra integration. |
Pattern Code |
Select a pattern code. When you set up a new weight profile, you can add the daily weights automatically by using one or more pattern codes. This is the easiest way to create the basic daily data for the weight profile for the first time. After this, you can change some or all of the daily weights by using another pattern code or by changing the weights for a single day. Note: It is not necessary to apply the pattern code to the entire weight profile before saving it. Provided the weight profile has a start and end date, you can save it without applying a pattern and then subsequently apply the pattern code for ranges of dates within the weight profile start and end dates as required. |
Start Date |
Select a date from which you want to apply the pattern along with an end date. You can repeat this to apply different patterns to different date ranges within the calendar. |
End Date |
Select a date on which you want to finish applying the pattern. |
Use the Change Calendar Weights page (DP_CALENDARWGTS) to change daily calendar weights for a specific calendar.
Navigation:
This example illustrates the fields and controls on the Change Calendar Weights page. You can find definitions for the fields and controls later on this page.
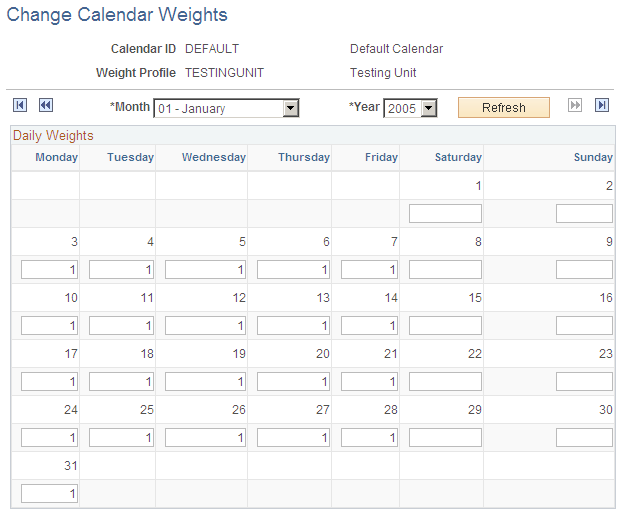
A daily calendar displays each day along with any weights for the day. Use the calendar to adjust the daily weight attribute by entering the relative demand weight for the day.