Setting Up Express Billing
No steps are required before using express billing. However, if you want to automatically navigate to express billing from the Bill Search page, use the Bill Type and Installation Options components.
|
Page Name |
Definition Name |
Usage |
|---|---|---|
|
INSTALLATION_BI1 |
Define express billing parameters. |
|
|
BI_BILLENTRY_TEMPL |
To create or edit the Express Bill Entry Template. |
Use the Installation Options − Billing - General Options page (INSTALLATION_BI1) to define express billing parameters.
Navigation:
Click the Billing - General Options link.
To define express billing parameters:
Select Express Bill Entry for the Bill Entry Hyperlink Option.
This option determines whether links on various pages, such as the Bill Search and Bill Summary pages, navigate to standard or express billing.
Define the default number of lines to add.
The system populates the Lines to Add field on the Express Billing page with this default value.
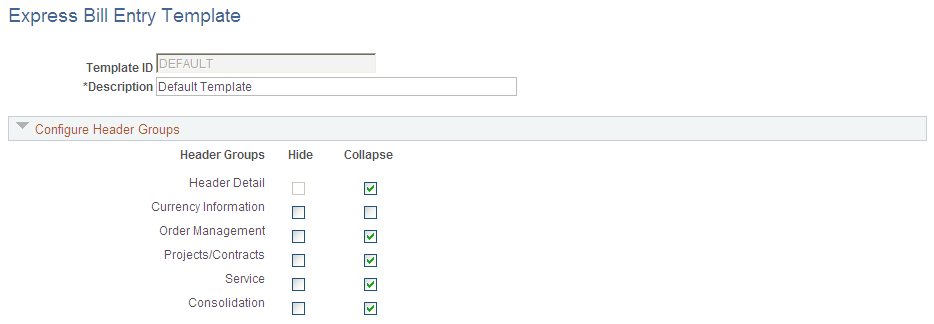
Use the Express Bill Entry Template page (BI_BILLENTRY_TEMPL) to create or edit the template. Only the express billing fields that can be hidden appear on this page. To display a field in the Express Billing - Line List page, select the corresponding check boxes.
Navigation:
This example illustrates the fields and controls on the Express Bill Entry Template page (1 of 2).
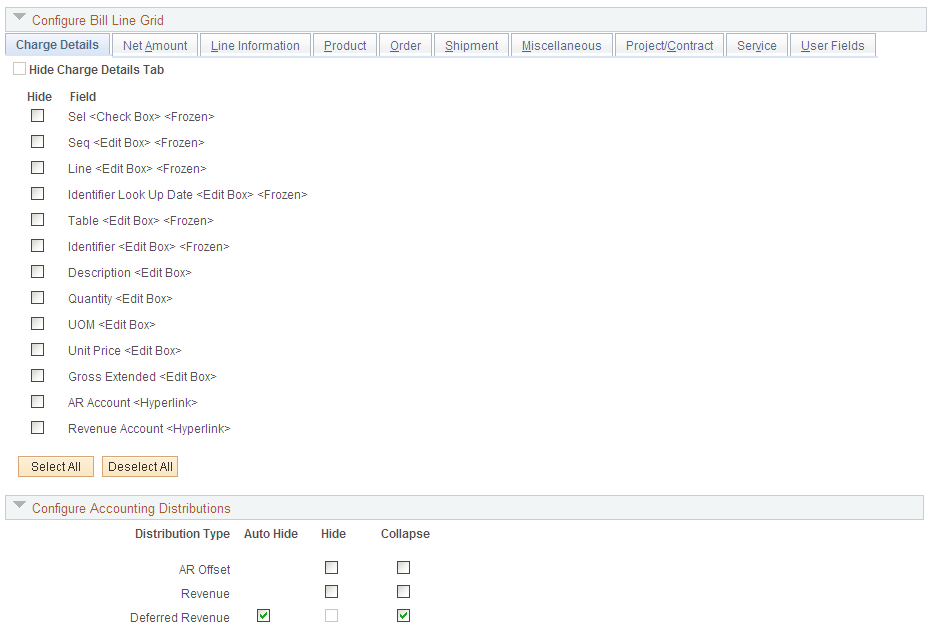
This example illustrates the fields and controls on the Express Bill Entry Template page (2 of 2).
If a template is specified at either the installation level or the BU level, but the user then enters a Bill Source or Bill Type that has a template, then the page is populated with the related template fields and options.
Configure Header Groups
The template allows the user to collapse/hide the various groups. Header Detail fields cannot be hidden.
Configure Bill Line Grid
The Bill Line grid is divided into tabs. User can hide the entire tab or hide/display specific fields within the tab.
The fields that are selected to be hidden on the Template configuration will be hidden on the Express Entry page which uses this Express Bill Entry template.
Configure Accounting Distributions
The user can collapse or hide the distributions, and if required, select the option to auto hide the distribution. The auto hide option for the distribution is based on logic and is determined by the data values. Logic is used to determine which chartfield distributions are valid/applicable for a bill and whether the distribution is displayed when the user chooses the auto-hide option. The following distributions have the auto hide option enabled; Contract Liability, Interunit Expense, Interunit Payables and Contract Asset.
The Contract Liability Distribution and deferred Discount/Surcharge is controlled by the Contract Liability flags on the Billing - Integration Options page. SeeBilling - Integration Options Page
Interunit Expense and Interunit Payables distributions are valid only for interunit bills. If the bill is not an interunit bill and the user has selected the auto-hide option, then the distributions are hidden.
Contract Asset entries are valid only when Contracts manages revenue and the system source is CBI or PBI, or when the bill is an Installment bill and Bill Frequency is Installment. If these conditions do not exist and the user has selected the auto-hide option, then the distributions are hidden.
Statistical Distributions are created for a line or sequence. If statistical accounting distributions are not used, you can hide the statistical distribution by selecting the Hide check box on the template.