Configuring Transaction Summary
The fluid user Interface allows users and administrators to quickly create or update transaction requests using an activity guide process. These guided processes contain a summary page as a last step. This transaction summary page displays the proposed changes made by the user along with the current existing data, helping users review the changes before submission. Administrators can use the Configure Transaction Summary pages to identify other fields that your organization may also want to display on the summary page, even when no changes were made to the field.
To set up transaction summary page information, use the Configure Transaction Summary (HRTS_CONFIG_SUMM) component.
This topic discusses how to configure transaction summary for a component.
|
Page Name |
Definition Name |
Usage |
|---|---|---|
|
HRTS_CONFIGURE |
Configure the fields that need appear on summary pages. |
|
|
HRTS_EVENT_MAPPING |
Select the portal registries to which this configuration applies |
Use the Configure Summary Fields page (HRTS_CONFIGURE) to configure the fields that need appear on summary pages.
Navigation:
This example illustrates the fields and controls on the Configure Summary Fields page.
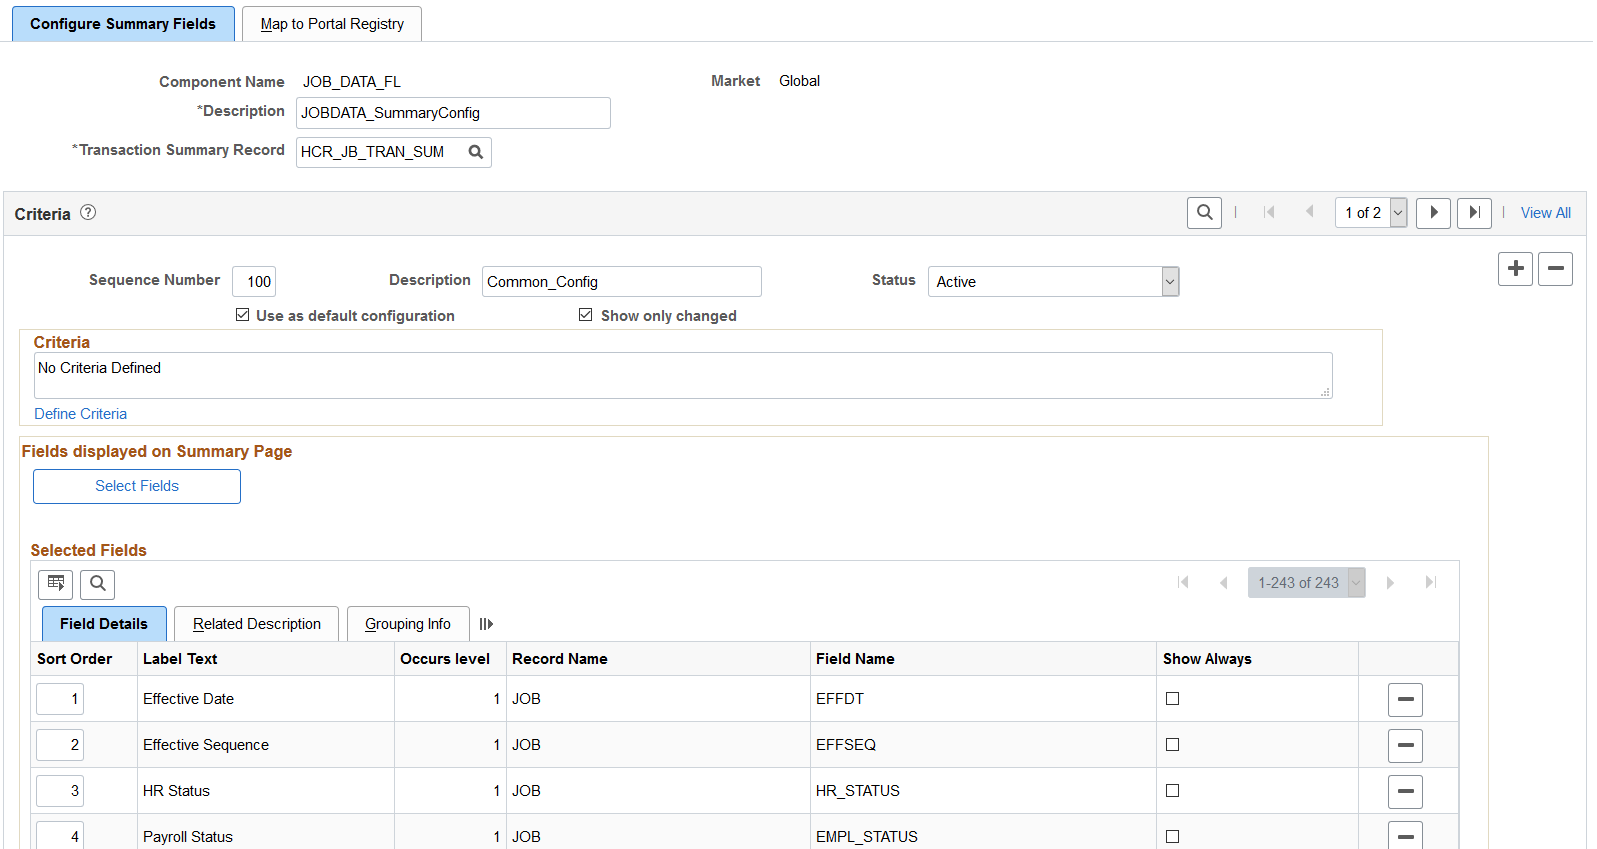
Select the Add an new row button to configure multiple configurations for the component. The system applies criteria in sequential order beginning with sequence number 1 until the criteria for the page is satisfied. Once a criteria is satisfied, that configuration is used and later sequence numbers and configurations are not applied.
Field or Control |
Description |
|---|---|
Transaction Summary Record |
Select the record to which the summary should be saved. The Transaction Summary engine uses the record specified here to save summary information. Note: The prompt for the record only displays the record with the transaction Summary Sub record (HRTS_SUMM_SBR). The structure of this record should have All the key fields for component or transaction and transaction summary sub record. |
Use as default configuration |
Select this check box to identify one configuration as the default configuration. If no specific configuration is defined, this default configuration will be used to display the summary data. |
Show Only Changed |
Select this check box to list only the modified fields in the transaction summary page. On selecting the check box, only the modified fields, out of the selected fields in the configuration, would be displayed in the summary. |
Select Fields |
Click this button to open the Select Fields page in a modal window. This modal window lists all the visible pages in the selected component and the fields corresponding to each page. Select the fields that needs to be added in the transaction summary page. Note: Related record fields and invisible fields are excluded. |
Selected Fields: Field Details Tab
This section lists the fields that will be tracked for changes and will be displayed in the summary page of the component being configured. You can add further configurations to these fields.
Field or Control |
Description |
|---|---|
Sort order |
Enter the order in which the fields should be displayed. When saved, the order number values will be updated to form a continuous sequence. |
Show Always |
Select this check box to have the transaction summary page show this field, regardless if there were changes or not. |
Selected Fields: Related Description Tab
Use this section to configure which fields to be displayed as the related fields.
This example illustrates the fields and controls on the Configure Summary Fields page, showing the Related Description tab.

Field or Control |
Description |
|---|---|
Show Related Information |
The check box is available only for fields which have an associated related display field in the page definition in Application Designer. Select this check box if you want to display the related information along with the field in summary page. |
Change Related Field |
This button is enabled only if you select the Show Related Information check box. Click this button to open the Change Related Field window. Use this button to change the related display field populated by default when the Show Related Information check box is selected. |
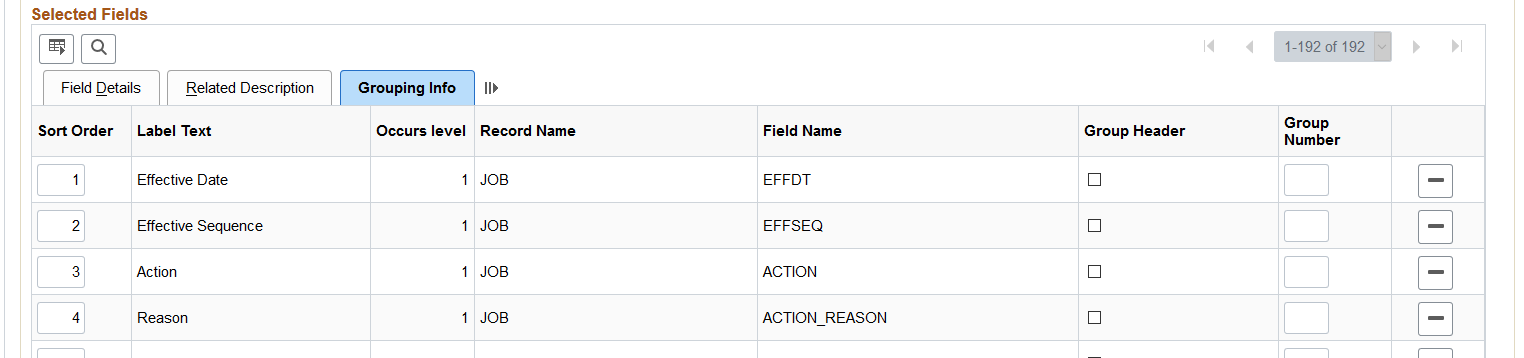
Selected Fields: Grouping Info Tab
Use this section to group fields as a header for group. For example, consider that you want to group Field A, Field B, and Field C and make Field A the group header. In this case, select the Group Header check box for Field A, then enter 1 as the Group Number. Put the same number for all the fields which you wish to include in the group.
This example illustrates the fields and controls on the Configure Summary Fields page, showing the Grouping Info tab.
Field or Control |
Description |
|---|---|
Group Header |
Select this check box to identify one of the key fields as the header field and associate it with a unique group number. This is used to distinguish rows from one another. |
Group Number |
Enter the group number to group fields in a grid together. All fields from the grid should have the same group number. Note: If the group number of a header field is changed, then the group number of all the fields in that group will get updated. All members of the group should be from the same record, and the header must be a key field. |
Use the Group Header and Group Number fields on the Grouping Info tab only when configuring fields from the grid. Transaction summary uses this to group fields for the grid together by row.
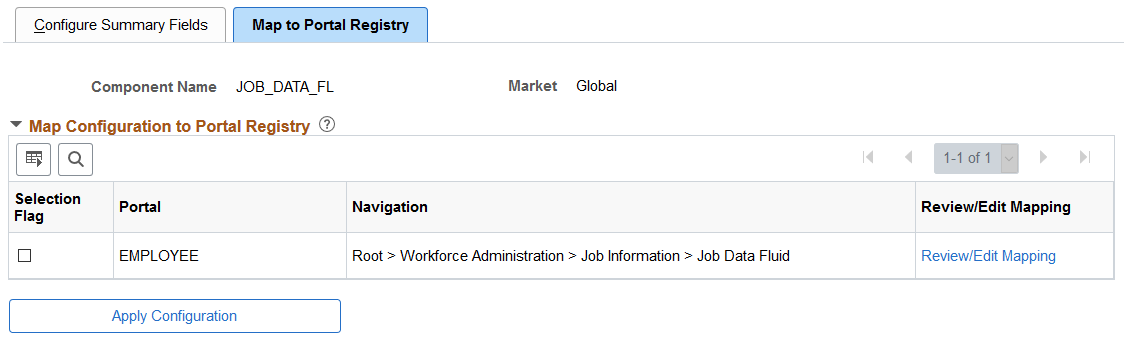
Use the Map to Portal Registry page (HRTS_EVENT_MAPPING) to select the portal registries to which this configuration applies.
Navigation:
This example illustrates the fields and controls on the Map to Portal Registry page.
Field or Control |
Description |
|---|---|
Review/Edit Mapping and Apply Configuration button |
This link appears after the mapping is applied by selecting the Apply Configuration button. Select the link to review the Event Mapping generated by the push button. |