Task menu has multiple sub menus. Based on the user role, the sub menus can be accessed by the user. Task Menu has the following sub menus:
l Completed Tasks
l Free Tasks
l Hold Tasks
l My Tasks
l Search
In the following sections, let’s look at the details of each sub menus.
This section contains the following topics:
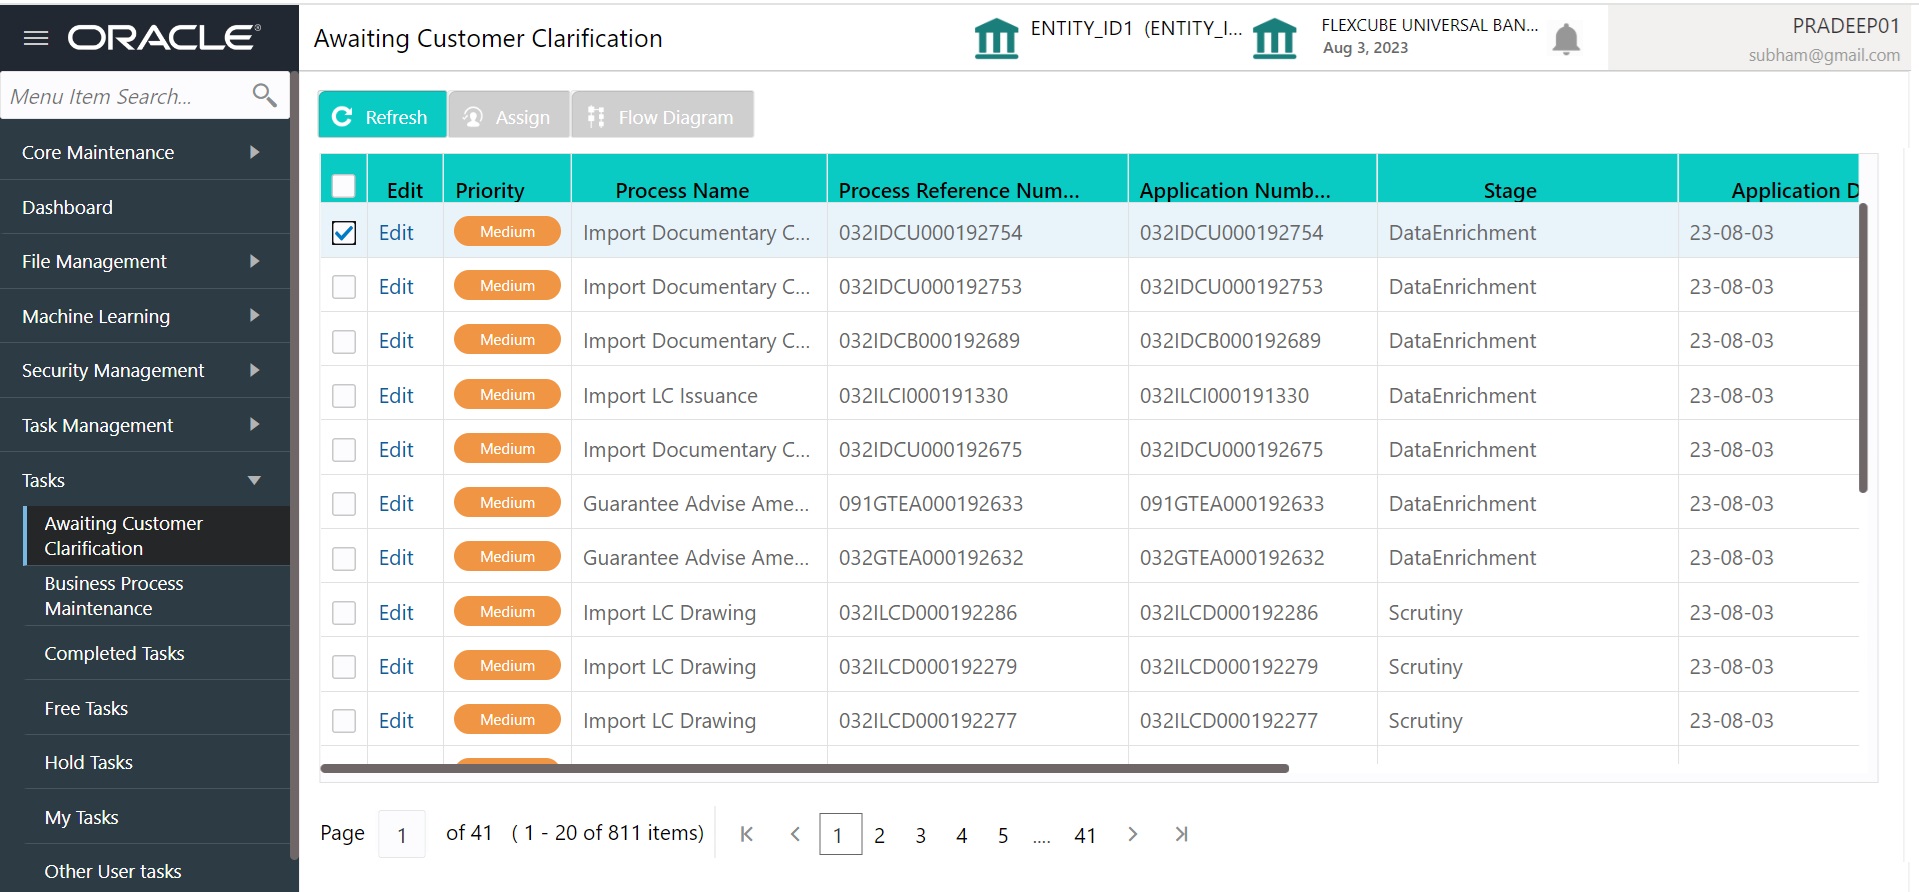
2.1 Awaiting Customer Clarification
The Awaiting Customer Clarification menu displays the tasks that are in the waiting for customer clarification state.
The following information is displayed on the task list:
l Edit
l Priority
l Process Name
l Process Reference Number
l Application Number
l Stage
l Application Date
l Branch
l Customer Number
l Amount
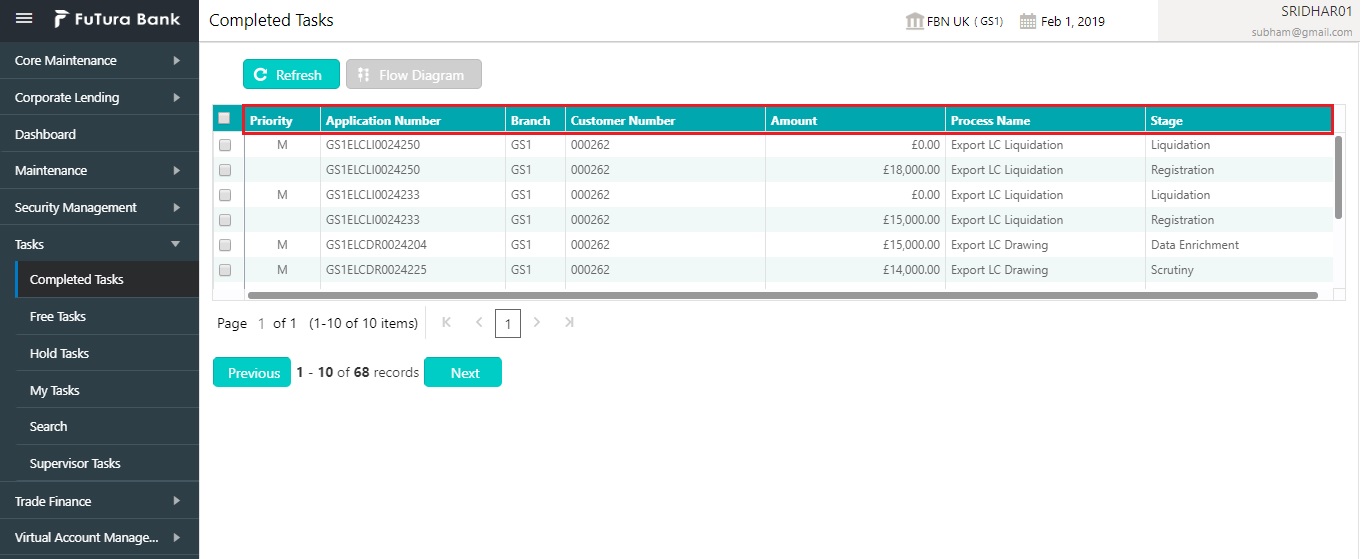
Completed Tasks menu displays the tasks which has recently completed a stage in a process by the current user. This menu does not displays completed tasks of all the stages but displays only the latest stage. The task list will display the following details of the task:
l Priority
l Process Name
l Process Reference Number
l Application Number
l Stage
l Application Number
l Branch
l Reference Number
l Customer Number
l Amount
Following actions can be performed on the Completed Tasks menu:
l Flow Diagram - Completed Tasks menu enables user to view the process flow of the selected task and also user can find the stages completed by the selected task and the current stage highlighted in the process flow.
l Refresh - Click Refresh to refresh the task list.
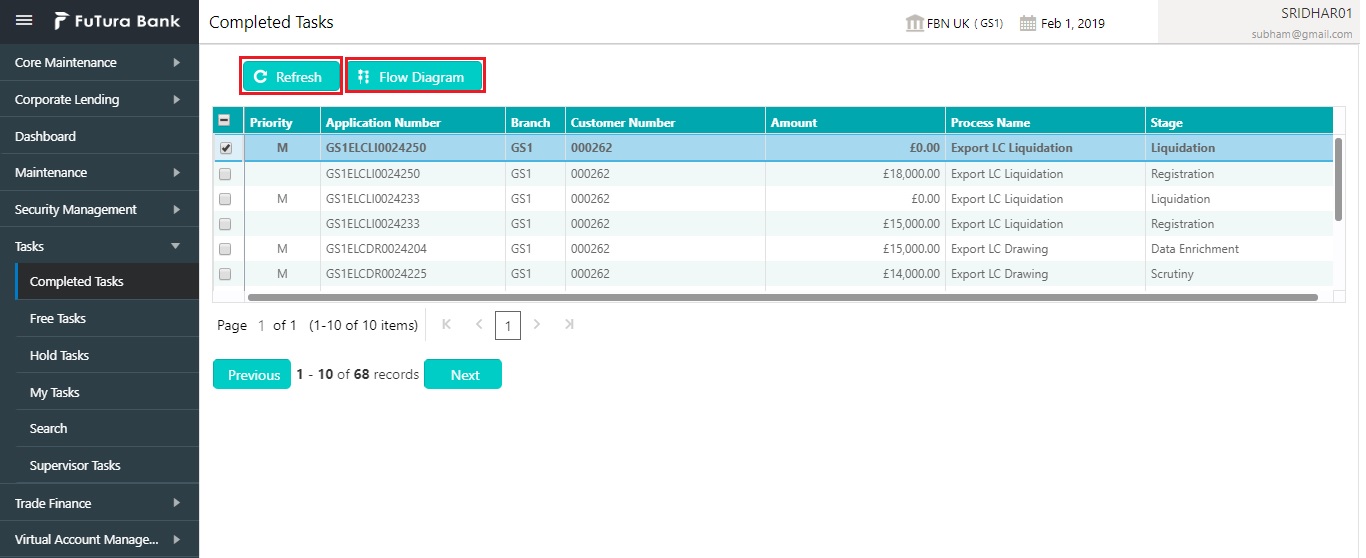
l The user can select the check box and click on Audit to view the details of the task's audits.
l The Task Audit Trail Details screen is displayed with the task details.

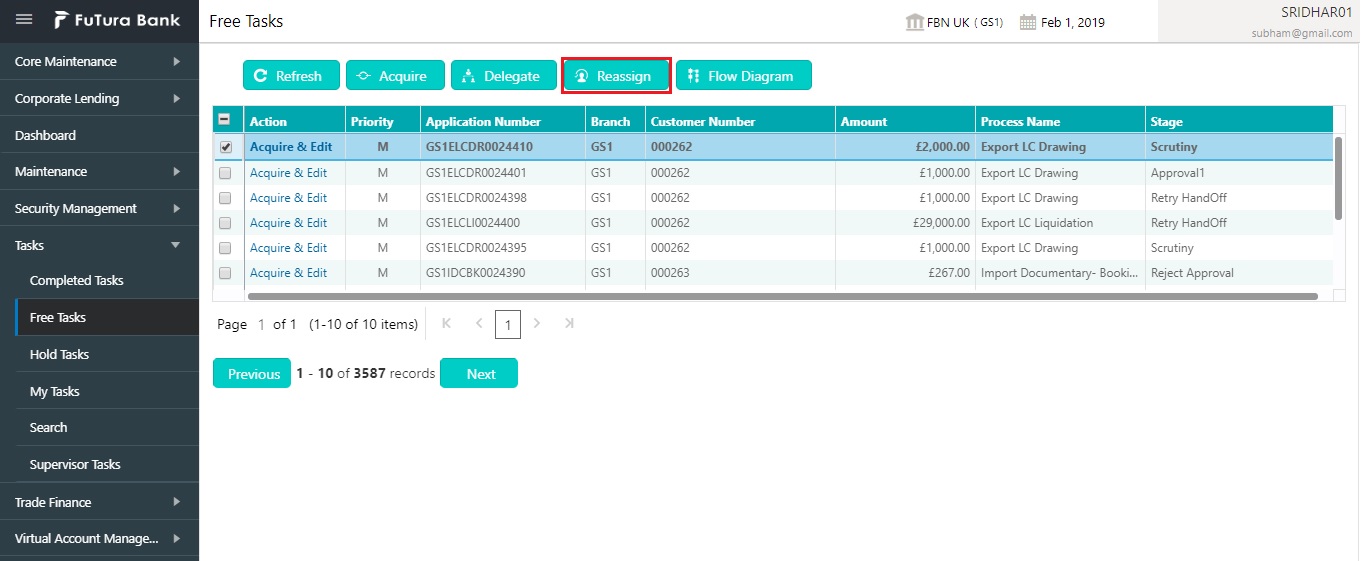
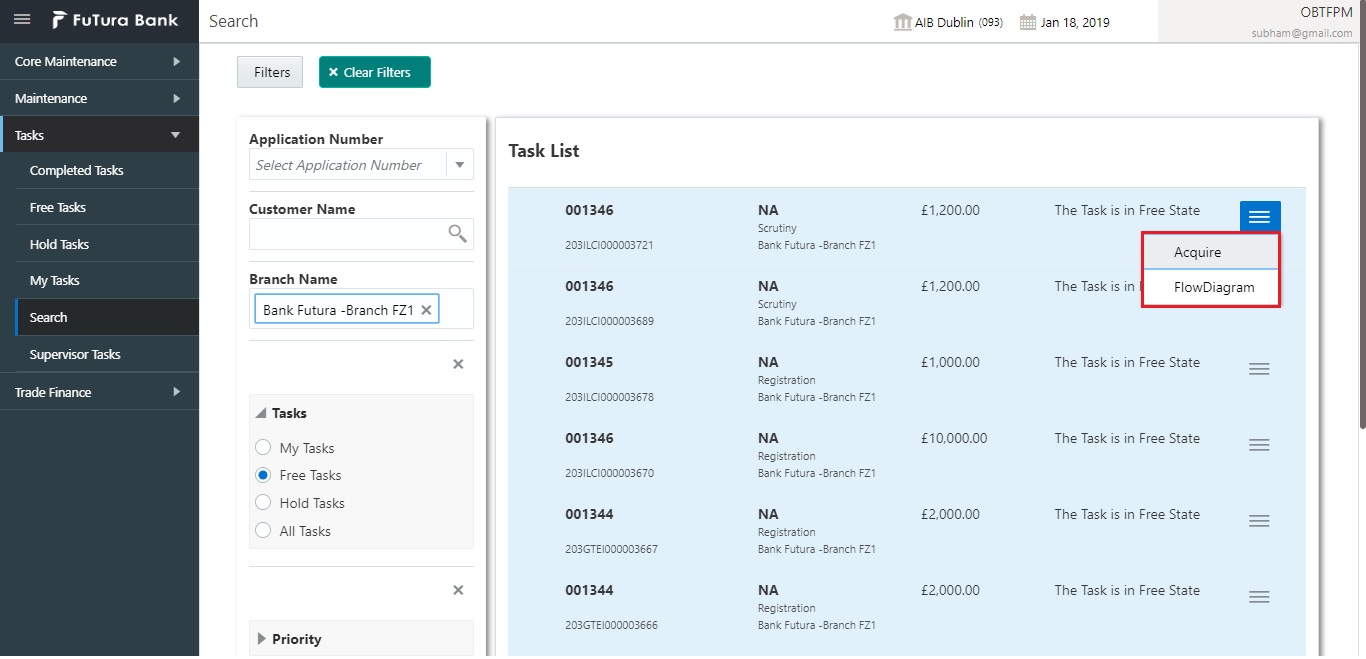
Free Tasks menu will display the tasks which were not acquired by any user and for which the current user is entitled to access. The task list will display the following details of the task:
l Action
l Priority
l Process Name
l Process Reference Number
l Application Number
l Stage
l Application Date
l Branch
l Reference Number
l Customer Number
l Amount
Following action can be performed on the Free Tasks menu:
l Acquire & Edit - Click Acquire & Edit to acquire the task and edit directly from free tasks menu.
l Acquire - Select the task and click Acquire to edit the task later from My Task menu.
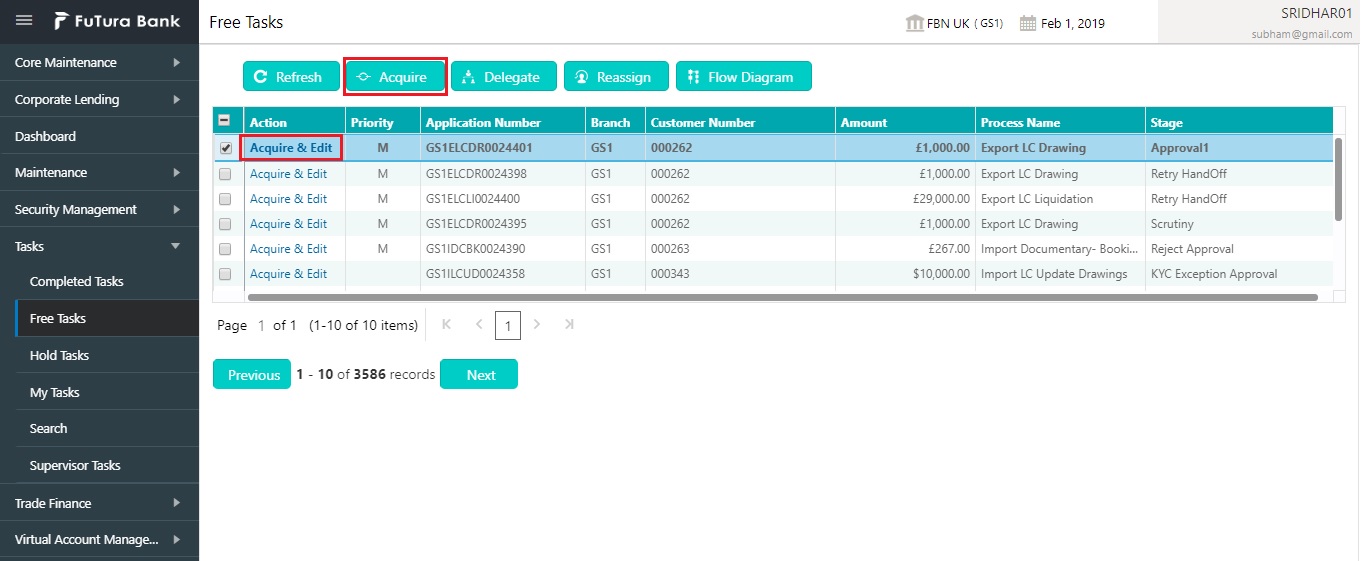
l Flow Diagram - Free Tasks menu enables user to view the process flow of the selected task and also user can find the stages completed by the selected task and the current stage highlighted in the process flow.
l Refresh - Click Refresh to refresh the task list.
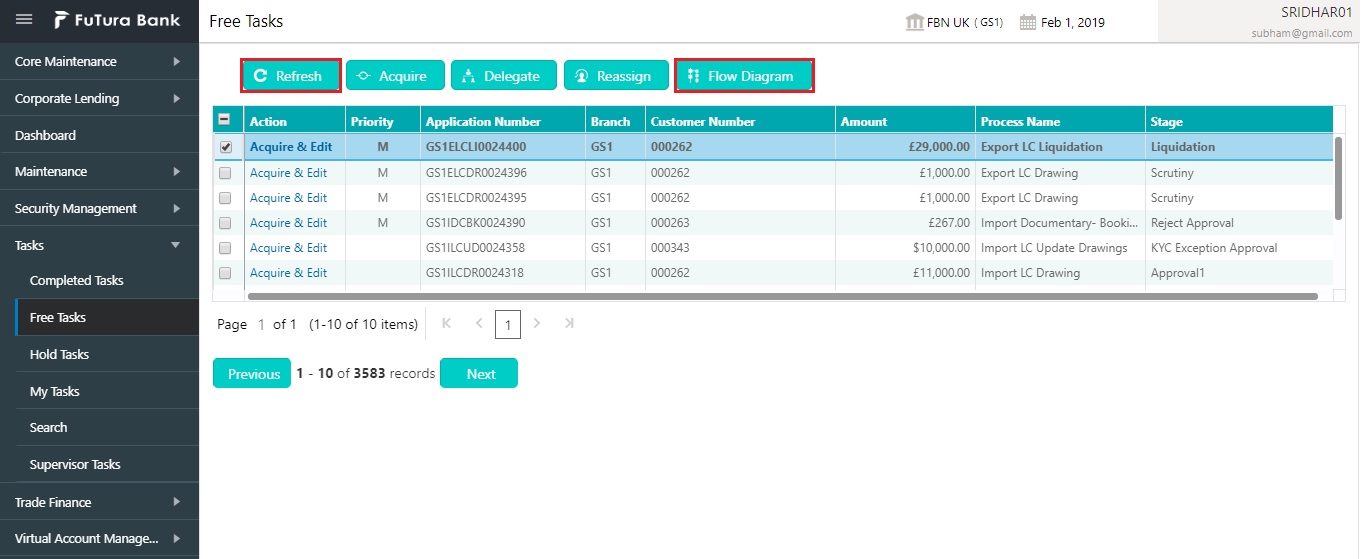
l Reassign- Click Reassign to the task to sub-ordinates. This action can be performed only if user is provided with the assignment rights.
Hold Tasks menu displays the tasks which were moved on hold by the current user. The task list will display the following details of the task:
l Priority
l Process Name
l Process Reference Number
l Application Number
l Stage
l Application Date
l Branch
l Reference Number
l Customer Number
l Amount
Following action can be performed on the Hold Tasks menu:
l Resume - Select the task and click Resume to move the task to My Tasks menu and edit.
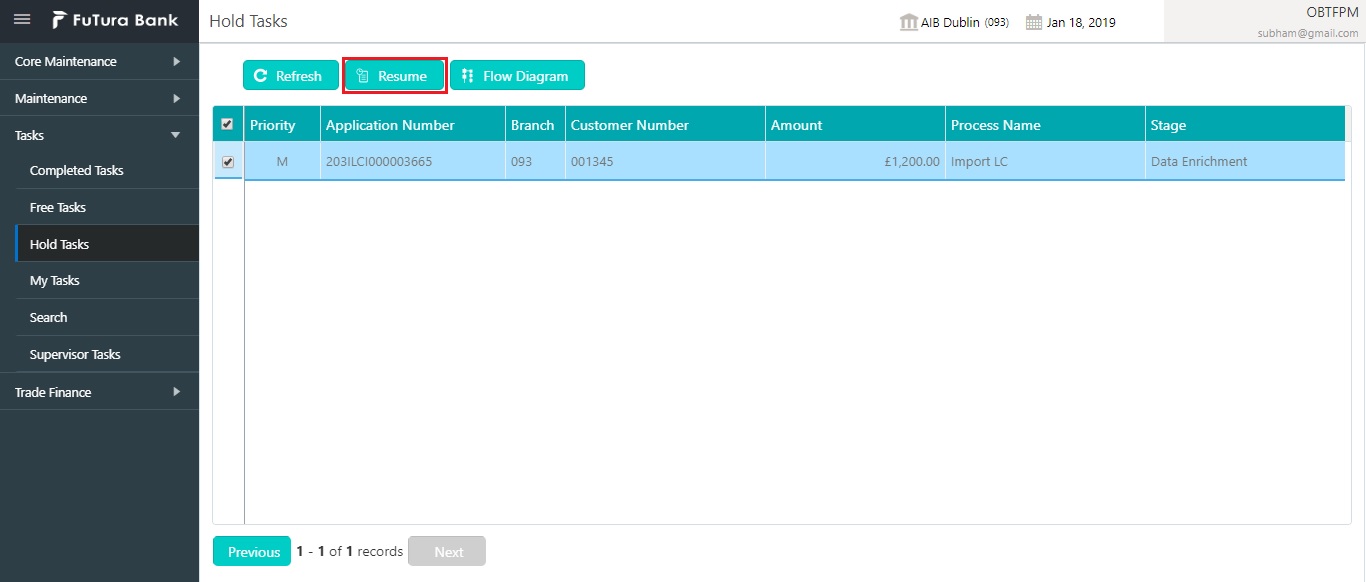
l Flow Diagram - Hold Tasks menu enables user to view the process flow of the selected task and also user can find the stages completed by the selected task and the current stage highlighted in the process flow.
l Refresh - Click Refresh to refresh the task list.

My Tasks menu displays the tasks acquired from the free tasks menu by the current user. The task list will display the following details of the task:
l Edit
l Priority
l Process Name
l Process Reference Number
l Application Number
l Stage
l Application Date
l Branch
l Reference Number
l Customer Number
l Amount
Following action can be performed on the My Tasks menu:
l Edit - Click Edit to edit the selected task.
l Release - Click Release to release the selected task from My Tasks to Free Tasks menu.

l Refresh - Click Refresh to refresh the task list.
l Flow Diagram - My Tasks menu enables user to view the process flow of the selected task and also user can find the stages completed by the selected task and the current stage highlighted in the process flow.
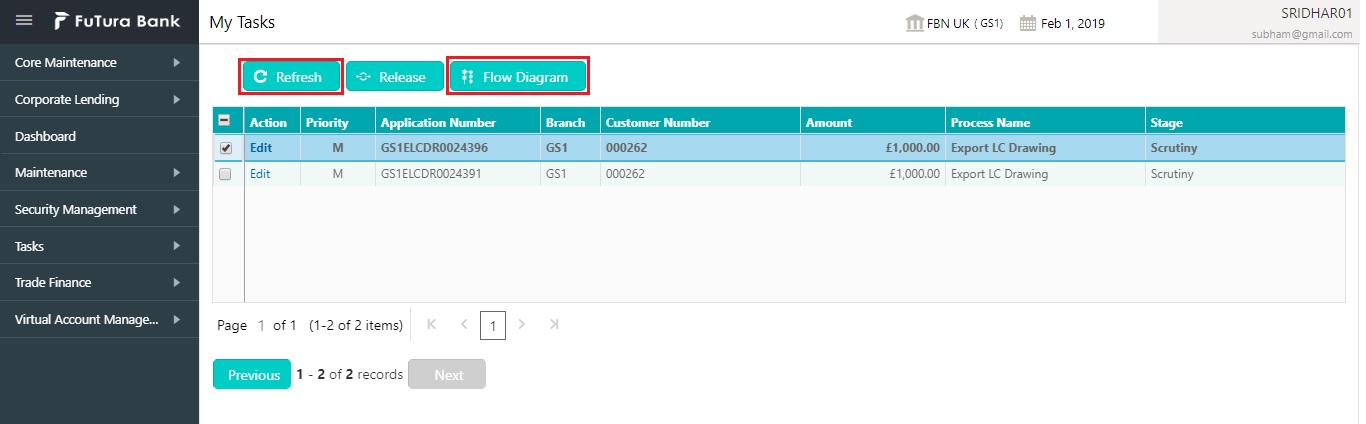
l Delegate - Click Delegate to assign the acquired task to any valid user for processing within the group.
l Escalate - Task will be assigned to Supervisor.
Search menu enables the user to search for the task(s) with the following filters. Search will fetch the results either will one filter criteria or with multiple filter criteria.
l Application Number
l Customer ID
l Party ID
l Branch Name
l Processes/Tasks
l Priority
l Process
l Amount
Note
Contract Reference Number and Other Bank Reference Number is applicable only for OBTFPM product.
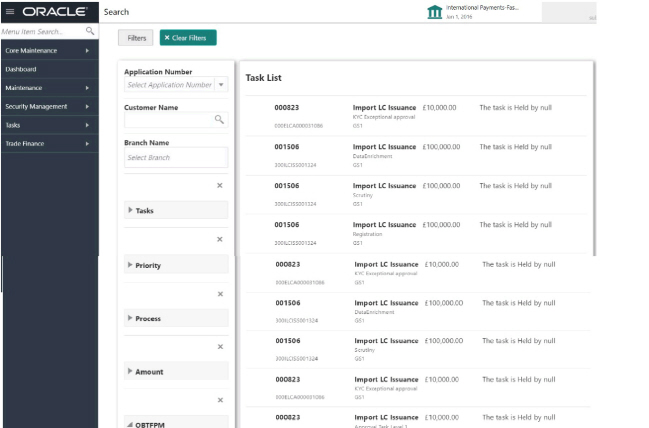
Following actions can be preformed on the tasks listed in the task list:
l Acquire - Click Acquire to acquire the task.
l Flow Diagram - enables user to view the process flow of the selected task and also user can find the stages completed by the selected task and the current stage highlighted in the process flow.
Supervisor Tasks menu displays the ‘User Tasks’ or ‘Free Tasks’ based upon the option that is selected.
The following information is displayed on the task list:
l Priority
l Process Name
l Process Reference Number
l Application Number
l Stage
l Application Date
l Branch
l Customer Number
l Amount
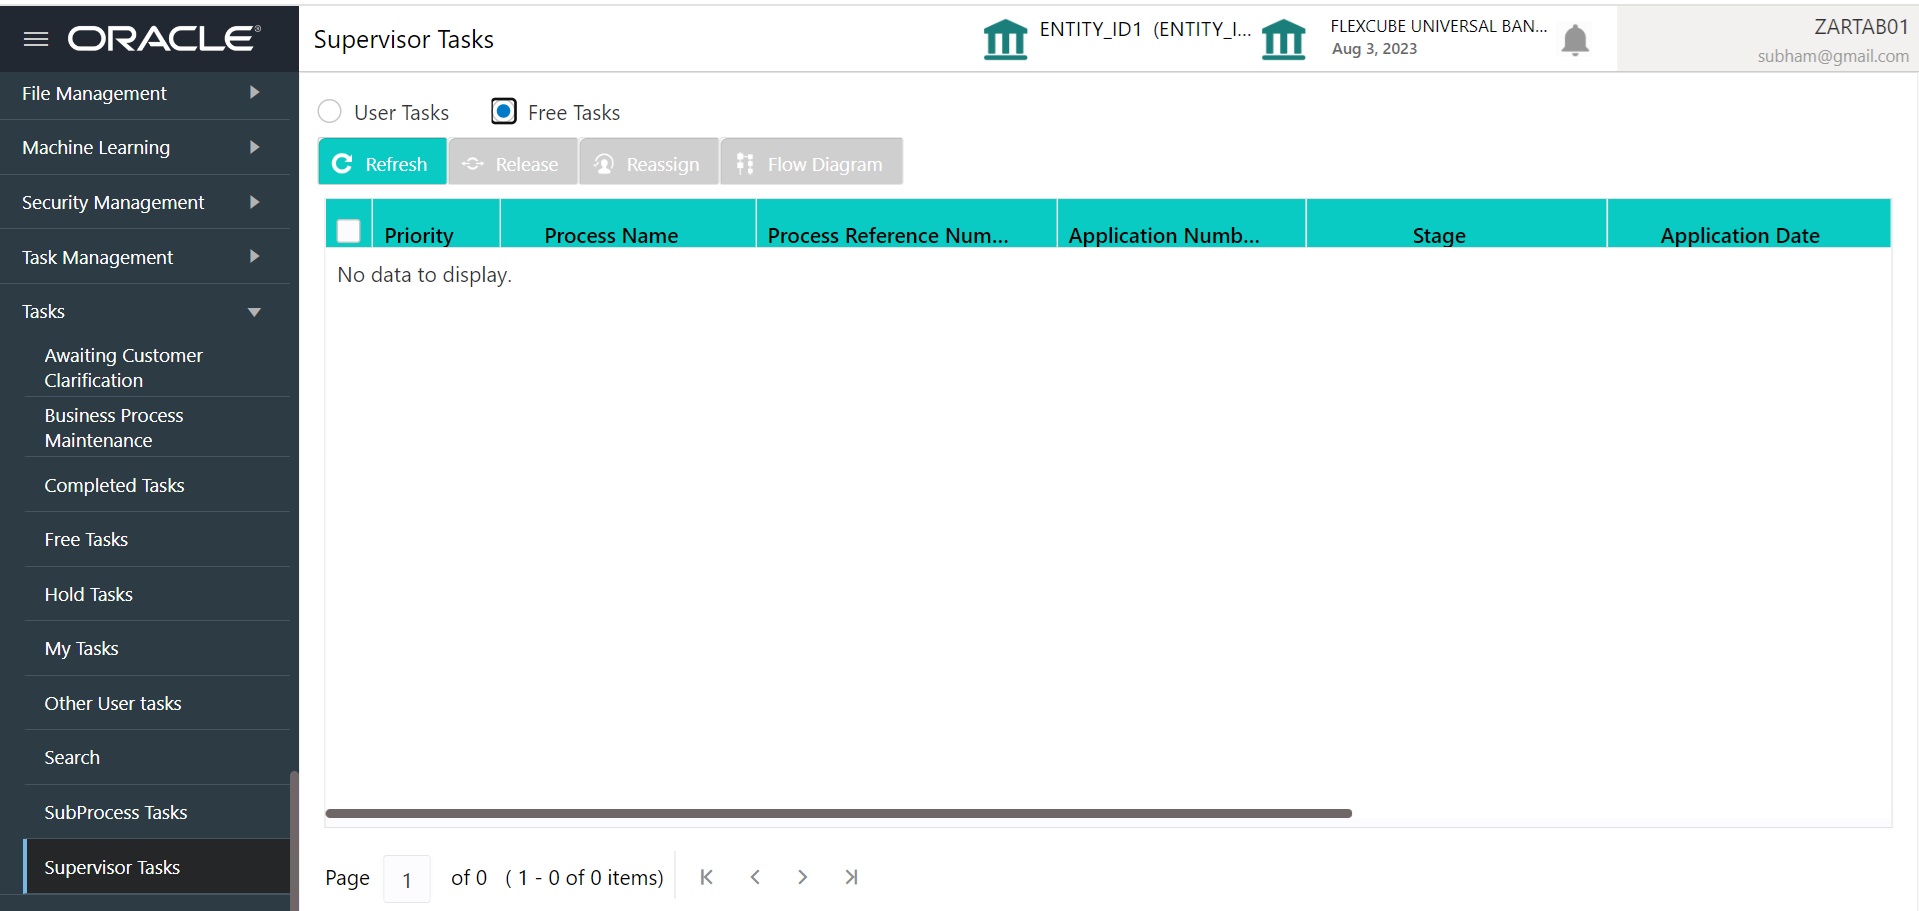
Following actions can be performed on the Supervisor Task menu:
l Refresh - It will refresh the data on the grid.
l Release - Supervisor can release the task of his/her report and the task will be available in free task.
l Reassign - After selecting tasks from the task list, click Reassign button to reassign the selected tasks to any of the subordinates.
l Flow Diagram - Click Flow Diagram button to preview the flow diagram of the selected task.
2.8 Business Process Maintenance
This topic describes the systematic instruction to create the workflows.
It comprises of the following three screens:
l Process List Screen
l Process Management Screen
l Verify & Submit Screen
Specify User ID and Password, and login to Home screen.
The Process List screen shows a list of processes. The user can select any of the existing processes. A blank process can also be selected in case the user wants to create a new workflow.
1. On Home screen, click Task Management. Under Tasks, click Business Process Maintenance.
l The Process List screen displays.
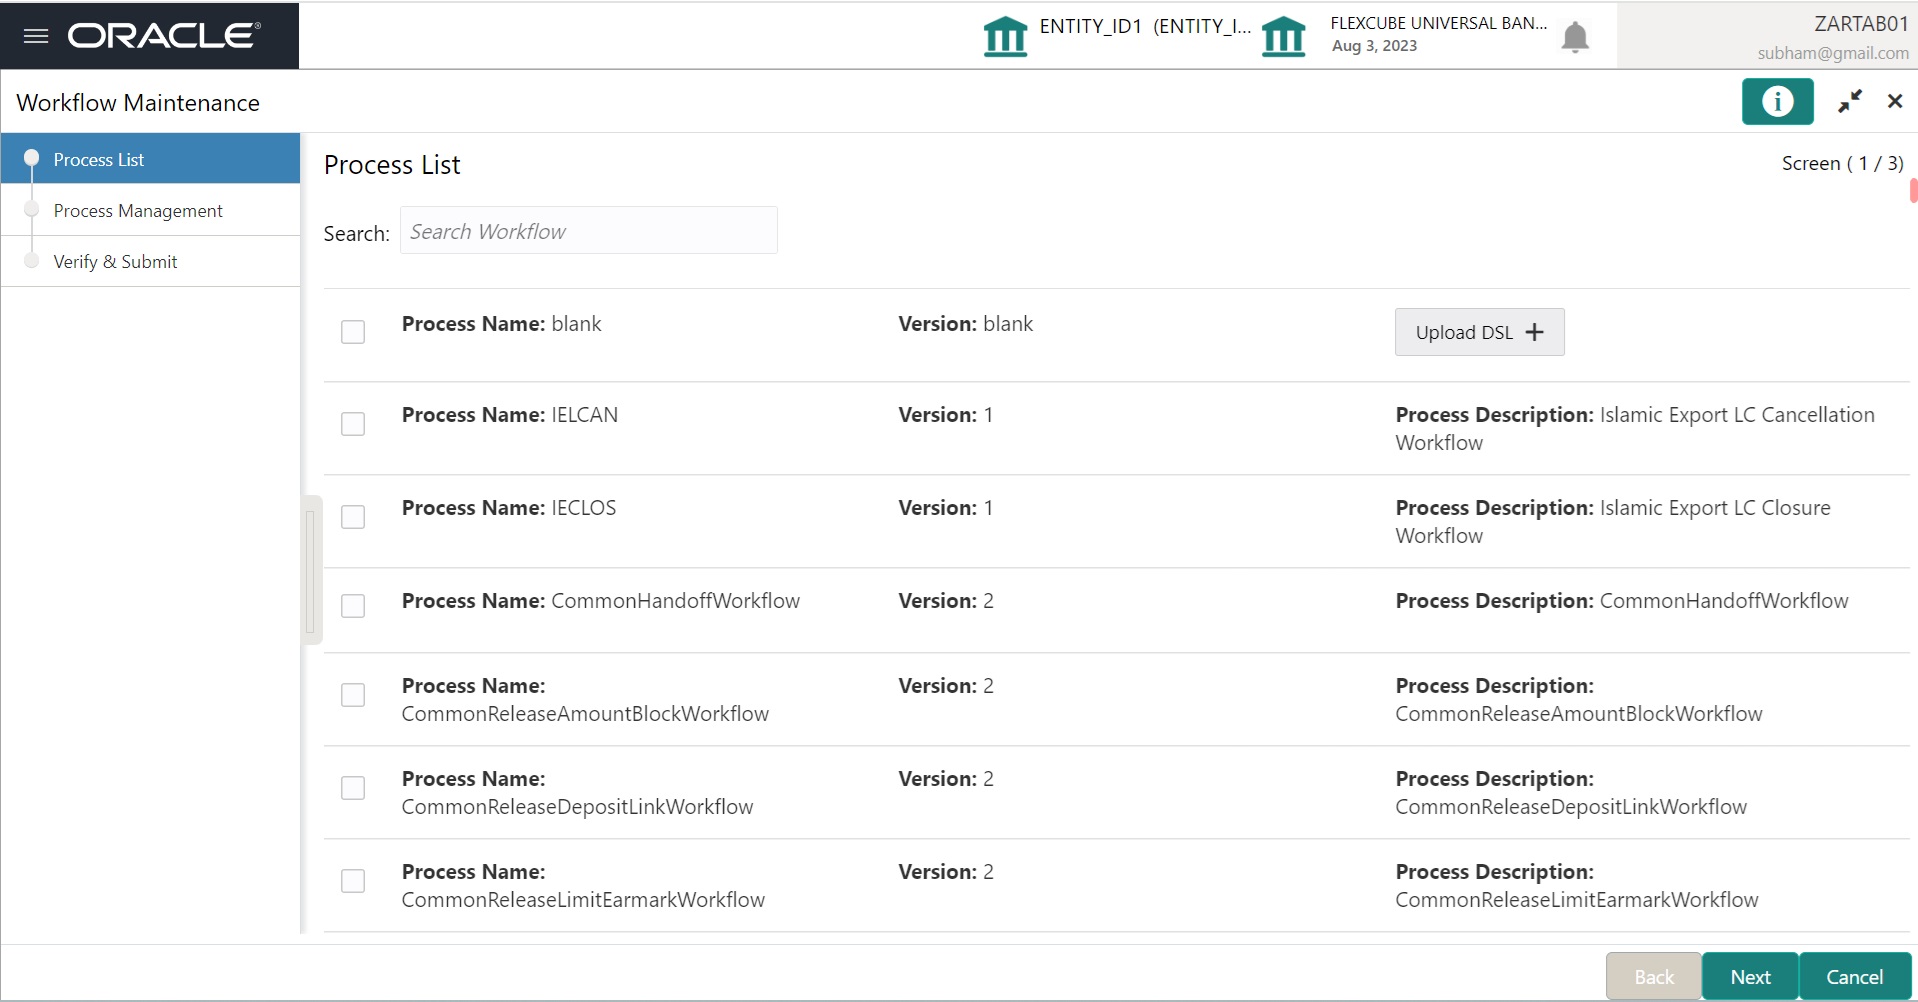
2. Select the required process and perform any one of the following actions:
l Click Next to navigate to the next screen.
l Click Search to search for any of the existing workflows/processes.
l Click Upload DSL button to upload a workflow in JSON format.
l Click Cancel button to exit the Business Process Maintenance screen.
The Process Management screen displays the list of the stages under the process, which was selected from the Process List screen, on the right under the heading Process Stage List. Also, all stages are listed in table on the left under the heading All Stage List.
3. Click Next.
The Process Management screen displays.
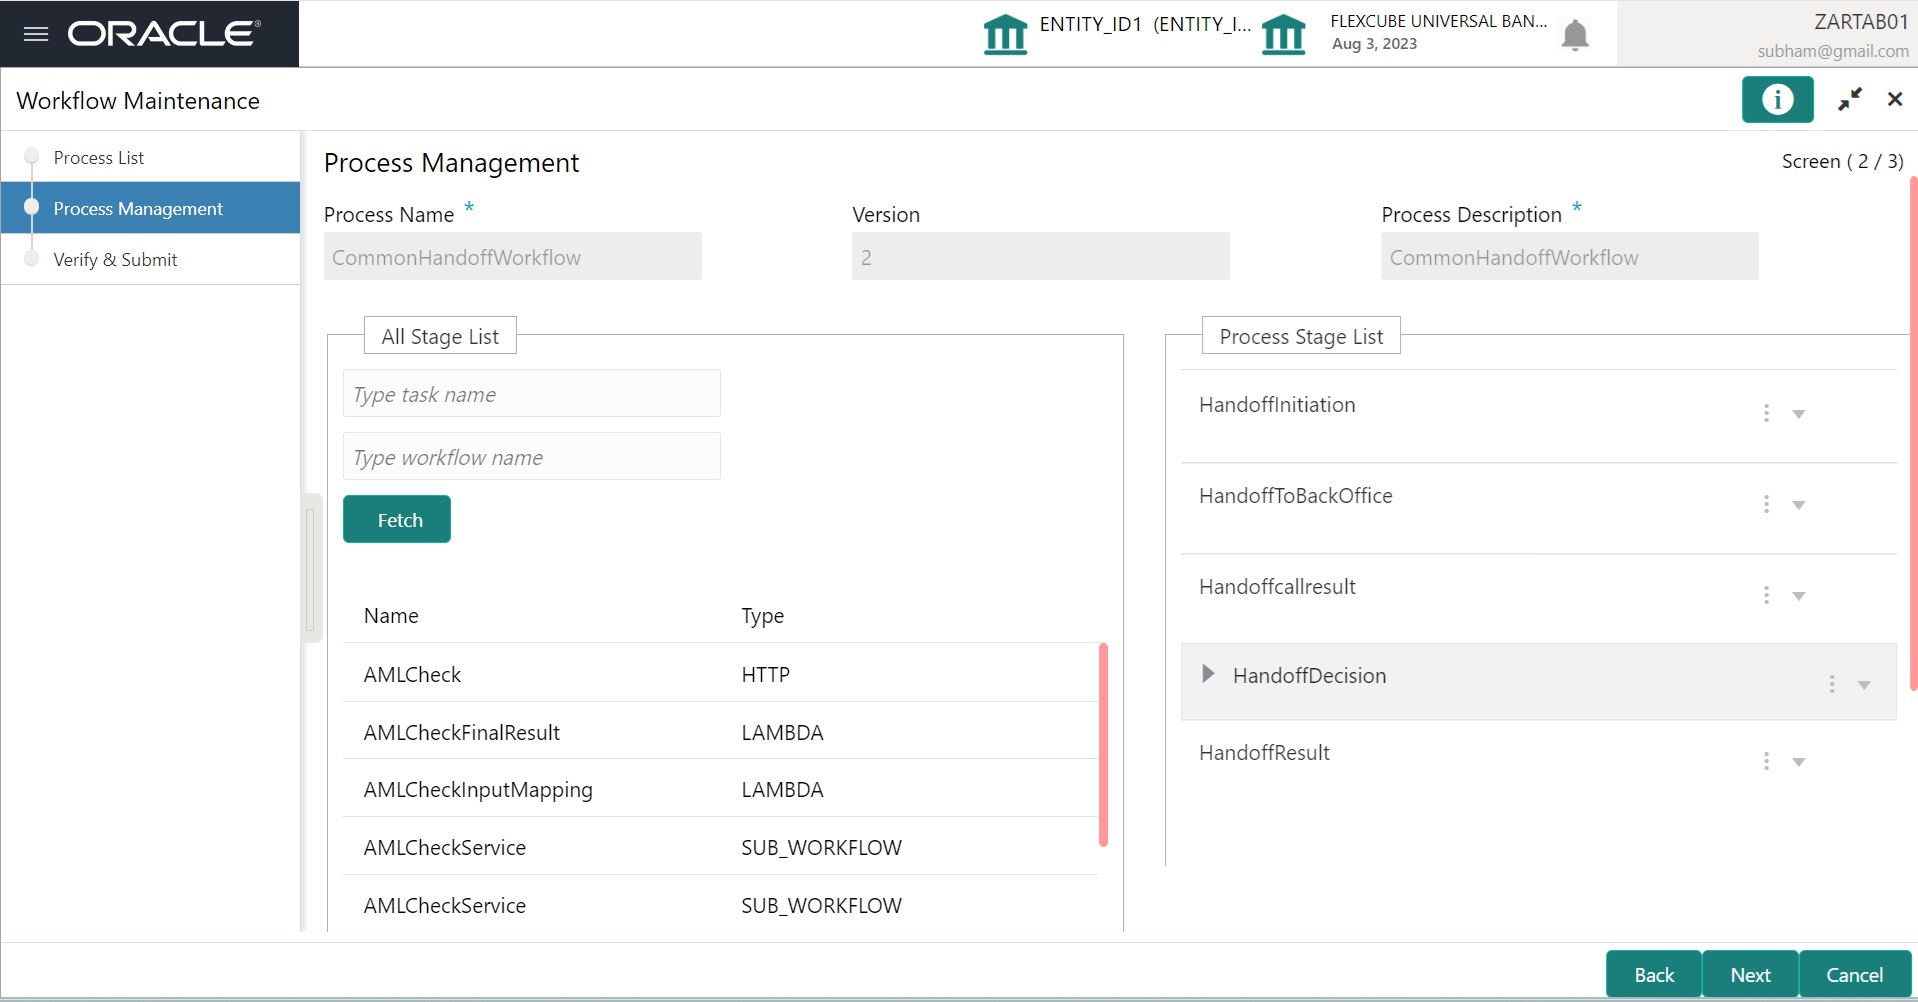
4. Drag and drop any stage from the All Stage List to the Process Stage List to add new stages in the process. The user can also perform the following actions in the Process Management screen:
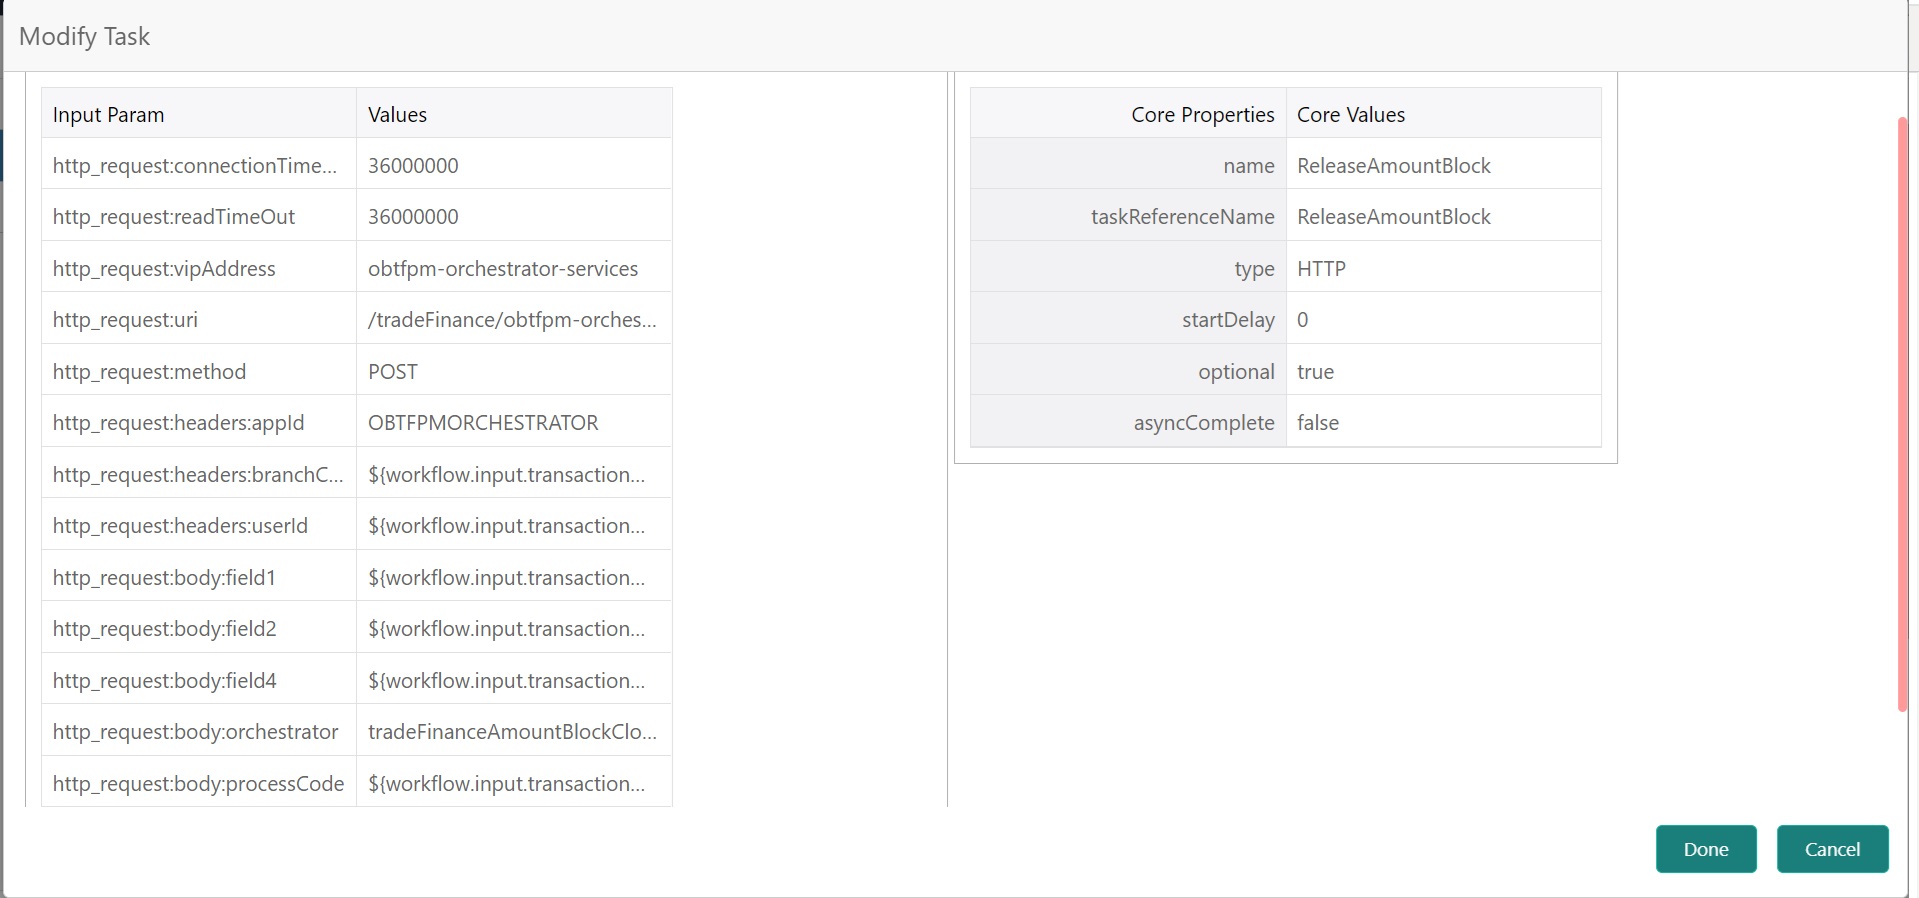
l Click More Options and select Edit to edit a stage in the Process Stage List.
l The Modify Task screen displays.
l Click More Options and select Delete to delete a stage from the Process Stage List.
5. Perform one of the following action on the Process Management screen.
l Click Next to navigate to the next screen after modifying the stages.
l Click Back to navigate to the previous screen.
l Click Cancel to exit the Business Process Maintenance screen.
The Verify & Submit screen displays the process task list with all the new/modified tasks.
6. Click Next.
l The Verify & Submit screen displays.
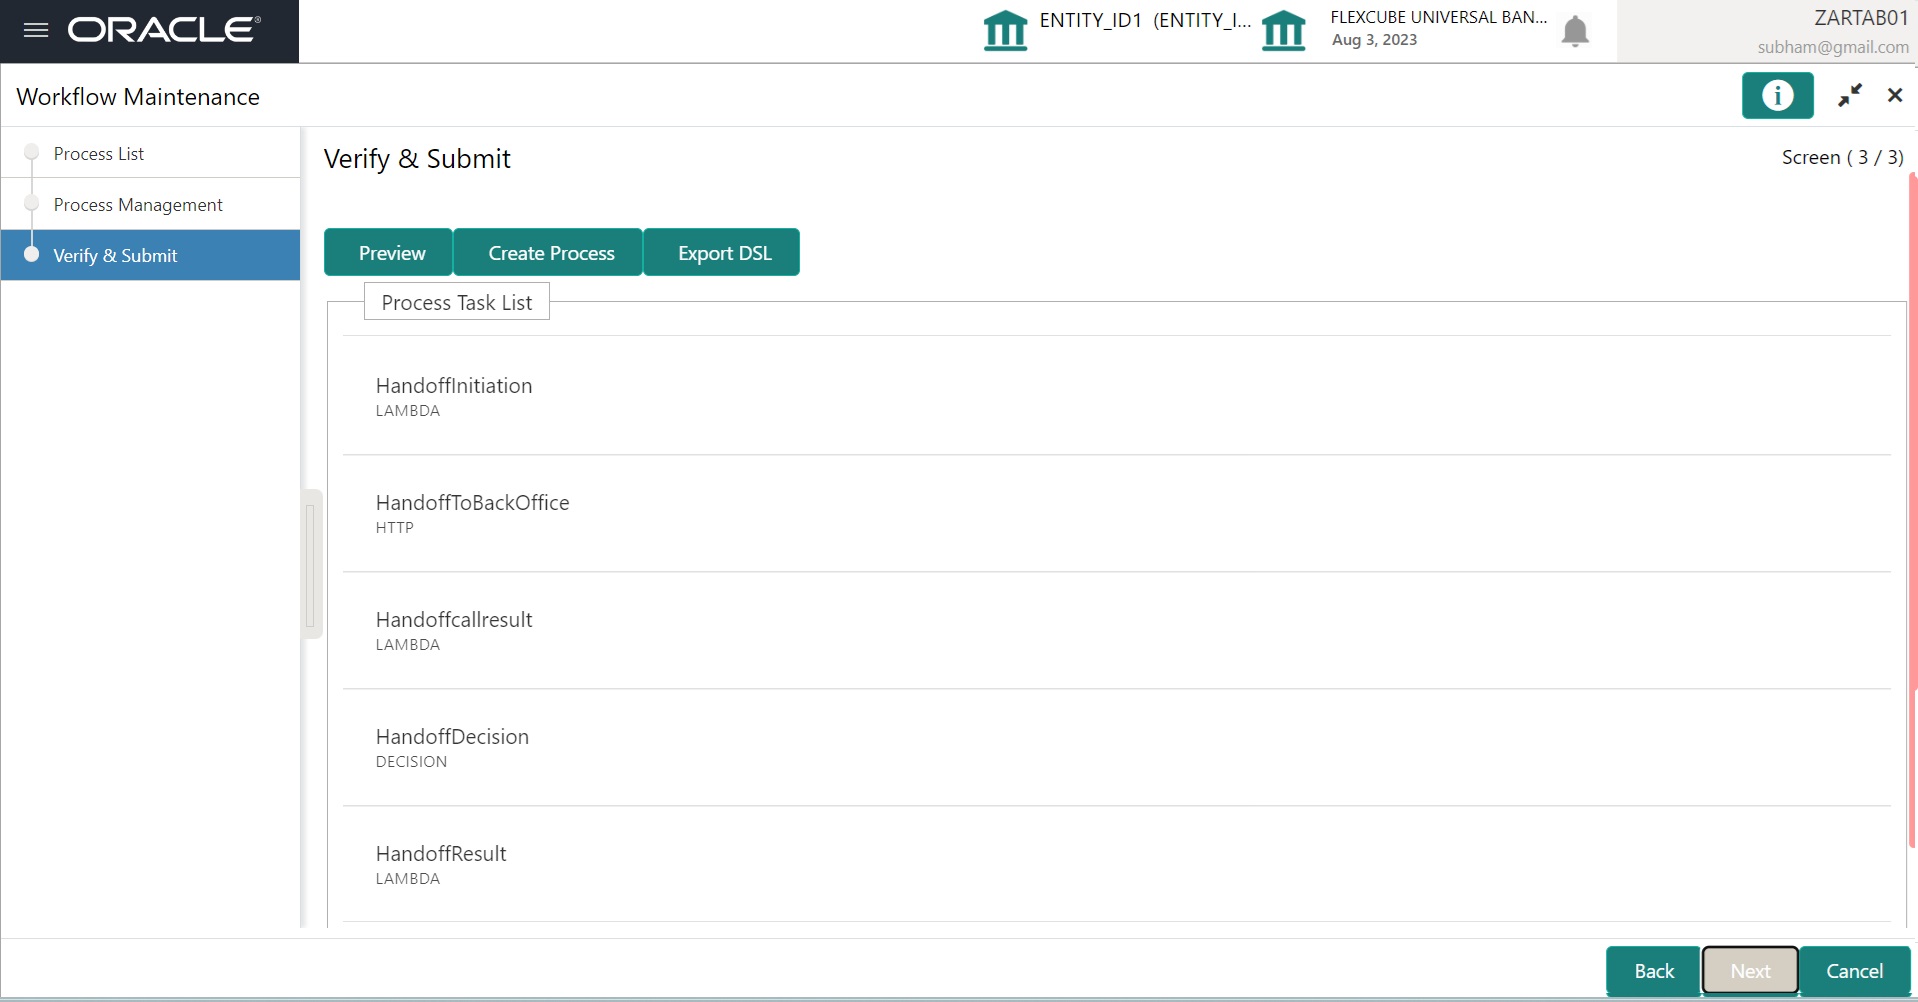
7. Perform one of the following actions in the Verify & Submit screen.
l Preview - Click this button to view the flow diagram of the selected process.
l Create Process – Click this button to create a new process. If an existing process is modified, a new process with updated version appears in the process list.
l Export DSL – Click this button to export DSL into a file in JSON format.
l Back – Click this button to navigate to the previous screen.
l Cancel – Click this button to exit the Business Process Maintenance screen.