6. Exception & Investigation Queues - Cross border / RTGS
6.1 Outbound Charge Claim Queue
All the outbound charge claim message sent is logged in Outbound Charge Claim Queue. To invoke this screen type ’PQSCOCLQ’ in the field at the top right corner of the Application Tool bar and clicking the adjoining arrow button.
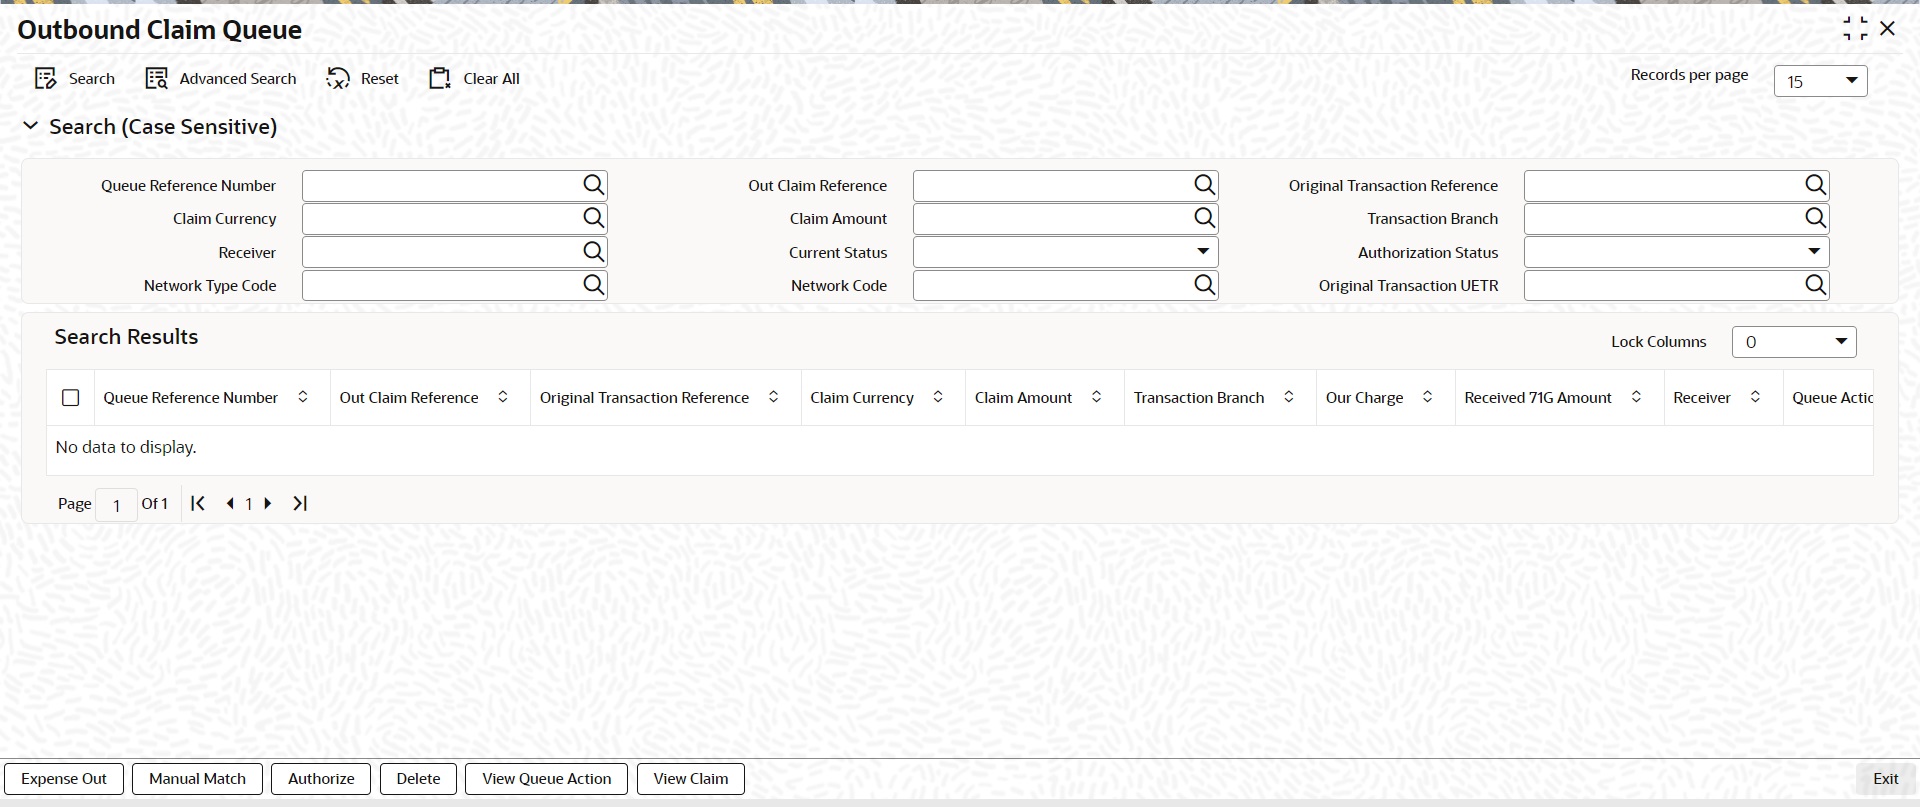
You can search using one or more of the following parameters
l Queue reference Number
l Out Claim Reference
l Original Transaction Reference
l Claim Currency
l Claim Amount
l Transaction Branch
l Receiver
l Current Status
l Authorization Status
l Network Type Code
l Network Code
l Original Transaction UETR
On click of ‘Search’ button, system displays the records that match the search criteria specified.
Following actions can be performed in the Queue screen:
You can invoke the Notify Message screen by clicking on ‘Notify Message ‘action button available at the left bottom in the ‘Notify Message Details ‘screen (PMSNOTFY)
Select the record and invoke this action, to close the outstanding claim by reversing the Receivable GL outstanding to an expense GL.
The expense GL maintained in Default Claim preferences PXD191PF is used as the debit GL.As the entries are posted, claim is marked as Liquidated
Select a record and click the ‘Manual Match’ button to launch the Manual Match detailed screen, The outstanding claim can be matched with any of the inbound Bank transfer transaction or with inbound MT 910 received.
Enter the settlement amount in Manual Match screen on selecting MT 202/MT 910 for matching, where the settlement amount should be less than or equal to Min (Claim amount, matched message amount).
l If the settlement amount is same as the claim amount the claim will be marked as liquidated. No entries are posted
l If the settlement amount is less than the claim amount, tolerance will be checked. If the difference is within the tolerance then the accounting for expensing out the difference will be passed.
l If the difference is above the tolerance the claim will remain as outstanding. No accounting is posted
Note
Charge Claim Manual Match (PXDCLMMM) screen can be invoked by clicking the action button ‘Manual Match’. This will open as standalone screen on clicking the action button:
l On selecting a specific record and on clicking ‘Manual Match’ button, all the details pertaining to Outbound Claim details, Match Transaction details are displayed.
Following actions requires authorization:
l Expense Out
l Manual Match
Select a claim for the initiated actions like - ‘Expense Out’, ‘Manual Match’ and click on ‘Delete’ button to delete the actions before authorizing the same.
View the queue actions for the selected claim with the maker/checker details.
Note
Queue rights and transaction limit rights will be verified for every action initiated.
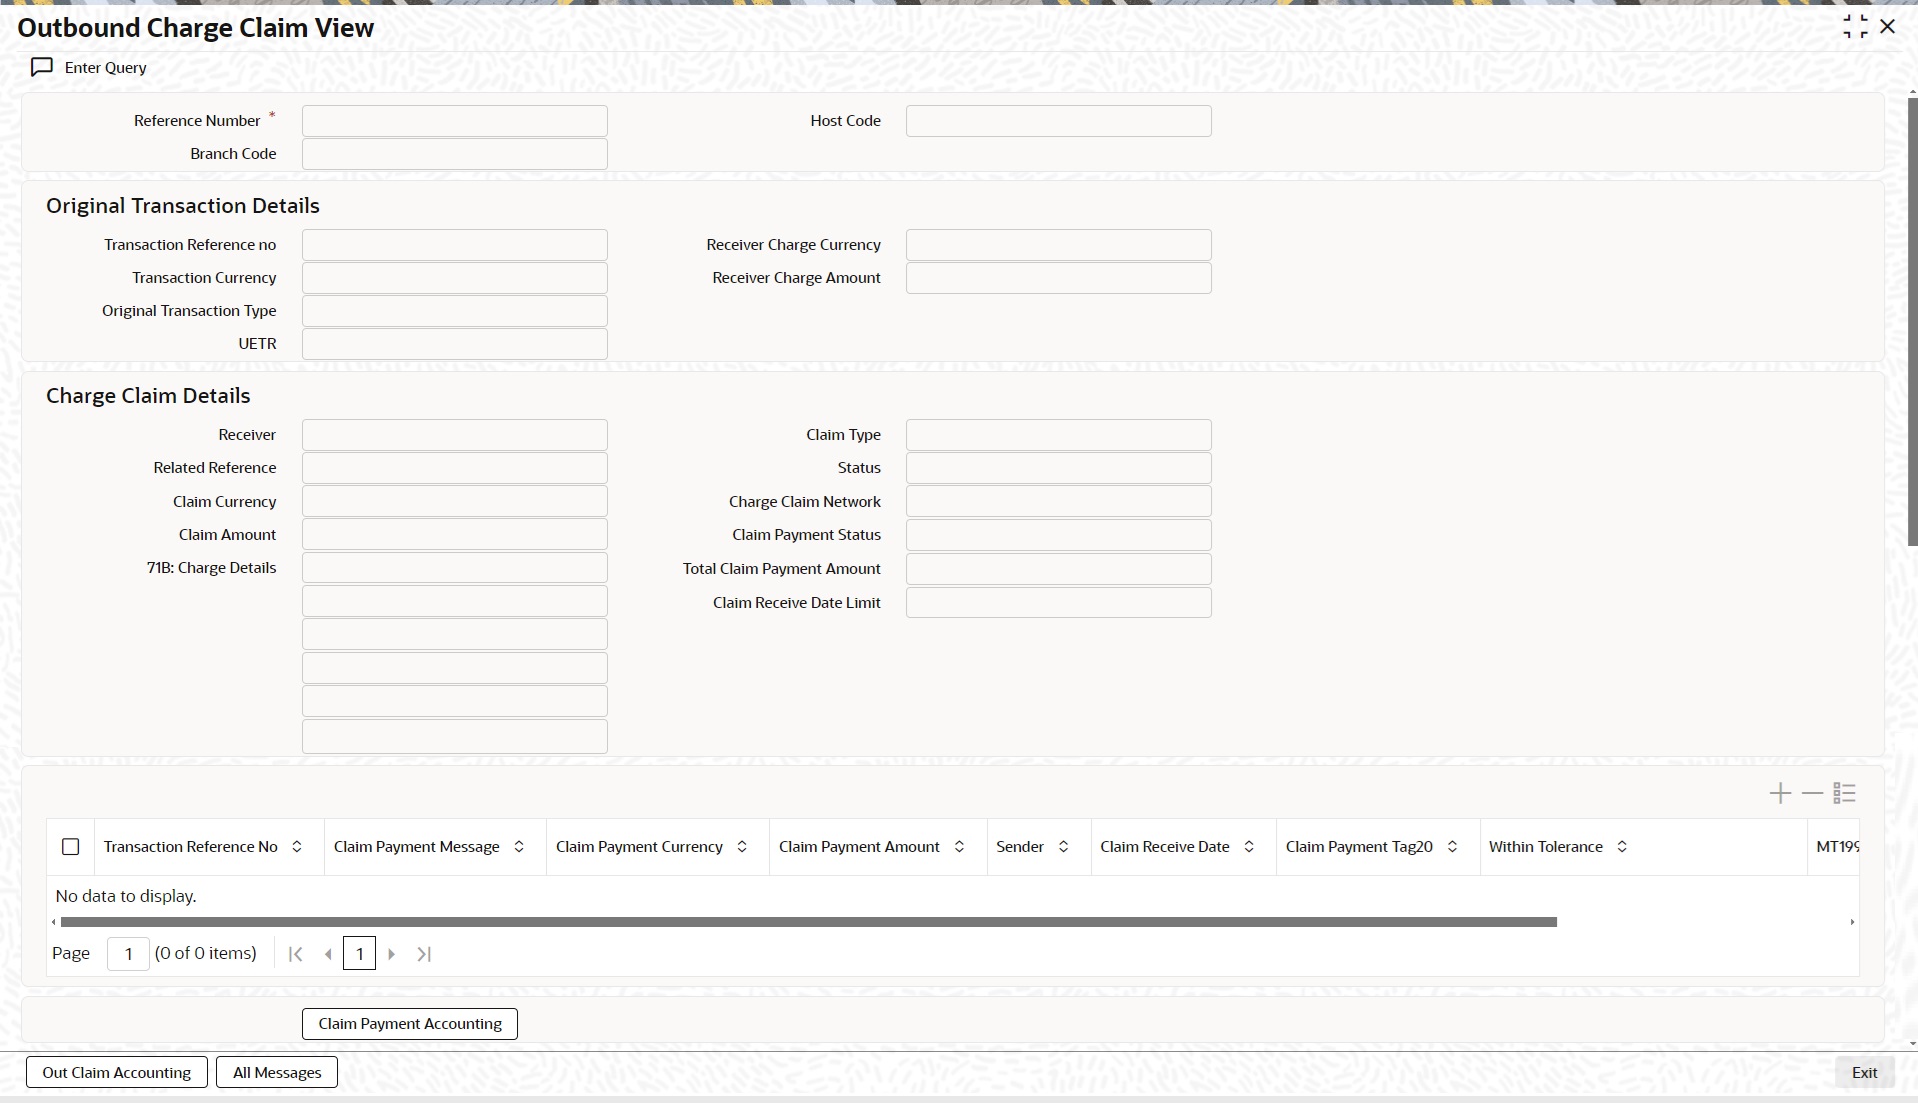
Outbound Claim message details are displayed in this screen ’PXDCLMVW’ Click on ‘View Claim’ to open this screen. All the payments received against the claim is listed here.
6.2 Inbound Charge Claim Queue
Any repair type validation failure is encountered while processing inbound claims, the claim is move to Inbound Charge Claim Queue. Refer Exception Queues User Manual for further details.
To invoke this screen type ’PQSCLMQU’ in the field at the top right corner of the Application Tool bar and clicking the adjoining arrow button.
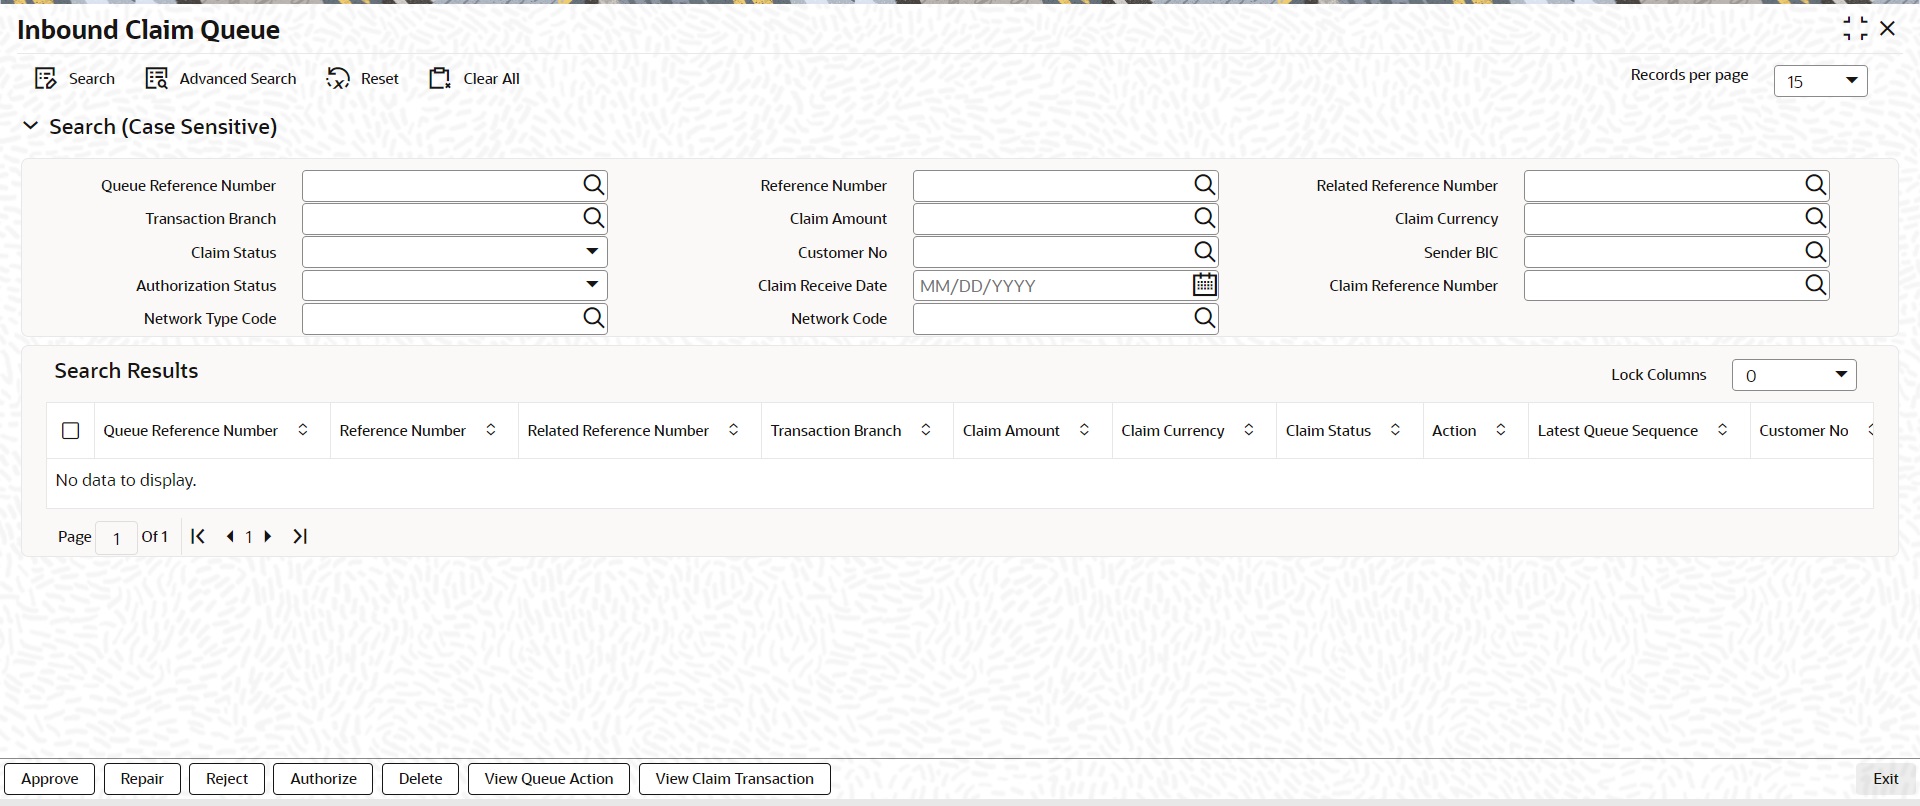
You can search using one or more of the following parameters:
l Queue Reference Number
l Transaction Branch
l Claim Status
l Authorization Status
l Network Type Code
l Reference Number
l Claim Amount
l Customer No
l Claim Receive Date
l Network Code
l Related Reference Number
l Claim Currency
l Sender BIC
l Claim Reference Number
On click of ‘Search’ button, system displays the records that match the search criteria specified.
Following actions can be performed in the Queue screen:
Select the record to Approve the outstanding claim settlement. On approving, customer account or Payable GL will be debited and Nostro will be credited.

Select a record and click the ‘Repair’ button to modify the Claim Currency, Claim Amount, Debit Account & Settlement Date from the repair screen Repairing the existing details requires authorization.
Outgoing Payment Details
The Outgoing Payment Details display outgoing transaction (i.e. MT103, MT202) details.
Fields displayed in the outgoing payment details section are read only fields.
Outgoing Payment Details section displays the transaction details only for the transaction status matched.
Edit Claim Details
Fields Instruction Date, Debit Account, Claim Currency, Claim Amount on the screen are displayed under section Edit Claim Details.
Related reference
Specify the Related Reference from the list of values. This field shows the Reference Numbers of original Unmatched transactions.
Select the record to reject the claim. Records selected will be marked as rejected. This requires authorization.
Following actions requires authorization:
l Approve
l Repair
l Reject
Select a claim for the initiated actions like - ‘Approve’, ‘Repair’, ‘Reject’ and click on ‘Delete’ button to delete the actions before authorizing the same.
View the queue actions for the selected claim with the maker/checker details.
Note
Queue rights and transaction limit rights will be verified for every action initiated.
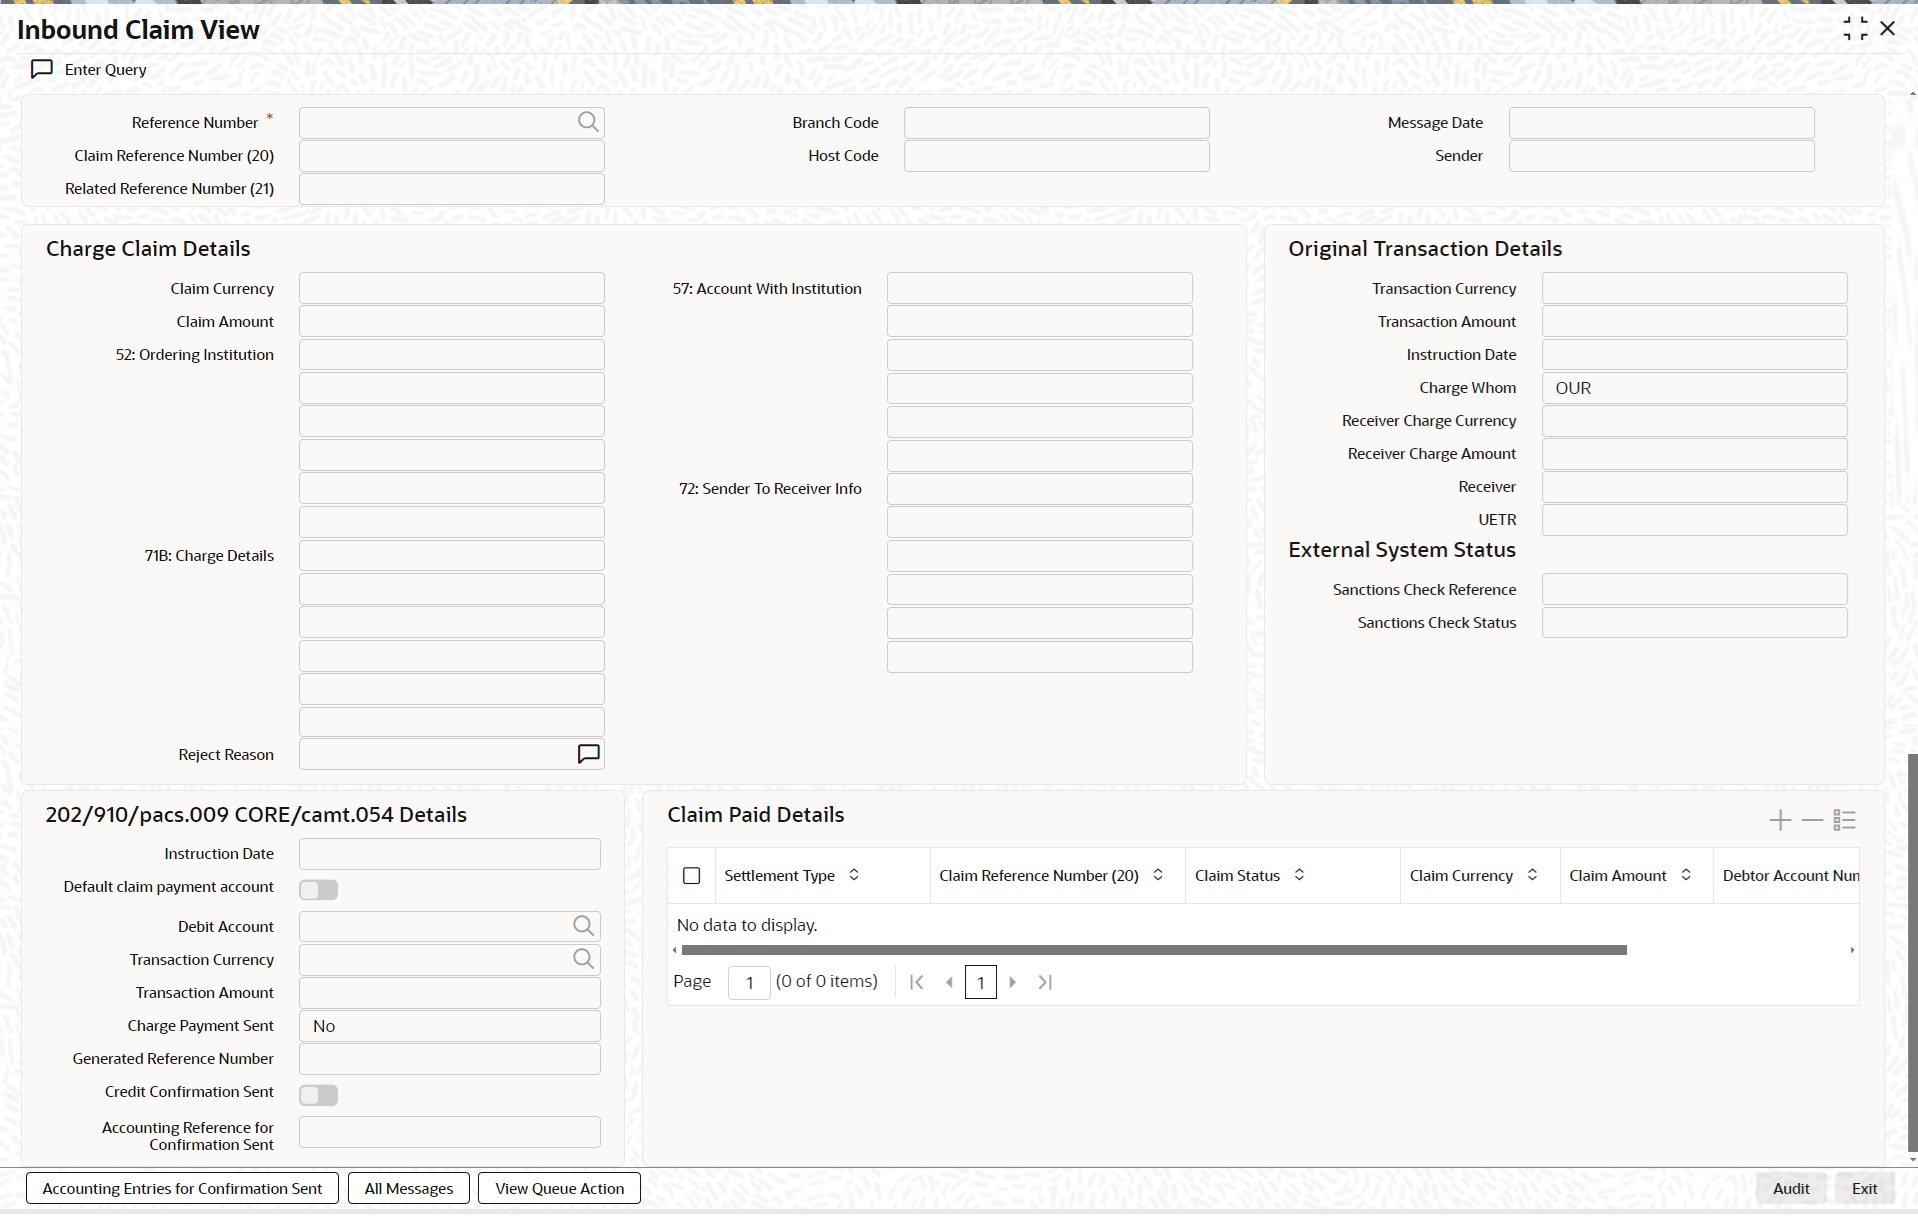
Claim message details and the liked transaction details is displayed in this screen ’PXDCHGCM’ Click on View Claim Transaction to open this screen.All the payments made against the claim is listed here.
6.3 Inbound Cancellation Request Browser
Inbound cancellation request messages (Received for both gSRP and non-gSRP) are available in this browser.
To invoke this screen, type ’PXSICLBR’ in the field at the top right corner of the Application Tool bar and click the adjoining arrow button.
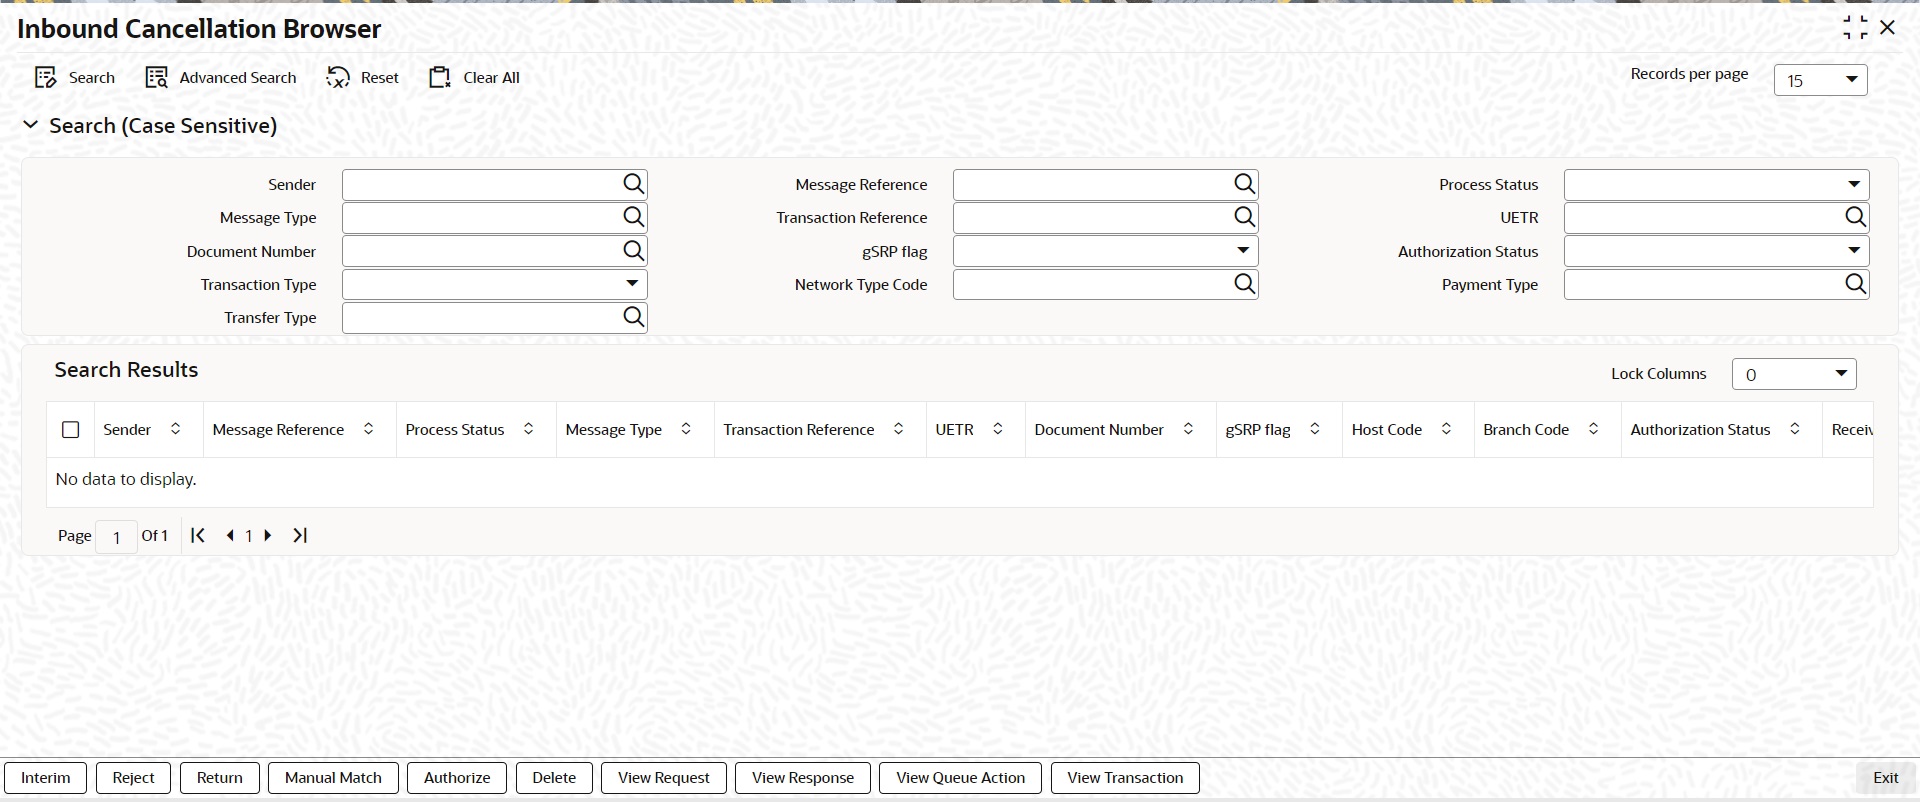
You can search using one or more of the following parameters:
l Sender
l Process Status
l Transaction Reference
l Document Number
l Authorization Status
l Network Type Code
l Transfer Type
l Message Reference
l Message Type
l UETR
l gSRP flag
l Transaction Type
l Payment Type
On click of ‘Search’ button, system displays the records that match the search criteria specified.
Following actions can be performed in this browser:
You can invoke the Manual Match screen PXDCANMM by a selecting a record and clicking on ‘Manual Match ‘action button available at the left bottom in this browser.
Manual Match action from PXSICLBR screen is allowed only if the Process status of the selected record is ‘Unmatched’. Manual Match requires authorization and queue access / limit rights.
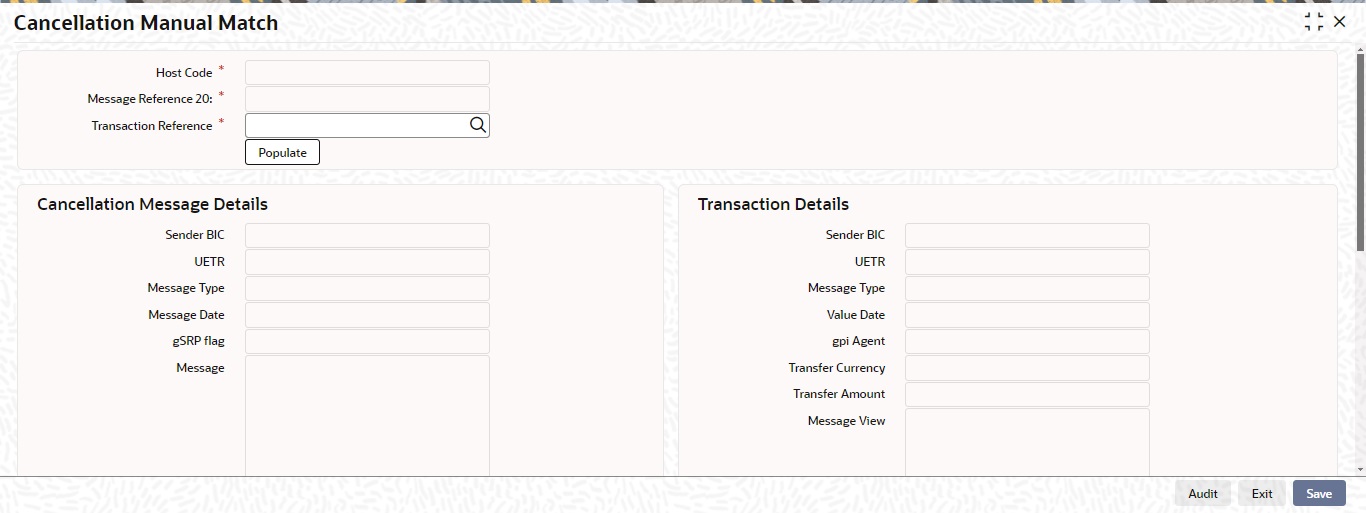
You can specify the following fields in this screen.
Host Code
The system displays the Host Code of the selected branch of the logged in user.
Message Reference 20
System defaults the value of Field 20 received in cancellation request message.
Transaction Reference
You can select a Transaction Reference from the list of Inbound transaction references which are not matched with the Inbound cancellation requests.
Cancellation Message Details
Sender BIC
The system displays the Sender BIC of the cancellation request message.
UETR
The system displays the UETR value from 121 tag received in the message.
Message Type
System displays the SWIFT message type received (192/292)
Message Date
The system displays the date on which the inbound cancellation message is received.
Message
The system displays the cancellation message received
Transaction Details
On clicking the Populate button in PXDCANMM screen, system defaults the following fields under this section from the inbound transaction reference selected in the LOV.
l Sender BIC
l Transfer Currency
l Transfer Amount
l Value Date
l gpi Enabled
l Message
On Authorization of manual match action, a cancellation request is logged against the matched transaction. You can view the cancellation request in the ‘Exception’ tab of the matched inbound transaction. In queue action log of the matched inbound transaction, a record is logged with action as ‘MATCH’.
You can invoke the Cancellation Response Details screen PQDCANRP by a selecting a record and clicking on ‘Interim’ or ‘Reject’ action button available at the left bottom in this browser.
Interim/Reject action from PXSICLBR screen is allowed only if the Process status of the selected record is ‘Unmatched’ or ‘Matched’. Reject action is not allowed if the Last Response Action is ‘Rejected’. Interim/Reject action requires authorization and queue access / limit rights.
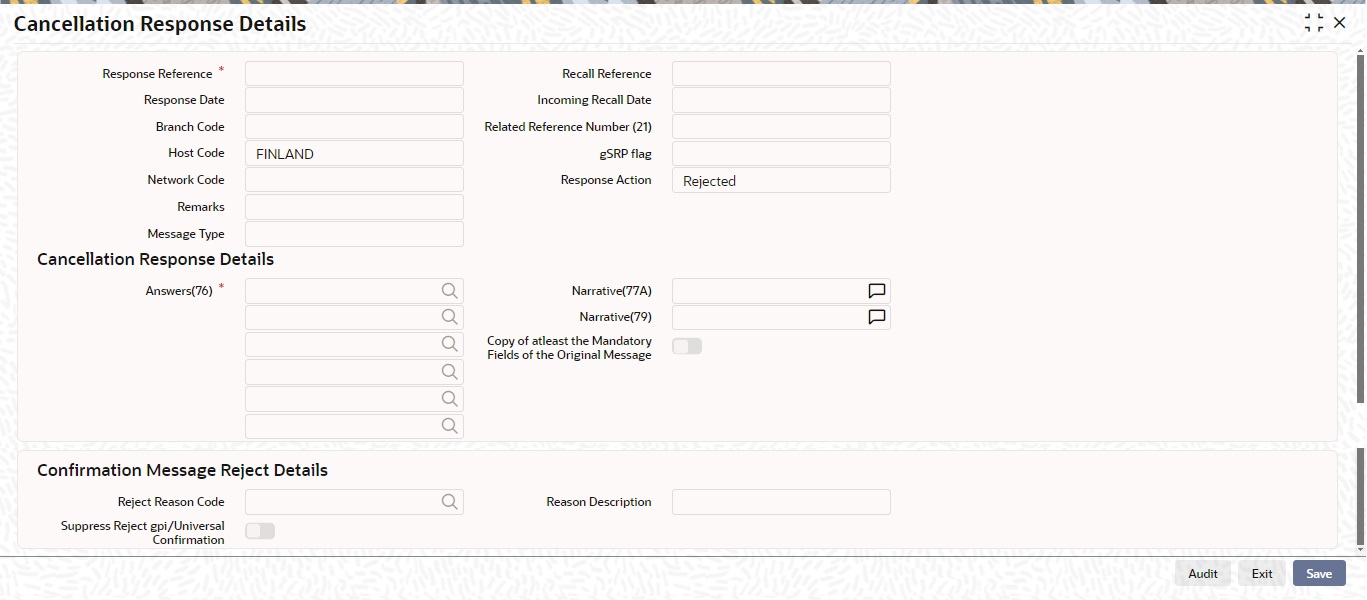
You can specify the following fields in this screen:
Response Reference
System displays an auto generated reference number in this field.
Response Date
System defaults the current branch date in this field.
Branch Code
The system defaults the Branch code of the matched transaction.
Host Code
The system defaults the Host code of the matched transaction.
Network Code
The system defaults the Network code of the matched transaction.
Recall Reference
The system displays the Field 20 of the incoming MT n92/gSRP request message.
Incoming Recall Date
The system displays the Date on which the incoming MT n92/gSRP request message received.
Related Reference
The system displays the transaction reference of the matched inbound transaction.
Response Action
The system displays the action selected from the PXSCIBLR screen (Interim/Reject).
gSRP flag
The system displays ‘Yes’ in this field if the request is a gSRP request. Else system displays ‘No’ in this field.
Answers (76)
You can input response details in the field by selecting the reason codes from the LOV. You can input 6 lines of 35 characters. Line 1 LOV displays various reason codes and reason statuses based on the action selected and the gpi Enabled flag of the matched transaction.
|
Action |
gpi Enabled flag |
Response Statuses/Recon Codes |
|---|---|---|
|
Interim |
Yes |
Will display gSRP Response code for Interim status within ‘/’ followed by gSRP Reason codes for the Interim status. E.g. /PDCR/RQDA |
|
Interim |
No |
Will display all response/reason codes applicable for n96 message |
|
Reject |
Yes |
Will display gSRP Response code for Reject status within ‘/’ followed by gSRP Reason codes for the Reject status. E.g. /RJCT/LGCL |
|
Reject |
No |
Will display all response/reason codes applicable for n96 message |
Narrative (77A)
You can input the narrative details up to 20 lines with 35 characters each.
Narrative (79)
You can input the narrative details up to 35 lines with 35 characters each.
Copy of at least the Mandatory Fields of the Original Message
You can check the Copy of at least the Mandatory Fields of the Original Message check box if the fields of the original request message needs to be populated.
l On Authorization of the Interim/Reject action, a gSRP response message is generated if the request is a gSRP request message. Else a non-gSRP response message is generated.
l On save and authorization of the ‘Reject’ action, system validates whether the response is processed within the days allowed if the transaction is gpi-transaction. If the response date is beyond the ‘Recall Response days’ maintained in gpi Host preferences (PXDGPIPF), system shows an information message ‘Final gSRP response is being provided to the Tracker after x calendar days from the receipt of gSRP request’.
l In the field Answers (76), line 1 is mandatory for gpi payments. Other lines in Answers (76), ‘Copy of at least the Mandatory Fields of the Original Message’ checkbox, field Narrative 77A and field Narrative 79 are not allowed for gpi payments.
l In View queue action log, queue action is logged for the user action taken against the message reference. Last Response action in PXSICLBR is updated with the user action taken. If the Process status is ‘Matched’, Recall Response is logged in the Exception tab of the matched inbound transaction.
Confirmation Message Reject Details
Reject Reason Code
Specify the Reject Reason Code from the list of values. Lists all the gpi Confirmation Reject Reason codes from SWIFT gpi Host Preferences (PXDGPIST).
Reason Description
This field displays the Description of the reject reason code selected.
Suppress Reject gpi/Universal Confirmation
The flag value 'Suppress Reject gpi/Universal Confirmation' is checked during the auto generation of SWIFT gpi/Universal confirmation message generation processing.
If the field is checked, then the Reject confirmation message gets generated and the message status is updated as Suppressed. The message is available in Outbound Message Browser (PMSOUTBR). The message do not get handed off.
If the field is Unchecked, then the Reject confirmation message gets generated and handed off.
You can perform the Authorize action only if the authorization status is ‘Unauthorized’. On Authorize action, the authorization status of the record is marked as ‘Authorized’.
You can perform the Delete action only if the authorization status is ‘Unauthorized’. On Authorize action, the system reverts the Process status of the record to previous status.
You can view the inbound cancellation request message by performing View Request Action.
You can view the response messages sent out by performing View Response Action. The latest response message sent out is displayed first in the screen.
You can view the action logs for the cancellation message received against the reference.
On clicking the View Transaction button, system launches Inbound SWIFT Payment View (PSDIVIEW) screen if the matched transaction is of type 'Incoming Message'.
6.4 Inbound Cancellation Request Queue
Inbound cross border transactions for which cancellation request messages are received are available in this queue screen.
To invoke this screen, type ’PQSICLRQ’ in the field at the top right corner of the Application Tool bar and click the adjoining arrow button.
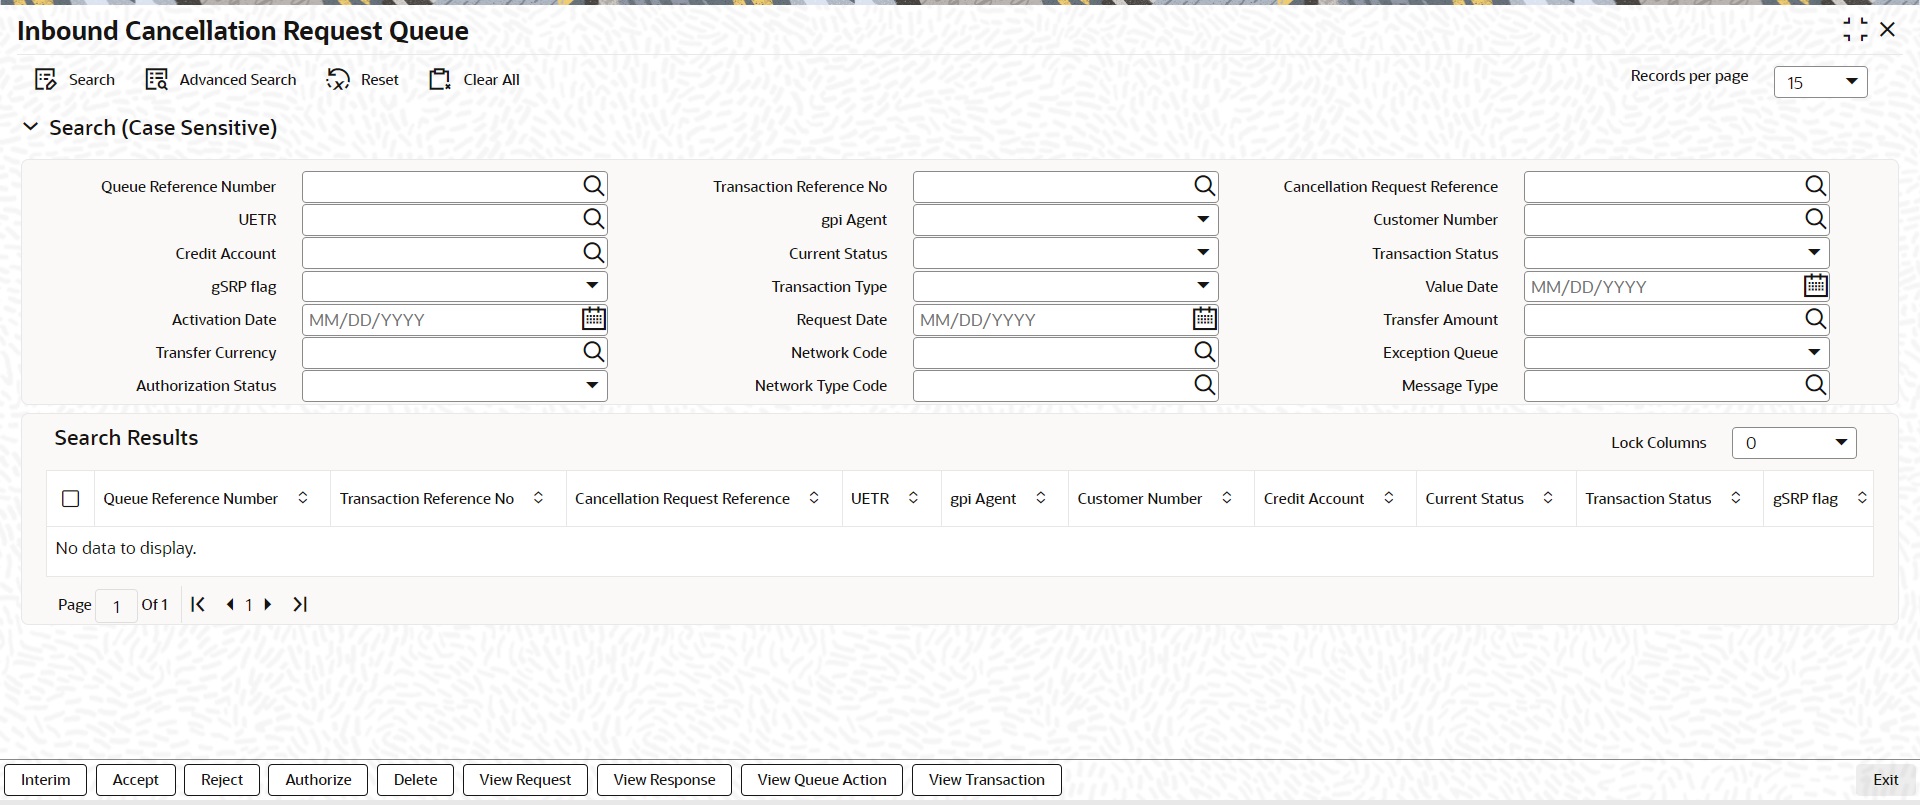
You can search using one or more of the following parameters:
l Queue Reference Number
l UETR
l Credit Account
l gSRP flag
l Value Date
l Transfer Amount
l Exception Queue
l Transaction Reference Number
l gpi Enabled
l Current Status
l Transaction Type
l Activation Date
l Transfer Currency
l Authorization Status
l Cancellation Request Reference
l Customer Number
l Transaction Status
l Request Date
l Network Code
l Network Type Code
l Message Type
On click of ‘Search’ button, system displays the records that match the search criteria specified.
Following actions can be performed in this browser:
You can invoke the Cancellation Response Details screen PQDCANRP by a selecting a record and clicking on ‘Interim/Accept/Reject’ or action button available at the left bottom in this browser.
Interim/Accept/Reject action requires authorization and queue access / limit rights. Accept action is not allowed when the transaction status is Cancelled / Seized / Reversed and the transaction type is incoming.
Field and the validations is same as Cancellation Response Details screen which is launched from inbound cancellation browser. For more details, refer Section 6.3.2, "Interim/Reject".
You can perform the Authorize action only if the authorization status is ‘Unauthorized’. On Authorize action, the authorization status of the record is marked as ‘Authorized’.
You can perform the Delete action only if the authorization status is ‘Unauthorized’. On Authorize action, the system reverts the Process status of the record to previous status.
You can view the inbound cancellation request message by performing View Request Action.
You can view the response messages sent out by performing View Response Action. The latest response message sent out is displayed first in the screen.
You can view the action logs for the cancellation message received against the reference.
This action launches the Inbound Cross Border Transaction View Detailed (PXDIVIEW) if the 'Transaction Type' field value is 'Incoming' and Incoming SWIFT Payment View screen (PSDIVIEW) if the value is 'Incoming Message.
6.5 Inbound Messages STP Queue
Inbound MT103 / MT 202 / Cov messages awaiting match is listed in this queue screen.
You can invoke the ‘Inbound Messages STP Queue’ screen by typing ‘PQSSTPQU’ in the field at the top right corner of the application toolbar and clicking the adjoining arrow button. Click New button on the Application toolbar.
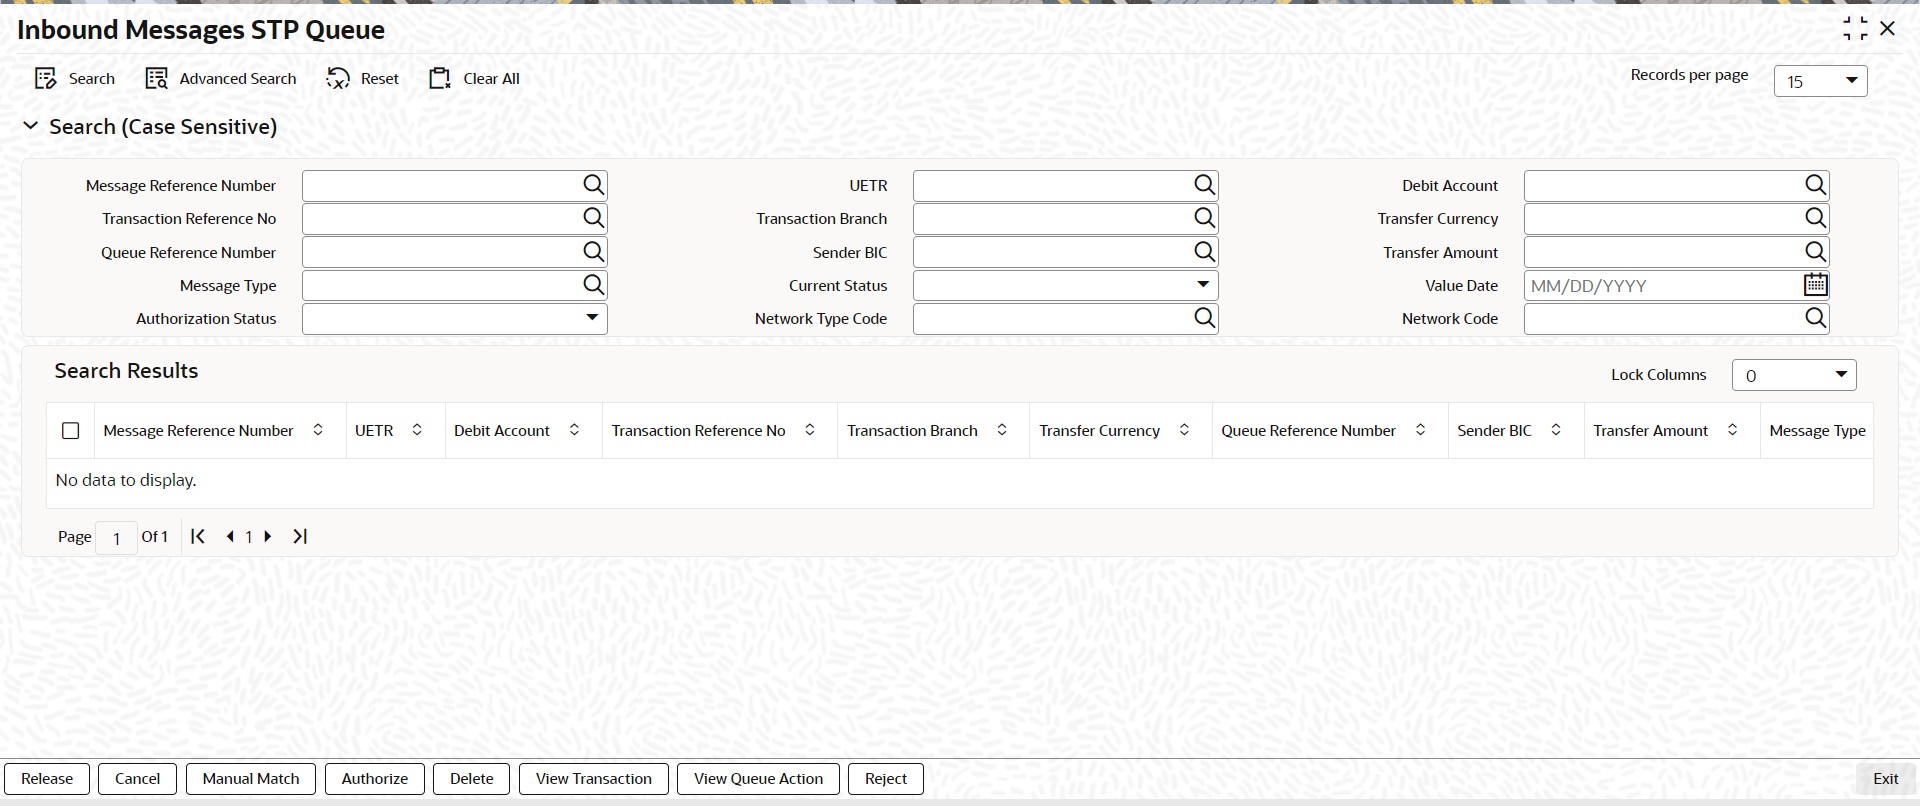
You can search using one or more of the following parameters:
l Message Reference Number
l Transaction Reference Number
l Queue Reference Number
l Message Type
l Authorization Status
l UETR
l Transaction Branch
l Sender BIC
l Current Status
l Network Type Code
l Debit Account
l Transfer Currency
l Transfer Amount
l Value Date
l Network Code
Once you have specified the search parameters, click ‘Search’ button. The system displays the records that match the search criteria.
The following actions can be performed for transactions in this queue
|
Actions |
Functions |
|
Release |
1. This action is applicable for both Non-STP and waiting for cover messages. 2. System skips the cover matching and release the message for further processing. 3. This action requires authorization and queue access / limit rights. |
|
Cancel |
For the details on, processes followed on cancelling a payment, refer to Section 9.1, "Cancellation from Exception Queues". |
|
Manual Match |
This action is applicable for only cover pending messages. Manual Match requires authorization and queue access / limit rights. |
|
Authorize |
Authorization is applicable for the Unauthorized Release, Suppress and Manual Match actions. |
|
Delete |
Allows the user to delete the actions – Release, Suppress and Manual Match that are unauthorized. |
|
View Transaction |
You can view the selected transaction details. |
|
View Action Queue |
Displays all queue activities performed for a transaction. |
:
Reject action opens a new sub screen 'PQDMCRJT' to capture remarks during 'Reject' action by Checker. Reject action is allowed only, if Authorization status is Unauthorized and if the user has access right for 'Authorize' action at Role/User level.
You can invoke the ‘Reject Details’ screen by clicking the Reject action on the screen.
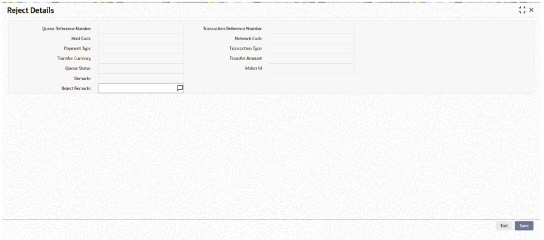
When you click on OK button in this sub screen, the below processing changes are done:
l Queue Authorization status is updated as 'Rejected'.
l Authorization status in Queue action log is updated as 'Rejected'.
l Queue status gets reset to 'Pending'.
l Reject Remarks if provided by user gets populated against Checker remarks fields of Queue action log.
l If the last Queue action is 'Manual Match', then the cover match reference gets reset. Similarly, if the last Queue action is 'Cancel', then the Reject reason code gets reset.
User actions Manual Match, Release, Cancel are allowed on the Rejected queue record.
You can invoke this screen, by clicking on ‘Manual Match’ action button in the ‘Inbound Messages STP Queue’ (PQSSTPQU).
This action is applicable for only cover pending messages. Manual Match requires authorization and queue access / limit rights.
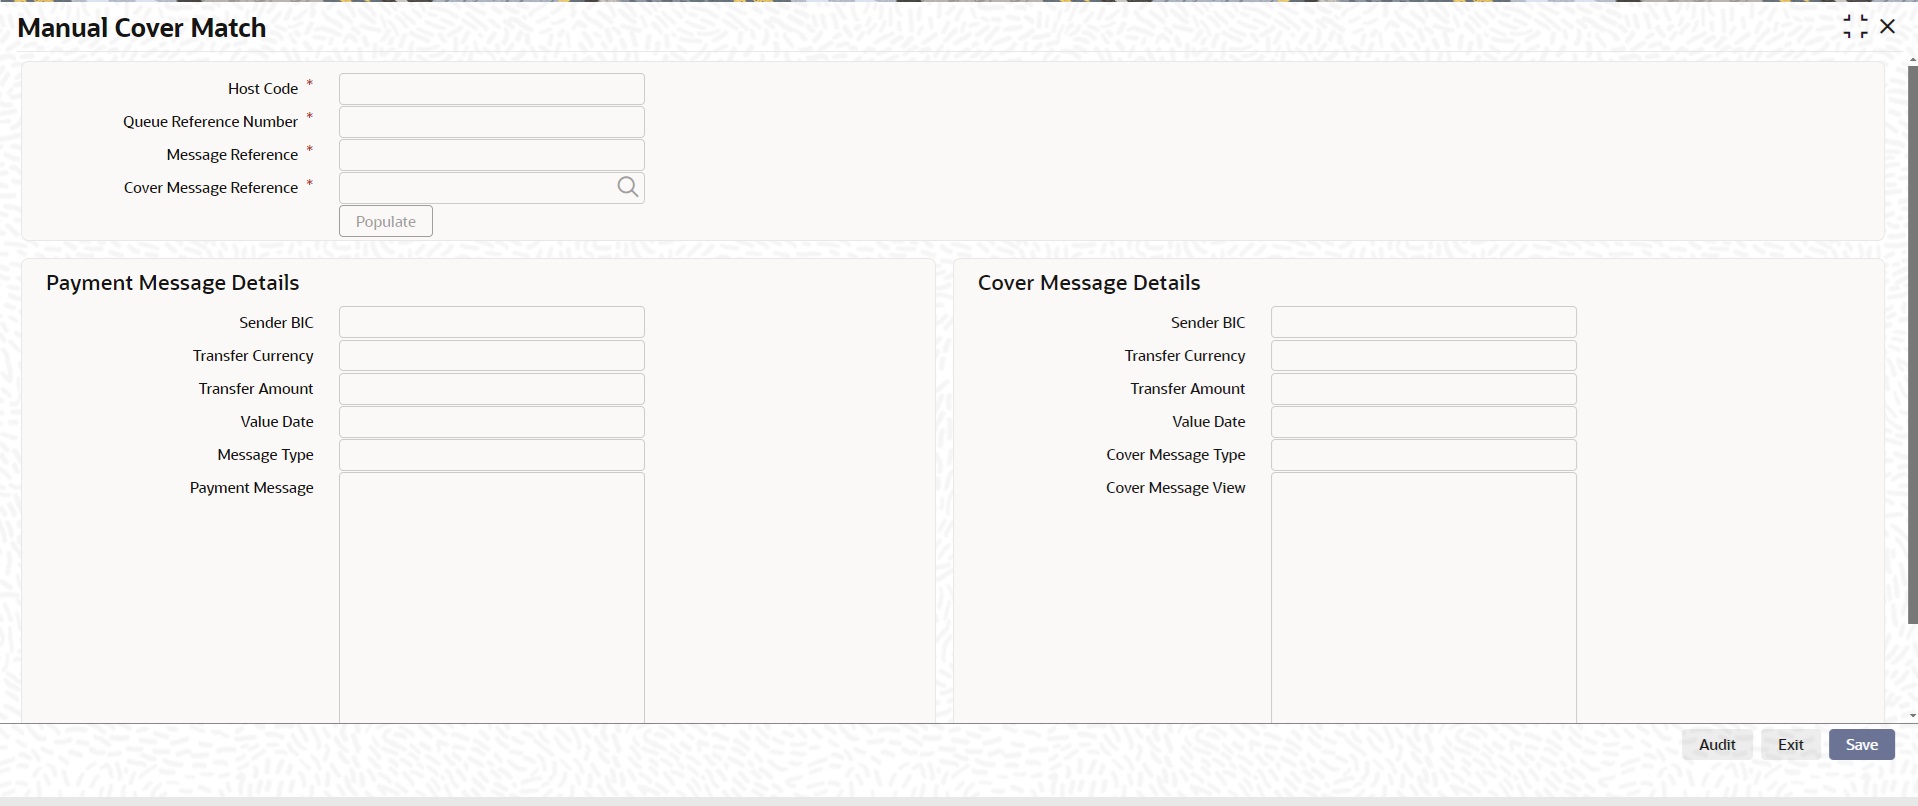
User has to select the cover message MT 202COV / MT 910 which is pending for match. While processing manual match system, tries to match the currency of the payment and cover message only.
Note
l Any difference in amount due to intermediary charges etc. has to be manually handled.
l Both payment message and cover message will be marked as manually matched. Payment value date will be derived based on the preference maintained in PMDCMPRF.
6.5.3 Auto Cover Match Processing
Auto cover matching of the messages MT 103 and MT 202 are supported.
Based on the rule condition mentioned in the Cover Queue Rule maintenance (PMDQURLE), an incoming payment message (MT103/MT 202) is routed to a STP queue. All payment messages in this queue await Cover matching. Incoming Cover messages are also routed to this queue based on the Cover queue rule condition.
l Sanction scanning of MT 202 COV and MT 910 inbound messages are done upfront.
l On successful completion of sanctions screening, the messages are matched with MT 103/ MT 202 messages pending in STP queue for cover match.
l Auto matching considers the following fields value matching between the original payment message & cover message:
– Reference Number
– Field 20 of payment message with Field 21 of cover message
– Currency & Amount match
l If the auto cover match is successful both payment message and cover message are marked as ‘Matched’, and payment message is released from STP queue for further processing.
Further the payment is sent for Network resolution and will be forwarded to the resultant payment processor.
To invoke this screen, type ’PQSING99’ in the field at the top right corner of the Application Tool bar and click the adjoining arrow button.
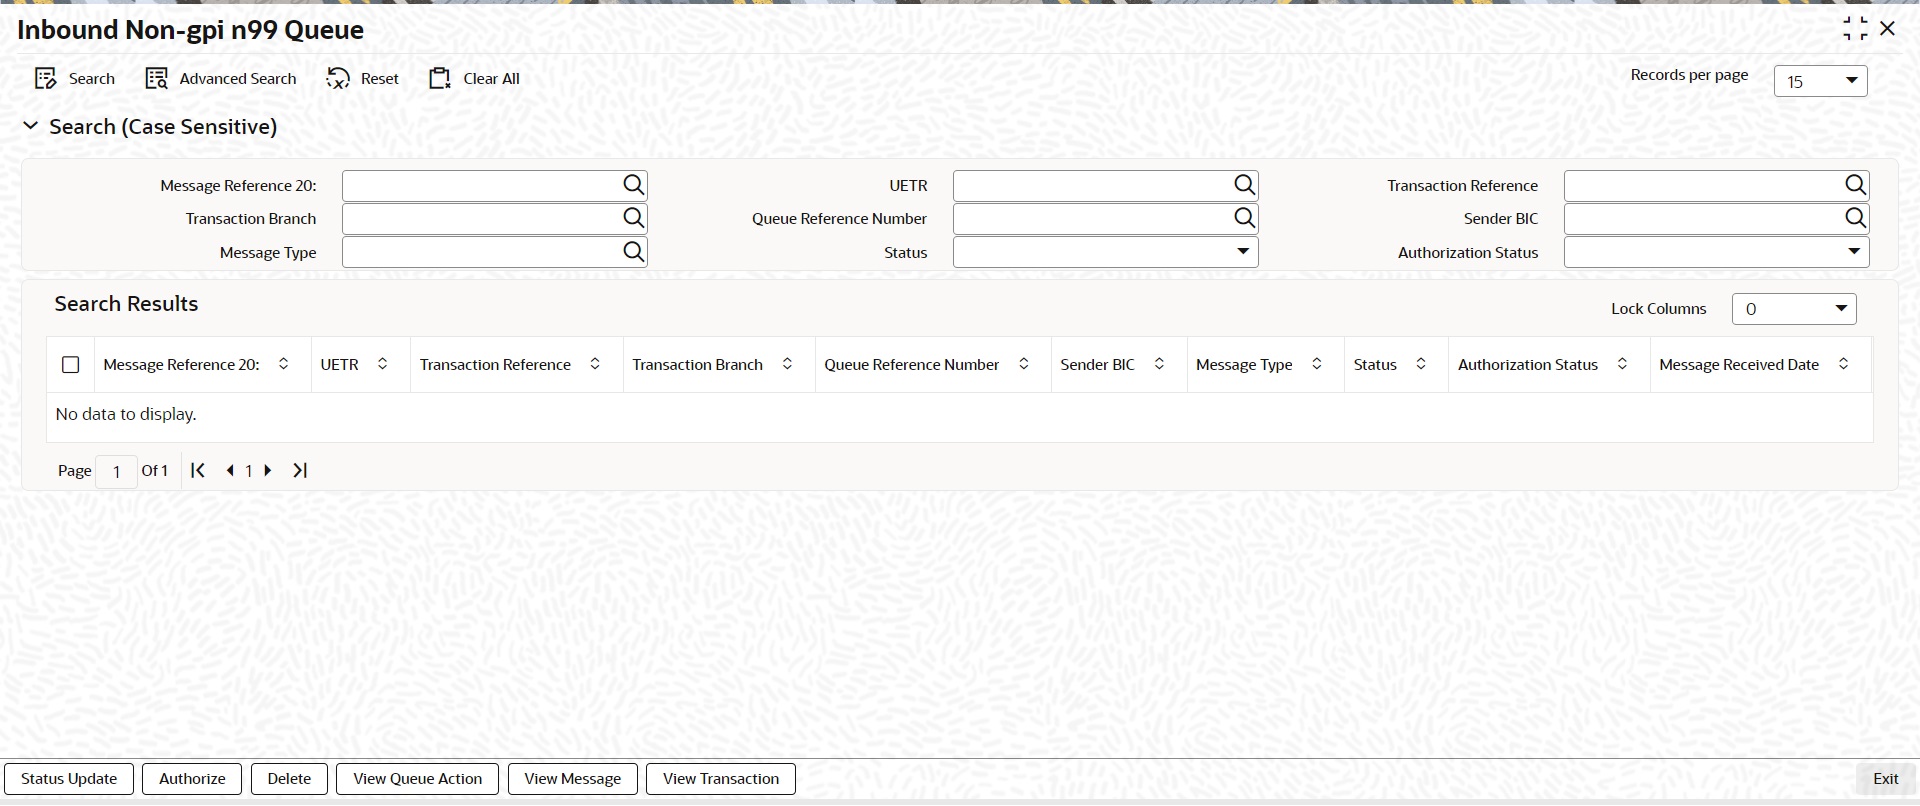
You can search using one or more of the following parameters:
l Message Reference 20
l UETR
l Transaction Reference (Indicated by Field 21 & Fetch transaction reference number from PXDOVIEW, PXDIVIEW)
l Transaction Branch
l Queue Reference Number
l Sender BIC
l Message Type (199, 299, 999 only)
l Status (Pending, Confirmed, Rejected, No Action Required)
l Authorization Status (Authorized, Unauthorized)
On click of ‘Search’ button, system displays the records that match the search criteria specified.
Following actions can be performed in this screen:
You can input remarks and select appropriate update status 'Pending, Confirmed, Rejected, No Action Required', as applicable. You can save the status update.
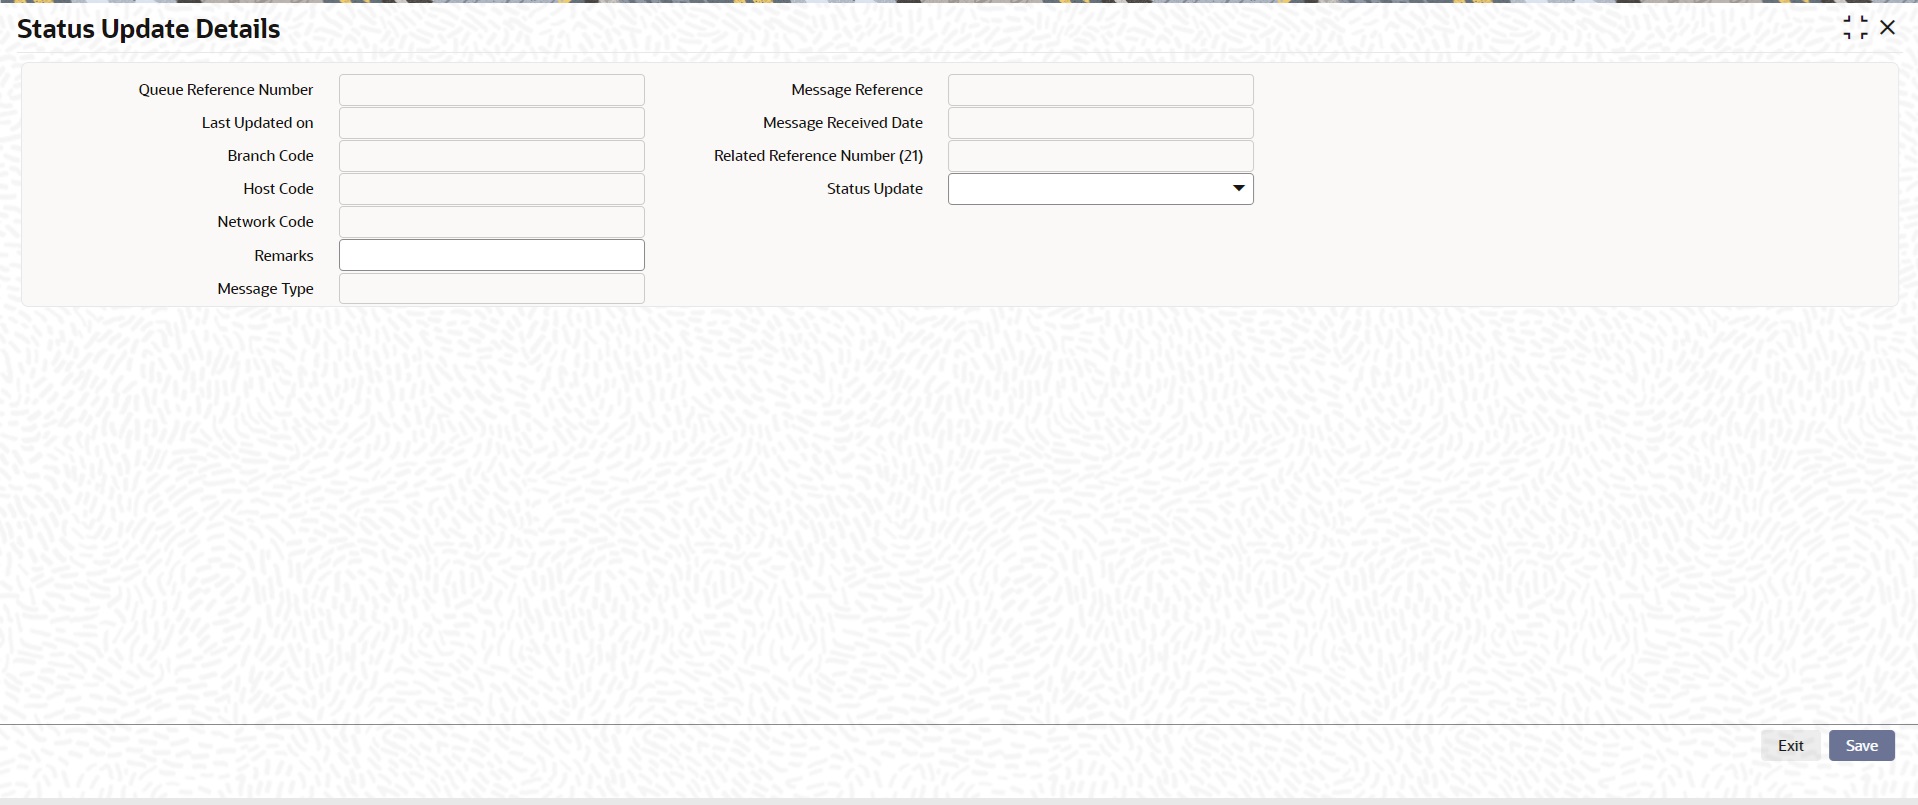
Following details are displayed:
Queue Reference Number
This field displays the system generated 16-digit status update reference number.
Message Reference
This field displays Field 20 of the incoming 'n99' message.
Last Updated on
This field displays the date of update.
Message Received Date
This field displays the date of receipt of the 'n99' message.
Branch Code
This field displays the Branch Code.
Related Reference Number (21)
This field displays the Field 21 of the incoming 'n99' message.
Host Code
This field displays the Host Code.
Status Update
This field lists the below values for the user to select as appropriate and update:
l Pending
l Confirmed
l Rejected
l No Action Required
Remarks
You can input remarks as applicable.
Message Type
This field displays the MT messages such as 199, 299, 999.
On click of 'OK' the status update gets saved and submitted for authorization.
After clicking Authorize, you can authorize an unauthorized queue action.
After clicking View Message, you can view the incoming MT 'n99' non-gpi message.
After clicking View Transaction, you can view the underlying transaction details (incoming or outgoing).
After clicking View Queue Action, it displays all the actions undertaken for the message from the queue.
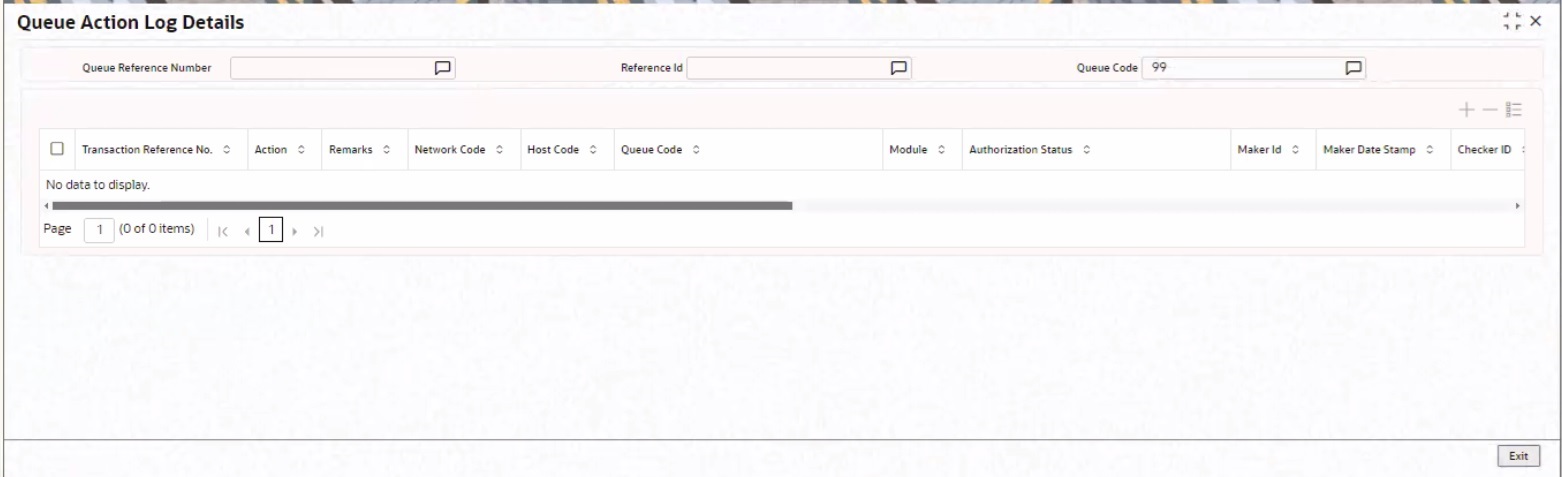
You can search using one or more of the following parameters:
l Queue Reference Number
l Reference Id
l Queue Code
After clicking Delete, you can delete an unauthorized queue action.
The ‘Incoming Unmatched Queue’ screen lists all the below items:
l All incoming MT202/205 messages which are terminating, and credit account resolution fails.
l All incoming MT202COV/205COV messages received for cover matching but not matched against Customer Transfer/Bank Transfer.
l All incoming MT910 messages which are not matched against Customer Transfer/Bank Transfer & Outbound Claim.
l All incoming MT940/MT950 statement entries which are not matched against Customer Transfer/Bank Transfer & Outbound Claim
To invoke this screen, type ’PQSIUNMQ’ in the field at the top right corner of the Application Tool bar and click the adjoining arrow button.
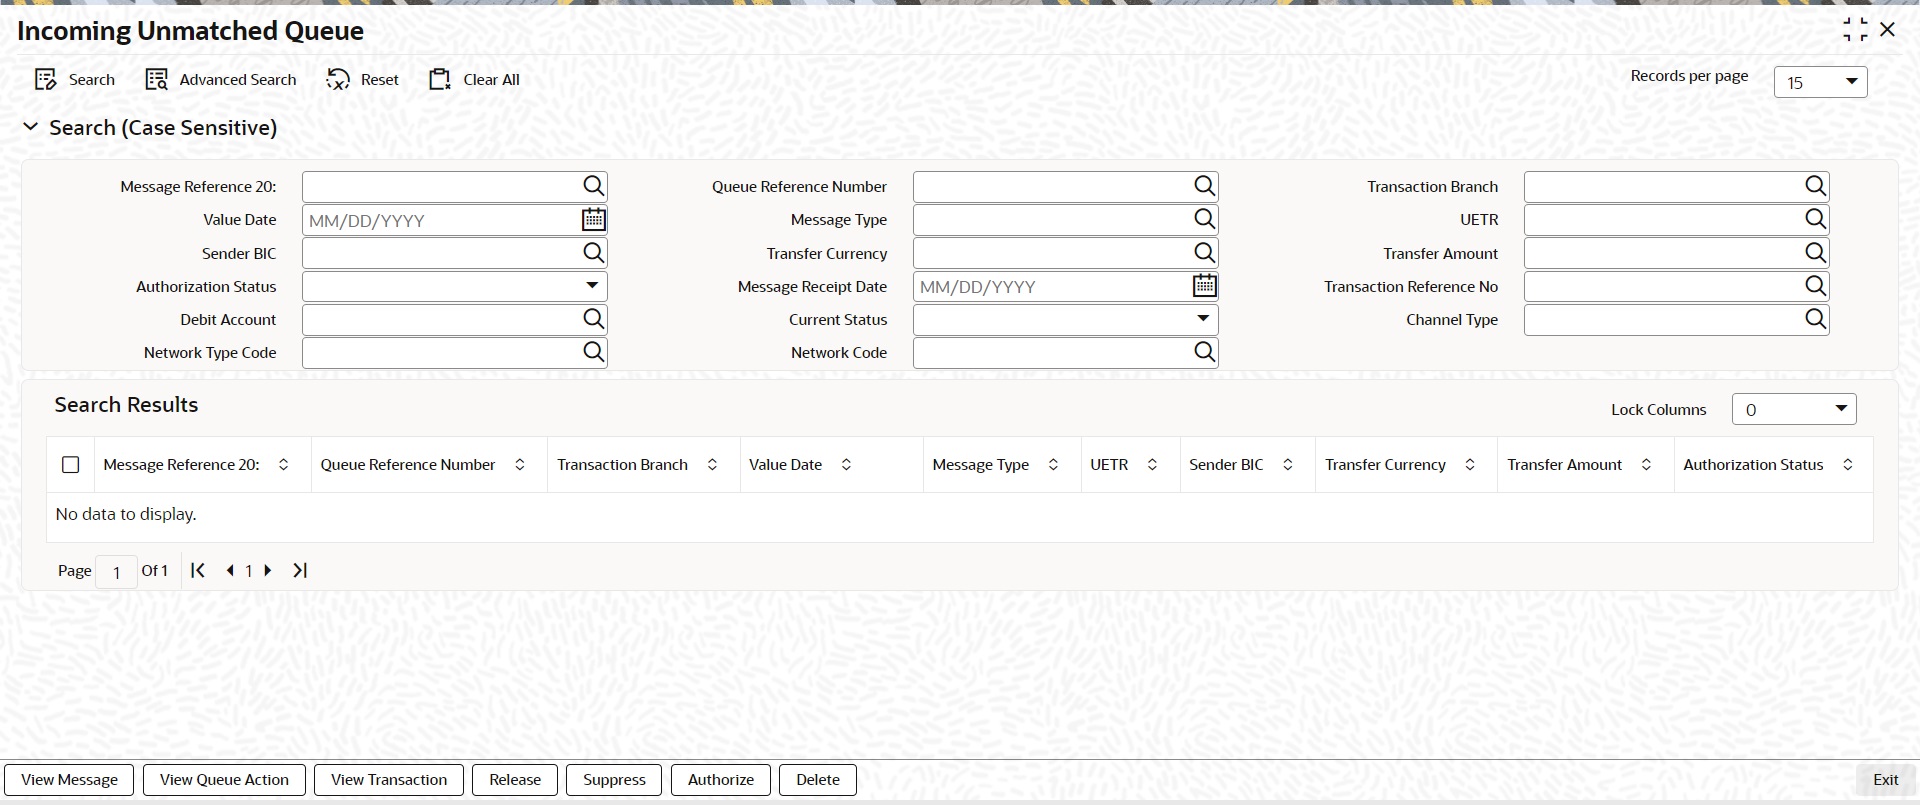
You can search using one or more of the following parameters:
l Message Reference 20
l Queue Reference Number
l Transaction Branch
l Value Date
l Message Type (MT202, MT205, MT910, MT940, MT950)
l UETR
l Sender BIC
l Transfer Currency
l Transfer Amount
l Authorization Status (Authorized, Unauthorized)
l Message Receipt Date
l Transaction Reference Number
l Debit Account
l Current Status (Unmatched, Matched, Released)
l Channel Type (SWIFT, C2B, SPS)
l Network Type Code
l Network Code
On click of ‘Search’ button, system displays the records that match the search criteria specified.
Note
Beneficiary Institution fields are not populated in the search results section when the message type is MT910, MT940, MT950.
Following actions can be performed in this screen:
After clicking View Message, existing Message Details screen (PMDVWMSG) gets launched and details of incoming message is displayed.
This action is allowed only for the MT910, MT202, MT205, MT202COV, MT205COV message types.
After clicking View Queue Action, existing Queue Action screen (PQDVWQAC) gets launched and it displays all the user actions taken on this message.
After clicking View Transaction, existing Incoming SWIFT Payment View (PSDIVIEW) screen gets launched. This action is allowed only for MT202/205 message types.
After clicking Release, new sub screen will get launched. Below are details of the of fields to be displayed in this sub screen. This action is allowed only for MT202/205 message types.
After clicking Suppress, a sub screen is launched to capture the maker / checker remarks
On successful authorization, message is marked as suppressed and hence not listing the message for cover match.
This action is allowed if selected message in 'Current Status' field is 'Unmatched'.
After clicking Authorize, the above-mentioned sub screen gets launched to capture authorizer's remarks and Authorize the Release action. Only Checker Remarks are made available for User Input for 'Authorize' user action.
After clicking Delete, the above-mentioned sub screen gets launched. Both Maker Remarks/Check Remarks fields are available for user input.
This screen maintains the Verification Rule. This Rule maintenance would be at the Host level and for a specific Network Code.
You can invoke the ‘Verification Queue’ screen by typing ‘PQSVERFQ’ in the field at the top right corner of the application toolbar and clicking the adjoining arrow button. Click New button on the Application toolbar.
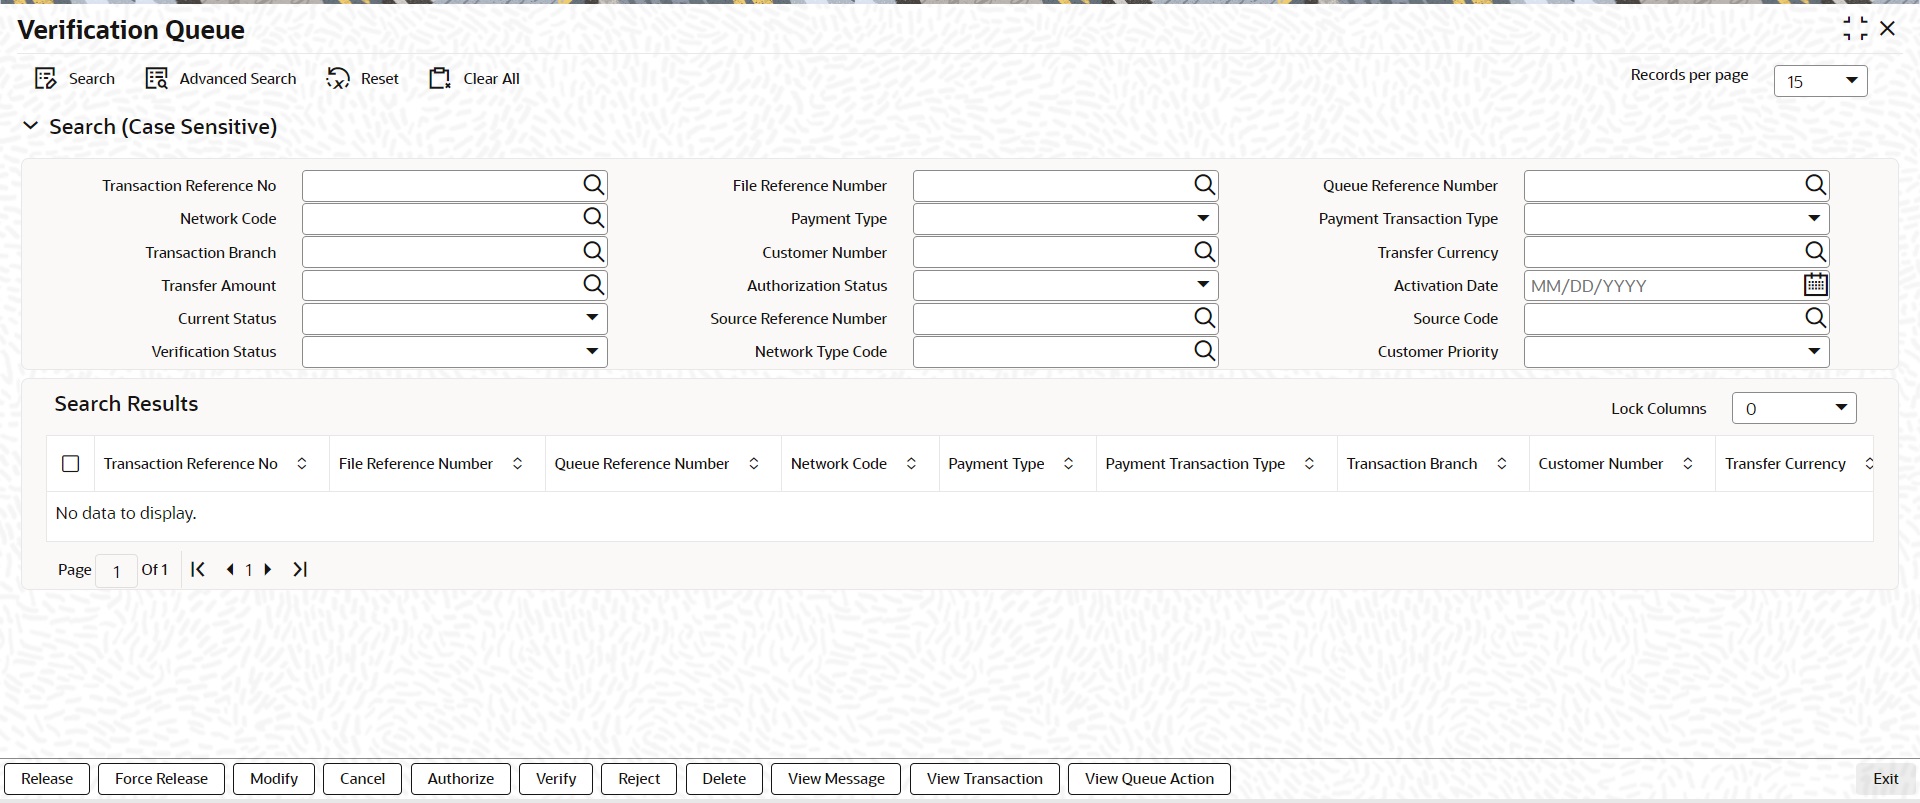
You can search using one or more of the following parameters:
l Transaction Reference Number
l File Reference Number
l Queue Reference Number
l Network Code
l Payment Transaction Type
l Transaction Branch
l Customer Number
l Transfer Currency
l Transfer Amount
l Authorization Status
l Activation Date
l Current Status
l Source Reference Number
l Source Code
l Verification Status
l Network Type Code
Once you have specified the search parameters, click ‘Search’ button. The system displays the records that match the search criteria.
The following actions can be performed for the selected transactions:
|
Actions |
Functions |
|---|---|
|
View Transaction |
View outgoing transaction view. |
|
View Queue Action |
To view all the user actions taken on the transaction. |
|
View Message |
Pre-view the generated payment messages. |
|
Force Release |
Release the transaction from the queue even if network cutoff is crossed. |
|
Release |
Release the transaction from the queue to process the transaction further. |
|
Modify |
Allowing modification of the transaction data. Branch Input screen gets launched in unlock mode and you can do modification based on the amendable fields list. |
|
Cancel |
Cancelling the transaction in Verification Queue. |
|
Authorize |
Authorization of the queue action. |
|
Verify |
This action displays the status of the 2nd Authorization. The Outbound Cross Border/RTGS Transaction Input (PXDOTONL) is displayed with menu 'Verify' in the screen. |
|
Delete |
Deletion unauthorized user action by Maker. |
|
Reject |
Rejection of unauthorized user action by Checker. |
6.9 Transaction Amendment Request Queue
The webservice captures the outbound transaction amendment requests and the system validates the received request.
This screen log all the amendment request received from channels for Cross Border/RTGS transactions.
You can invoke the ‘Transaction Amendment Request Queue’ screen by typing ‘PQSAMNAQ’ in the field at the top right corner of the application toolbar and clicking the adjoining arrow button. Click ‘New’ button to create a new maintenance.
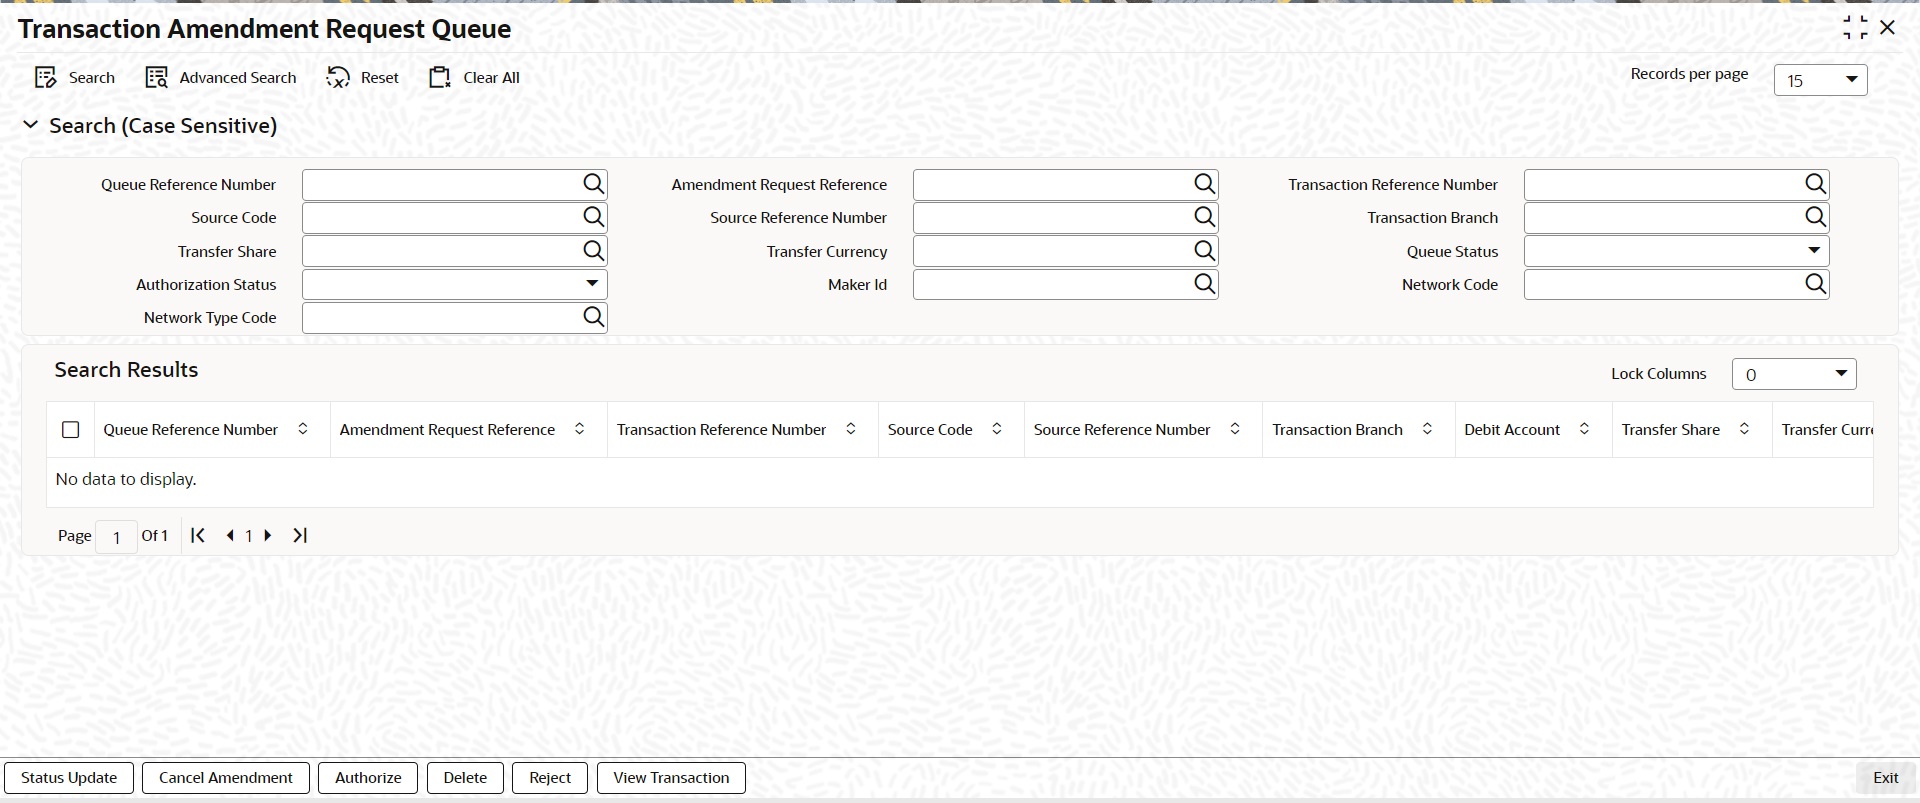
You can search using one or more of the following parameters:
l Queue reference Number
l Amendment Request Reference
l Transaction Reference Number
l Transaction Branch
l Source Code
l Network Code
l Transfer Currency
l Transfer Amount
l Source Reference Number
l Current Status
l Authorization Status
l Maker Id
l Debit Account
l Network Type Code
Once you have specified the search parameters, click ‘Search’ button. The system displays the records that match the search criteria.
The following actions can be performed for the selected transactions:
|
Actions |
Functions |
|---|---|
|
Status Update |
Launches a new sub screen to capture the action taken on the amendment request. |
|
Cancel Amendment |
This action mark the request as cancelled. |
|
Authorize |
Authorization of the action taken by maker. |
|
Delete |
This action is for maker to undo the action taken. |
|
Reject |
Rejection of unauthorized user action by Maker. |
|
View Transaction |
This action show the outbound original transaction. The Outbound Cross-border/RTGS Transaction View Screen (PXDOVIEW) get launched. |