4. IMPS Outbound Payments
Outbound credit transactions can be booked, viewed through the Outbound IMPS transaction screens.
4.1 IMPS Outbound Transaction Input
This chapter contains the following sections:
l Section 4.1.1, "IMPS Outbound Transaction Input"
l Section 4.1.2, "IMPS Outbound Transaction View"
l Section 4.1.3, "ReST Services"
4.1.1 IMPS Outbound Transaction Input
You can book the outbound IMPS transactions through this screen. Outbound IMPS details can be provided here.
You can invoke ’IMPS Outbound Payment Transaction Input Detailed’ screen by typing ‘PJDOTONL’ in the field at the top right corner of the Application tool bar and clicking on the adjoining arrow button. Click ‘New’ button on the Application toolbar.
Following are the actions allowed from this screen:
l New
l Save
l Copy
l Print
l Enter Query
l Unlock
l Delete
l Authorize
Specify the following details:
Transaction Branch
The system defaults the transaction branch code with the user’s logged in branch code.
Branch Name
System displays the Name of the Transaction Branch.
Host Code
System defaults the host code of transaction branch on clicking ‘New’.
Host Code Description
System defaults the description of the Host Code displayed.
Source Code
Select the Source Code from the list of values. All valid Source code are listed here. For manually input transactions, source code can be selected from the list of valid source codes.
For transactions received through Rest services, the source code is populated as received in the request.
Source Code Description
System defaults the description of the Source Code selected.
Network code
The system defaults the Network code as ‘IMPS’. If only one Network is maintained with payment type as ‘IMPS’ for the host code, the same gets defaulted in this field.
And you can also select the Network code from the list of values when multiple networks are available. All valid codes maintained in Network maintenance (PMDNWMNT) screen are listed.
Transaction Reference
This is a 16-digit unique identifier of the IMPS payment transaction and auto-generated by the system based on the common transaction reference generation logic.
For more details on the reference generation logic, refer to Payments Core User manual.
Retrieval Reference
System auto generates the RRN (Retrieval Reference Number) on authorization of the payment transaction. This is a 12-digit number. RRN is generated using the following logic:
The RRN Mask is: ‘YDDDHHSSSSSS’
l Y – Last digit of year.
l DDD – Julian date of transaction
l HH – Hour of transaction (
l derived from DE-12 as in IST).
l SSSSSS – STAN of transaction (Same as in DE -11 for system generated unique 6-digit number within a business day).
Source Reference
System defaults the Source Reference Number as Transaction Reference. The maximum length of this field accepts up to 35 characters. and it is modifiable.
Message ID
This field displays the unique Message ID generated by system.
Transaction ID
This field displays the unique Transaction ID generated by system.
Network Code
Select the Network code as ‘IMPS’ from the list of values. In case multiple networks are found for the same combination, all applicable networks are listed for the field. You can select the required network.
Network Code Description
System defaults the description of the Network Code selected.
IMPS Transaction Type
Select the IMPS Transaction Type from the drop-down values. The options are:
l P2A: You can specify the details of A/C + IFSC in the Beneficiary Details section. System validates and does not allow to enter details in the MMID+Mobile Number / Aadhaar Number section for P2A Transaction type.
l P2P: You can specify the details of MMID + Mobile Number in the Beneficiary Details section. System validates and does not allow to enter details in the A/C + IFSC / Aadhaar Number section for P2P Transaction type.
Prefunded Payments
Select this check box to indicate that Pre funded payments are allowed for the source.
4.1.1.1 Main Tab
Debtor Details
Debtor Account Number
Select the Debit Account Number from the list of values.All open and authorized accounts maintained in the India Payment Account Preferences (PMDEXACP) are listed for this field. System displays only the ‘Savings/Current type accounts in the LOV.
System defaults the following details on selecting the Debit Account Number and the details cannot be modified:
l Debtor Account Type
l Debtor Account Branch
l Debtor Name
l Customer No
l Debtor Mobile Number
l Debtor MMID
l Debtor Bank Name
l Debtor Bank IFSC Code
Payment Details
Booking Date
System defaults the current date as Booking Date.This is disabled for user modification.
Instruction Date
System defaults the current application server date. This date can be modified by the user. This is the requested execution date by the customer. Back dates are not allowed as instruction date.
Activation Date
Activation Date is derived from Instruction date and is disabled for modification.
Since Network / Branch holidays are applicable for IMPS payments, activation date is same as instruction date. Payment is submitted to NPCI on Activation date and processed by NPCI on the same date.
Transaction Currency
System defaults the Transfer currency as ‘INR’. This field is disabled for modification.
Transaction Amount
Specify the Transaction Amount.
Remarks
Any internal remarks can be input in this field. This is a free text field of allowed character length ‘50’
Beneficiary ID
Beneficiary ID
Select the Beneficiary ID from the list of values.This field fetches the Beneficiary IDs maintained for the debtor account number and beneficiary type combination.
Note
l For the selected debtor account number, if IMPS transaction type selected is ‘P2A’, the LOV displays only beneficiary IDs of type ‘P2A’ with beneficiary details maintained in A/C+IFSC section of beneficiary registration (PMDBENRN) for the network ‘IMPS’.
l Similarly, for P2P IMPS transaction types, Beneficiary ID LOV, fetches only the P2P beneficiary type records maintained for the debtor account number.
Beneficiary Details
A/C + IFSC
System defaults the following A/C + IFSC details on selecting the valid Beneficiary ID:
l Beneficiary Name
l Beneficiary Account Number
l Beneficiary Account Type
l IFSC Code
l Bank Name
l Branch Name
l Mobile Number and Email ID (if available)
On saving the transaction, following validations are done by the system:
l System validates if IMPS transaction type applicable is maintained in IMPS Outbound Payment Preferences (PJDNWOPF). If not input for IMPS transaction type, system throws a warning message ‘This Particular IMPS Transaction type <IMPS_TXN_TYPE> is not enabled. Unable to process’.
l System validates if the values for the above fields (Beneficiary Name, Ben Account Number and IFSC Code) are present for the IMPS transaction type ‘P2A (A/C + IFSC)’. If not input, system throws a warning message ‘Please enter Beneficiary Name, Account Number, IFSC Code to proceed’.
l System shows ‘Transfer to Overdraft, Cash Credit, Loan Account, Account is not allowed through IMPS.’ as per the beneficiary account type input.
l System validates if the debtor account type is allowed for the Outbound Payment and Network Code as maintained in Account Type Restrictions screen (PJDACSTR). If the account type is not allowed for the network, system shows error message ‘This Account Type is not allowed for IMPS transfer.’ The transaction is moved to Process Exception queue.
– If the validation is successful, it is moved to the next step of outbound processor.
– In cases where beneficiary account type is not input, system still processes the transaction as validation successful.
l System validates for ‘On-US Transfer’ (for P2P transfer within same bank) for Outbound IMPS as below:
– System derives the NBIN based on the first four-digits of beneficiary MMID input at the transaction level.
– Compare this derived NBIN with the NBIN maintained at the IMPS outbound payment preferences screen PJDNWOPF.
– If found to be same, the outbound transaction is blocked and rejected. System shows the warning message ‘IMPS Transfer within the same bank is not allowed. Unable to Save’.
Note
l All the fields in the grid, except Bank and Branch Name can be edited, only if the Beneficiary ID is ‘NULL’ (without beneficiary registration)
l System does not allow the user to select same bank as that of remitter bank’s IFSC Codes as per the LOV restriction.
l LOV Restriction condition: NBIN maintained in (PJDNWOPF) is equal to Bank IFSC Code (first four characters) as maintained in the screen NBIN Details (PJDNBIFS).
MMID + Mobile Number
System defaults the following MMID + Mobile Number details on selecting the valid Beneficiary ID:
l Beneficiary Name
l MMID
l Mobile Number
On saving the transaction, following validations are done by the system:
l System validates if the values for the above fields (Beneficiary Name, MMID, Mobile Number) are present for the IMPS transaction type ‘P2P (MMID + Mobile Number)’. If not input, system throws a warning message ‘Please enter Beneficiary Name, MMID, Mobile Number to proceed’
l All the above fields are editable only if Beneficiary ID is ‘NULL’ (without beneficiary registration) and the debtor account number is not of ‘GL’ type.
Enrich Button
On clicking the Enrich button, system computes the Charges, and Tax on Charges if applicable, based on the maintenance for Transaction Pricing Code specified in IMPS Outbound Payment Preferences screen (PJDNWOPF).
4.1.1.2 Pricing Tab
You can view the computed charges and taxes applicable for each charge component, for the transaction booked by clicking the ‘Pricing’ tab.Pricing details are populated on clicking the ‘Enrich’ button.
Charges and Tax components are fetched as maintained in the Pricing Value Maintenance screen (PPDVLMNT) as applicable for the Payment Source code & Customer Service model.
The below mentioned attributes is available in the Pricing tab.
Pricing Component
Displays the Name of the pricing component, applicable for the transaction, for which charges are computed.
Pricing Currency
Displays the Currency in which the charge amount is calculated for the Pricing component. from the Pricing Code maintenance.
Pricing Amount
Displays the fixed or calculated charge amount using the Pricing Value maintenance. You can edit the amount in this field to a non-zero value.
Waiver
Check this box to indicate that the charge is waived for the pricing component.
l If a particular Charge component is waived by the user then system would automatically also check the waiver the associated Tax component
l If charge/tax component is already waived in the Pricing Value maintenance, this component would still be displayed with the value and the waiver flag checked. This flag would not be allowed to be unchecked by the user.
Debit Currency
Displays the currency in which the charge amount is debited for the pricing component. This is the currency of the debit (originator) account
Debit amount
Displays the debited amount to the selected debit amount.
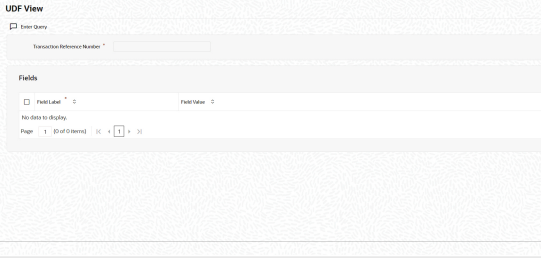
4.1.1.3 UDF Tab
You can view or capture the UDF fields and its details for the outbound IMPS transaction input screen by clicking the ‘UDF’ button.
Based on the UDF Group linked in the Source Maintenance screen, for source code applicable to Manual initiation, UDF fields are available for input while creating the transaction.
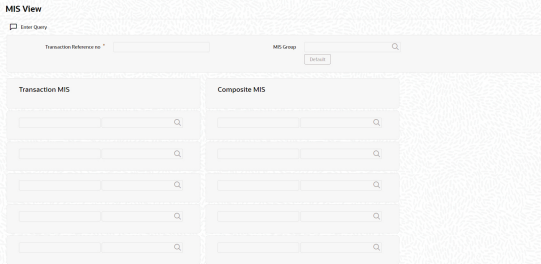
4.1.1.4 MIS Tab
You can view/ edit the MIS details for the outbound IMPS transaction input screen by clicking the ‘MIS’ button.
Based on the MIS Group linked in the Source Maintenance screen, for source code applicable to Manual initiation, MIS default values are populated for the IMPS payment transaction.
You can change the default MIS values and input values for other MIS fields for which no value is defaulted.

4.1.1.5 IMPS Outbound Transaction Input Detailed Summary
You can view all the IMPS outbound transactions booked in this summary screen.
You can invoke ‘IMPS Outbound Transaction Input Detailed Summary’ screen by typing ‘PJSOTONL’ in the field at the top right corner of the Application tool bar and clicking on the adjoining arrow button.
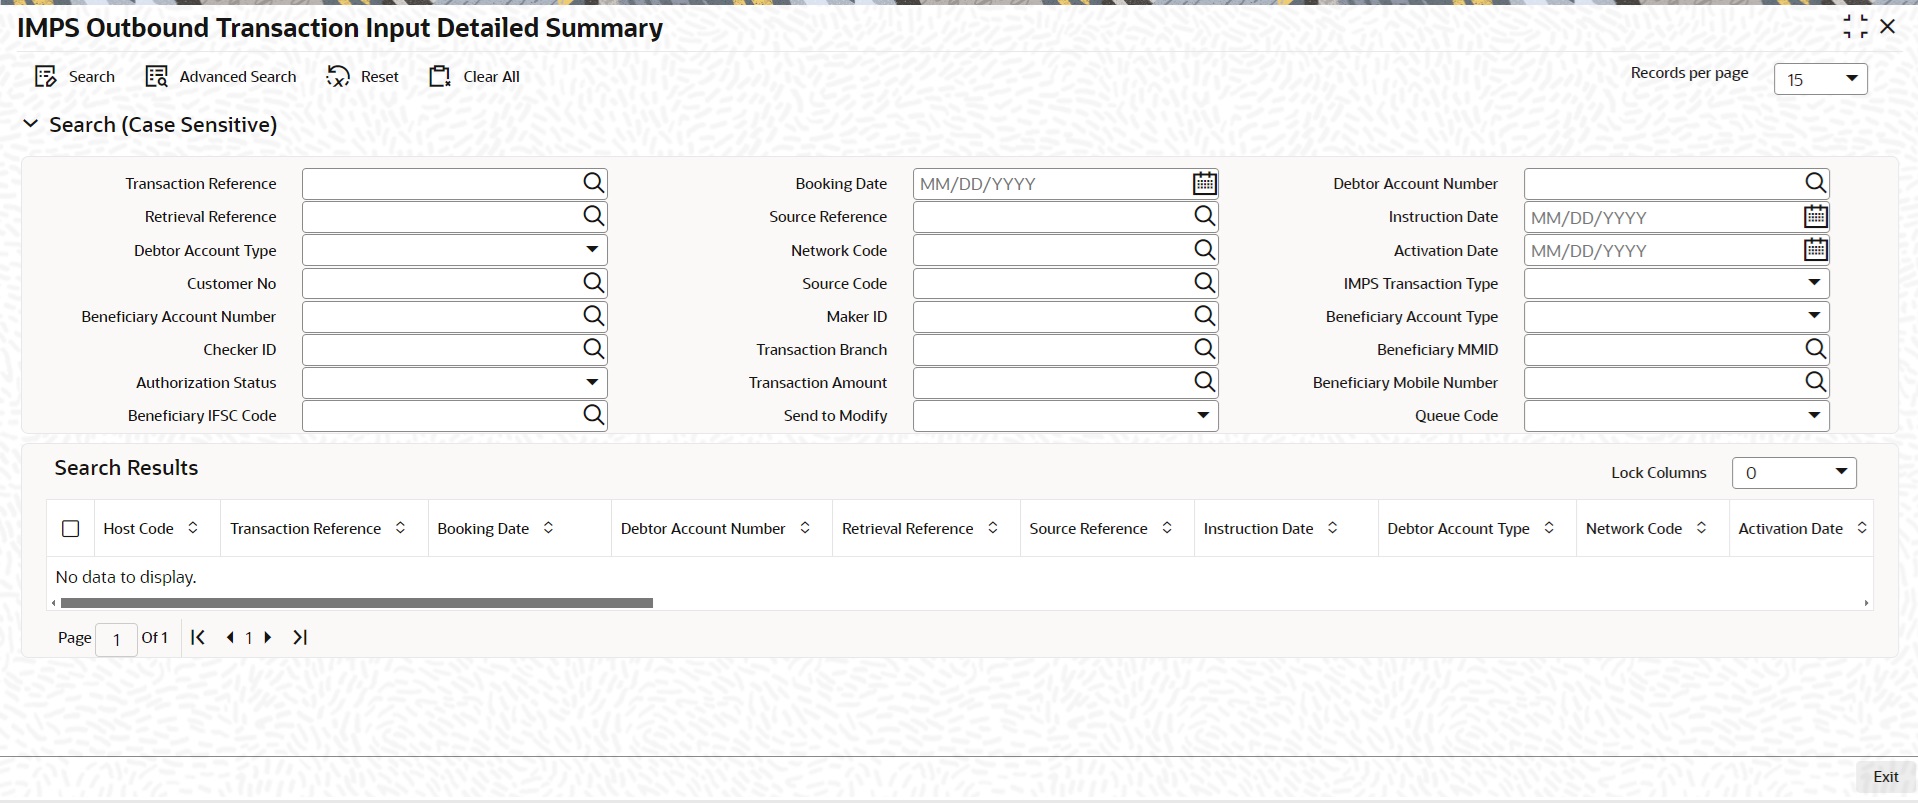
You can search using one or more of the following parameters:
l Transaction Reference Number
l Retrieval Reference
l Network Code
l Source Code
l Maker ID
l Checker ID
l Instruction Date
l Activation Date
l IMPS Transaction Type
l Transaction Currency
l Transaction Branch
l Transaction Amount
l Booking Date
l Debtor Account Number
l Customer No
l Beneficiary Account Number
l Beneficiary IFSC Code
l Beneficiary MMID
l Beneficiary Mobile Number
l Authorization Status
l Beneficiary Account Type
l Debit Account Type
Once you have specified the search parameters, click ‘Search’ button. The system displays the records that match the search criteria.
Double click a record or select a record and click ‘Details’ button to view the detailed maintenance screen.
4.1.2 IMPS Outbound Transaction View
You can view all the outbound IMPS transactions with all the processed details in this screen.
You can invoke ‘Outbound IMPS Transaction View Detailed’ screen by typing ‘PJDOVIEW’ in the field at the top right corner of the Application tool bar and clicking on the adjoining arrow button.

l From this screen, click Enter Query. The Transaction Reference field gets enabled which opens an LOV screen.
l Click the Fetch button and select the required value.
l Along with the transaction details in the Main and Pricing tabs user can also view the Status details for the following:
– External System Status
– Transaction Status
– Error Details
l Click Execute Query to populate the details of the transaction in the Outbound IMPS Transaction View screen.
View Reversal Transaction
For a IMPS Outbound Transaction if there is a 'ReqPay' API for remitter online credit is received from NPCI and process successfully, then on click 'View Reversal Transaction' button to invoke the IMPS Inbound Transaction View Detailed (PJDIVIEW) screen to view the respective inbound transaction details.
For more details on Main, Pricing tabs refer to ‘PJDOTONL’ screen details above.
Transaction Status - Queue Code
|
Transaction Status |
Applicable Queue Codes for IMPS |
Remarks |
|
In Progress |
<SC/EC/EP> |
Transaction is under progress (or) response is pending from External systems. Queue Code is applicable if response is pending from External systems - Sanction Check - ECA - Pricing |
|
Exception |
<SC/EC/EP/BO/PE> |
Transaction is in an internal/external queue. Applicable internal/external queues - Sanction Check - ECA - Pricing - Business Override - Processing Exception |
|
Future Dated |
<FV> |
Transaction is future-value dated |
|
Processed |
## |
OUT message is generated |
|
Cancelled |
## |
Cancelled from exception queue |
|
Seized |
## |
Sanction Seized |
|
Rejected |
## |
Decline response from NPCI |
Settlement Status
Settlement Status field in the ‘Transaction Status’ section displays the following details.
l Settled: On receipt of Response Pay with response code 00
l Deemed Approved: On receipt of Response Pay with response code 91
4.1.2.1 UDF Tab
You can invoke this screen by clicking ‘UDF’ tab in the screen.
4.1.2.2 MIS Tab
You can invoke this screen by clicking ‘MIS’ tab in the screen.
4.1.2.3 View Queue Action Log
User can view all the queue actions for the respective transaction initiated. You can invoke this screen by clicking the ‘View Queue Action’ button in View screen, where the Transaction Reference Number is auto populated and related details are displayed.:
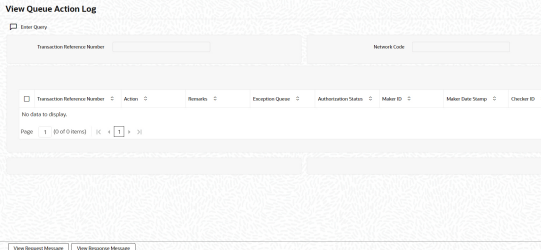
Following details are displayed:
l Transaction Reference Number
l Network Code
l Action
l Remarks
l Queue Code
l Authorization Status
l Maker ID
l Maker Date Stamp
l Checker ID
l Checker Date Stamp
l Queue Status
l Queue Reference No
l Primary External Status
l Secondary External Status
l External Reference Number
User can view the request sent and the corresponding response received for each row in Queue Action Log.
Also user can view the request sent to and the response received from external systems for the following:
l Sanction screening
l External credit approval
l External price fetch
l Accounting system
4.1.2.4 All Messages
Click the ‘All Messages’ link in the Outbound IMPS Payments View screen, to invoke this sub-screen.
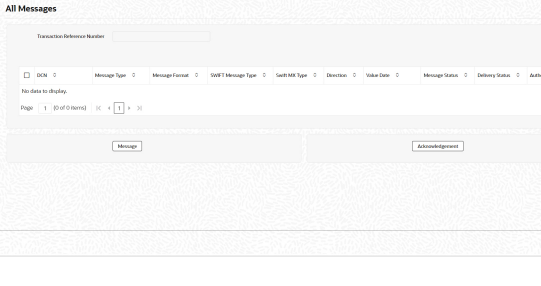
You can view the generated messages and the response messages for the transaction in this sub screen for the Transaction Reference Number specified. Following details are displayed in the screen:
Request Messages
l Message Reference Number
l Message Type
l VR Sequence
l Message Date and Time
Response Messages
l Message Reference
l Message Type
l Response Code
l Response Code Description
l Response Status
l Message Date and Time
4.1.2.5 Accounting Entries Tab
You can view the Accounting Entries posted for the Outbound IMPS in Accounting entries Tab.
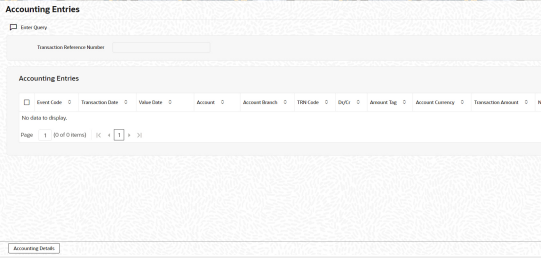
By default, the following attributes of the Accounting Entries tab are displayed:
l Event Code
l Transaction Date
l Value Date
l Account
l Account Branch
l TRN Code
l Dr/Cr
l Amount Tag
l Account Currency
l Transaction Amount
l Netting
l Offset Account
l Offset Account Branch
l Offset TRN Code
l Offset Amount Tag
l Offset Currency
l Offset Amount
l Offset Netting
l Hand-off Status
4.1.2.6 View Repair Log
User can view all the Repair actions for the respective transaction initiated. You can invoke this screen by clicking the ‘View Repair Log’ button in View screen, where the Transaction Reference Number is auto populated and related details are displayed.
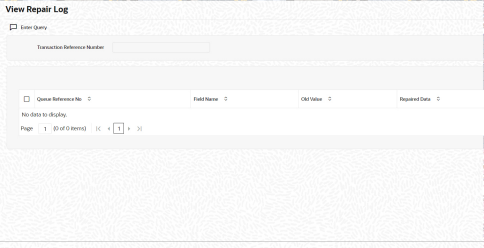
Following details are displayed:
l Queue Reference No
l Field Name
l Old Value
l Repaired Data
l Error
4.1.2.7 IMPS Outbound Transaction View Summary
You can invoke ‘Outbound IMPS Transaction View Summary’ screen by typing ‘PJSOVIEW’ in the field at the top right corner of the Application tool bar and clicking on the adjoining arrow button.
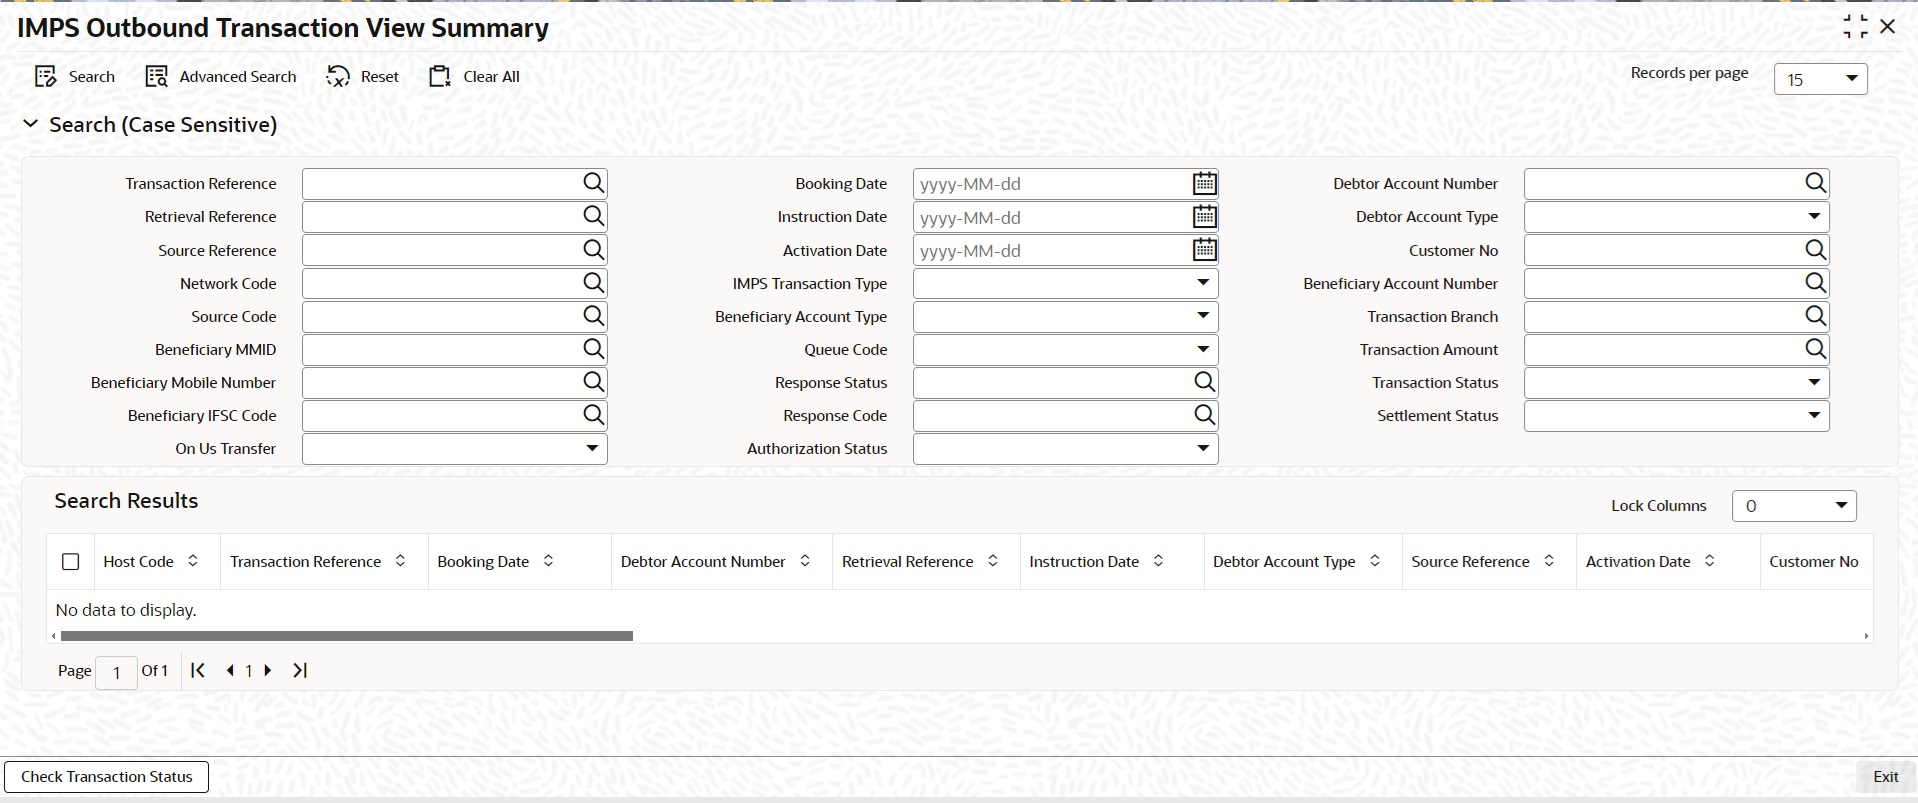
You can search for the records using one or more of the following parameters:
l Transaction Reference Number
l Retrieval Reference
l Source Reference Number
l Network Code
l Source Code
l Queue Code
l IMPS Transaction Type
l Transaction Currency
l Transaction Branch
l Transaction Amount
l Transaction Status
l Booking Date
l Instruction Date
l Activation Date
l Debtor Account Number
l Debtor Account Type
l Customer No
l Beneficiary Account Number
l Beneficiary Account Type
l Beneficiary IFSC Code
l Beneficiary MMID
l Beneficiary Mobile Number
l Sanction Seizure
l Response Code
l Response Status
Once you have specified the search parameters, click ‘Search’ button. The system displays the records that match the search criteria.
You can perform following actions:
Check Transaction Status
After selecting a record, click Check Transaction Status to check the transaction status of the selected record.
ReST services for Outbound IMPS transaction are supported.
4.2 IMPS Outbound Payments Processing
4.2.1 Outbound IMPS Payment Processing
l Following are the processing steps for outbound payments:
– Initial Validations
– NRE Account Validation
– Intra Bank Transfer Check
– Duplicate Check
– Daily limit Check
– Sanctions CheckPricing
– ECA Check
– Accounting
– Messaging
– Prefunded Payments Allowed
– Debtor Account Derivation
– Debtor Account Type Derivation
– Debtor Name Derivation
4.2.1.1 Initial Validations
The following processing are covered as part of initial validations:
– Data enrichment - Account / Bank Re-direction, Network character replacement
– Beneficiary ID Validation if registered for the IMPS network with corresponding Beneficiary Type.
– Mandatory fields validations
– Network Limit validations
– Account/Customer Validations based on core maintenance
– Network Character replacement
l If Account re-direction or bank re-direction is maintained, then the account / bank details are replaced by that values. Account re-direction is applicable for debtor account only.
l Network character replacement is done for characters not allowed by the Network if the corresponding maintenance is available in the screen (PMDSPCHR).
l Mandatory Fields / Referential data checks are done based on the details received in the payment request and the values populated by system. Validation is available to verify if the below fields are present in the request:
– Host Code
– Network Code
– Transaction Branch
– IMPS Transaction Type
– Debtor Account (Validation is available to check only INR currency accounts allowed for IMPS.)
– IFSC Code
– Beneficiary Account Number
– Beneficiary Name
– Transaction Currency
– Transaction Amount
– Instruction Date
– Beneficiary bank IFSC Code is allowed for IMPS network (PMDBKMNT)
l Transaction amount limit check is done for the minimum and maximum amount limits defined for the Network, as maintained in IMPS Outbound Payment Preferences (PJDNWOPF)
l In case of validation failure for any of the above, transaction is rejected with proper error code. Transaction is moved to Process Exception Queue.
l Account Type Restrictions: System validates if the debtor account type is allowed for the Network Code as maintained in Account Type Restrictions screen (PJDACSTR) for the outbound payment. If the account type is not allowed for the network, system shows error message ‘This Account Type is not allowed for IMPS transfer.’ Transaction is moved to Process Exception Queue.
– If the validation is successful, it is moved to the next step of outbound processor.
– In cases where beneficiary account type is not input, system still processes the transaction as validation successful.
l Customer /Account Status validations:
– System validates whether account record is open and authorized.
l The system checks the Account Type Value present in the incoming channel requests for Debtor Account Type and Beneficiary Account Type.
l If the user selects any value other than the LOV available for Debtor Account Type and Beneficiary Account Type, the system rejects the transaction.
4.2.1.2 NRE Account Validation
When the user clicks the 'Enrich/Save' button and Transaction Type is 'P2A', the system checks for the following NRE account type validations:
l If you select Beneficiary Account Type 'NRE' (40), then you must select Debtor Account Type also 'NRE' (40). Else system rejects the transaction with an error message PJ-TXP-048 'If Beneficiary Account Type is NRE, then Debtor Account Type must be NRE.'
l If you select Debtor Account Type 'NRE' (40), then you can select Beneficiary Account Type as any account from drop-down lists, such as Savings Bank (10), Current Account (11), Cash Credit (13), Loan Account (14), Overdraft (12), NRE (40), and Credit Card (52).
4.2.1.3 Duplicate Check:
l Duplicate parameters can be maintained for the source (PMDSORCE). Based on the duplicate days and fields set, duplicate check for the transaction is done.
l If the transaction is identified as a duplicate transaction, then the transaction is moved to business override queue.
l The following parameters are validated during duplicate check:
– Debtor Account - DBTR_ACC
– Beneficiary Account - CRDTR_ACC (Aadhaar number, MMID& Mobile Number is mapped to this element.)
– Transaction Amount - TFR_AMT
– Instruction Date - VALUE_DATE
– Retrieval Reference Number - RRN
– Transaction ID - TXN_ID
– Message ID - MSG_ID
– Beneficiary Bank IFSC Code - CRDTR_BANK_CODE (For India Payments IFSC Code is mapped for this element)
– DBTR_BANK_CODE
4.2.1.4 Message Generation
As part of IMPS XML version, 'OrgID' field is present in the header of the XML. When generating then IMPS outbound message, system performs following:
l Validate if the Sender Bank (Our Bank) Organization ID field is maintained on India Payments Our Bank Identifier Detailed (PMDIOBID) Screen.
– If Yes, then system derives the 'OrgID' field value and map it to 'OrgID' field in the Header.
– If No, then system Rejects the payment. No further action can be taken on the payment.
Every payment/message generates Request Pay in XML format. Time stamp put in the message is stored for the transaction. Message is forwarded to NPCI Switch.
4.2.1.5 Daily limit check
l System tracks the daily aggregate limit and source wise limit allowed for a customer account on a daily basis based on the limit maintained in IMPS Transaction Limits (Function ID:PMDDFLMT).
l If the limit is breached, the transaction is moved to BO queue.
4.2.1.6 Sanction Check
l Sanction check for IMPS outbound payment transaction is done on payment instruction date for current dated payments. For future dated transactions, sanction check is done on booking date as well.
l System verifies whether sanction check is applicable in Network Preferences (PMDSORNW)/Customer level preferences, and based on that system initiates sanction check validation.
l The external system status can be linked to one of the following system status:
– Approved
– Rejected
– Interim
– Seizure
– Timed out
l If sanction is approved, the transaction is resumed with the further processing.
l In case of seizure, customer account is debited, and the Seizure GL is credited, if seizure accounting is opted. If the status is rejected, interim or timed out, the transaction is moved to sanction check queue.
l Sanction Check System maintenance is updated to have specific In/Out queues for real time instant payment in general. The sanction requests originating from IMPS is sent through separate JMS queues.
4.2.1.7 Future Valued Check
l System checks if the instruction date is future dated. If yes, transaction is moved to Warehouse queue.
l Future dated IMPS transactions are processed by separate jobs.
l Processing of transactions would be completed till sanction check on booking date itself and is stored in future dated transaction tables.
l During beginning of day, future dated transaction job picks up transactions with value date as current date and does complete steps for processing from initial validations.
4.2.1.8 Pricing - Charge /Tax Computation
l Price code can be linked in Outbound IMPS Payment preferences (PJDNWOPF). Internal /External charge/tax values are applied based on the configuration.
4.2.1.9 Balance Check with DDA System
l The debit details are sent to the DDA system for account validation and balance check. The external system status can be linked to one of the following system status:
– Approved
– Rejected
– Interim
– Timed out
l If balance check is approved, the transaction is resumed with the further processing. If the status is rejected, interim or timed out (15 seconds), the transaction is moved to external credit approval queue.
l It is assumed that customer and account status checks are done by the external ECA system along with account balance check.
4.2.1.10 Accounting
l Accounting preference can be set at Outbound IMPS Payment preferences (PJDNWOPF) for the outbound transactions.
l If the preference maintained is ‘Before Messaging’ accounting entries are handed off to Accounting system before Messaging and Payment is marked as ‘Processed’.
– On payment reject, the reversal entries are posted and handed-off to Accounting system and the Payment is marked as ‘Reversed’.
l If the preference maintained is ‘On Confirmation from NPCI’, the accounting hand-off is deferred till response is received from NPCI.
– Based on the response received, payment is marked as ‘Processed’ or ‘Reversed’.
– On payment success/reject, the accounting entries/reversal entries gets posted and handed-off to Accounting system.
Accounting Entries:
|
Details in Accounting hand-off |
Debit Liquidation |
Credit Liquidation |
|
Accounting Event |
DRLQ |
CRLQ |
|
Amount Tag |
XFER_AMT |
XFER_AMT |
|
Transaction Account |
Debit Customer Account |
IMPS Outward Clearing GL maintained in the Accounting code. If Nostro Account (Network Account) is maintained in (PJDNWOPF) that is considered. |
|
Offset Account |
This is picked from the Debit Liquidation Accounting code maintenance. |
This is picked from the Credit Liquidation Accounting code maintenance. |
|
Transaction Currency |
INR |
INR |
|
Transaction Amount |
Debit Amount |
Transfer Amount |
|
Value Date |
Transaction Value Date |
Transaction Value Date |
|
Offset Currency |
Transaction Currency |
Transaction Currency |
|
Offset Amount |
Transaction Amount |
Transaction Amount |
4.2.1.11 Messaging
Every payment generates a Request pay message in XML format. Time stamp put in the message gets stored for the transaction. Message is forwarded to NPCI Switch.
4.2.1.12 Prefunded Payments Processing
l Customer number/debtor account number is not mandatory.
l If Debtor Account currency is not provided in the outbound request, then it gets defaulted to Transfer Currency (INR) in transaction.
l If the ‘Prefunded Payments GL’ check box is selected, the system skips the below processing:
– ECA check
– Pricing
– FX Limit Check
l The ‘Prefunded Payments GL’ is always used as Debit account while posting the debit liquidation entries. The ‘Prefunded Payments GL’ value maintained in the Source Maintenance (PMDSORCE).
4.2.1.13 Debtor Account Derivation
l If Debtor Account is not given, then the Prefunded Payments GL maintained at Source maintenance (PMDSORCE) is considered as the Debtor Account.
l If a value is given in the Debtor Account field (for uploaded transactions), the system does not validate the same against the customer account maintenance.
4.2.1.14 Debtor Account Type Derivation
l If Debtor Account is a valid account, the system defaults the Debtor Account Type from the India Payments Account Type Preferences Detailed (PMDEXATP) maintained.
l If Debtor Account is a valid GL or not a valid account, the system defaults the Debtor Account Type from the India Payments Default Account Type Preferences (PMDIDAPF).
l For manually inputted transactions, if the “Prefunded Payments’ check box is selected, the Debtor Account Type field is editable. You can select or change the Debtor Account type value for Prefunded payments.
l For uploaded transactions (IMPS OUT Service), the system defaults the Debtor Account Type only if the Debtor Account Type is not given in the service request.
4.2.1.15 Debtor Name Derivation
l If Debtor Account is a valid account, the system defaults Account Name from Customer Account Maintenance (STDCRACC) as Debtor Name.
l If Debtor Account is a valid GL, the system fetches Debtor Name from GL Description and populates it in the Debtor name field.
l For manually inputted transactions, if the “Prefunded Payments’ check box is selected, the Debtor Account Name field is editable. You can input or modify the Debtor Account Name value.
l For uploaded transactions (IMPS OUT Service), the system defaults the Debtor Account Type only if the Debtor Account Type is not given in the service request.
4.2.1.16 Response Handling
System receives the Response Pay XML from NPCI for the Request Pay sent. The parsing of the XML is done as per the specification.
System matches the request sent and the response received for the request with the help of 'Message Identifier (msgId)' present in the header of the XML.
Based on the response received the Payment status in system is updated appropriately as below:
|
Transaction Type (API Name in first tag of Response XML) |
Response Code |
Transaction Status |
Response Status |
|
45 or 48 |
00 |
Processed |
Approved |
|
91 |
Processed |
Deemed Approved |
|
|
Response Pay |
Other than ‘00’, ‘91’ |
Rejected |
Declined |
|
Response Pay |
M0 & Result is 'Deemed' |
Processes |
Deemed Approved |
|
Response Pay |
M0 and Result is 'Failure' |
Rejected |
Declined |
4.2.1.17 Outbound Check Transaction Status Request Processing
Response Monitor Process will track if the Request Pay XML message sent out has received corresponding Response Pay within the time-out period (Field: Timed Out Period) maintained on Outbound Payment Preferences screen (PJDNWOPF).
If no response received within set time-out period from the NPCI Switch, system would generate a Check Transaction Request as per the specification with required details from the Original Request sent.
System generates Check Transaction Request up to the Max reties and interval (Field: Retry Count for Check Transaction Status and Check Transaction Request Interval) configured in Outbound Payment Preferences screen (PJDNWOPF).
|
Outbound Request Pay XML/Message |
Outbound Transaction Status |
Check Transaction Request Sent by Debtor Bank |
Outbound Check Transaction Request Sent |
System Action on Outbound Transaction |
Check Transaction Status Response Received |
|---|---|---|---|---|---|
|
Yes |
Processed |
56 to 65 Sec |
Yes (Check Transaction Request Sequence 1) |
1. Log Check Transaction request sequence 1 |
No |
|
Yes |
Processed |
66-75 secs |
Yes (Check Transaction Request Sequence 2) |
1. Log Check Transaction request sequence 2. |
No |
|
Yes |
Processed |
76-85 secs |
Yes (Check Transaction Request Sequence 3) |
1. Log Check Transaction request sequence 3. 2. Based on response code received in response, update the outbound transaction status appropriately. |
Yes |
4.2.1.18 Check Transaction Status Response Processing
Based on the response received, the Payment status gets updated appropriately as below:
|
Transaction Type (API Name in first tag of Response XML) |
Response Code |
Transaction Status |
Response Status |
|
Check Transaction Status Response |
00 |
Processed |
Approved |
|
91 |
Processed |
Deemed Approved |
|
|
Other than ‘00’, ‘91’ |
Rejected |
Declined |
l Response Process Monitor will track if the Original Request Pay sent out has received corresponding Response Pay within the time-out period (55 seconds) maintained in Outbound Payment Preferences screen (PJDNWOPF).
l If no response received within ’55 seconds’ time-out period from the NPCI Switch, system generates a Check Transaction Request with required details from the Original Request sent.
l The maximum number of retry allowed is ‘3’ for IMPS payments.
l System generates Check Transaction Request and forward to NPCI Switch maximum 3 times every 10 seconds, if no response (Original Response Pay/Check Transaction Response) is received from NPCI Switch.
l System will not generate any Check Transaction Request if a corresponding Response Pay/Check Transaction Response is received OR after maximum retry count.
4.3 IMPS Outbound Message Browser
4.3.1 IMPS Outbound Message Browser
You can view all the outbound messages generated in this screen.
You can invoke ‘IMPS Outbound Message Browser’ screen by typing ‘PJSOUTBR’ in the field at the top right corner of the Application tool bar and clicking on the adjoining arrow button.
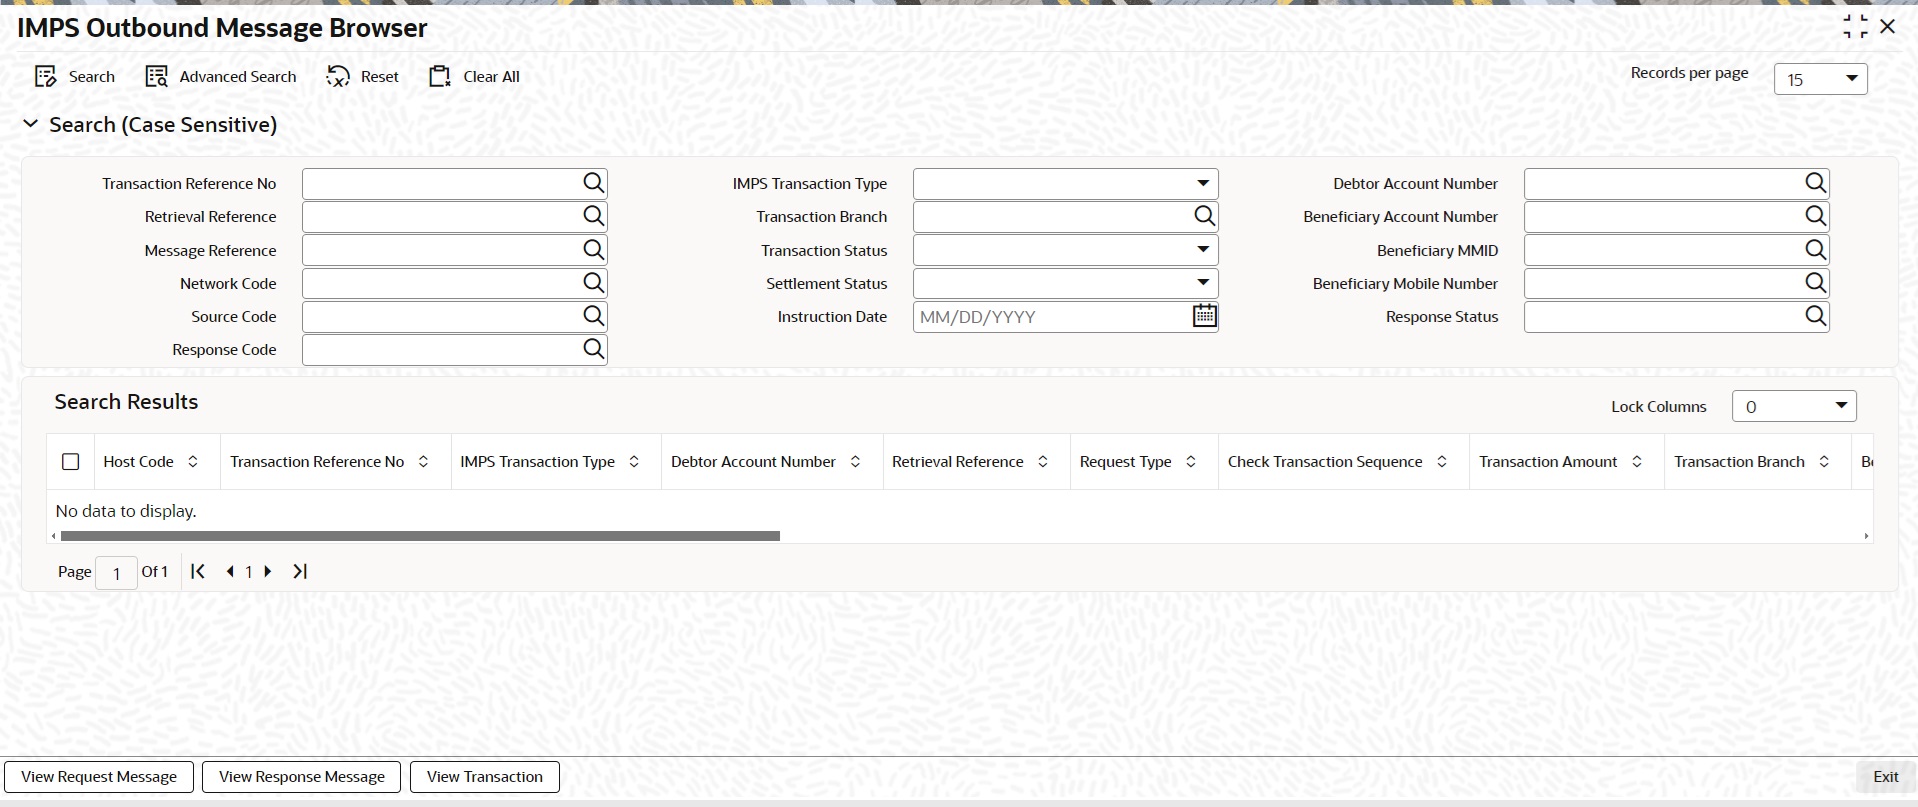
You can search for the records using one or more of the following parameters:
l Transaction Reference Number
l IMPS Transaction Type
l Retrieval Reference
l Message Reference
l Transaction Branch
l Transaction Status
l Network Code
l Response Code
l Response Status
l Settlement Status
l Beneficiary Account Number
l Beneficiary Mobile Number
l Instruction Date
l Beneficiary MMID
l Debtor Account Number
l Source Code
Following messages can be viewed from this browser:
l RequestPay – Outbound Original Request and Verification Request
l ResponsePay – Outbound Original Response and Verification Response
Once you have specified the search parameters, click ‘Search’ button. The system displays the records that match the search criteria. Following actions can be done from this screen:
View Request Message
Select a record and click on ‘View Request Message’ button to view the request message details. System displays the following details with the respective fields.
l Message Reference Number
l Transaction Reference Number
l Message Type
l Message
View Response Message
Select a record and click on ‘View Response Message’ button to view the request message details. System displays the following details with the respective fields.
l Message Reference Number
l Transaction Reference Number
l Message Type
l Message
View Transaction
Select a record and click on ‘View Transaction’ to view the complete transaction details.
System launches the IMPS Outbound View Detailed screen (PJDOVIEW) on clicking the ‘View Transaction’ tab for the selected record.
You can invoke ’IMPS Adjustment View’ screen by typing ‘PJDAJUPD’ in the field at the top right corner of the Application tool bar and clicking on the adjoining arrow button. Click ‘New’ button on the Application toolbar.
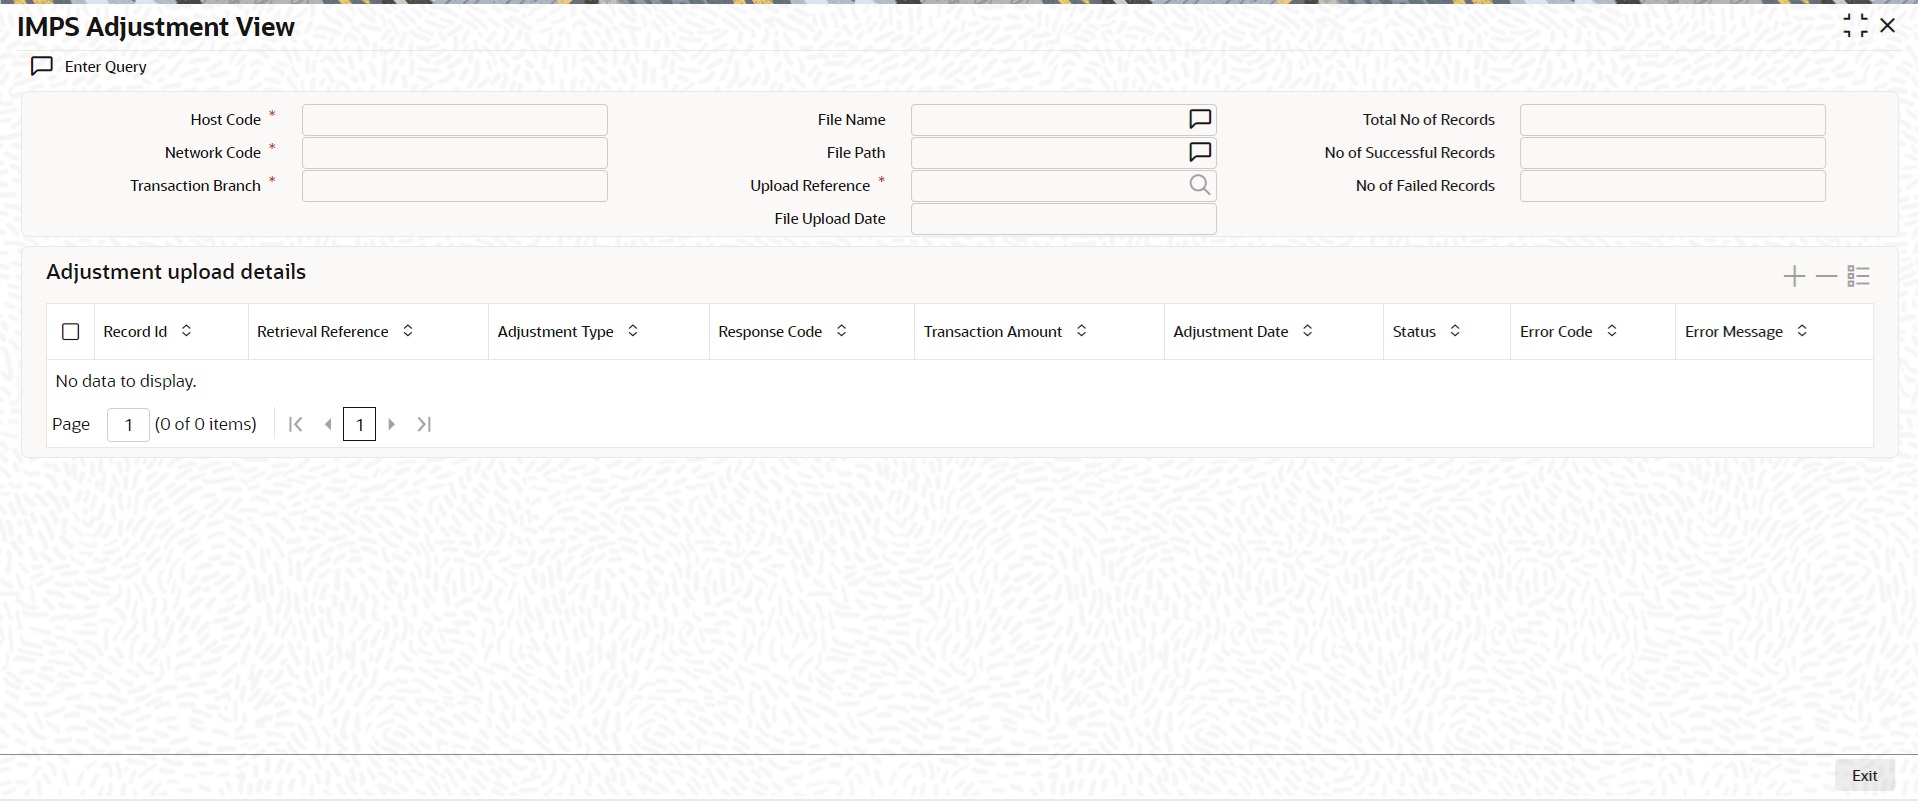
Specify the following details:
Host Code
System auto populates the Host Code defined for India Payments.
Network Code
System auto populates the Network Code defined for India IMPS.
Transaction Branch
System displays the transaction branch of logged in user.
File Name
You can type in the file name to be uploaded.
File Path
You can type in the file path to be uploaded.
Upload Reference
System generates unique Upload Reference for new upload every-time and display in this field.
File Upload Date
System displays the current date as file upload date.
Total No of Records
System displays the total no of records present in the upload file.
No of Successful Records
System displays the count of records which are uploaded successfully.
No of Failed Records
System displays the count of records which failed during upload.
Adjustment upload details
You can view the following display fields:
l Record Id
l Retrieval Reference
l Adjustment Type
l Response Code
l Transaction Amount
l Adjustment Date
l Status
l Error Code
l Error Message
4.4.2 IMPS Adjustment Upload Summary
You can view summary of the TCC files uploaded in this screen.
You can invoke ‘IMPS Adjustment Upload Summary’ screen by typing ‘PJSAJUPD’ in the field at the top right corner of the Application tool bar and clicking on the adjoining arrow button.
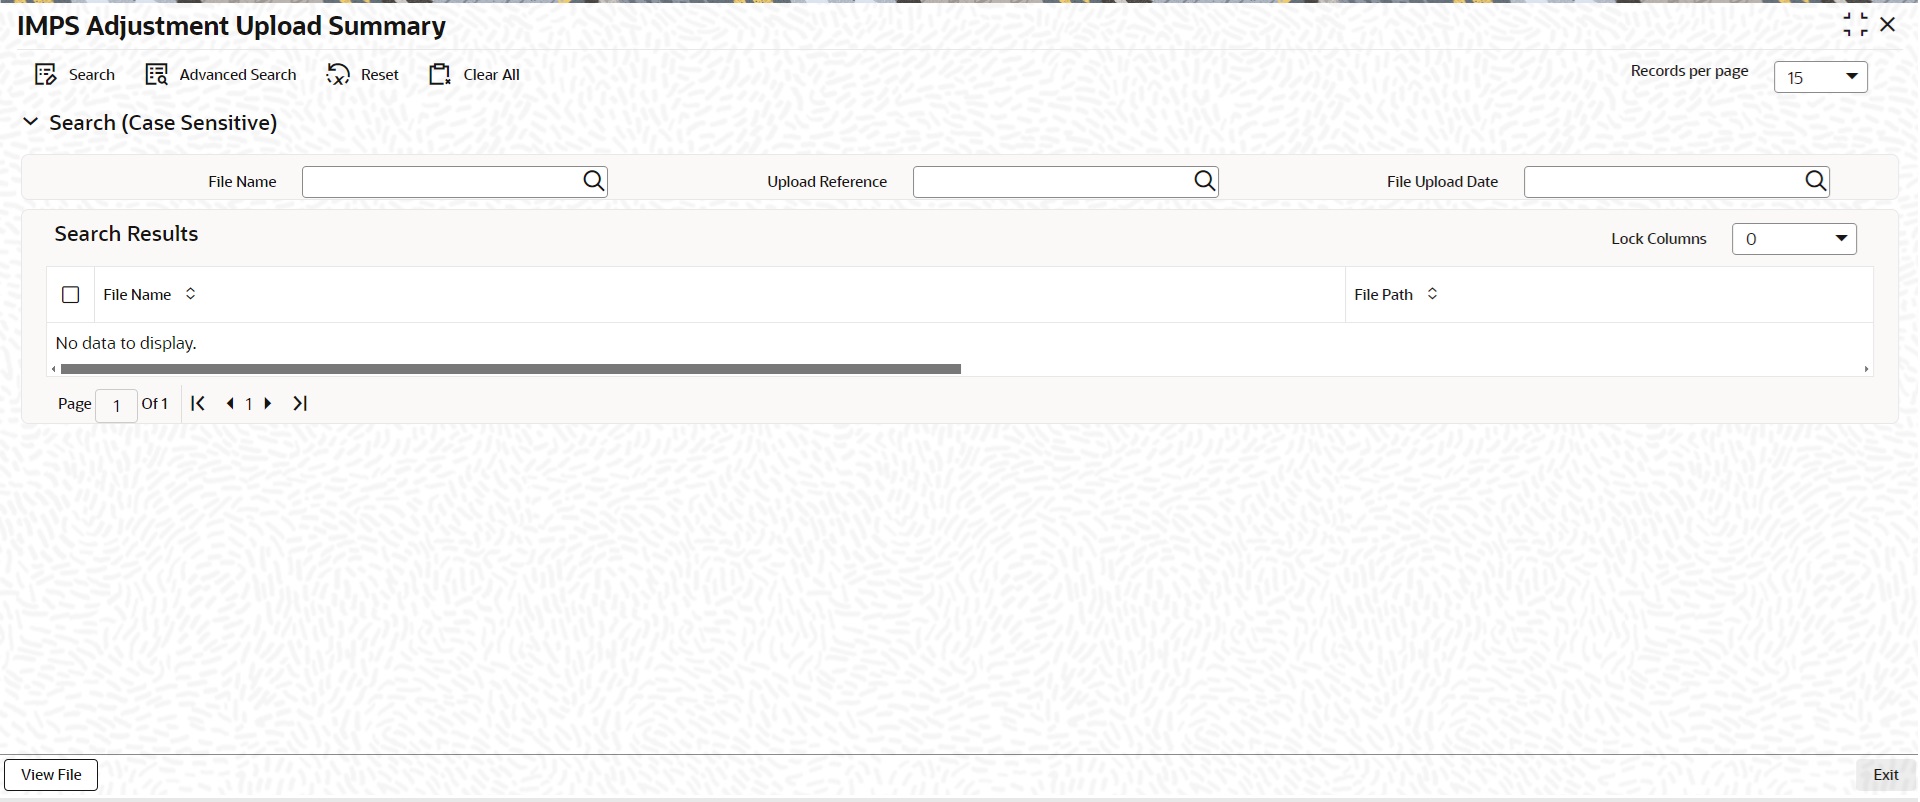
You can search for the records using one or more of the following parameters:
l File Name
l Upload Reference
l File Upload Date
Once you have specified the search parameters, click ‘Search’ button. The system displays the records that match the search criteria.
Following actions can be done from this screen:
View File
This action displays the TCC file that is upload from the given path.
4.5 IMPS Acknowledgement Message for Outbound Transaction
If any outbound IMPS XML message is sent to NPCI, system receives the acknowledgement message.
This acknowledgement message is received for:
l Request Pay
l Response Pay
l Check Transaction Request
l Check Transaction Response
l Heartbeat Request and Response.
XSD validation is done for the received Ack response.
System matches the Ack response with original outbound request by using reqMsgId field.
Acknowledgement response format is defined by NPCI.
For Negative Acknowledgement response, system receives the Error Details in Ack response only if any error in the original request message sent.When Ack response is received with error details then system rejects the transaction and reverse the accounting entries.
Ack Message is available to view on screen PJDIVIEW -> All messages -> Response Messages Tab.