Data Entry Check
Data Entry Check now allows adjusting the count of subforms/groups to simulate triggering within the entry form view
Choosing to run the Data Entry Check on a form allows the user to set the number of copies for each section and simulates a result that is similar to what might happen with triggering.
Beginning in version 12.7.2, the Manual Triggering dialog that lets you adjust the number of each section will also present subforms and groups not previously shown.
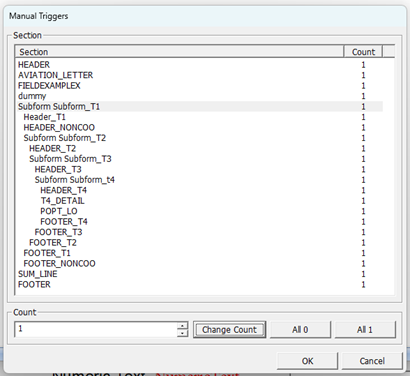
Subforms/groups display using a simple indention pattern to help identify which sections belong to which subform/group.
If you adjust the count of a subform/group, this implies that you want to replicate the entire grouping that many times. Of course, you can adjust the count of sections within the grouping and still only have one copy of the overall group.
Notice that you only see the start of the subform/group and not the end section. The end group will be duplicated automatically if you adjust the number of subforms/groups.
Keep in mind that if you adjust the number of sections within a group and also adjust how many copies of the group you desire, each subform/group will have the same number of sections as the first. Although this dialog is useful in viewing what happens when you “simulate” triggering multiple sections or groups, it is not possible at this time to have one copy of a subform/group that differs from another. This is possible in a true runtime triggering process, just not Data Entry Check.
Consider this simple example viewed by showing the subform from within DMStudio Form Manager.

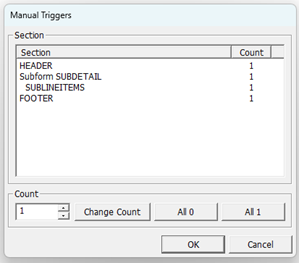
Here we have a form with a header and footer and the body is a subform named SubDetail. Inside that subform is one section named SubLineItems.
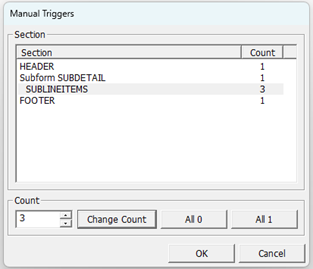
Choose Data Entry Check on this form and the Manual Triggering dialog looks like this:
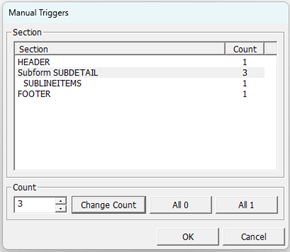
Let's change the count for the subform SubDetail to 3.
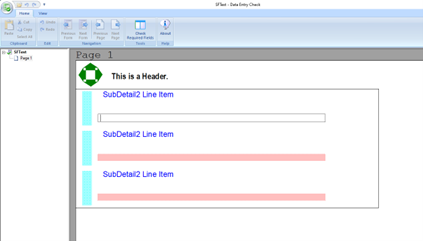
The resulting form in the entry view looks like this.
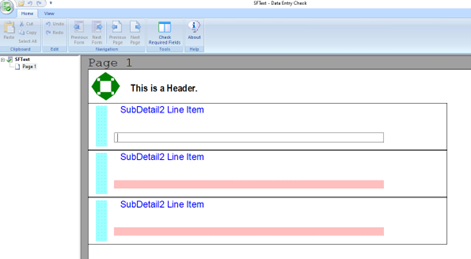
The subform was triggered three times and the detail within each copy is the same.
If you notice the boxes drawn each subform, this is done with the group border option and will help you visualize what comes next. In the above example, there are three subforms and each has a box drawn around its content.
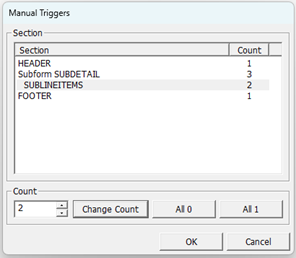
Returning to Studio and performing another Data Entry Check, let’s instead change the SubLineItems to a count of 3 and leave the subform count as 1.
With these settings, the entry view of the form now looks like the following. Although at first glance you may think the two results are the same, notice to group border. In this latter situation, you see only a single box encompassing all the subform sections. This is because these belong to the same subform group and not multiple subforms as we did before.
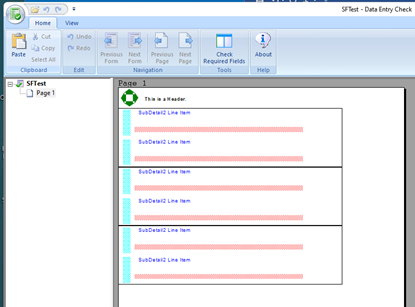
As a final example, let us change the subform count to 3 again and also change the SubLineItems section to have a count of 2.
This further demonstrates the distinction between changing the number of copies of the subform versus changing the count of the sections within the subform.
As in the prior example, you can see that there are three distinct subforms because there are three border boxes. Each copy of the subform has two SubItemLines sections just as specified on the Manual Triggering dialog.
Back to Top