3.3 Database Backup
Perform the following steps at the Primary Active NOAM VIP, to perform database
backup.
- Launch an HTML5 compliant browser and
connect to the XMI Virtual IP address (VIP) assigned to Primary
Active NOAM site.
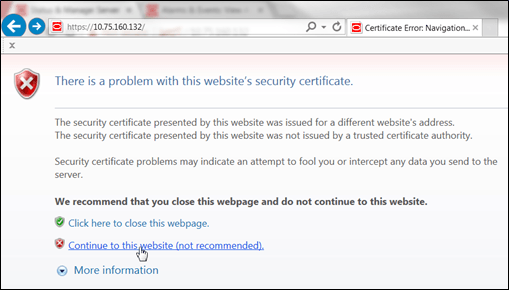
If a Certificate Error is received, click on Continue to this website (not recommended) link.The login screen appears.
Figure 3-9 Certificate Error
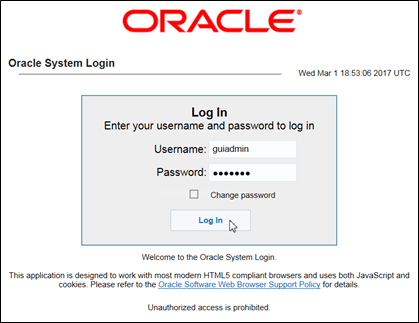
- Log in to the GUI using a user account with administrator
privileges.
Figure 3-10 Login Screen
The Product Main Menu appears.
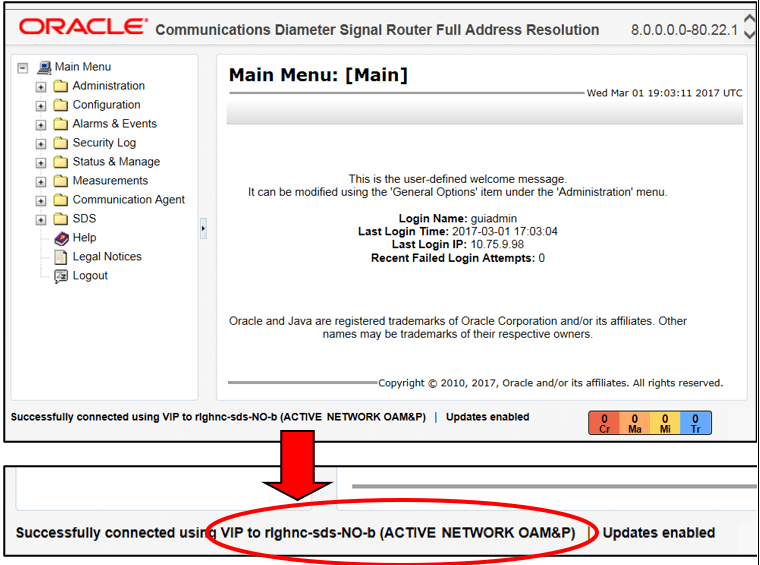
- Verify if the message shown across the bottom of the panel
indicates that the browser is using the VIP to connect to the
Active NOAM server (hostname) on the
ACTIVE NETWORK OAM&P NE.
Figure 3-11 Main Menu
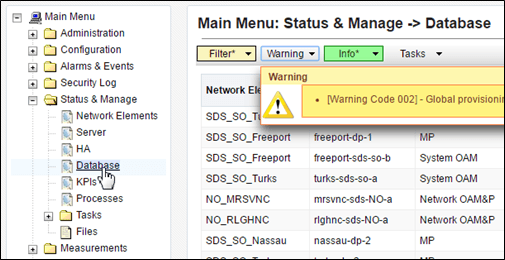
- Go to . Manage, and then select Database.
Figure 3-12 Database
- Select the row containing the hostname of the
Active NOAM server (previously identified in Step
3 of this procedure). Then, click Backup.
The Database [Backup] screen appears.
Figure 3-13 Database Backup
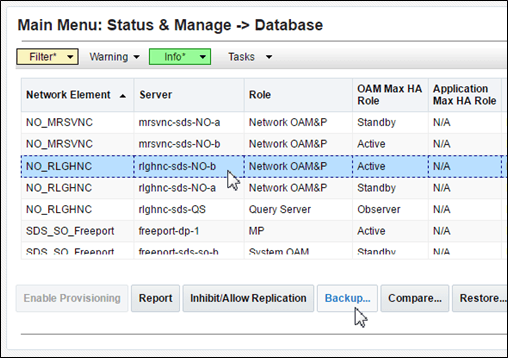
Figure 3-14 Database [Backup]
![Database [Backup] Database [Backup]](img/db_4.png)
- For SDS Systems only, perform the following steps:
- Uncheck the Configuration checkbox, so that only the Provisioning checkbox is selected.
- Enter a comment to reflect the reason for the manual backup in the comment field.
- Click Ok.
Figure 3-15 Database [Backup] - SDS Systems Only
![Database [Backup] - SDS Systems Only Database [Backup] - SDS Systems Only](img/db_5.png)
- For DSR Systems only, perform the following steps:
- The Provisioning checkbox cannot be selected on DSR. Ensure that the Configuration checkbox is selected.
- Enter a comment to reflect the reason for the manual backup in the comment field.
- Click Ok.
Figure 3-16 Database [Backup] - DSR Systems Only
![Database [Backup] - DSR Systems Only Database [Backup] - DSR Systems Only](img/db_6.png)
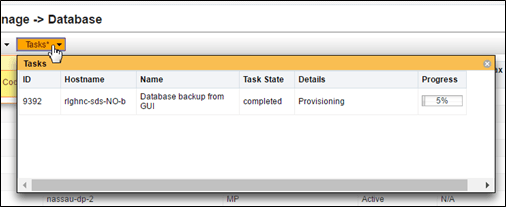
- Click on Tasks tab to verify that a new
Database backup from GUI task has been created.
Figure 3-17 Database Task
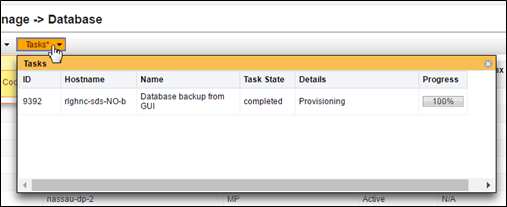
- Use the Tasks tab to monitor the status
in the Progress column until it shows 100%.
Figure 3-18 Database Task Progress
Note:
- Depending on the release version, the User may have to periodically click the Status & Manage, under Database menu option in order for the information on the Tasks tab to refresh and show real-time status.
- This procedure has been completed. Return to Figure 2-1.