2. SEPA Instant Credit Transfer
SEPA Instant Credit Transfer (SCT Inst) is an instant payment instrument for the execution of credit transfers in Euro. The messages are exchanged in ISO XML formats over a high speed network resulting in credit to beneficiary’s account in seconds.
Oracle Banking Payments supports execution of SCT Instant payments.
SCT Inst scheme allows a target maximum execution time of 10 seconds to process a payment within which the Beneficiary Bank must report acceptance/rejection of the payment. The services based on the Scheme are available 24 hours a day and on all Calendar Days of the year.
Payment Processing
l On receiving an SCT Inst payment request, the originator bank completes the necessary validations related to the payment. On processing the payment successfully, the bank makes a reservation of the Amount (amount block) on the Originator’s Account.
l The Originator Bank instantly prepares pacs.008 message for SCT Instant Instruction, puts the Time Stamp and forwards the same to beneficiary bank through CSM. The Time Stamp marks the start of the Execution Time Cycle of the SCT Inst Transaction.
l The Beneficiary Bank receives the SCT Inst Transaction from its CSM, verifies whether it can apply the payment to the Beneficiary’s Payment Account and executes various validation checks. The Beneficiary Bank sends the confirmation message back to its CSM within the maximum allowed execution time.
l The CSM passes on the positive confirmation message to the Originator Bank. Based on this positive confirmation message, the Originator Bank debits the Originator’s account.
l Beneficiary bank receives a technical confirmation from CSM that its positive confirmation message has been successfully delivered to the CSM, based on which funds are made available to the beneficiary.
l A ‘Reject’ occurs when an SCT Instant Transaction is not accepted for normal execution under the Scheme because of validation failures or delay in receiving the message. Reject messages contain a reason code by the CSM or beneficiary bank. When Beneficiary Bank has the certainty that its confirmation message cannot reach or has not reached the CSM within the 20 seconds after the Time Stamp, the Beneficiary Bank sends a negative confirmation message with the appropriate reason code to its CSM.
l If the Originator Bank receives a negative confirmation message regarding the SCT Instant Transaction, the Originator Bank cancels the SCT Instant Instruction and revokes the reservation of the Amount on the Originator’s account. It is obliged to immediately report the SCT Inst Transaction failure to the Originator with a reason.
l The CSM of the Originator Bank or the Originator Bank cannot unilaterally reject the SCT Inst Transaction after the time-out deadline.
l The Scheme delivers the end-to-end carrying of Customer remittance data on either a structured or an unstructured basis.
Recall Processing
l An SCT Inst Recall occurs when the Originator Bank requests to cancel an SCT Instant transaction. The Recall procedure can be initiated only by the Originator Bank which may do it on behalf of the Originator. The Originator Bank must send out the SCT Inst Recall within 10 Banking Business Days after the execution date of the initial SCT Inst Transaction.
l Before initiating the Recall procedure, the Originator Bank checks if the SCT Instant Transaction is subject to only one of the following reasons:
– Duplicate sending
– Technical problems resulting in erroneous SCT Inst Transaction(s)
– Fraudulent originated SCT Inst Instruction
l The Beneficiary Bank provides the Originator Bank with an answer to the SCT Inst Recall within 10 Banking Business Days following the SCT Inst Recall from the Originator Bank.
l Beneficiary Bank can charge a return fee to the Originator Bank. This practice is only allowed for a positive response to a Recall. The amount sent back can differ from the initial amount of the SCT Inst Transaction in such cases.
Investigation Messages
l The Originator Bank sends an SCT Inst status inquiry message pacs.028 to the Beneficiary Bank through CSM to inquire about the actual status of the initial SCT Inst Transaction. This is done if no response is received regarding the status of the payment after an allowed time limit. The current time limit is 25 seconds.
l Each party in the Interbank Space instantly verifies if it actually received the initial SCT Inst Transaction from the Originator Bank.
l In case the initial SCT Inst Transaction had not been received by CSM/beneficiary bank, non-delivery of this initial transaction is reported back to the Originator Bank who then rejects the transaction and informs the Originator. If a party in the Interbank Space had received a confirmation message on the initial SCT Inst Transaction, this party is obliged to instantly retransmit this confirmation message to the Originator Bank.
Message versions supported by SCT Inst
|
Message Type |
|
|
|---|---|---|
|
FI to FI Customer Credit Transfer |
pacs.008.001.02 |
pacs.008.001.08 |
|
Confirmation Message Positive/Negative |
pacs.002.001.03 |
pacs.002.001.10 |
|
Cancellation Request (Recall) |
camt.056.001.01 |
camt.056.001.08 |
|
Negative Response to Recall |
camt.029.001.03 |
camt.029.001.09 |
|
Positive Response to Recall |
pacs.004.001.02 |
pacs.004.001.09 |
|
Transaction status investigation message |
pacs.028.001.001 |
pacs.028.001.03 |
For ISO 2019 version, maintenance is to be done in SEPA Message Preferences screen (Function ID:PMDSEPAM).
2.1 Faster Payment Maintenances
This section lists the major maintenances that are required for processing of outward and inward Faster Payments.
l Network Maintenance
l Source Maintenance
l Source Network Preferences
l Network Currency Preferences
l Network Preferences
l External System Maintenances
l External Customer Account Input
l Pricing Code
l Pricing Value
For maintenance details, refer to Payments Core and Payment Pricing – User Manuals.
2.2 Outbound Faster Payments Transaction Input
2.2.1 Outbound SCT Inst Transaction Input
You can invoke “Outbound SCT Inst Transaction Input” screen by typing ‘PFDOTONL’ in the field at the top right corner of the Application tool bar and clicking on the adjoining arrow button.This screen can be used to manually input the SCT Inst payment details for an outbound transaction
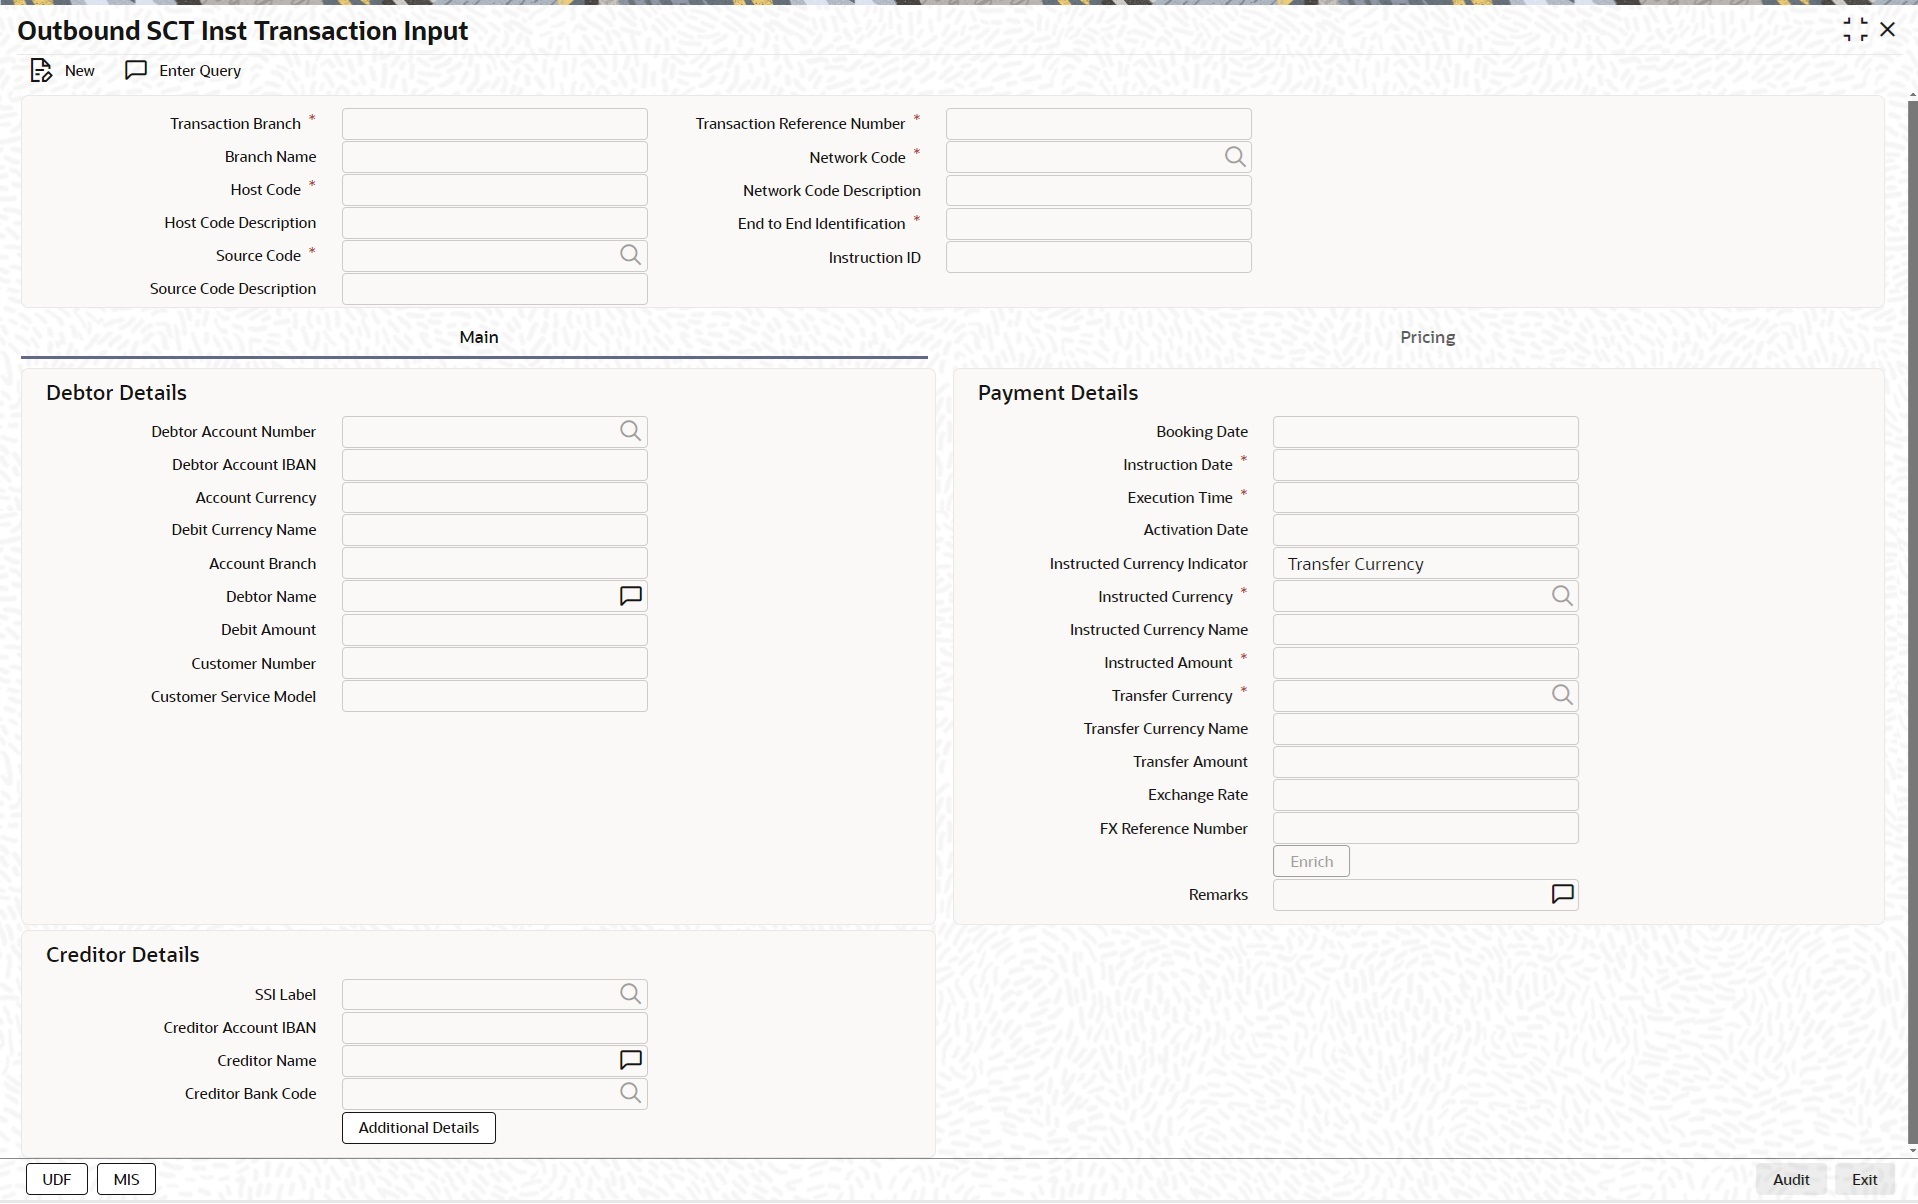
.
You can specify the following fields:
Transaction Branch
The system indicates the branch from which the customer is logged in.
Branch Name
System defaults the Branch Name of the Transaction Branch Code
Host Code
The system indicates the host code that is linked to the transaction branch of the customer.
Host Code Description
System defaults the description of the host code
Source Code
This is defaulted to ‘MANL’ and it is non-editable for manually initiated transactions.
Source Code Description
System defaults the description of the Source code
Transaction Reference Number
Indicates a unique identifier of the SCT Inst payment transaction and auto-generated by the system based on the common transaction reference generation logic.
Network Code
The field shows a list of valid network codes from the Network maintenance (PMDNWMNT) with payment type as ‘Faster payment’. This is a mandatory field.
Network Code Description
System defaults the description of the Network code
End to End Identification
End to End ID is populated as the transaction reference. You can modify the same to indicate the End to End ID provided by the originating customer (debit account owner).
Instruction ID
This is an optional field. This is for input of the Instruction ID received from the customer’s payment request.
Click Main tab from the Faster Outgoing Payment screen
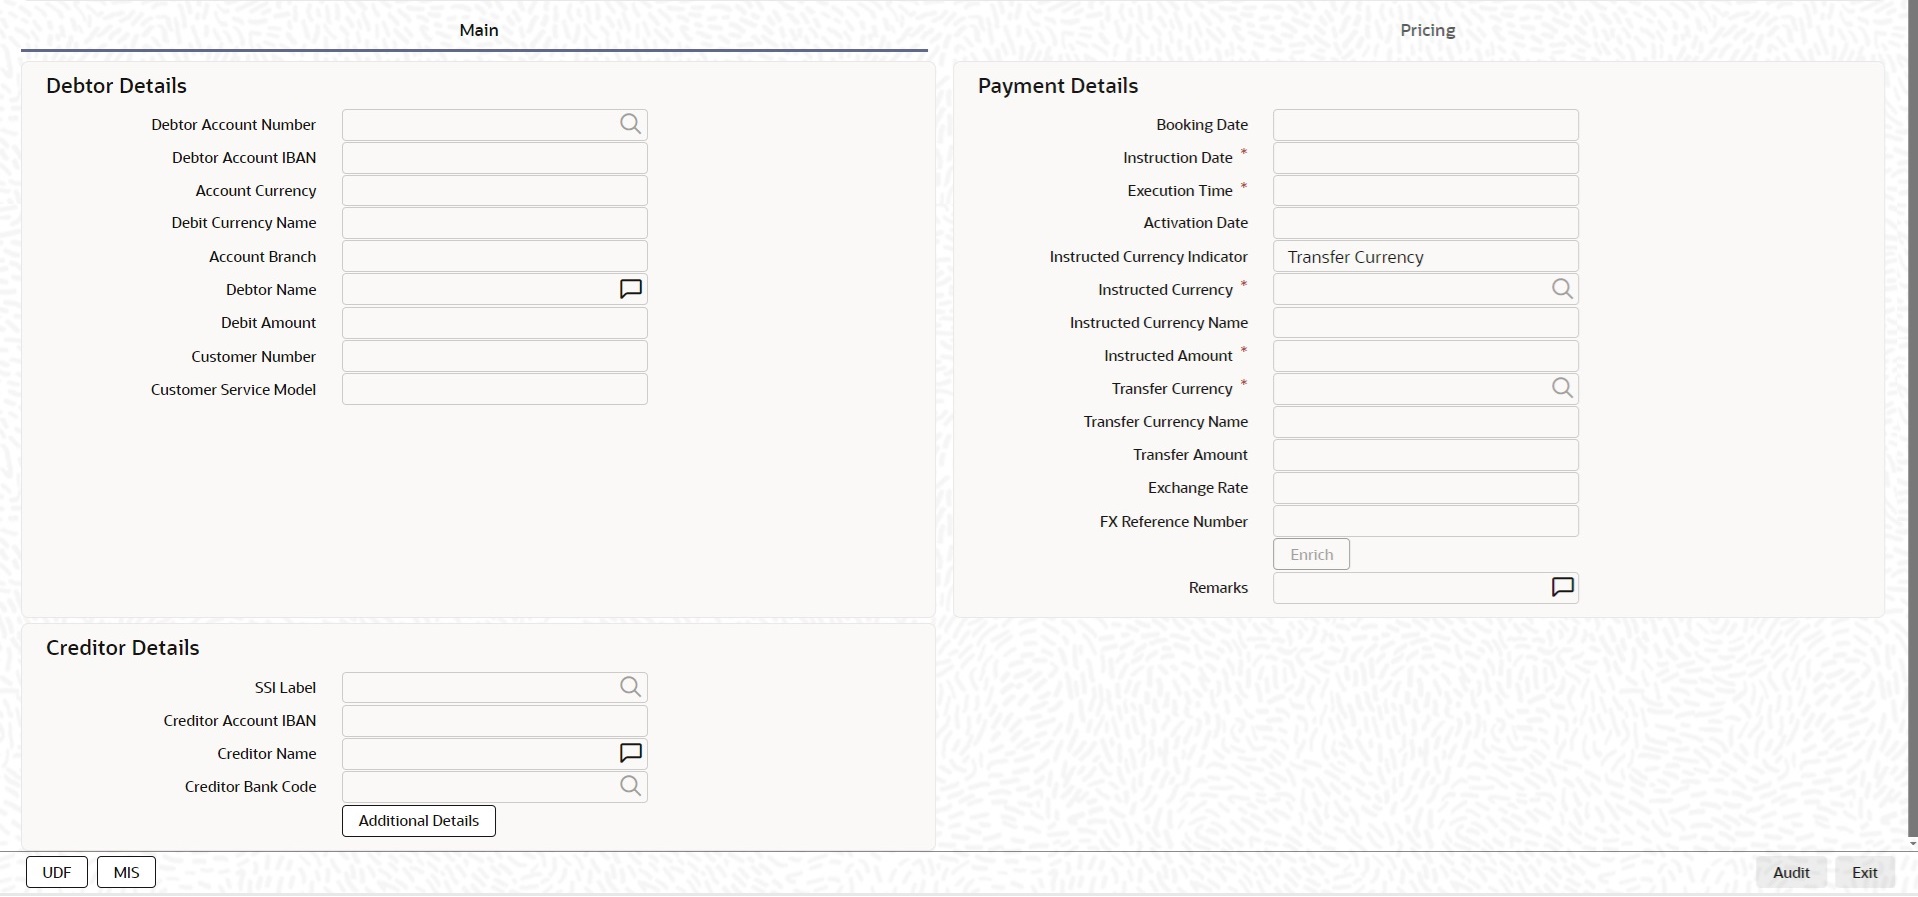
You can specify the following fields:
Debtor Details
Debtor Account Number
Specify the account number of the debtor. Alternatively, you can select the account number from the option list. The list displays all valid account numbers maintained in the system. This is a mandatory field.
Debtor Account IBAN
This field is auto-populated based on the debtor account selected.
Account Currency
Account currency is defaulted based on the selected debit account.
Account Branch
Account Branch is also defaulted based on the selected debit account.
Debtor Name
This is populated based on debtor account customer.
Debit Amount
This field is populated as the transfer amount converted in debtor account currency. The exchange rate pick up is based on network preferences maintained. This field is disabled for user input.
Customer Number
The system indicates the customer linked to the debtor account.
Customer Service Model
The system indicates the service model linked to the customer.
Creditor Details
SSI Label
Select the required SSI label from the list of values so that beneficiary details can appear by default.
This list is populated with valid SSI Labels, applicable for the customer and the Network. This is an optional field
Creditor Account IBAN
Specify the IBAN of the beneficiary. This is a mandatory field.
Creditor Name
Specify the name of the beneficiary. This is a mandatory field.
Creditor Bank Code
Select the required bank code from the list of values. All open and authorized Bank Codes/BIC codes available in local bank directory (PMDBKMNT) applicable for the Network are listed in this field. The listing is based on the ‘Bank Network Identifier’ maintained for Network maintenance (PMDNWMNT). For Network Type code corresponding to TIPS, only the BICs in the “TIPS Directory” are displayed.
Payment Details
Booking Date
The current date is defaulted as Booking Date. This is a disabled field for user modification.
Instruction Date
This is defaulted to current application server date. You can modify this date. This is the requested execution date by the customer. Back dates are not allowed.
Execution Date
This is defaulted to the current time in time zone of the logged in Branch.
Activation Date
This date is derived from Instruction date and it is disabled. Since Network / Branch holidays are not applicable for SCT Instant, activation date is the same as instruction date. Payment is submitted to the Clearing Infrastructure (CI) on Activation date and processed by the CI on the same date.
Instructed Currency Indicator
Select any of the two options:
l Transfer Currency - If the Instructed currency option is ‘Transfer Currency’ then the Instructed amount provided will be considered as the Transfer Amount.
l Debit Currency - If the option is ‘Debit Currency’, then the Instructed Amount provided will be the Debit amount.
Instructed Currency
Select the currency from the list of values available required for the transaction
Instructed Amount
Specify the Instructed Amount for the transaction
Transfer Currency
This is automatically populated based on the selected Network code and the currency maintained in Network currency preferences (PMDNCMNT) maintenance. This is a mandatory field.
Transfer Amount
Specify the payment amount for transfer. This is a mandatory field.
Exchange Rate
Specify the exchange rate if debit account currency is different from the transfer currency. The system retains the input value and validate the same against override and stop variances maintained in the Network preference.
If exchange rate is not specified, then the system populates the exchange rate on enrich or save, if the transfer amount is less than small FX limit maintained.
FX Reference Number
Specify the FX Reference Number if the External Exchange Rate is applicable and advance FX booking is done.
Enrich
Click this button to trigger computation of Charges and tax on charges, if applicable based on the maintenance for Pricing Code specified in Network Currency Preferences (PMDNCPRF).
Exchange rate is fetched if internal rates are applicable.
Remarks
Specify the required Remarks.
Note
IBAN Validation for Outbound/Inbound Instant payments is done only if IBAN validation required field is maintained as Yes in Network Maintenance screen (PMDNWMNT).
2.2.1.2 Additional Details - Debtor Creditor Details
Under Main tab, click the Additional Details button in the Outbound Faster Payment screen.

You can specify the following fields:
Debtor Unstructured Address Details
Address 1
Specifies the first line of the debtor’s address.
Address 2
Specify the second line of the debtor’s address.
Debtor Account Proxy Details
Proxy Type Code
Specify the Proxy Type Code from the following:
l TELE
l EMAL
l DNAM
Proxy Type Proprietary
Specify the Proxy Type Proprietary.
Account Proxy Identification
Specify the Account Proxy Identification.
Debtor Structured Address Details
Specify the following fields:
l Department
l Sub Department
l Street Name
l Building Number
l Building Name
l Floor
l Post Box
l Room
l Post Code
l Town Name
l Town Location Name
l District Name
l Country Sub Division
l Country
Debtor Private Details
Birth Date
Specify the date of birth of the debtor.
Province Of Birth
Specify the province of birth of the debtor.
City Of Birth
Specify the city of birth of the debtor.
Country Of Birth
Specify the country of birth. Alternatively, you can select the country code from the option list. The list displays all valid country codes maintained in the system.
Debtor Identification
Organization Bank Id
Specify the BIC details in case the organization is a Financial Institution. In case of non-financial specify the BIC assigned to the corporate organization.
LEI
Specify the LEI.
Organization Identification
Specify the Identification of the Debtor identification.
Private Identification
Specify the Private Identification details that is issued by a government or private organization to an individual person.
Identification Issuer
Specify the Issuer that provided the identification.
Identification Scheme Code
Specify the Identification Scheme Code from the list of values.
Identification Scheme Proprietary
Specify the Identification Scheme Proprietary details.
Creditor Unstructured Address Details
Address 1
Specifies the first line of the creditor’s address.
Address 2
Specify the second line of the creditor’s address.
Creditor Account Proxy Details
Proxy Type Code
Specify the Proxy Type Code from the following:
l TELE
l EMAL
l DNAM
Proxy Type Proprietary
Specify the Proxy Type Proprietary.
Account Proxy Identification
Specify the Account Proxy Identification.
Creditor Structured Address Details
Specify the following fields:
l Department
l Sub Department
l Street Name
l Building Number
l Building Name
l Floor
l Post Box
l Room
l Post Code
l Town Name
l Town Location Name
l District Name
l Country Sub Division
l Country
Creditor Private Details
Birth Date
Specify the date of birth of the creditor.
Province Of Birth
Specify the province of birth of the creditor.
City Of Birth
Specify the city of birth of the creditor.
Country Of Birth
Specify the country of birth. Alternatively, you can select the country code from the option list. The list displays all valid country codes maintained in the system.
Creditor Identification
Organization Bank Id
Specify the BIC details in case the organization is a Financial Institution. In case of non-financial specify the BIC assigned to the corporate organization.
LEI
Specify the LEI.
Organization Identification
Specify the Identification of the Creditor identification.
Private Identification
Specify the Private Identification details that is issued by a government or private organization to an individual person.
Identification Issuer
Specify the Issuer that provided the identification.
Identification Scheme Code
Specify the Identification Scheme Code from the list of values.
Identification Scheme Proprietary
Specify the Identification Scheme Proprietary details.
Ultimate Debtor Details
Name
Specify the name of the Ultimate Debtor.
Ultimate Debtor Private Details
Birth Date
Specify the date of birth of the Ultimate Debtor.
Province Of Birth
Specify the province of birth of the Ultimate Debtor.
City Of Birth
Specify the city of birth of the Ultimate Debtor.
Country Of Birth
Specify the country of birth. Alternatively, you can select the country code from the option list. The list displays all valid country codes maintained in the system.
Ultimate Debtor Identification
Organization Bank Id
Specify the BIC details in case the organization is a Financial Institution. In case of non-financial specify the BIC assigned to the corporate organization.
LEI
Specify the LEI.
Organization Identification
Specify the Identification of the Ultimate Debtor identification.
Private Identification
Specify the Private Identification details that is issued by a government or private organization to an individual person.
Identification Issuer
Specify the Issuer that provided the identification.
Identification Scheme Code
Specify the Identification Scheme Code from the list of values.
Identification Scheme Proprietary
Specify the Identification Scheme Proprietary details.
Ultimate Creditor Details
Name
Specify the name of the Ultimate Debtor.
Ultimate Creditor Private Details
Birth Date
Specify the date of birth of the debtor.
Province Of Birth
Specify the province of birth of the debtor.
City Of Birth
Specify the city of birth of the debtor.
Country Of Birth
Specify the country of birth. Alternatively, you can select the country code from the option list. The list displays all valid country codes maintained in the system.
Ultimate Creditor Identification
Organization Bank Id
Specify the BIC details in case the organization is a Financial Institution. In case of non-financial specify the BIC assigned to the corporate organization.
LEI
Specify the LEI.
Organization Identification
Specify the Identification of the Ultimate Creditor identification.
Private Identification
Specify the Private Identification details that is issued by a government or private organization to an individual person.
Identification Issuer
Specify the Issuer that provided the identification.
Identification Scheme Code
Specify the Identification Scheme Code from the list of values.
Identification Scheme Proprietary
Specify the Identification Scheme Proprietary details.
2.2.1.3 Additional Details - Other Details
After specifying the Debtor Creditor details, click the Other Details tab.

You can specify the following fields:
Purpose Code
Select the purpose code from the list of values.
Remittance Information (Unstructured)
Payment Details 1 -4
Specify the first line of the payment details for the creditor to identify the purpose so that payment can be applied. You can enter a maximum of 35 characters.
Remittance Information (Structured)
Remitter Code
Specify the remitter code details.
Remitter Info Issuer
Specify the Remitter Info Issuer details.
Remitter Info Reference
Specify the Remitter Info Reference details.
Payment Type Information
Category Purpose Code
Select the category of the purpose code from the list of values.
Category Purpose Value
Specify the value of the Category Purpose.
2.2.1.4 Field Level Validations
Upon saving of an Outbound SCT Instant payment transaction, the system performs validations for presence of the following mandatory fields:
l Host Code
l Transaction Branch Code
l Network Code
l End to End ID
l Debtor Account IBAN
l Debtor Account Name
l Creditor Bank Code
l Creditor Account IBAN
l Creditor Account Name
l Transfer Currency
l Transfer Amount
l Activation Date
If the country code embedded in the Creditor Agent BIC has values like ‘PF’, ‘NC’ or ‘WF’, AND the country code embedded in the Debtor Agent BIC does not have one of values like: ‘FR’, ‘GP’, ‘RE’, ‘MQ’, ‘GF’, ‘PM’, ‘PF’, ‘NC’, ‘WF’, ‘BL’, ‘MF’ or ‘YT’, then the individual transaction is rejected. (Field validation as required by EBA RT1)
In party identification for each party (Debtor/Creditor/Ultimate Debtor/Ultimate Creditor), only one of the values in can occur for:
l Organization Bank ID
l Organization identification
l Private Identification
Only one of the values can be present for:
l Category purpose code
l Category purpose proprietary
Only one of structured Payment Details or Unstructured Payment details may be present.
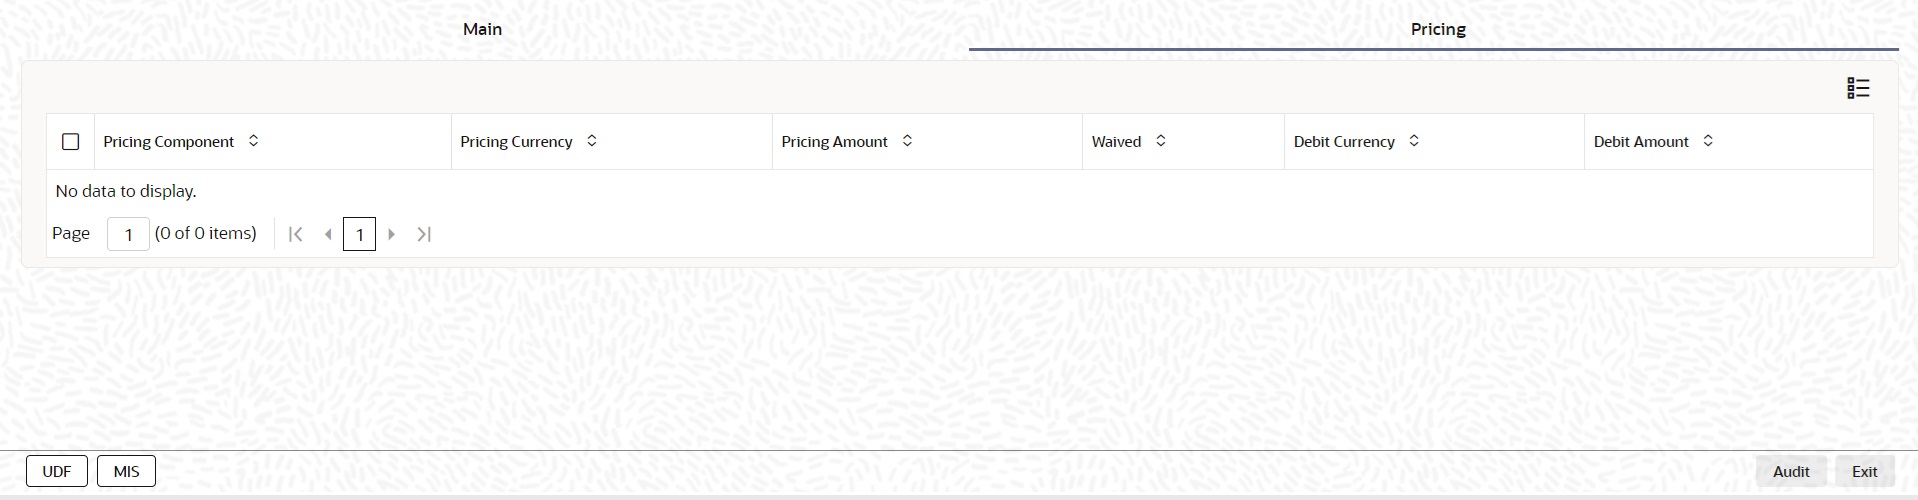
2.2.1.5 Pricing Tab
Click the Pricing tab from the Faster Payment Outbound Payment screen.:
Note
– On clicking the Enrich button, system would compute the Charges, and Tax on Charges if applicable, based on the maintenance for Pricing Code specified in Network Currency Preferences (PMDNCPRF).
– There may be one or more applicable Charge and Tax components as defined in the Pricing Code maintenance. For each Charge and/or Tax component, the fixed amount or rate would be fetched from Pricing Value Maintenance screen (PPDVLMNT) as applicable for the Payment Source code & Customer Service model.
You can specify the following fields:
Pricing Component
The system displays the name of the applicable Charge component.
Pricing Currency
The system displays the pricing currency of the component from the Pricing Code Maintenance.
Pricing Amount
The system displays the fixed or calculated charge amount using the Pricing Value Maintenance. You can edit this field to a non-zero value.
Waived
Check this box to select the charge component to waive the associated charges.
Note
– If a particular Charge component is waived by you, then system would automatically also check the Waiver check box for the associated Tax component (identified from the Pricing code maintenance) if displayed in this grid. You would not be able to clear the Waiver check box for this Tax component unless the associated Charge component waiver flag is unchecked.
– If charge/tax component is already waived in the Pricing Value maintenance, this component would still be displayed with the value and the waiver flag checked. This flag would not be allowed to be unchecked.
Debit Currency
Displays the debit account currency.
Debit Amount
The system displays the amount debited to the selected debit amount.
Note
Debit Currency is the same as Pricing Currency.
2.2.1.6 UDF button
Click on the ‘UDF’ button to invoke this screen.
You can specify user defined fields for each transaction.
Based on the UDF Group linked in the Source Maintenance screen for source code applicable to Manual initiation, UDF fields are available for input while creating the transaction.
2.2.1.7 MIS button
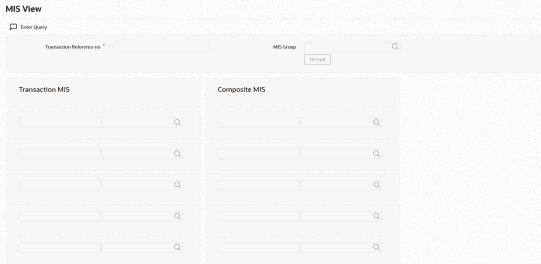
Click on the ‘MIS’ button to invoke this screen.
You can specify the MIS details in this sub-screen.
Based on the MIS Group linked in the Source Maintenance screen for source code applicable to Manual initiation, MIS class codes and MIS default values are populated for the SCT Instant payment transaction.
It is possible to change the default MIS values and input values for other MIS fields for which no value is defaulted.
Actions allowed in the Outbound Payment Input screen
The following are the operations which are supported in the Outbound Payments Input Screen:
l New: This operation is to be used to create a new Payment Transaction.
l Delete: This operation is to be used to delete the new Payment transaction created before Payment Authorization. Only the user who created the Payment transaction can do this Operation.
l Copy: This operation enables the user to create a transaction by copying details from an existing transaction.
l Authorize: This operation is to be used to approve the Payment creation or the last operation on the payment.
Query: This operation is to retrieve already created payment using the combination of header fields. The search fields should be used in a manner so that it results in a single matching transaction being retrieved as a search result.
2.2.1.8 Outbound SCT Inst Transaction Summary
You can view the summary in “Outbound SCT Inst Transaction Summary” screen. You can invoke the Outbound Faster Payments Summary screen by typing ‘PFSOTONL’ in the field at the top right corner of the Application toolbar and clicking on the adjoining arrow button.
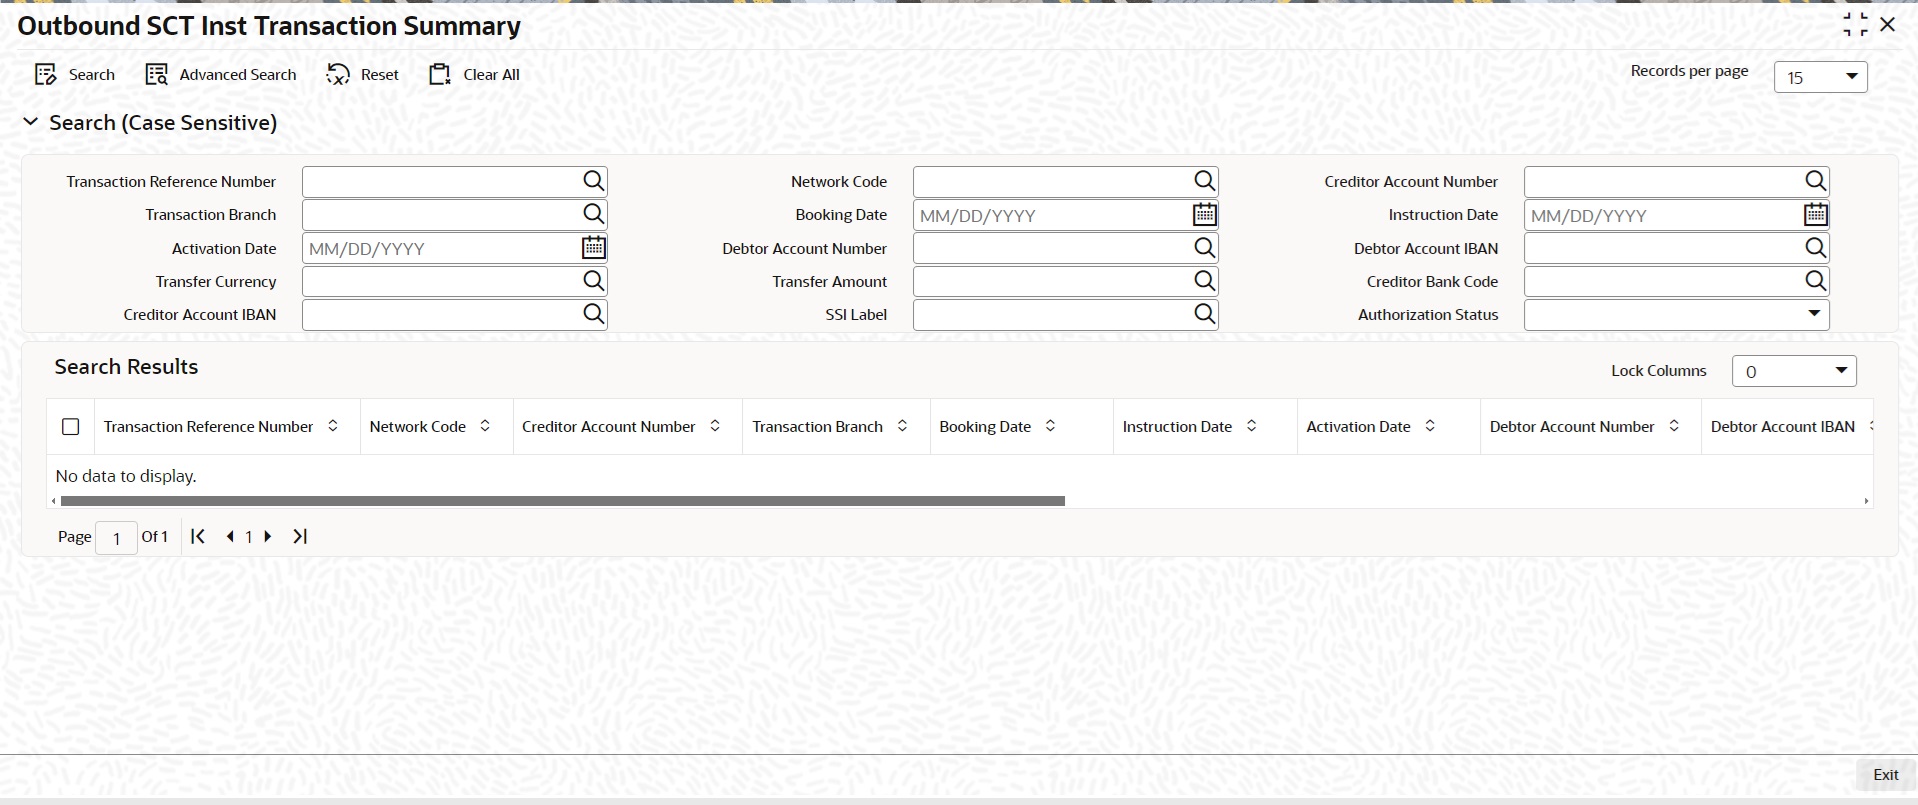
You can search for the records using one or more of the following parameters:
l Transaction Reference Number
l Network Code
l Transaction Branch
l Booking Date
l Instruction Date
l Activation Date
l Debtor Account Number
l Debtor Account IBAN
l Transfer Amount
l Transfer Currency
l Creditor Bank Code
l Creditor Account IBAN
l SSI Label
l Authorization Status
Once you have specified the search parameters, click ‘Search’ button. The system displays the records that match the search criteria.
2.2.2 Outbound Faster Payments Transaction Processes
The time limit for SCT Inst processing by all banks/CSM involved in the process starts from the time stamp put by the Originator’s bank in the outbound message once the required processing is over. Hence, processing queues are allowed for outbound payments for better operational control.
The transaction steps are detailed below:
l Initial Validations
– If Creditor Account BIC is not available as part of payment details, the system derives the Creditor Bank BIC from Creditor Account IBAN if IBANPlus details are maintained.
– Network character replacement is done for characters that are not allowed by the Network if the corresponding maintenance is available.
– If Account re-direction or bank re-direction is maintained, then the account / bank details is replaced by the values. Account re-direction is applicable for debtor account only.
– Mandatory Fields / Referential data checks are done based on the details received in the payment request and the values populated by the system. Validation is available to verify whether the Creditor Bank Code is allowed for the Network chosen. In case of validation failure, the transaction is rejected.
– Transfer amount limit check is done for the minimum and maximum amount limits defined for the Network, as maintained in Network Currency Preferences (PMDNCPRF).
– Customer /Account Status validations – Customer accounts are verified whether account records are open and authorized.
Note
Customer and account status checks are done by the external ECA system along with account balance check.
– In case of invalid IBAN or Network character validation failure, transaction is moved to repair queue.
l Duplicate Check
– Duplicate parameters can be maintained for the source. Based on the duplicate days and fields set, duplicate check for the transaction are done. If the transaction is identified as a duplicate transaction, the transaction is moved to business override queue.
l Sanction Check
The transaction can be sent for sanction screening to an external system. The external system status can be linked to one of the following system status:
– Approved
– Rejected
– Interim
– Seized
– Timed out
If sanction is approved, the transaction is resumed with the further processing. In case of seizure, if seizure accounting is applicable, then customer account is debited and the Seizure GL is credited. If the status is rejected, interim or timed out, the transaction is moved to sanction check queue.
l Charge /Tax Computation
Price code is linked in Network Currency preferences. Internal charge/tax values are picked up from Price value maintenance PMDVLMNT for the price code.
Note
Price fetch from External systems is not supported for SCT Instant payments.
l Exchange rate
The debit account can be in any currency. It is not mandatory to have debit account currency as Euro. The system fetches the internal exchange rate maintained if the transfer amount is within the mall FX limit maintained. If the transfer amount is more than the FX limit maintained and if External exchange rate fetch is applicable, the transaction details are sent to the external FX system for rate fetch. Any failure in rate fetch moves the transaction to exchange rate related Exception queues.
l Balance Check with DDA (CASA) System
The debit details are sent to the DDA system for account validation and balance check. The external system status can be linked to one of the following system status:
l Approved
l Rejected
l Interim
l Timed out
If balance check is approved, the transaction is resumed with the further processing. If the status is rejected, interim or timed out, the transaction is moved to Credit Approval queue.
Note
It is assumed that DDA system will create an amount block on the debit account for the debit amount on a successful ECA check.
l Accounting
Accounting preference can be set at Network preferences for the Outbound transactions. If he preference selected is ‘Before Messaging’ accounting entries will be handed off to Accounting system before Messaging. On payment reject, the reversal entries will be posted.
If the preference is for posting the accounting ‘On Confirmation from CI’, the accounting handoff will be deferred till positive confirmation is received from CSM.
l Accounting entries:
|
Details in Accounting hand-off |
Debit Liquidation |
Credit Liquidation |
|---|---|---|
|
Accounting Event |
DRLQ |
CRLQ |
|
Amount Tag |
XFER_AMT |
XFER_AMT |
|
Transaction Account |
Debit Customer Account |
Faster Payment Clearing GL maintained in the Accounting code. If Nostro Account is maintained in PMDNCPRF that account is considered. |
|
Offset Account |
Intermediary GL: This is picked from the Debit Liquidation Accounting code maintenance. |
Intermediary Gl: This is picked from the Credit Liquidation Accounting code maintenance. |
|
Transaction Currency |
Debit Account Currency |
Transfer Currency |
|
Transaction Amount |
Debit Amount |
Transfer Amount |
|
Value Date |
Transaction Value Date |
Transaction Value Date |
|
Offset Currency |
Transfer Currency |
Transfer Currency |
|
Offset Amount |
Transfer Amount |
Transfer Amount |
|
Local Currency Amount |
Transfer amount (in Local Currency) |
Transfer amount (in Local Currency) |
l Messaging
Every payment generates a pacs.008 message with group header details. Time stamp put in the message are stored for the transaction.
While generating the pacs.008 message, the following values are populated for SCT Inst:
– Instructing Bank –This is populated as BIC of length 8 from the BIC maintained in Dispatch parameters for service type SCT.
– Instructed Bank -EBA IPS BIC is fetched from Network maintenance
– Clearing system Proprietary value is IPS
– Settlement method is CLRG
– Service level code is populated as SEPA
– Local instrument code is INST
– Charge bearer value is populated as SLEV
The message is forwarded to Clearing Infrastructure.
l Response Handling
– The Accept or Reject confirmation is received from the CSM in pacs.002 format. For every message sent, a confirmation message is received.
– The system parses and uploads the received message and based on the status value received ACCP / RJCT, the outbound transaction is further processed.
– If the accounting is configured to be after confirmation, the accounting entries are handed off on getting a ACCP status.
– On receiving RJCT status, if the accounting is already passed, reversal entries are posted
– if accounting is pending, then Balance block reversal (ECA reversal) request is sent to DDA system
Notification is sent to debtor customer that indicates the status of the payment.
2.2.2.1 Webservices
l Outbound SCT Inst payment request received via SOAP services, ReST web services or via J-SON over JMS from the bank’s channels is processed in Oracle Banking Payments. The system automatically creates an Outbound SCT Inst payment transaction for a web service request received.
l If the Transaction branch code is received but no Host code then Host code is identified and populated in the transaction based on the Transaction branch code.
l Instead of the fields of Creditor Account IBAN, Creditor Account Name and Creditor Bank Code being present in the request, SSI label may be present.
l If the End to End ID value is not received in the request then this field in the transaction is set to Transaction Reference Number.
l Instruction date, if not provided will be considered as current date.
l On receiving and parsing of a payment request via ReST web services or via J-SON over JMS, the system performs validations for the following mandatory fields:
– Network code
– Transaction Branch
– Source Reference Number
– Debtor Account Number
– Creditor IBAN - This field may be empty if SSI label is present.
– Creditor Account Name - This field may be empty if SSI label is present.
– Transfer Currency
– Transfer Amount
Note
Creditor Bank Code is not mandatory in the request as the Creditor Bank BIC can be derived from the Creditor IBAN available. All transaction field level validations applicable to user interface is applicable to requests received through web services too.
2.2.2.2 Routing Matrix Support
You can do Routing matrix validations for SEPA Instant outbound requests via following channels:
l Rest / SOAP services
l C2B upload
l UI
Upon Network resolution, immediate validation occurs based on routing rules.
Note
Only Reject Rules are pertinent to SEPA Instant transactions.
Application of a reject rule leads to upfront transaction rejection, with detailed logging of routing rule application..
Rule maintenance with the latest effective date equal to or earlier than the current date is applied.
2.2.3 Outbound Faster Payments View
Faster payment Outbound transaction view screen allows you to query the payment details.
You can invoke “Outbound Faster Payments View” screen by typing ‘PFDOVIEW’ in the field at the top right corner of the Application tool bar and clicking on the adjoining arrow button...
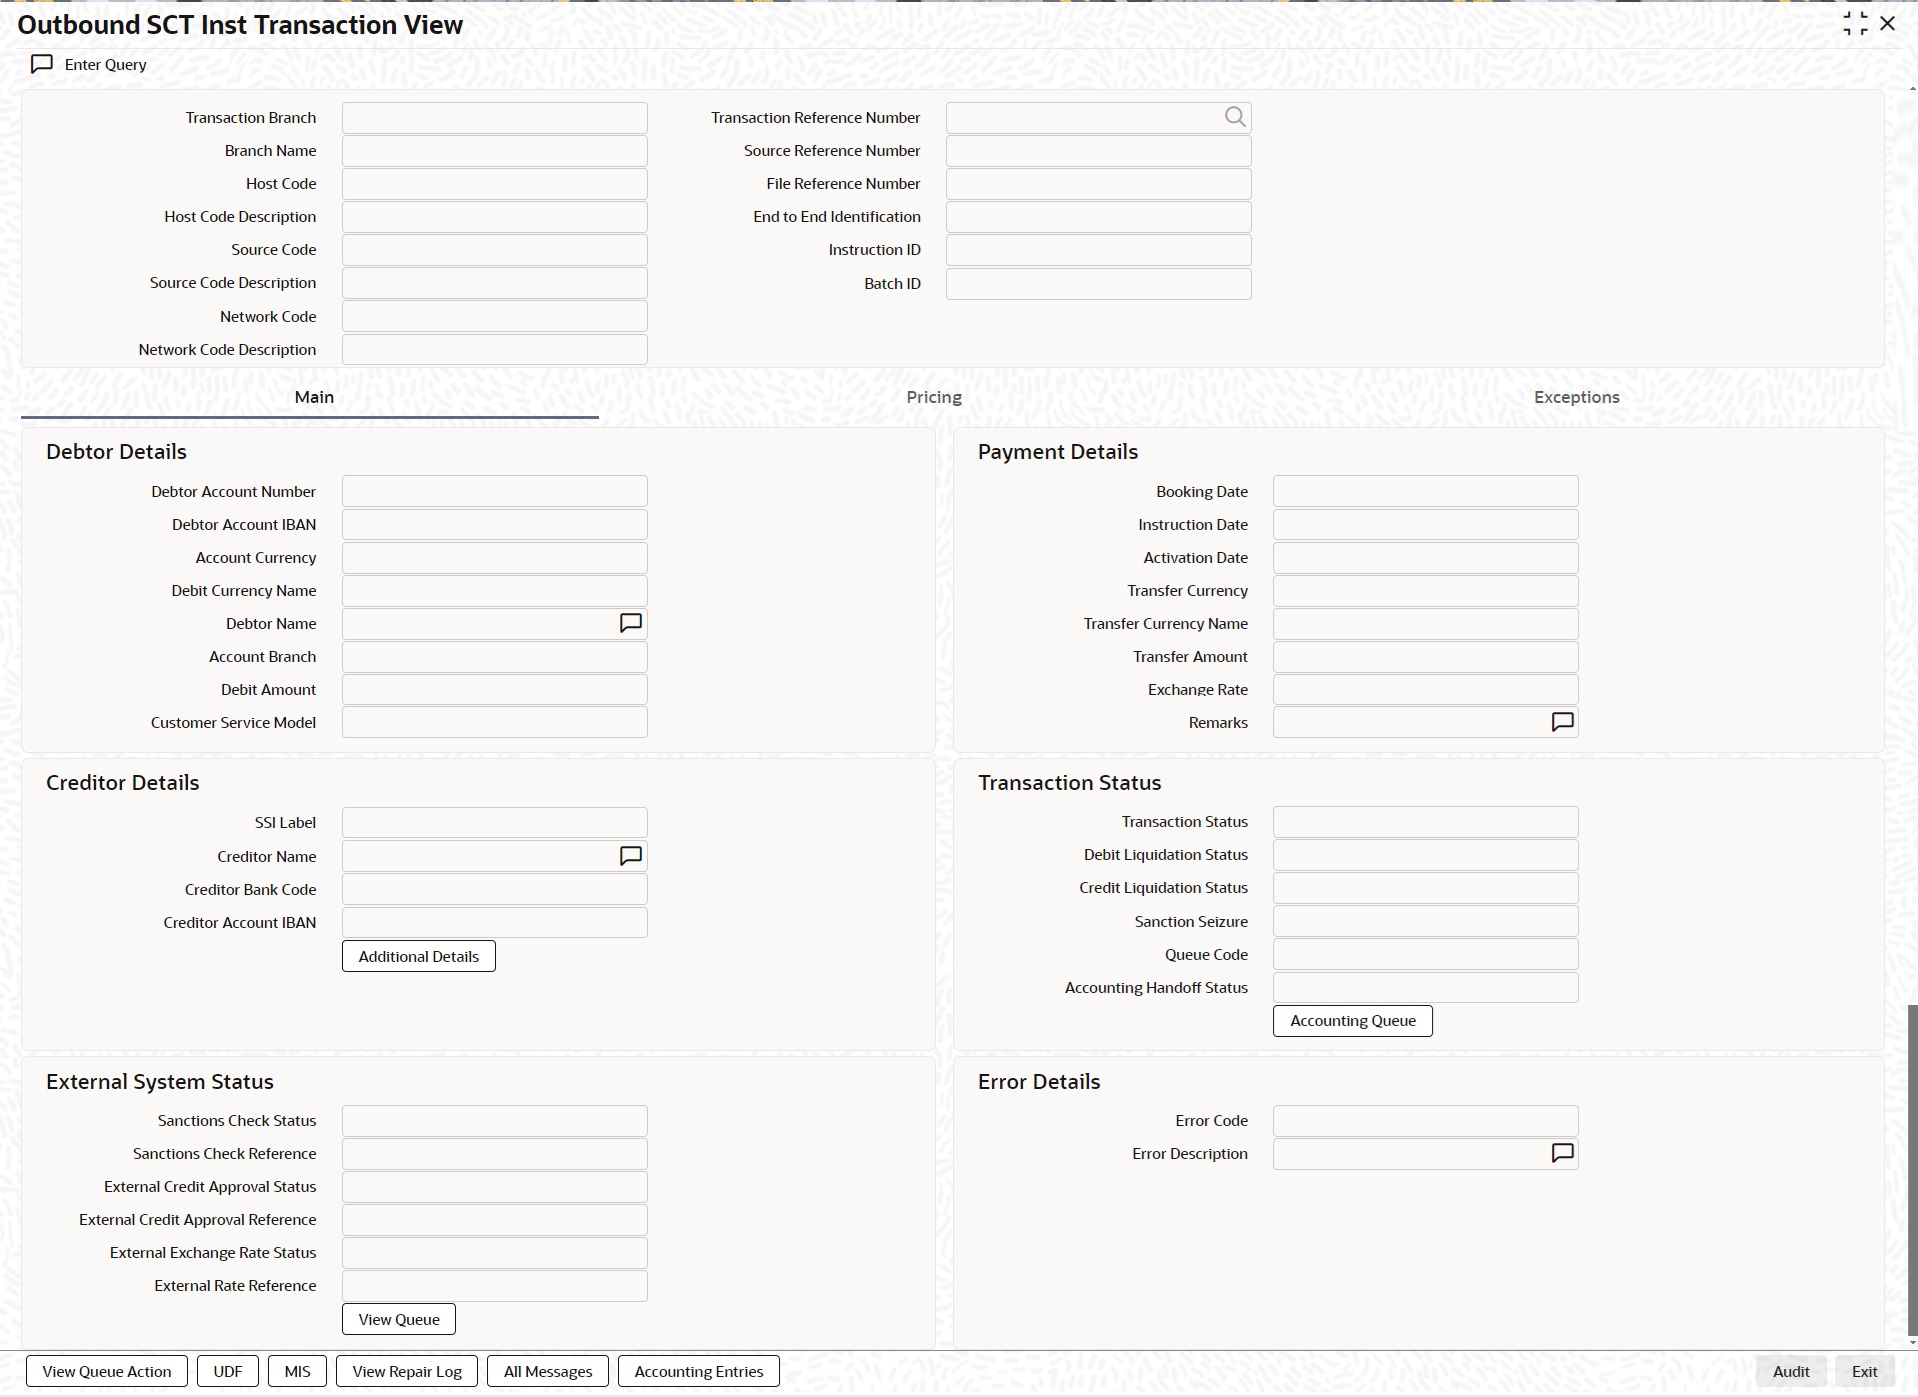
l From this screen, click Enter Query. The Transaction Reference field gets enabled which opens an LOV screen.
l Click the Fetch button and select the required value.
l Along with the transaction details in the Main and Pricing tabs user can also view the Status details for the following:
– External System Status
– Transaction Status
– Pending Queue Details
– Sanction Seizure
Accounting Handoff Status
Accounting Handoff status for a transaction is set considering the accounting status of all accounting entries for the transaction and assigning the priority for the status as below:
l Rejected
l In Progress (if any entry has status as Pending/Deferred/Requested)
l Success
l Cancelled
l Suppressed
l Not Applicable
Accounting Queue
You can get to Accounting Queue by pressing Accounting Queue Button. All accounting entries of the transactions in the Accounting Queue are listed. If no entry is available for the transaction error is displayed.
l Click Execute Query to populate the details of the transaction in the Outbound Faster Payments View screen.
For more details on Main and Pricing tabs refer to ‘PFDOTONL’ screen details above.
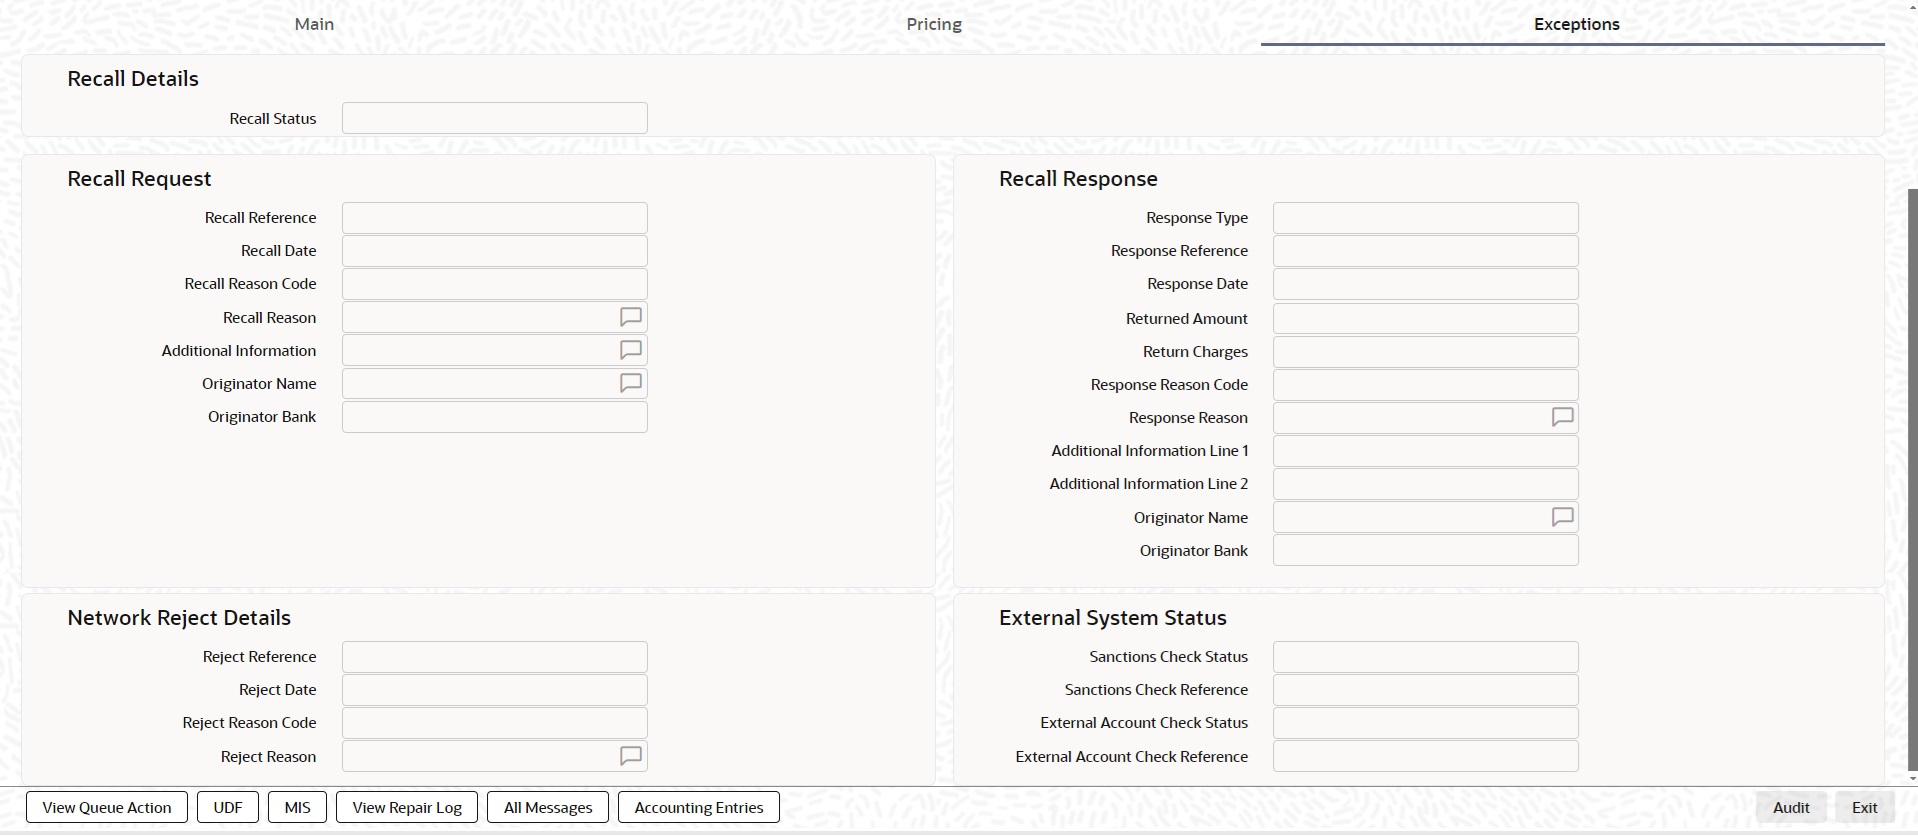
2.2.3.1 Exceptions tab
User can all view the recall details and its response, Network reject details and external system status here.
2.2.3.2 View Queue Action Log
You can view all the queue actions for the respective transaction initiated. You can invoke this screen by clicking the ‘View Queue Action’ button in View screen, where the Transaction Reference Number is auto populated and related details are displayed.

Following details are displayed:
l Transaction Reference Number
l Network Code
l Action
l Remarks
l Queue Code
l Authorization Status
l Maker ID
l Maker Date Stamp
l Checker ID
l Checker Date Stamp
l Queue Status
l Queue Reference No
l Primary External Status
l Secondary External Status
l External Reference Number
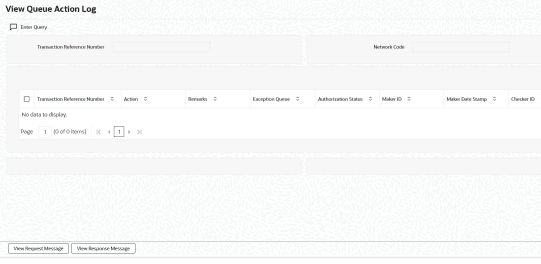
You can view the request sent and the corresponding response received for each row in Queue Action Log.
Also you can view the request sent to and the response received from external systems for the following:
l Sanction screening
l External credit approval
l External Account Check
l External FX fetch
l External price fetch
l Accounting system
2.2.3.3 UDF Tab
Click on the ‘UDF’ button to invoke this screen.
You can specify user defined fields for each transaction
2.2.3.4 MIS Tab
Click on the ‘MIS’ button to invoke this screen.

You can specify the MIS details in this sub-screen.
2.2.3.5 View Repair Log
You can view all the Repair actions for the respective transaction initiated. You can invoke this screen by clicking the ‘View Repair Log’ button in View screen, where the Transaction Reference Number is auto populated and related details are displayed.
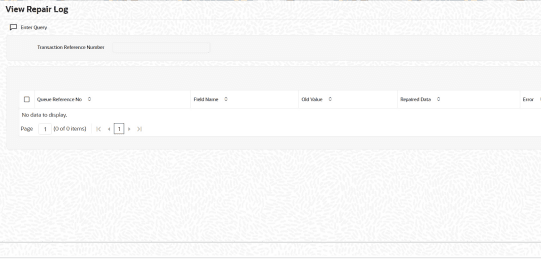
Following details are displayed:
l Queue Reference No
l Field Name
l Old Value
l Repaired Data
l Error
2.2.3.6 All Messages Screen
Click the All Messages button in the View Outbound Faster Payments screen.Click the “All Messages” link in the transaction input screen to invoke this sub-screen.

The system displays the message details like Message Identification, Message Type, Direction and Message Date.
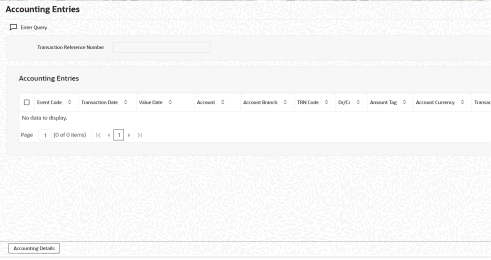
2.2.3.7 Accounting Entries Tab
You can invoke this screen by clicking ‘Accounting Entries’ tab in the screen.to view the complete accounting entries
2.2.3.8 Outbound SCT Inst Transaction View Summary
You can view the summary in “Outbound SCT Inst Transaction View Summary” screen. You can invoke the Outbound Faster Payments View Summary screen by typing ‘PFSOVIEW’ in the field at the top right corner of the Application toolbar and clicking on the adjoining arrow button.
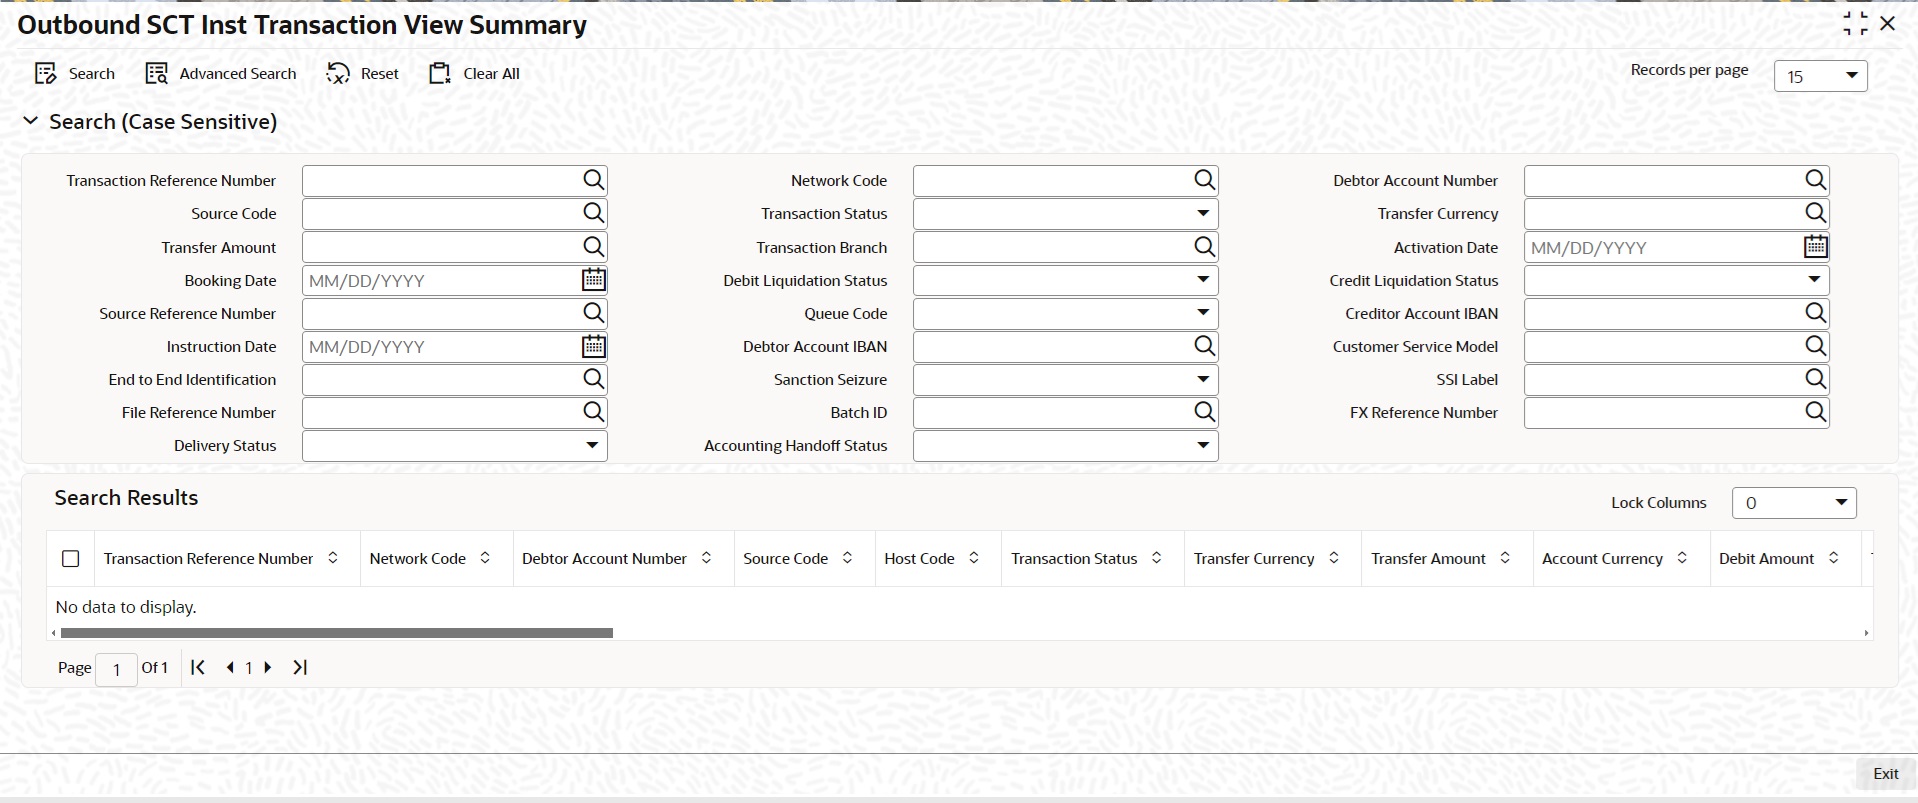
You can search for the records using one or more of the following parameters:
l Transaction Reference Number
l Network Code
l Debtor Account Number
l Source Code
l Transaction Status
l Transfer Amount
l Transfer Currency
l Transaction Branch
l Activation Date
l Booking Date
l Debit Liquidation Status
l Credit Liquidation Status
l Source Reference Number
l Queue Code
l Creditor Account IBAN
l Debtor Account IBAN
l Customer Service Model
l End to End ID
l Sanction Seizure
l SSI Label
l File Reference Number
l Batch ID
l FX Reference Number
l Delivery Status
Once you have specified the search parameters, click ‘Search’ button. The system displays the records that match the search criteria.
Double click a record or select a record and click on ‘Details’ button to view the detailed maintenance screen.
Future Valued Transaction Processing
SCT Inst scheme rules allow the customers to send the payment requests with future value date. Such requests are processed by the system till sanction screening on booking date and are marked as future valued.
On value date future dated transaction job processes the payments starting from the initial validations.
2.3 Inbound Faster Payments View
User can view the complete details about the Inbound Faster Payments transaction, approvals from the system, Queue actions, and all the details pertaining to the transaction in this screen
2.3.1 Inbound SCT Inst Transaction View
You can invoke “Inbound SCT Inst Transaction View” screen by typing ‘PFDIVIEW’ in the field at the top right corner of the Application tool bar and clicking on the adjoining arrow button
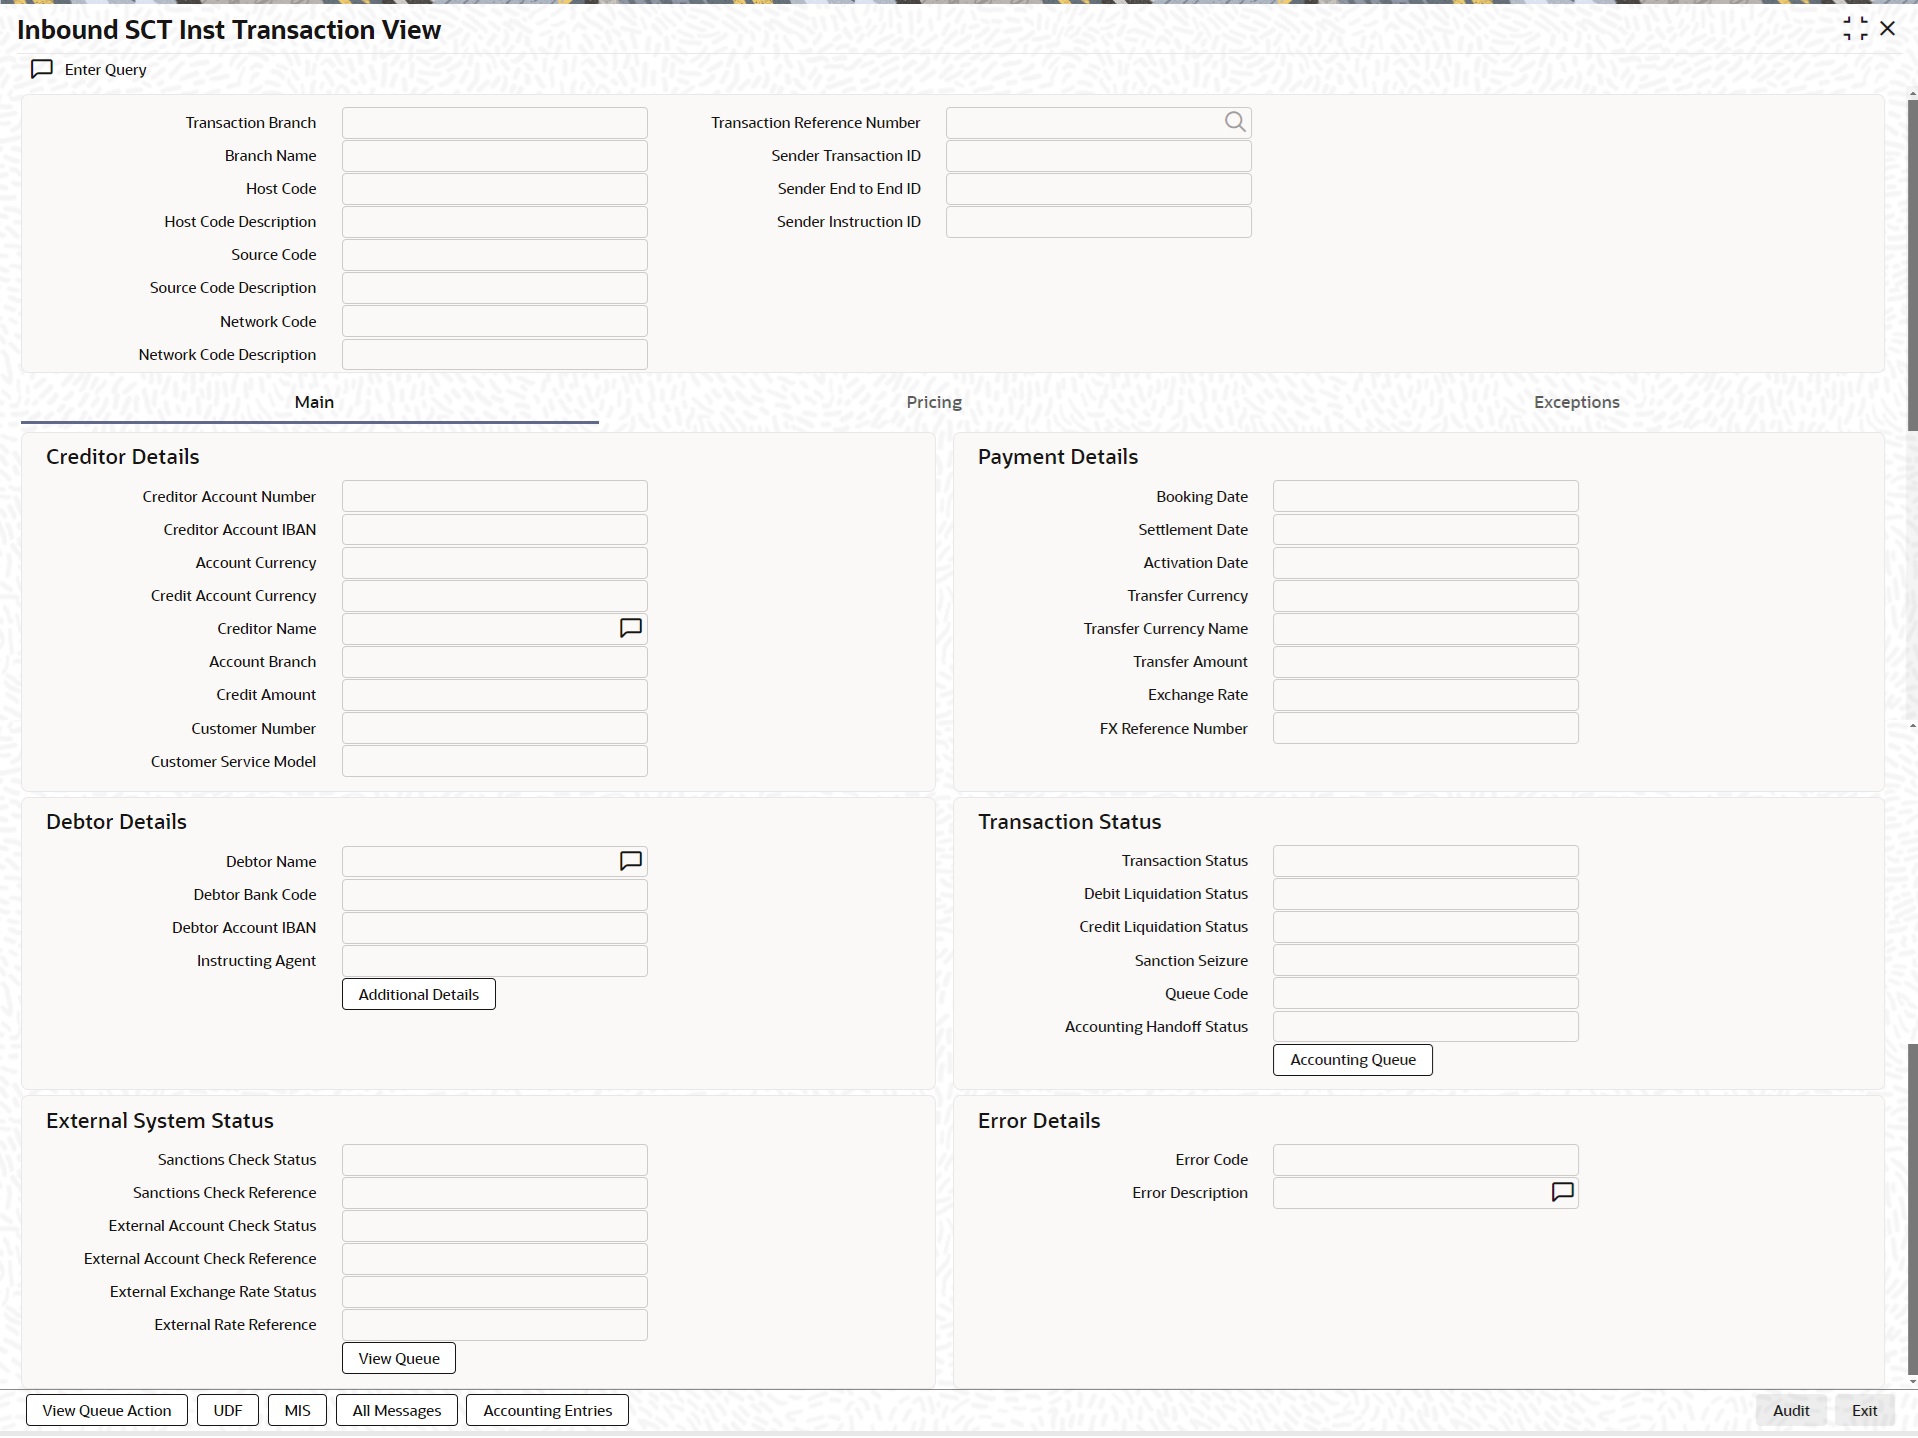
.
l From this screen, click Enter Query. The Transaction Reference field gets enabled which opens an LOV screen.
l Click the Fetch button and select the required value.
l Along with the transaction details in the Main and Pricing tabs user can also view the Status details for the following:
– External System Status
– Transaction Status
– Pending Queue Details
– Sanction Seizure
Accounting Handoff Status
Accounting Handoff status for a transaction is set considering the accounting status of all accounting entries for the transaction and assigning the priority for the status as below:
l Rejected
l In Progress (if any entry has status as Pending/Deferred/Requested)
l Success
l Cancelled
l Suppressed
l Not Applicable
Accounting Queue
You can get to Accounting Queue by pressing Accounting Queue Button. All accounting entries of the transactions in the Accounting Queue are listed. If no entry is available for the transaction error is displayed.
l Click Execute Query to populate the details of the transaction in the Inbound Faster Payments View screen.
For more details on Main and Pricing tabs refer to ‘PFDOTONL’ screen details above.
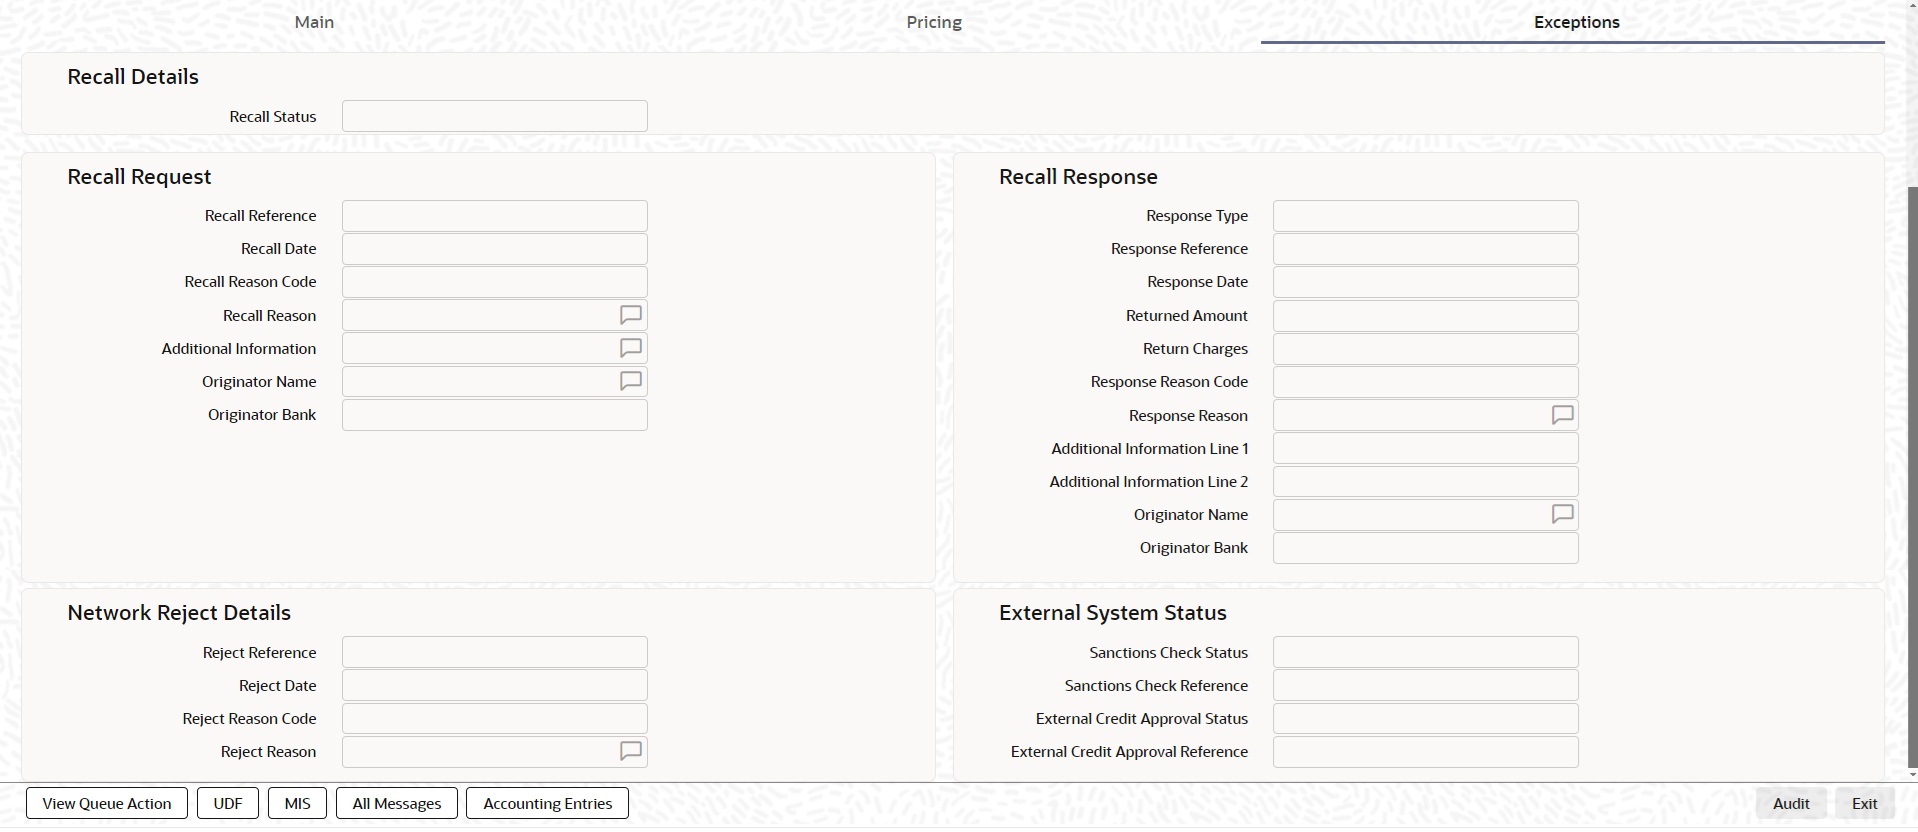
2.3.1.1 Exceptions tab
User can all view the recall details and its response, Network reject details and external system status here.
2.3.1.2 View Queue Action Log
User can view all the queue actions for the respective transaction initiated. You can invoke this screen by clicking the ‘View Queue Action’ button in View screen. For more details on the screen, refer section
2.3.1.3 UDF Tab
Click on the ‘UDF’ button to invoke this screen.
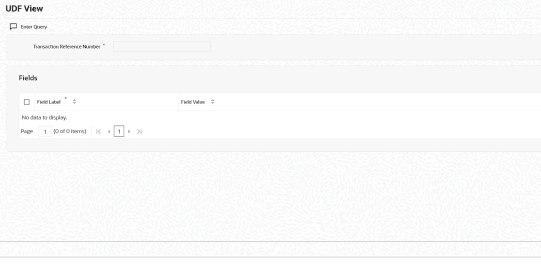
You can specify user defined fields for each transaction
2.3.1.4 MIS Tab
Click on the ‘MIS’ button to invoke this screen.
You can specify the MIS details in this sub-screen.
2.3.1.5 All Messages Screen
Click the All Messages button in the View Outbound Faster Payments screen.Click the “All Messages” link in the transaction input screen to invoke this sub-screen.
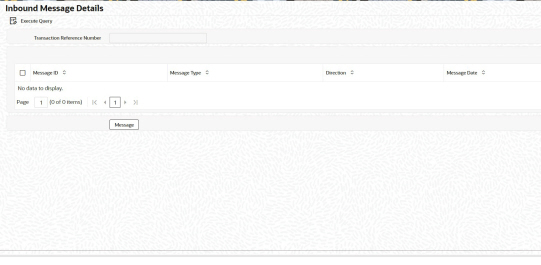
The system displays the message details like Message Identification, Message Type, Direction and Message Date.
2.3.1.6 Accounting Entries Tab
You can invoke this screen by clicking ‘Accounting Entries’ tab in the screen.to view the complete accounting entries.

2.3.1.7 Inbound SCT Inst Transaction View Summary
You can view the summary in “Inbound SCT Inst Transaction View Summary” screen. You can invoke the Inbound Faster Payments View Summary screen by typing ‘PFSIVIEW’ in the field at the top right corner of the Application toolbar and clicking on the adjoining arrow button.
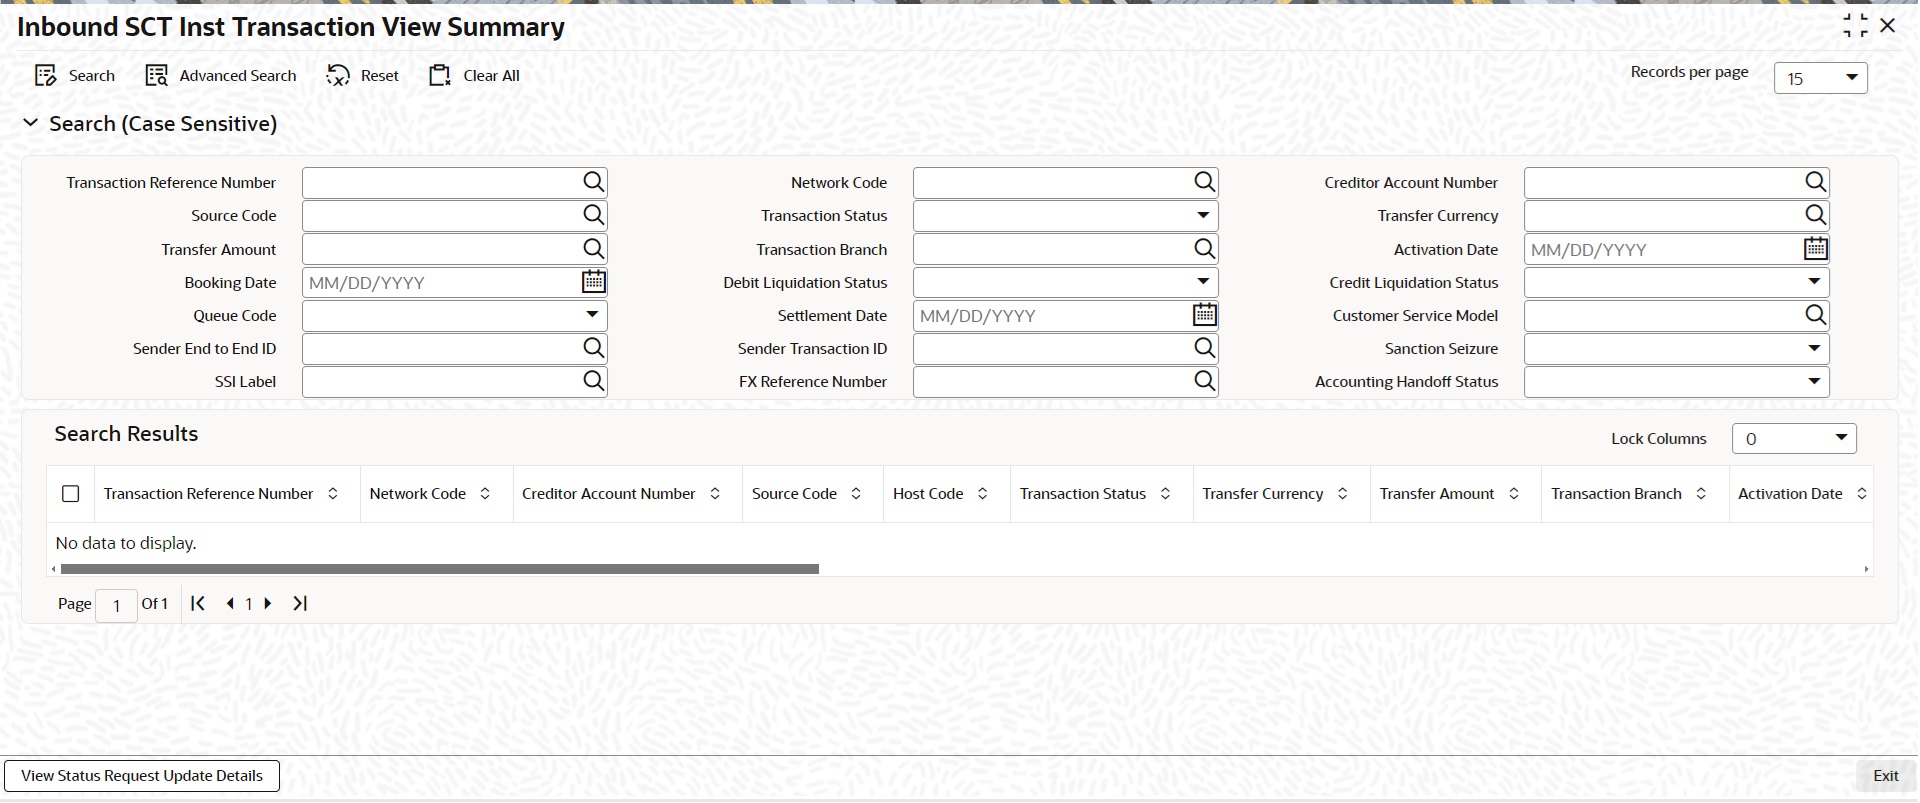
You can search for the records using one or more of the following parameters:
l Transaction Reference Number
l Network Code
l Source Code
l Transaction Status
l Transfer Amount
l Transfer Currency
l Transaction Branch
l Activation Date
l Booking Date
l Debit Liquidation Status
l Credit Liquidation Status
l Queue Code
l Customer Service Model
l Sender End to End ID
l Sanction Seizure
l SSI Label
l FX Reference Number
Once you have specified the search parameters, click ‘Search’ button. The system displays the records that match the search criteria.
Double click a record or select a record and click on ‘Details’ button to view the detailed maintenance screen.
View Status Request Update Details
On clicking this button, Inbound Request for Status Update View Summary screen is launched.
2.3.1.8 Inbound Faster Payments Processes
l The Inbound SCT Inst payments are received as pacs.008 messages from CI. The system receives and processes the payments based on predefined processing steps.
l Before starting the transaction processing, the system validates whether the message is received within the time out time maintained for the Inbound transaction in Network preferences. Time stamp in the message is used for this validation.
l If received after time out seconds maintained, the payment is rejected upfront. On payment rejection, pacs.002 message is sent to CSM with an appropriate Reason Code.
l If the payment is received within the allowed time limit, Inbound payment is further processed. The system does the below validations similar to the outbound payments:
– Account/Bank re-direction �Account re-direction is done for the credit account
– Mandatory field checks/ Referential data checks
– Network limit check
– Customer account is verified whether it is open and authorized.
l Beneficiary name validation is done if the same is set as required in Source Network Preferences.
l Minimum and maximum amount maintained in Network Currency Preference screen (PMDNCPRF) for SEPA Instant network will be validated when inbound messages are received.
l Any failure during validation processing results in a transaction reject and pacs.002 message is sent to CSM with appropriate reason code.
l On completing all the initial validation successfully, the following steps are executed:
– Sanction check – If the sanction check status is approved, the next processing activity is followed. In case of Seizure, the transaction amount will get credited to Seizure GL skipping further processing. In case of reject/interim/timed out status, transaction is rejected by the system and pacs.002 message is sent out.
– External Account Check (EAC) – If EAC fails with reject/interim/timed out status, payment is rejected and pacs.002 message is sent out.
l On successful completion of EAC, the system validates again whether the processing is completed before time out seconds maintained for inbound payments. This is checked with respect to the time stamp available in the Inbound pacs.008 message. If yes, acceptance message to CSM is sent. If the processing is completed after the maintained time out seconds, reject message is sent to CSM.
l If EAC request is rejected by external system, you can send pacs.002 reject message with the reason code linked to the external error code in Reject code maintenance (PMDRJMNT). If the external system returns with multiple reject codes, any one of the error code to reason code linkage maintained is considered by system.
l After sending an acceptance message, the system waits for the response from CSM before processing the payment further.
l If positive technical confirmation is received back from CSM, price/exchange rate processing are performed for the Inbound payment and beneficiary account is credited by handing off the payment accounting entries to Accounting System.
l Notification to Beneficiary is sent after the credit accounting is successfully handed off.
l If the technical confirmation from CSM is received as negative, the Inbound payment is marked as rejected.
2.4 Recall of SEPA Instant Credit Transfer
A recall happens when an Originator Bank requests to cancel a SEPA Instant Credit Transfer. The recall can be requested by the originating customer. The recall procedure must be initiated by the Originator Bank within the number of days maintained as Recall days in Network Preferences after the execution date. A recall procedure is initiated for the following reasons:
l Duplicate payment
l Technical problems
l Fraudulent Credit Transfers
Note
Only Outbound payment transaction in ‘Processed’ and ‘Future Valued’ status will be al- lowed to be selected for recall processing.
2.4.1 Outbound SCT Inst Recall Request
You can access the Outbound SCT Inst Recall Request Screen by typing PFDOTRCL in the field in the top right corner of the application tool bar and clicking on the adjoining arrow button.

Recall Reference Number
System defaults the recall reference number.
Recall Date
Displays date on which the recall was initiated. This date is defaulted as recall booking date.
Customer Initiated
System defaults the value as ‘Yes’.
Branch Code
System defaults the Branch Code on clicking New button
Host Code
System defaults the Host Code on clicking New button
Original Reference
Select the Original Payment Reference. All Outbound payments with transaction status as ‘Processed’ or ‘Future Valued’ are listed for this field.
On selecting the Original Transaction Reference, the information related to the transaction is defaulted in the below listed fields:
l Network Code
l End to End ID
Original Transaction Details
l Transfer Currency
l Transfer Amount
l Debtor IBAN
l Debtor Name
l Creditor IBAN
l Creditor Name
l Creditor Bank BIC
Recall Details
Recall Reason
While initiating a Recall request, you can specify the reason for the recall. All valid reject codes applicable for the Network for the operation ‘Payment Recall ‘are listed for this field.
Reason Description
Based on the Reason code chosen,reason description is defaulted.
Additional Recall Information
If the reason code entered is ‘FRAD’ then you can provide additional details in this field.
Originator Name
Specifies the name of the Originator.
Originator Bank
Specifies the name of the Originator Bank.
Note
Either Originator name or Originator Bank code can be captured as part of recall request.
For Network Type code corresponding to TIPS, only the BICs in the "TIPS Directory" are displayed.
Response Details
Response details are populated if a positive response is received from Beneficiary bank.
Response Reference
Displays the reference of the response.
Response Status
Displays the Response Status received
Response Date
Displays the date on which the response was created.
Reason Code
Displays the reason code.
Reason Details
Displays the reason for recall.
Compensation Amount
Displays the compensation amount.
Additional Details
On clicking Additional Details button, you can invoke Additional Details button to specify Additional information 1 to 13 for the recall response. The number of “Additional Information” that can be entered changes based on the value of “Recall Response”, “Response Reason” and whether Recall or RFRO.
Network Reject Details
Network reject details are populated if the recall request sent is rejected by the CSM.
Reject Reference
Displays the reference for rejection.
Reject Received Date
Displays the date on which the reject was received.
Reject Code
Displays the reject code.
Reject Reason
Displays the reason for rejection.
2.4.1.1 Outbound SCT Inst Recall Request Summary
You can invoke the ‘Outbound SCT Inst Recall Request Summary’ screen by typing ‘PFSOTRCL’ in the field at the top right corner of the application toolbar and clicking the adjoining arrow button. Click new button on the Application toolbar.
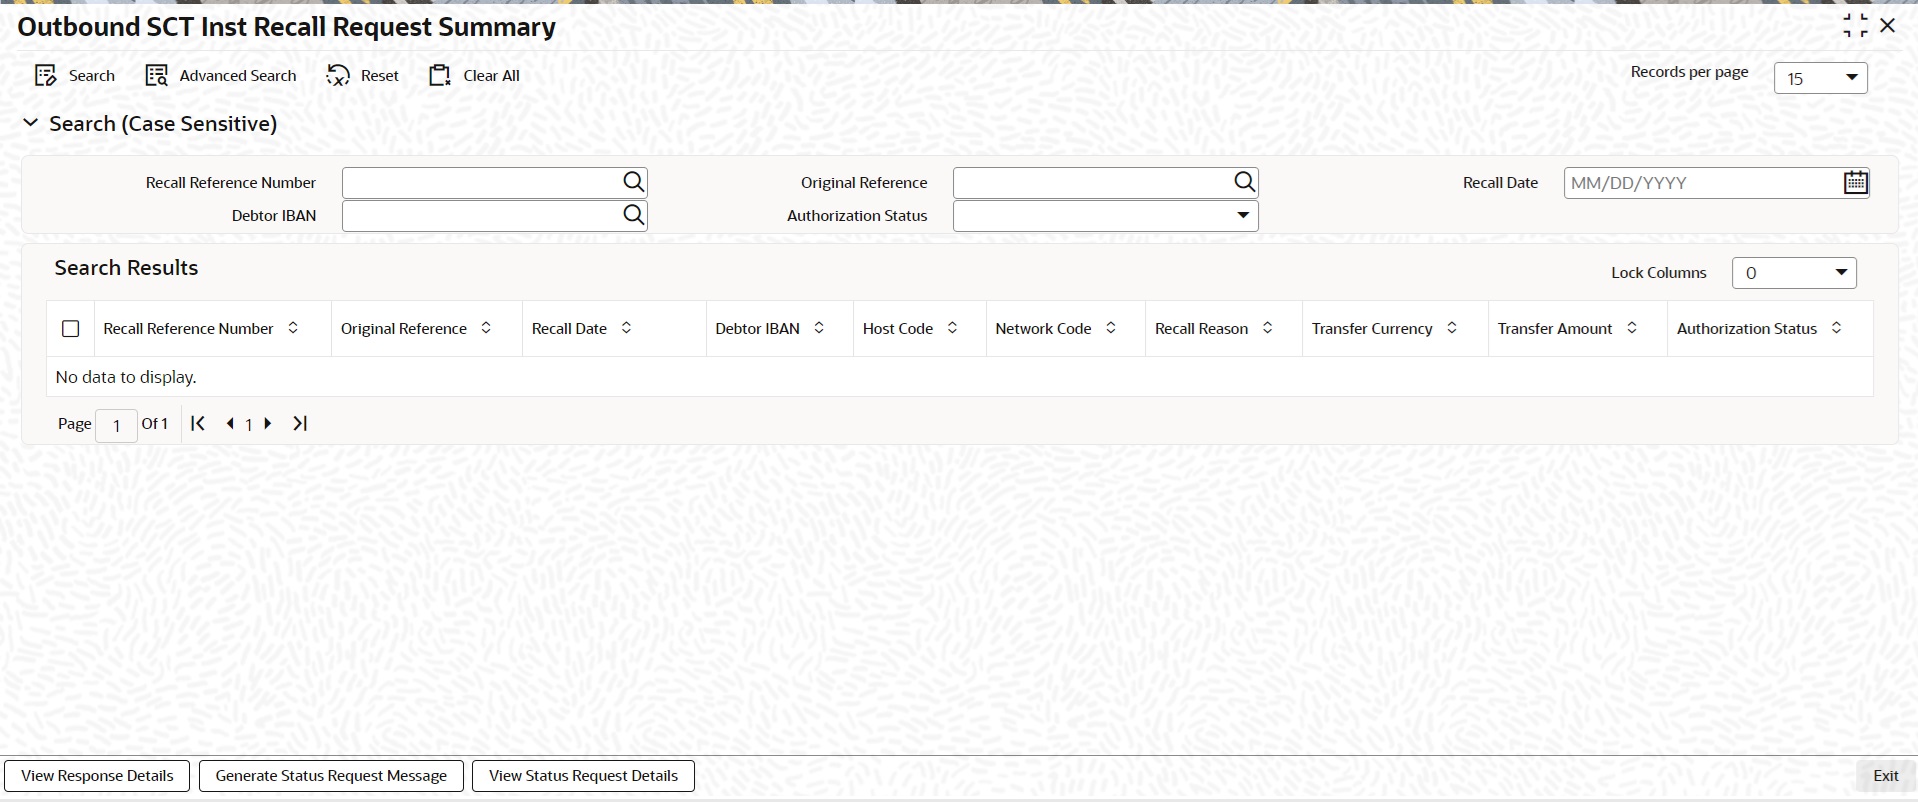
You can search for the records using one or more of the following parameters:
l Recall Reference Number
l Original Reference
l Recall Date
l Debtor IBAN
l Authorization Status
Once you have specified the search parameters, click ‘Search’ button. The system displays the records that match the search criteria.
Double click a record to view the detailed maintenance screen.
You can perform following actions:
|
Action |
Description |
|---|---|
|
View Response Details |
Click the button with search applied on “Recall Reference Number to launch screen PFDOTRCL. |
|
Generate Status Request Message |
Click the button to generate Request for Status Update message (pacs.028) corresponding to the SCT inquiry. |
|
View Status Update Details |
Click the button to view the Status update details. |
2.4.1.2 Outbound Recall Processing
l If you process the recall request before the dispatch of the original transaction message, it is considered as a cancellation of the original payment.
l Original transaction status is also marked as ‘Cancelled’ and payment liquidation entries are reversed. Entries are reversed with negative values.
l If the recall is after the message dispatch, system verifies whether Recall is initiated within the recall days specified in payment preferences. If it exceeds the recall days specified, system displays an override.
l Original transaction is marked as ‘Recall Requested’ and recall record is inserted in message table. camt.056 message is generated for a recall request during dispatch.
l Recall reference, recall date and recall reason is available for original transaction.
l Recall request does not have any accounting impact.
2.4.2 Inbound Faster Payments Recall Request
You can access the Inbound SCT Inst Recall Request screen by typing PFDINRCL in the field in the top right corner of the application tool bar and clicking on the adjoining arrow button.
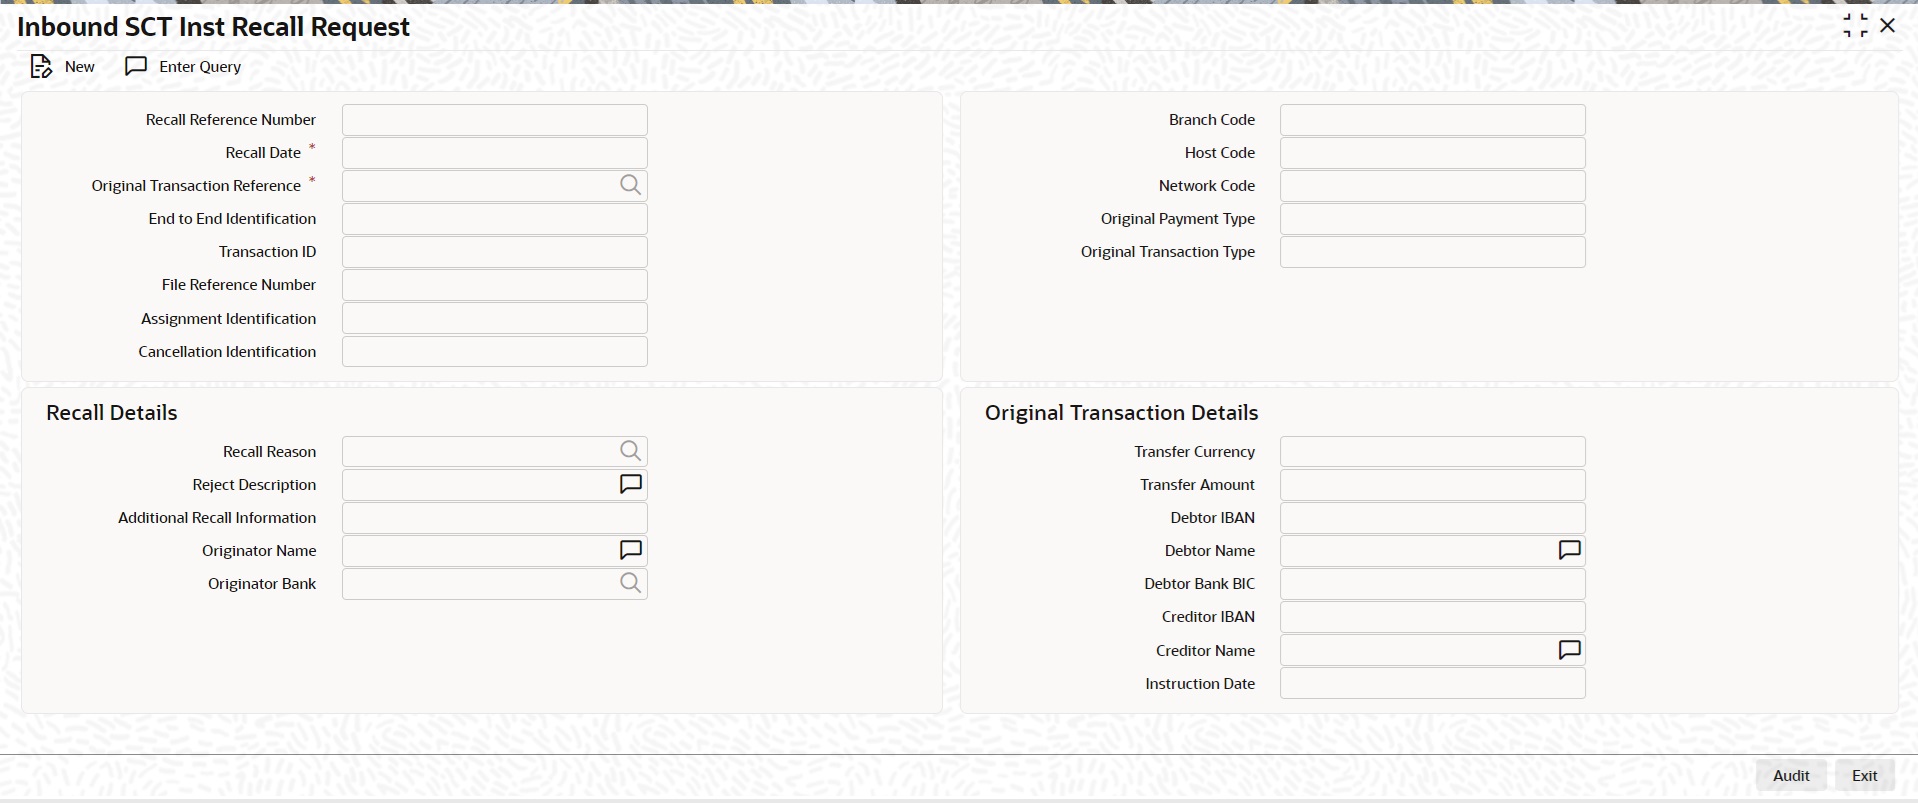
Recall Reference Number
System defaults the recall reference number.
Recall Date
Displays date on which the recall was initiated. This date is defaulted as recall booking date.
Original Transaction Reference
Specify the Original Transaction Reference from the list of values.
End to End Identification
System defaults the End to End Identification on Original Transaction Reference selected.
Transaction ID
System defaults the value as ‘Yes’.
File Reference Number
System defaults the File Reference Number on Original Transaction Reference selected.
Assignment Identification
System defaults the value as ‘Yes’.
Branch Code
System defaults the Branch Code on clicking New button.
Host Code
System defaults the Host Code on clicking New button.
Network Code
System defaults the Network Code on Original Transaction Reference selected.
Original Payment Type
System defaults the Branch Code on clicking New button.
Original Transaction Type
System defaults the Branch Code on clicking New button.
Recall Details
Recall Reason
While initiating a Recall request, you can specify the reason for the recall. All valid reject codes applicable for the Network for the operation ‘Payment Recall ‘are listed for this field.
Reason Description
Based on the Reason code chosen,reason description is defaulted.
Additional Recall Information
If the reason code entered is ‘FRAD’ then you can provide additional details in this field.
Originator Name
Specifies the name of the Originator.
Originator Bank
Specifies the name of the Originator Bank.
Note
Either Originator name or Originator Bank code can be captured as part of recall request.
For Network Type code corresponding to TIPS, only the BICs in the "TIPS Directory" are displayed.
Original Transaction Details
Transaction details related fields are populated on Original Transaction Reference selected:
l Transfer Currency
l Transfer Amount
l Debtor IBAN
l Debtor Name
l Debtor Bank BIC
l Creditor IBAN
l Creditor Name
l Instruction Date
2.4.2.1 Inbound SCT Inst Request Summary
You can invoke the ‘Inbound SCT Inst Request Summary’ screen by typing ‘PFSINRCL’ in the field at the top right corner of the application toolbar and clicking the adjoining arrow button.
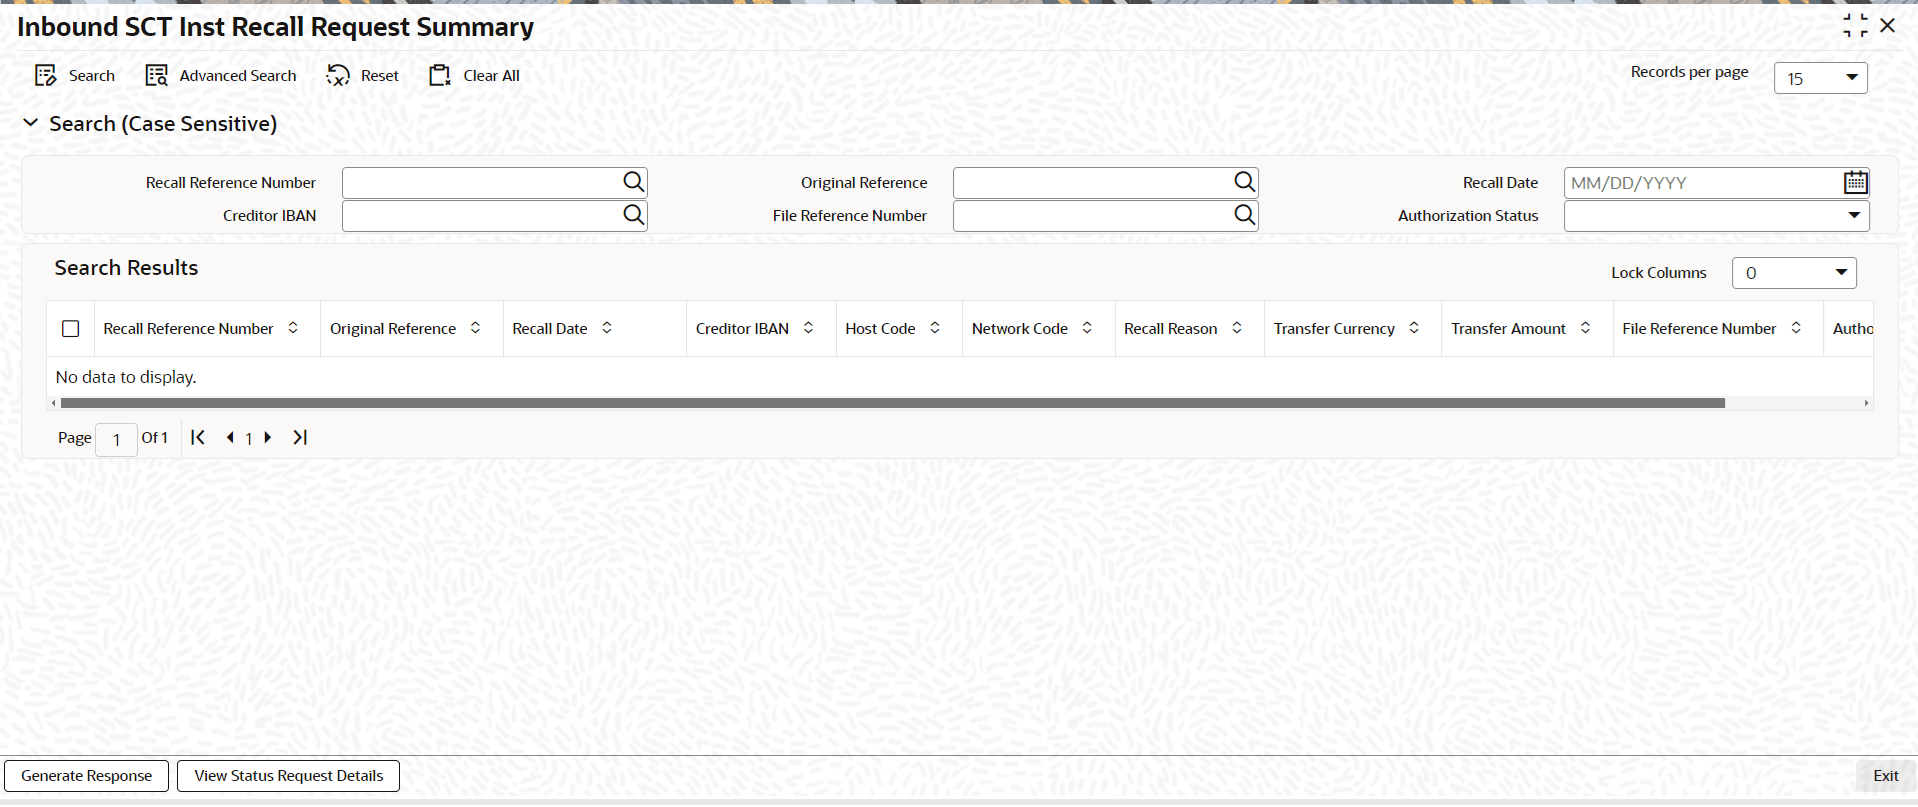
You can search for the records using one or more of the following parameters:
l Recall Reference Number
l Original Reference
l Recall Date
l Creditor IBAN
l File Reference Number
Once you have specified the search parameters, click ‘Search’ button. The system displays the records that match the search criteria. Double click a record to view the detailed maintenance screen.
You can perform following actions:
|
Action |
Description |
|---|---|
|
Generate Response |
Click the button with search applied on “Recall Reference Number to launch screen PFDITRCL. |
|
View Status Update Details |
Click the button to view the Inbound Request for Status Update View Summary screen. |
2.4.3 Negative Response for Recall Request
l On receiving a negative response camt.029 for a recall request from beneficiary bank, the system matches the same with the original transaction.
l Parent transaction is matched using the Original Transaction ID field with Transaction reference of Outbound payments in ‘Recall Requested’ status.
l On getting the parent transaction, further matching is done based on the following fields:
– Transaction currency
– Transaction Amount
– Original debtor IBAN
– Original Creditor IBAN
– Original Creditor BIC
l The original transaction is marked back to ‘Completed’ status. Further operations are possible for this transaction.
l Response details are available as part of original transaction exception details in the view screen.
l There is no accounting impact.
2.4.4 Positive Response for Recall Request
If pacs.004 is received with reject reason ‘FOCR’ – Following Cancellation Request, as response of a recall request, then it is matched with original Outbound transactions with ‘Recall Requested ‘status.
On getting the parent transaction, further matching is done for the following fields:
l Transaction Currency
l Transaction Amount
l Original Debtor IBAN
l Original Creditor IBAN
l Original Creditor BIC
Original transaction is marked as Returned. Return of the Outbound payment transaction is processed.
ECA and accounting related to Inbound return is done.
No further action is allowed for a Recall Accepted transaction. Acceptance details are available for viewing.
l Return accounting will be original settlement amount and charges will be debited separately. Customer debit account will be the charge recovery account and charge amount will be the amount mentioned in Inbound message. Reversal details will be sent to DDA system for external account check along with charge details. Accounting entries will be handed off to accounting system.
l Accounting code and derived based on the price code linked for third party charges in payment currency preferences for transaction type ‘Outbound’.
l When a Inbound camt.056 is received from CSM, matching of the details with original Inbound transaction is done.
l Original transaction ID is mapped with Relate Reference field of Inbound transactions which are processed in ‘Processed’ status.
l On successful matching with a parent transaction, further matching will be done with the following fields:
– Transaction Currency
– Transaction Amount
– Original debtor IBAN
– Original Creditor IBAN
– Original Creditor BIC
l Inbound recall request is uploaded on successful matching and will be available in Inbound Recall Screen. You can manually accept or refuse the recall request from this screen.
2.4.6 Response to Inbound SCT Inst Recall
You can access the “Response to Inbound SCT Inst Recall” Screen by typing PFDITRCL in the field in the top right corner of the application tool bar and clicking on the adjoining arrow button.
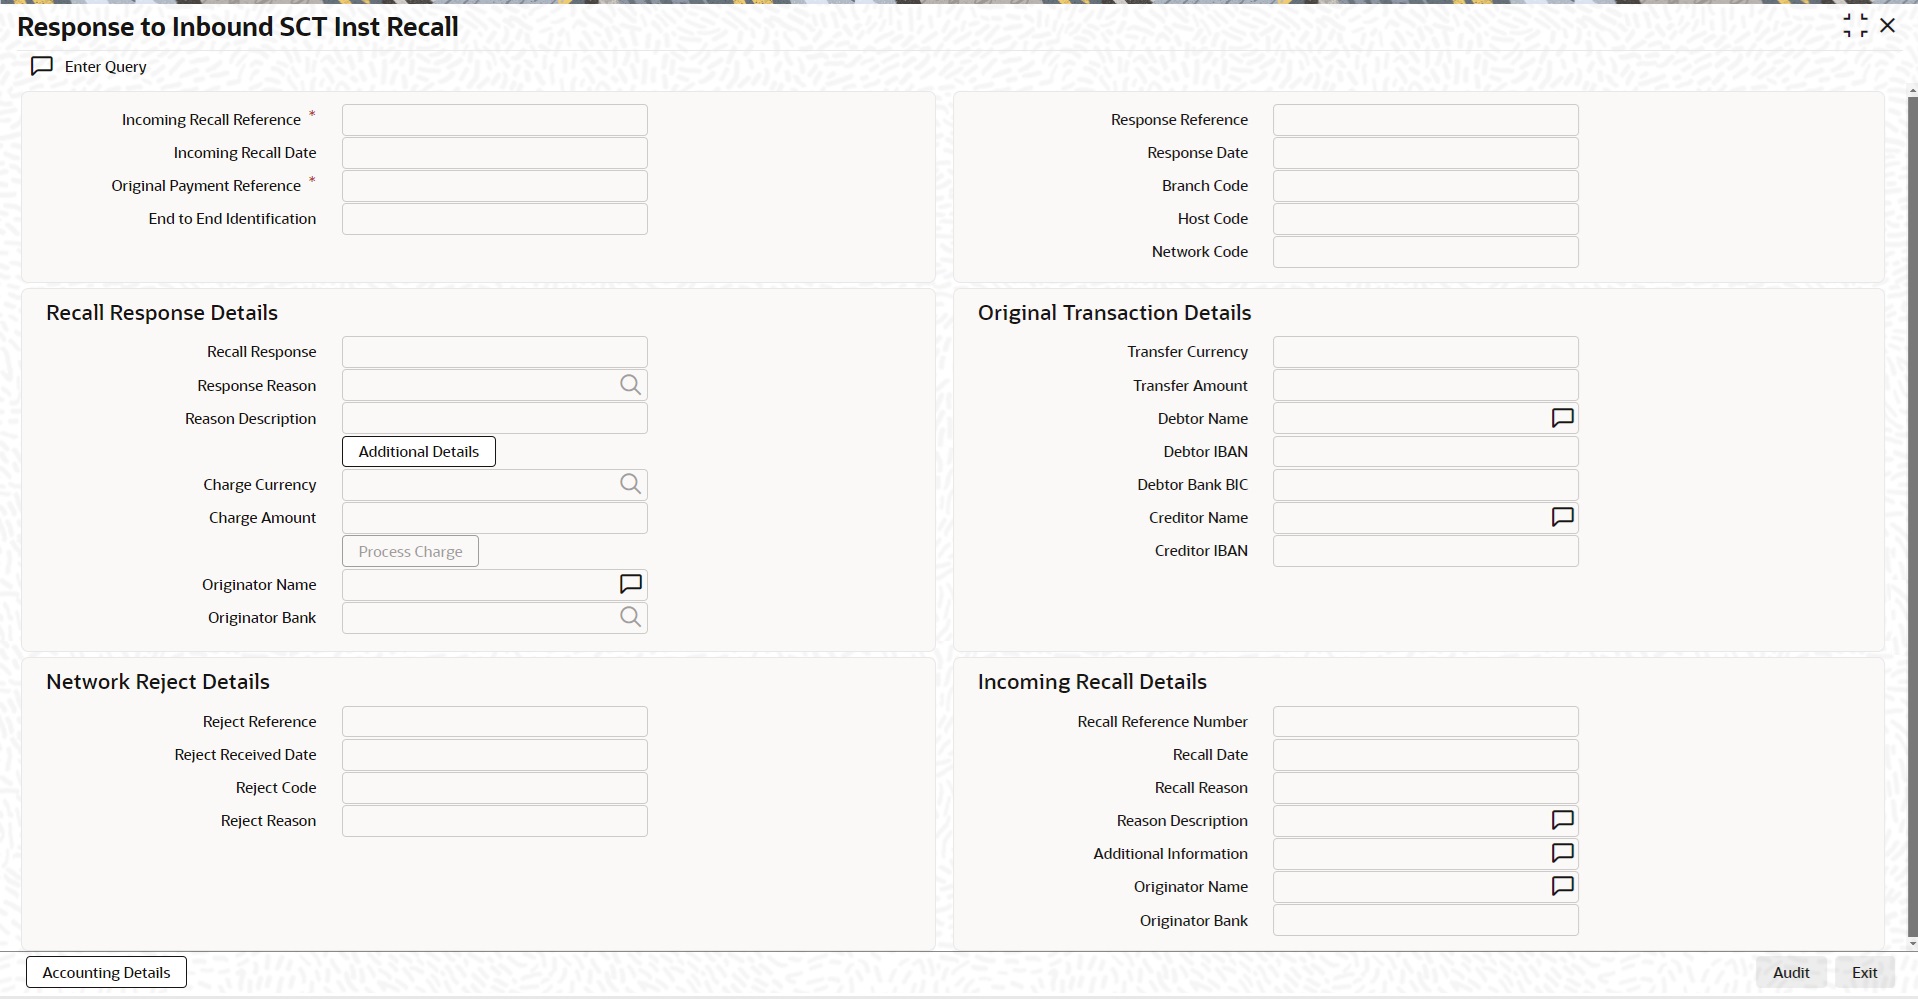
Recall requests received by the Beneficiary Bank are available in this screen. You can query the records and provide positive/negative response to the Originating Bank.
You can query the available records by providing the Inbound Recall reference number.
The following details are defaulted on clicking Execute Query button:
l Inbound Recall Date
l Original Payment Reference
l End to End Identification
l Response Reference
l Response Date
l Branch Code
l Host Code
l Network Code
Recall Response Details
l Recall Response
l Response Reason
l Response Description
l Charge Currency
l Originator Name
l Originator Bank
Charge Amount
If the recall request is accepted you can mention the charge amount applicable. This amount is reduced from the payment amount while returning the funds.
On clicking Process Charge button, the system defined charge is defaulted. The charge is populated based on the Recall Acceptance Price code maintenance for the transaction type ‘Inbound’ in Network Currency Preferences. You can override the defaulted charge.
Additional Details
On clicking Additional Details button, you can invoke Additional Details button to specify Additional information 1 to 13 for the recall response. The number of “Additional Information” that can be entered changes based on the value of “Recall Response”, “Response Reason” and whether Recall or RFRO.
Original Transaction Details
l Transfer Currency
l Transfer Amount
l Debtor Name
l Debtor IBAN
l Debtor Bank BIC
l Creditor Name
l Creditor IBAN
Network Reject Details
l Reject Reference
l Reject Received Date
l Reject Code
l Reject Reason
Inbound Recall Details
l Recall Reference Number
l Recall Date
l Originator Name
l Originator Bank
You can unlock the record and provide the Recall Response details:
Recall Response
You can either accept or reject the recall request received.
Reject Reason
The applicable reject code for the action can be selected
Reason Description
Reason description is populated based on the Reject reason chosen.
2.4.6.1 Response Summary of Inbound SCT Inst Recall
You can invoke the “Response Summary of Inbound SCT Inst Recall” screen by typing ‘PFSITRCL’ in the field at the top right corner of the application tool-bar and clicking the adjoining arrow button.Click new button on the Application tool-bar.
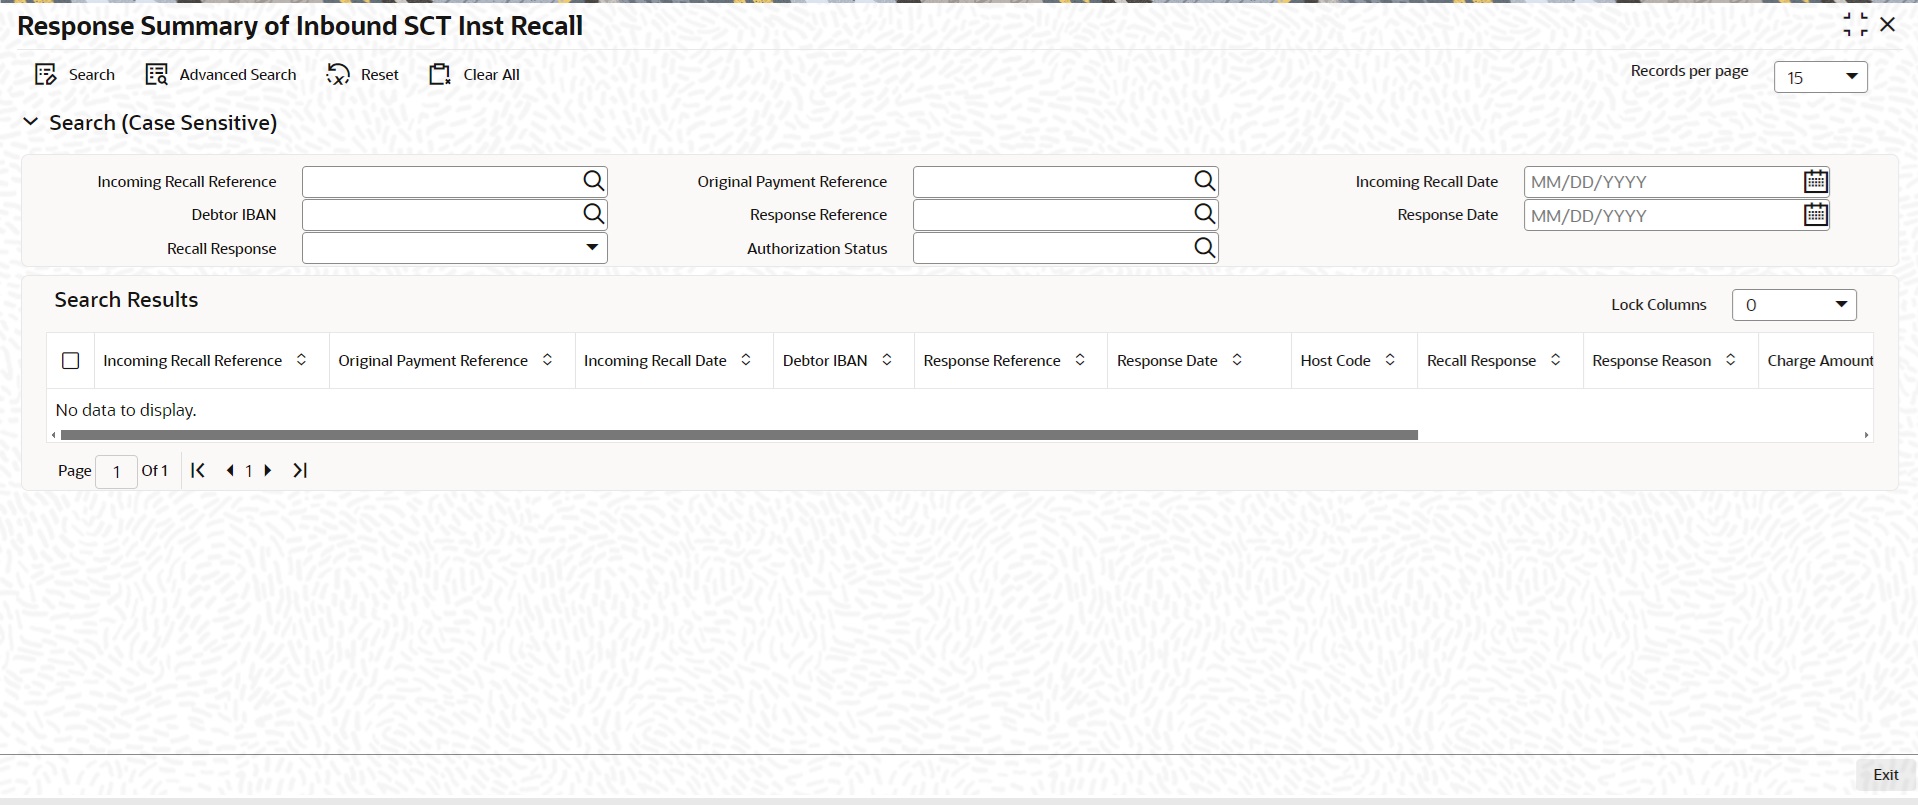
You can search for the records using one or more of the following parameters:
l Inbound Recall Reference
l Original Payment Reference
l Inbound Recall Date
l Debtor IBAN
l Response Reference
l Response Date
l Recall Response
l Authorization Status
Once you have specified the search parameters, click ‘Search’ button. The system displays the records that match the search criteria.
Double click a record to view the detailed maintenance screen. You can also export the details of selected records to a file using ‘Export’ button
2.4.7 Inbound Recall Processing
l While processing a Recall response, it will be validated whether response is being sent within the response days specified in Network preferences.If it exceeds the recall days specified, system displays an override.
l Acceptance of recall triggers return of original Inbound and related details gets inserted in message table for sending return message in pacs.004 format.
l Refusal of recall sends out camt.029
2.4.8 Outbound Positive Response to Recall
l On processing Outbound positive response to recall, system validates whether reject reason input is FOCR when recall response type is ‘Accept’.
l On tabbing out of the reason code field, charge is populated based on the Recall Acceptance Price code maintenance for the transaction type ‘Inbound’ in Payment Currency Preferences.
l You can modify the populated charge amount.
l Return accounting is processed with original settlement amount. Charges are processed separately. GL mentioned in price accounting code is the charge recovery account and charge amount is the amount mentioned in Inbound message.
l Reversal details is sent to DDA system for external credit approval. Any failure moves the transaction to ECA queue.
l Accounting entries are handed off to accounting system.
l The Investigation message in pacs.028 format is generated if the originator bank does not getting a response from the CSM even after the time out period maintained in Network Preferences (PMDNWPRF) for the outbound payments.
l Generation of investigation message and handling of the response message in pacs.002 format are supported.
l If a Beneficiary bank receives an investigation message, upload and processing of the Inbound message and the generation of the corresponding response message are supported.
2.5 SCT/ SCT Inst - Processing of inbound status request message (pacs.028)
A pacs.028 can be received for the below scenarios
|
SCT |
SCT Inst |
|---|---|
|
> Request for Status Update on a SCT Inquiry > Request for Status Update on a RFRO > Request for Status Update on a Recall |
> FI to FI Payment Status Request > Request for Status Update on a RFRO > Request for Status Update on a Recall |
On receiving a pacs.028 message, system performs the identification whether the message is for a pacs.008, camt.056, camt.027, or camt.87.
When the “Original Message Name Identification” (OrgnlGrpInf/OrgnlMsgNmId) is
l "pacs.008", then the pacs.028 received is for a "FI to FI Payment Status Request"
l "camt.056", then the pacs.028 received is for a "Request for Status Update on a Recall or RFRO".
l "'camt.027" or "camt.087", then the pacs.028 received is for a "Request for Status Update on a SCT Inquiry".
FI to FI Payment Status Request
Attempt to match the status request with the original inbound pacs.008 transaction.
l Resend the pacs.002 previously generated if a match is found and mark the processing of the pacs.028 as "Processed". Update the "Original Transaction Match Status" corresponding to the inbound pacs.028 as "Matched".
Note that the Originator Bank can send one or more status update requests.
l Update the "Original Transaction Match Status" corresponding to the inbound pacs.028 as "Unmatched" if a match is not found. Additionally, generate a negative pacs.002 with reason code 'AG09'.
Note - Configure 'AG09' in the "Reject Code Detailed" screen (PMDRJMNT).
Request for Status Update on a Recall or RFRO
Attempt to match the status request with the original inbound camt.056. The inbound camt.056 could be for a SCT or SCT Inst.
l Update the "Original Transaction Match Status" corresponding to the inbound pacs.028 as "Matched" when a match is found.
l Update the "Original Transaction Match Status" corresponding to the inbound pacs.028 as "Unmatched" when no match is found.
l In both cases above, the processing status of the pacs.028 is "Not Processed".
Request for Status Update on a SCT Inquiry
Attempt to match the status request with the original inbound camt.027 or camt.87.
l Update the "Original Transaction Match Status" corresponding to the inbound pacs.028 as "Matched" when a match is found.
l Update the "Original Transaction Match Status" corresponding to the inbound pacs.028 as "Unmatched" when no match was found.
l In both cases above, the processing status of the pacs.028 is "Not Processed".
2.5.3 Request for status update on Single or group SCT inquiries or SCT/ SCT Inst Recall/ RFRO
The Request for Status Update (pacs.028) received have the Transaction Information tag (FIToFIPmtStsReq/TxInf) repeated for multiple SCT Inquiries or multiple SCT/ SCTInst Recall or RFRO.
l On receiving the pacs.028 message, for each FIToFIPmtStsReq/TxInf, the system matches it with a pending inbound SCT Inquiry (camt.027 or camt.087) or inbound SCT/ SCT Inst Recall or RFRO (camt.056).
2.6 Faster Payments Message Browser
2.6.1 Inbound Faster Payments Message Browser
You can view the message details about the Inbound messages received for inbound transactions for the all the message types - pacs.008, pacs.028, pacs.002, pacs.004, camt.056, camt.029 in the message browser screen.
You can invoke “Inbound Faster Payments Message Browser” screen by typing ‘PFSINBRW’ in the field at the top right corner of the Application tool bar and clicking on the adjoining arrow button.
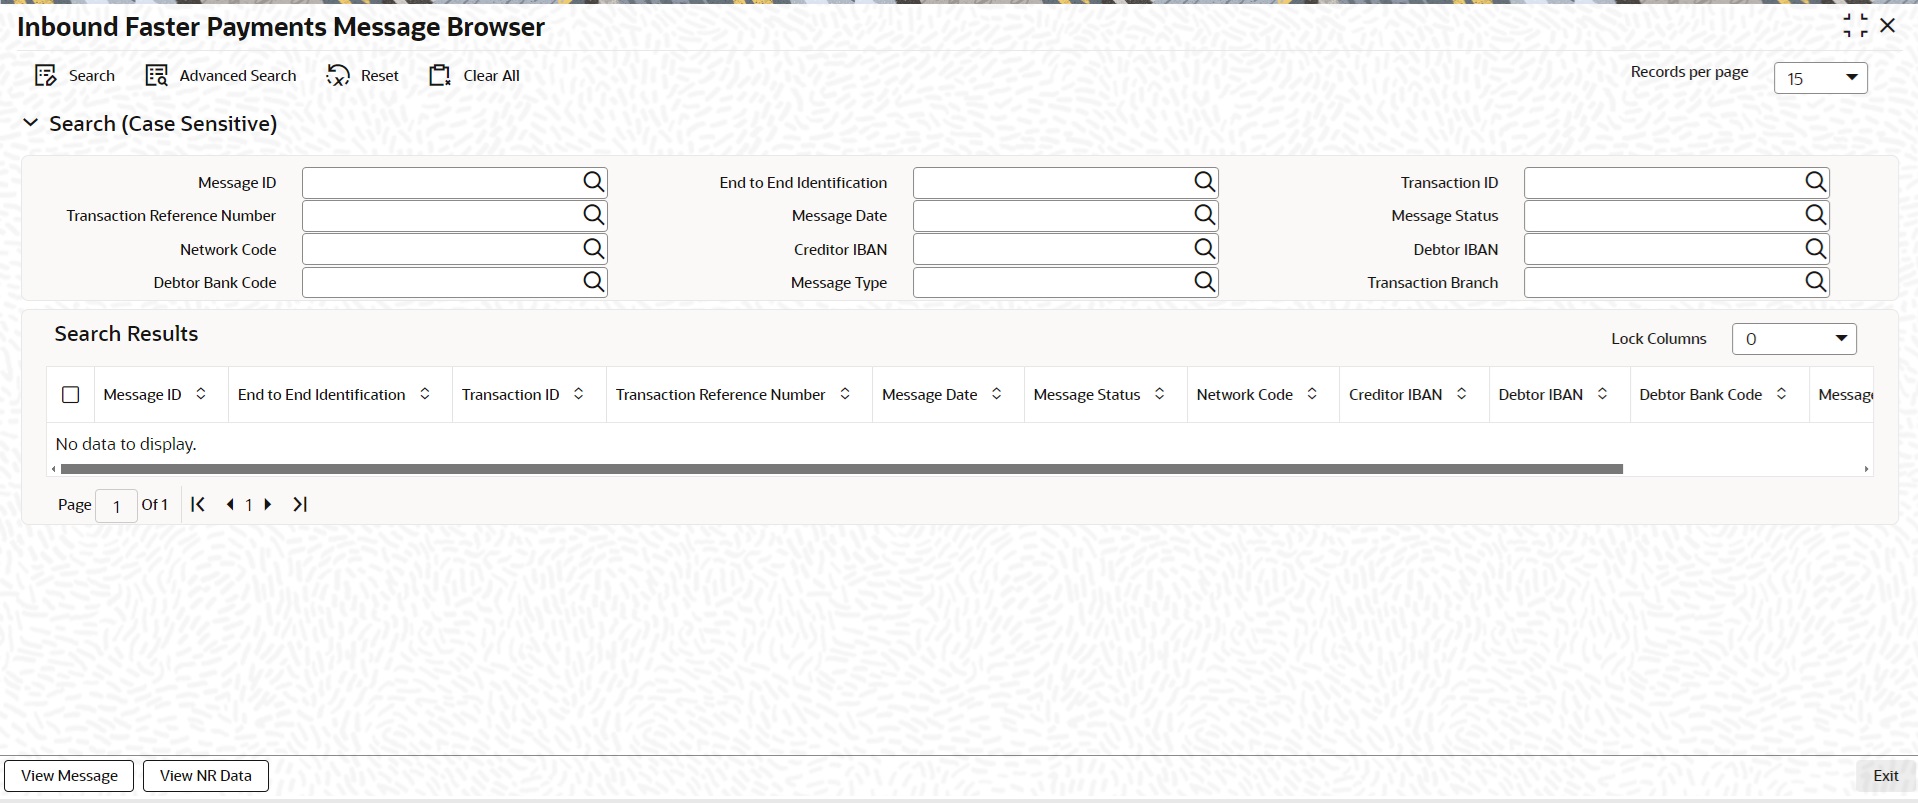
You can search for the records using one or more of the following parameters:
l Original Message ID
l End to End ID
l Transaction ID
l Transaction Reference No
l Message ID
l Message Date
l Message Status
l Network Code
l Creditor IBAN
l Debtor IBAN
l Debtor Bank Code
l Message Type
l Transaction Branch
Once you have specified the search parameters, click ‘Search’ button. The system displays the records that match the following search criteria.
Double click a record or select a record and click on Details button to view the detailed maintenance screen.
2.6.1.1 View Message
You can view the message generated for a specific record by clicking the ‘View Message’ tab in the left corner of the screen.
2.6.1.2 View NR Data
You can view the NR Data message screen (PFDNOMSG) for a specific record by clicking the ‘View Message’ tab in the screen.
2.6.2 Outbound Faster Payments Message Browser
You can invoke “Outbound Faster Payments Message Browser” screen by typing ‘PFSOTBRW’ in the field at the top right corner of the Application tool bar and clicking on the adjoining arrow button.
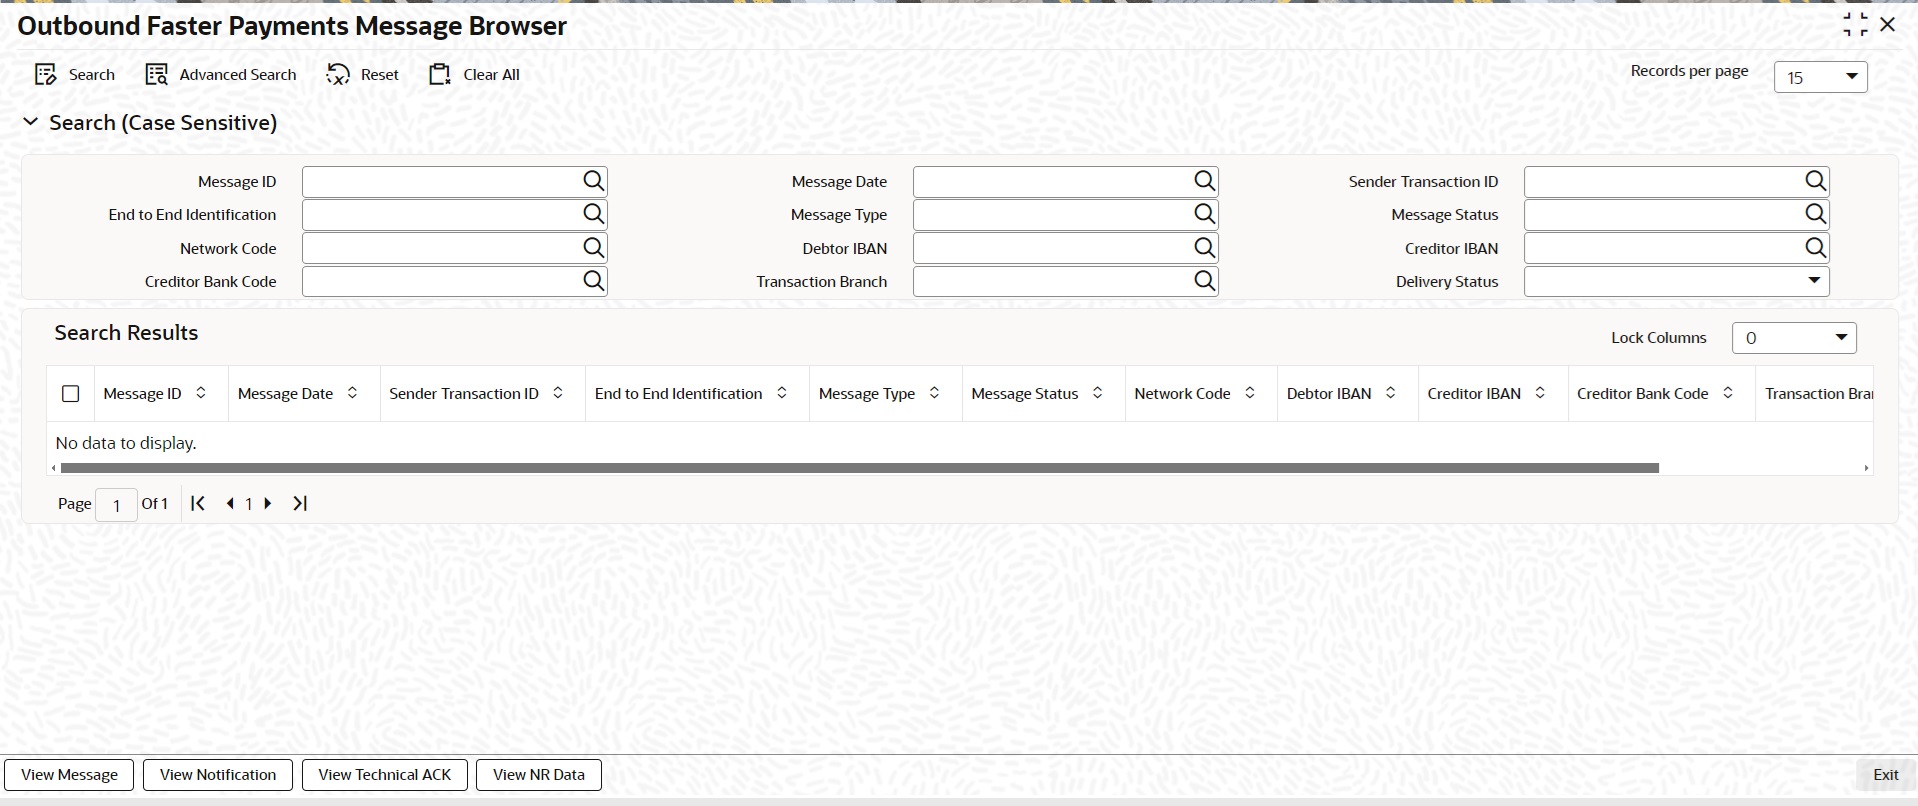
You can search for the records using one or more of the following parameters:
l Message ID
l End to End Identification
l Network Code
l Creditor Bank Code
l Message Date
l Message Type
l Debtor IBAN
l Transaction Branch
l Sender Transaction ID
l Message Status
l Creditor IBAN
l Delivery Status
Once you have specified the search parameters, click ‘Search’ button. The system displays the records that match the search criteria. Double click a record to view the detailed maintenance screen.
You can perform below actions:
2.6.2.1 View Message
You can view the corresponding message for a specific record by clicking the ‘View Message’ tab in the screen.
2.6.2.2 View Notification
You can view the Notification message screen (PFDNTMSG) for a specific record by clicking the ‘View Notification’ tab in the screen.
2.6.2.3 View Technical ACK
You can view the Technical ACK message screen (PFDACMSG) for a specific record by clicking the ‘View Message’ tab in the screen.
2.6.2.4 View NR Data
You can view the NR Data message screen (PFDNOMSG) for a specific record by clicking the ‘View Message’ tab in the screen.
2.6.3 SEPA Messaging Preferences
A file type preference field is provided in this maintenance to decide whether CSM based bulk messages to be generated or ISO messages. This is an optional maintenance. If this maintenance is not available, the system generates EBA specific SEPA files
You can access the ‘SEPA Messaging Preferences’ Screen by typing ‘PMDSEPAM’ in the field in the top right corner of the application tool bar and clicking on the adjoining arrow button.
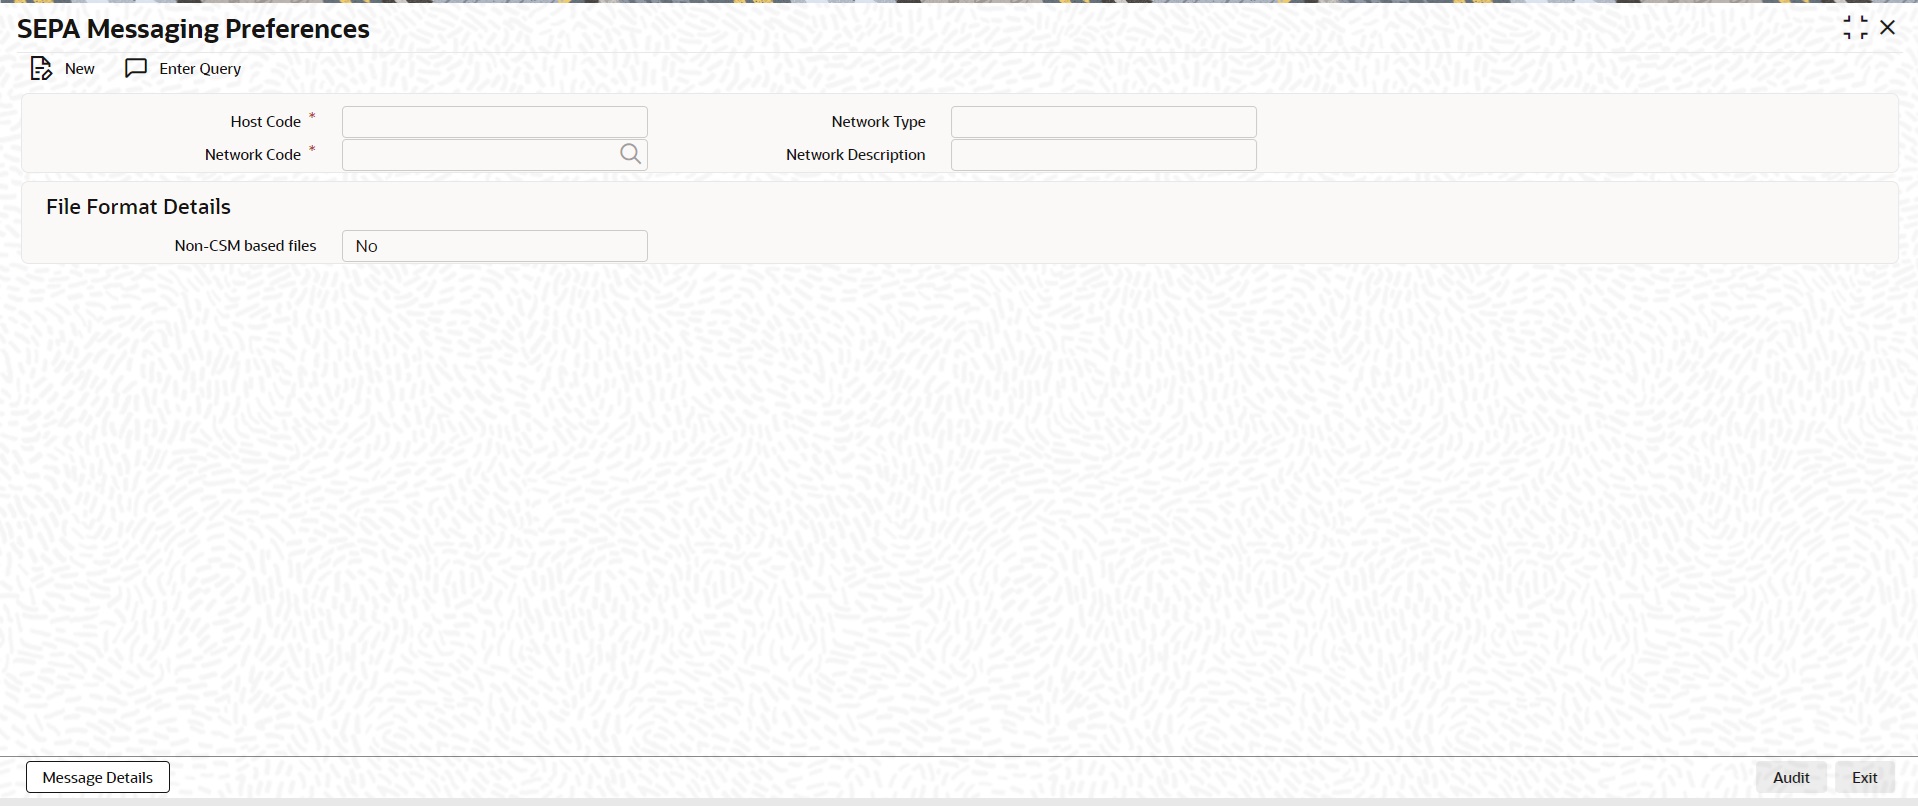
You can specify the following details:
Host Code
System defaults the host code of transaction branch on click of ‘New’.
Network Code
Specify the Network Code from the list of values.
Network Type
Defaults the description of the selected Host Code.
Network Description
Defaults the description of the selected Host Code.
File Format Details
Non-CSM based files
Select the value between Yes or No.
2.6.3.1 SEPA Messaging Preferences Summary
You can invoke the ‘SEPA Messaging Preferences Summary’ screen by typing ‘PMSSEPAM’ in the field at the top right corner of the application toolbar and clicking the adjoining arrow button.
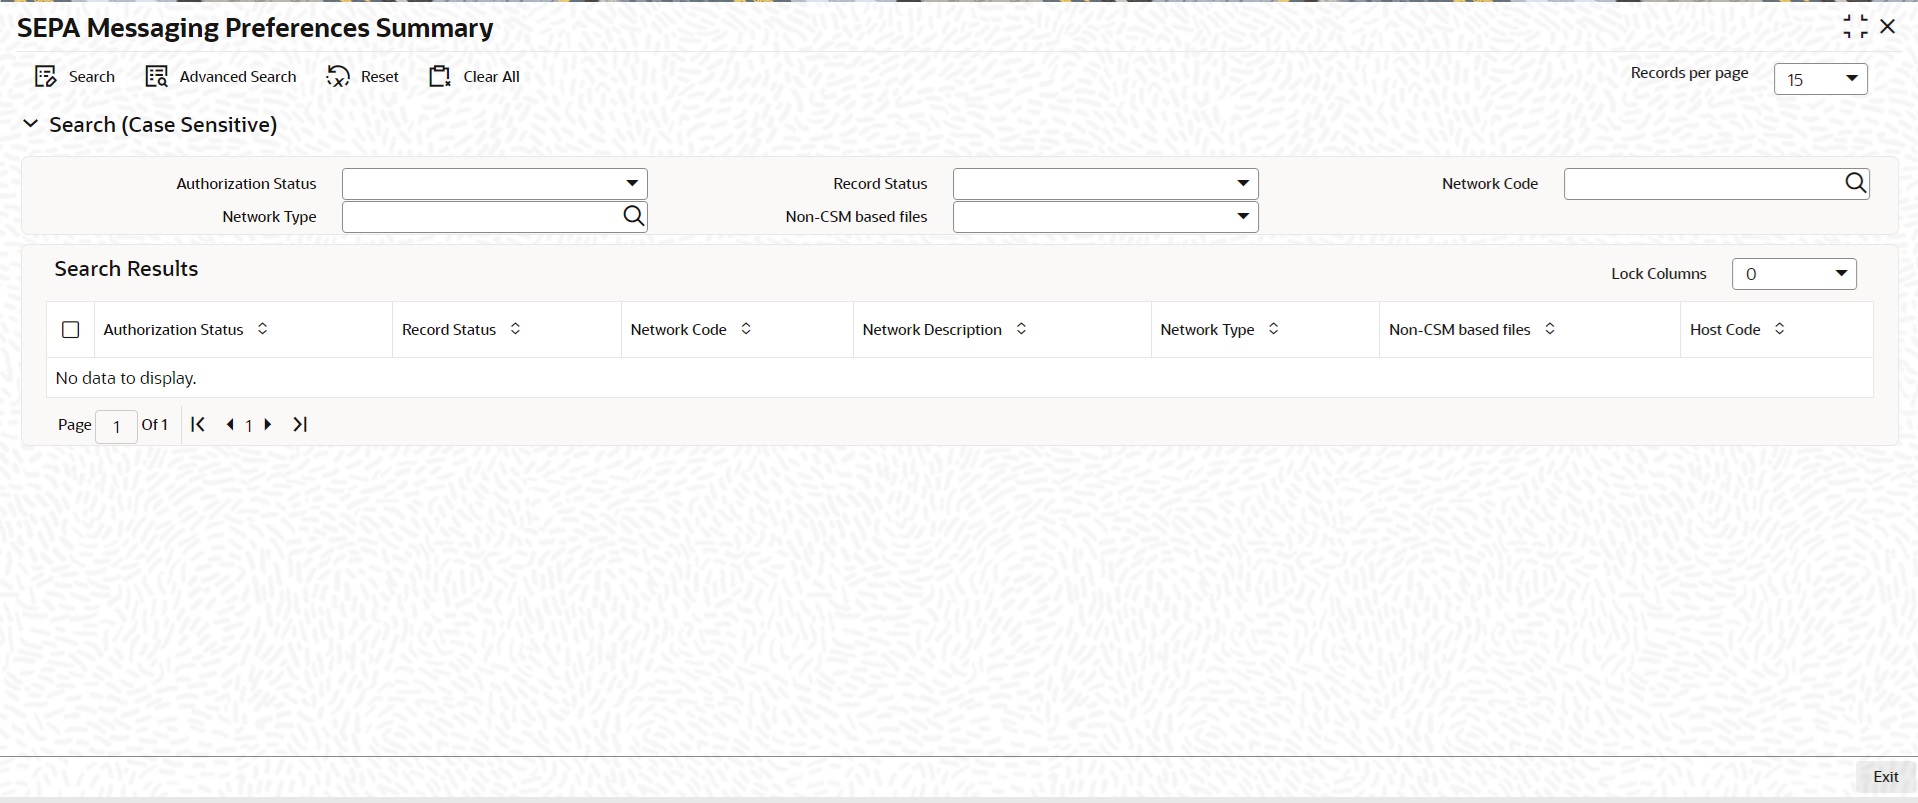
You can search for the records using one or more of the following parameters:
l Authorization Status
l Network Code
l Non-CSM based files
l Record Status
l Network Type
Once you have specified the search parameters, click ‘Search’ button. The system displays the records that match the search criteria. Double click a record to view the detailed maintenance screen.
You can access the ‘SEPA Routing Directory’ Screen by typing ‘PMDSEPAD’ in the field in the top right corner of the application tool bar and clicking on the adjoining arrow button.

You can specify the following details:
Participant Bank BIC
Specify the Participant Bank BIC from the list of values. All valid BICs are listed from BIC directory.
Bank Name
System defaults the Bank Name on the Participant Bank BIC selected.
City
System defaults the City on the Participant Bank BIC selected.
Country
System defaults the Country Code on the Participant Bank BIC selected.
Scheme
Select the Scheme from the following values:
l SCT
l SDD CORE
l SDD B2B
l SCT INST
Channel ID
Specify the Channel ID.
Preferred Channel
Select the Preferred Channel between Yes or No.
Participant Type
Select the Participant Type from the following values:
l Direct
l Indirect
Intermediary BIC
This field is enabled to specify only if the participation type is 'Indirect'. All valid BICs already available in PMDSEPAD maintenance with participation type as 'Direct' are listed.
Start Date
Select the Start Date.
End Date
Select the End Date.
2.6.4.1 SEPA Routing Directory Summary
You can invoke the ‘SEPA Routing Directory Summary’ screen by typing ‘PMSSEPAD’ in the field at the top right corner of the application toolbar and clicking the adjoining arrow button.
You can search for the records using one or more of the following parameters:
l Authorization Status
l Participant Bank BIC
l Channel ID
l Record Status
l Scheme
l Country
Once you have specified the search parameters, click ‘Search’ button. The system displays the records that match the search criteria. Double click a record to view the detailed maintenance screen.
2.7 Alliance Gateway Instant (AGI) Integration
SWIFTNet Instant is a messaging service by SWIFT to provide participants access to Instant Payment CSMs. At the moment there are two Instant Payment CSMs that are accessible through SWIFTNet Instant, namely EBA RT1 (SEPA Instant) and TIPS. It is mandatory that participants install Alliance Gateway Instant (AGI) software on their hosts (or virtual machines) in their data centres to access the SWIFTNet Instant messaging service. AGI acts as a local communication gateway between OBPM and the SWIFT network.
AGI can exchange ISO 20022 messages with back-office applications like OBPM using several methods. There are 5 message primitives that are sent/received to/from AGI, namely:
1. SendRequest - To send traffic, the Participant's back-office application puts the SendRequest messages into the emission queue that are consumed by AGI.
2. ReceiveIndication - When receiving traffic from the SWIFT network, AGI puts the ReceiveIndication messages to reception queue that is consumed by the Participant's back-office application.
3. Notify - The Notify message is generated by the local (sending) AGI once the message has been put on the network.
4. TechnicalACK - The TechnicalACK is generated (and sent back to) by the receiving AGI once the message has been put on the reception queue of the receiver.
5. NRData - NRData is for the purpose of non-repudiation. NR data (signature information) is provided either as part of the Notify (for senders) or as part of the ReceiveIndication (for receivers). Optionally, you can receive non-repudiation data as a separate message (NRData) in a specific queue, so that the payment application is not required to process the signatures on received traffic or notifications. Since the signature size is typically larger than the actual message, it also optimizes the flow towards the Payment Application. For senders, the NRData is provided as a separate message if NR Data queue is configured and “NotificationRequired” in the SendRequest is set as “A”. For receivers, the NRData is provided as a separate message if NR Data queue is configured.
You can define a partner with the Emission profile and the Reception profile, using this screen.
You can access the ‘AGI Adapter Maintenance Detailed’ Screen by typing ‘PFDAGADM’ in the field in the top right corner of the application tool bar and clicking on the adjoining arrow button.
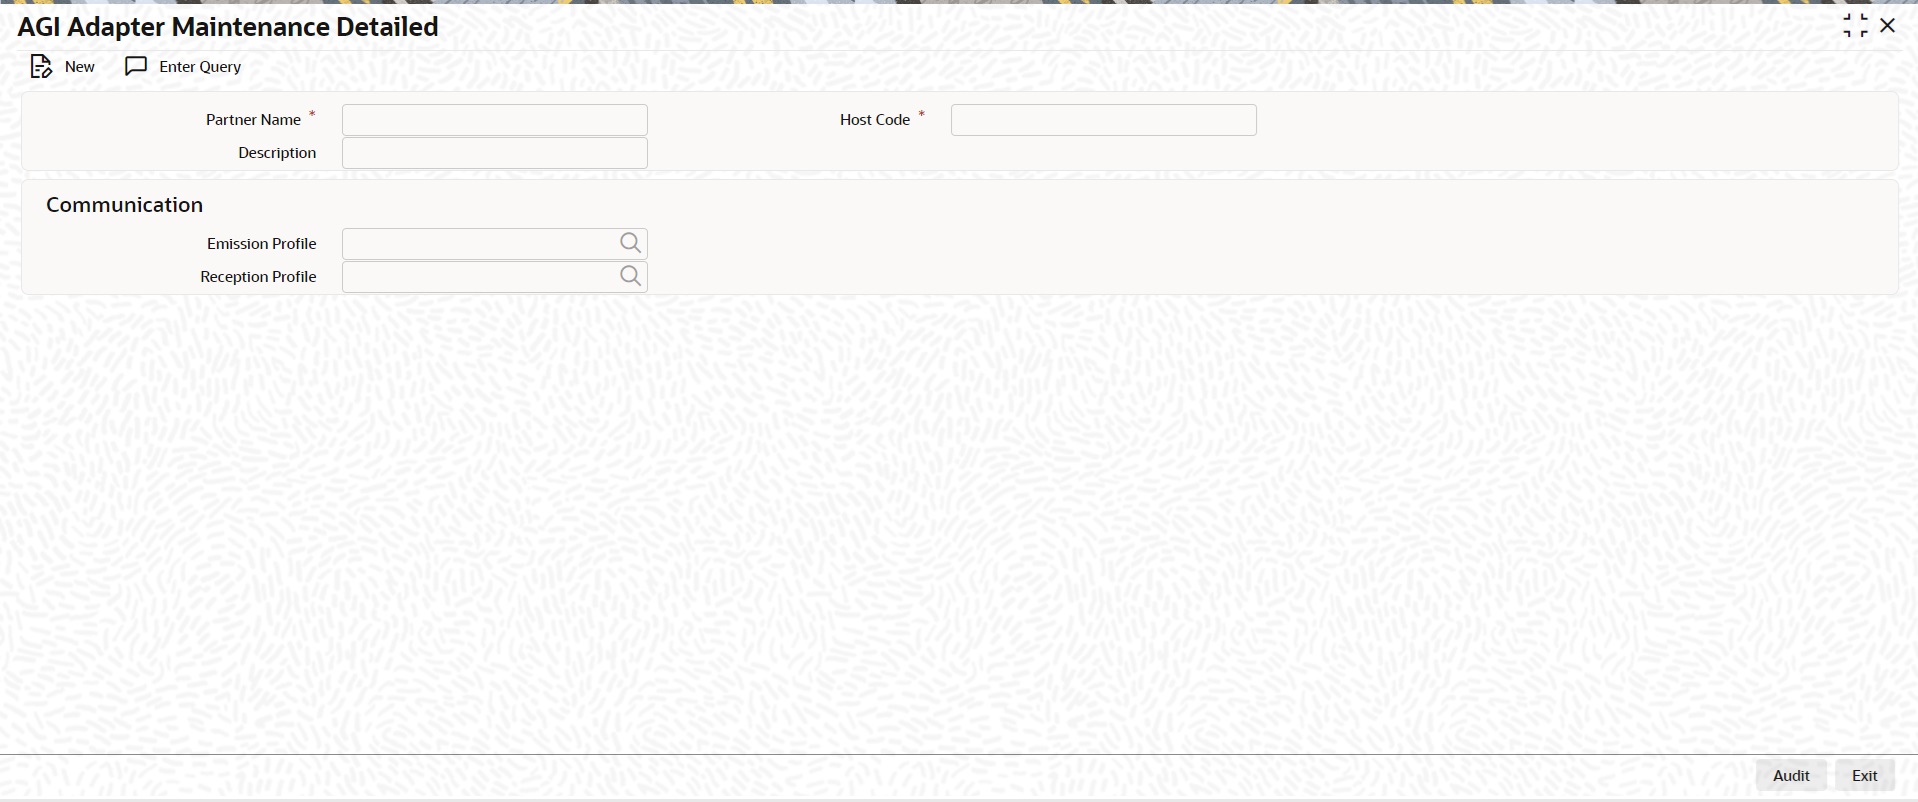
You can specify the following details:
Partner Name
Specify the Name of the Partner.
Description
Specify the Partner description.
Host Code
System defaults the host code of transaction branch on click of ‘New’.
Communication
Emission Profile
Specify the Emission Profile from the list of values. Emission Profiles maintained in PFDAGEQM are listed.
Reception Profile
Specify the Reception Profile from the list of values. Reception Profiles maintained in PFDAGRQM are listed.
2.7.1.1 AGI Adapter Maintenance Summary
You can invoke the ‘AGI Adapter Maintenance Summary’ screen by typing ‘PFSAGADM’ in the field at the top right corner of the application toolbar and clicking the adjoining arrow button.
You can search for the records using one or more of the following parameters:
l Authorization Status
l Record Status
l Partner Name
Once you have specified the search parameters, click ‘Search’ button. The system displays the records that match the search criteria. Double click a record to view the detailed maintenance screen.
2.7.2 AGI Adapter Network Maintenance
This screen links a Partner with a Network code corresponding to the Instant Payment.
You can access the ‘AGI Adapter Network Maintenance Detailed’ Screen by typing ‘PFDAGANM’ in the field in the top right corner of the application tool bar and clicking on the adjoining arrow button.
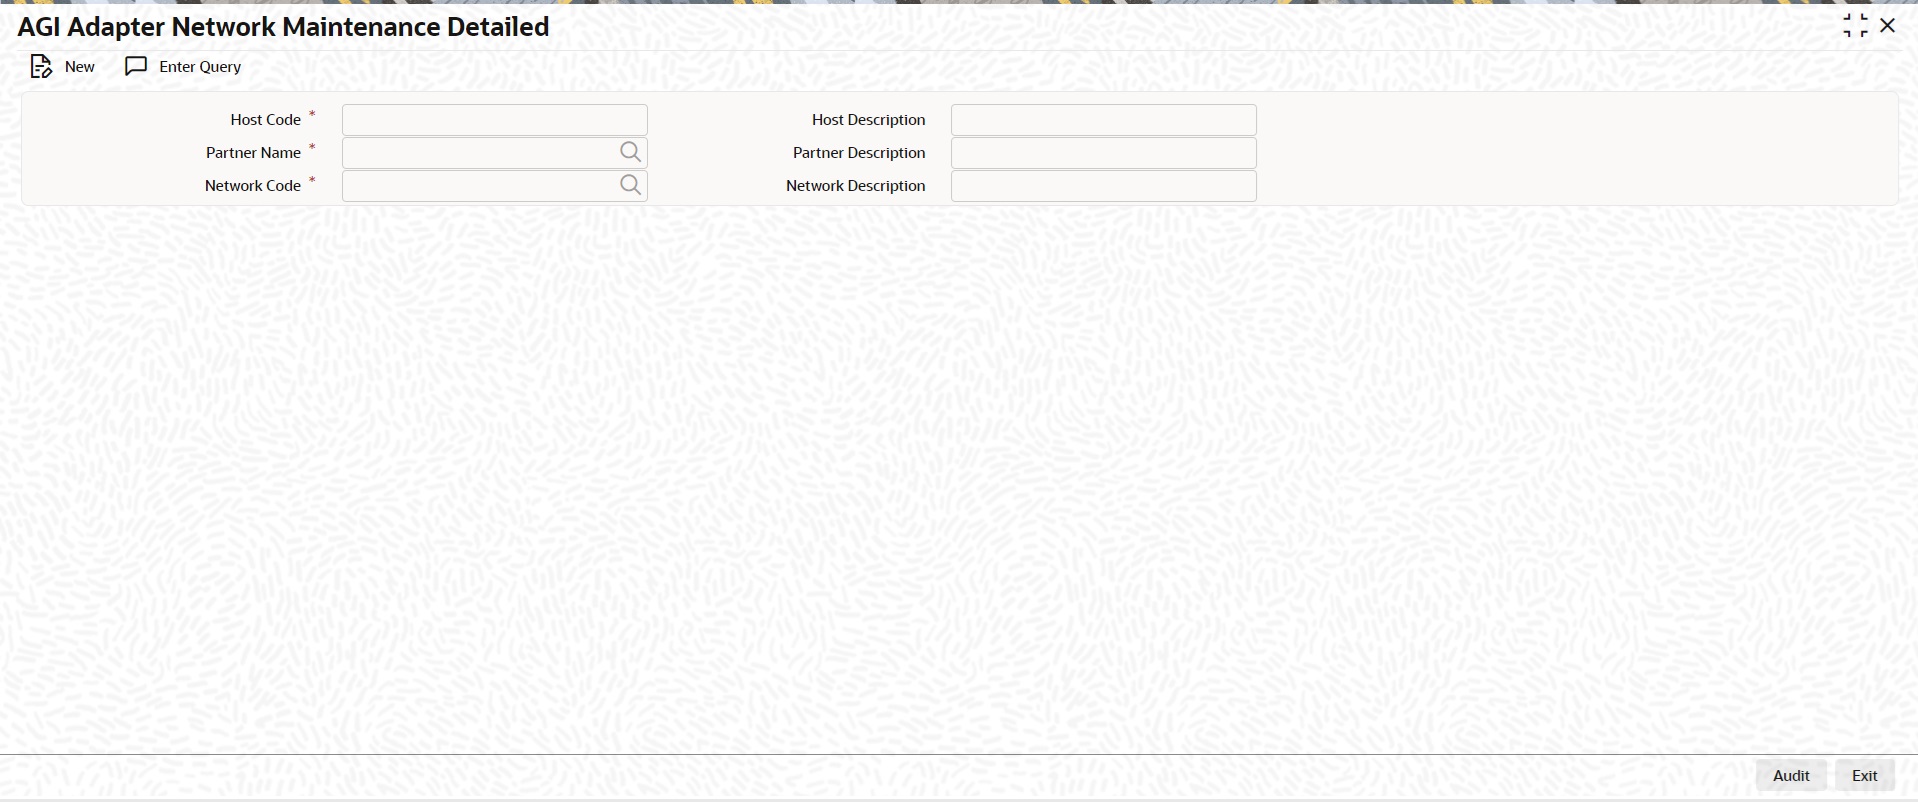
You can specify the following details:
Host Code
System defaults the host code of transaction branch on click of ‘New’.
Host Description
Defaults the description of the selected Host Code.
Partner Name
Specify the Partner Name from the list of values.
Partner Description
Defaults the description of the selected Partner Name.
Network Code
Specify the Network Code from the list of values. Lists all Network Code corresponding to the Instant Payment network.
Network Description
Defaults the description of the selected Network Code.
2.7.2.1 AGI Adapter Network Maintenance Summary
You can invoke the ‘AGI Adapter Network Maintenance Summary’ screen by typing ‘PFSAGANM’ in the field at the top right corner of the application toolbar and clicking the adjoining arrow button.
You can search for the records using one or more of the following parameters:
l Authorization Status
l Record Status
l Host Code
l Partner Name
l Network Code
Once you have specified the search parameters, click ‘Search’ button. The system displays the records that match the search criteria. Double click a record to view the detailed maintenance screen.
A default AGI LAU key is maintained in the main screen. A BIC8 specific LAU Key can be maintained by selecting “BIC LAU Key”.
You can access the ‘AGI LAU Key Maintenance Detailed’ Screen by typing ‘PFDAGLUM’ in the field in the top right corner of the application tool bar and clicking on the adjoining arrow button.
You can specify the following details:
Host Code
System defaults the host code of transaction branch on click of ‘New’.
Host Description
Defaults the description of the selected Host Code.
Partner Name
Specify the Partner Name from the list of values.
Partner Description
Defaults the description of the selected Partner Name.
AGI LAU Key A
Key Id
This field Identifies the key used for calculating the HMAC. Select the value from following:
l A
l B
Key First Part
Specify the First part of the LAU key.
Key Second Part
Specify the Second part of the LAU key.
Start Date
Specify the Start Date of the LAU Key.
AGI LAU Key B
Key Id
This field Identifies the key used for calculating the HMAC. Select the value from following:
l A
l B
Key First Part
Specify the First part of the LAU key.
Key Second Part
Specify the Second part of the LAU key.
Start Date
Specify the Start Date of the LAU Key.
BIC LAU Key
On clicking the BIC LAU Key button, the below sub screen is launched. The BIC8 specific LAU Keys are maintained using this screen. If there is no BIC8 LAU key maintained, the default LAU key is used.
2.7.3.1 BIC LAU Key
Sending Bank Identifier
Specify the BIC8 of the Sending Bank.
Key Id
This field Identifies the key used for calculating the HMAC. Select the value from following:
l A
l B
Key First Part
Specify the First part of the LAU key.
Key Second Part
Specify the Second part of the LAU key.
Start Date
Specify the Start Date of the LAU Key.
2.7.3.2 AGI LAU Key Maintenance Summary
You can invoke the ‘AGI LAU Key Maintenance Summary’ screen by typing ‘PFSAGLUM’ in the field at the top right corner of the application toolbar and clicking the adjoining arrow button.
You can search for the records using one or more of the following parameters:
l Authorization Status
l Record Status
l Partner Name
Once you have specified the search parameters, click ‘Search’ button. The system displays the records that match the search criteria. Double click a record to view the detailed maintenance screen.
2.7.4 AGI Emission MQ Profile Maintenance
You can access the ‘AGI Emission MQ Profile Maintenance’ Screen by typing ‘PFDAGEQM’ in the field in the top right corner of the application tool bar and clicking on the adjoining arrow button.
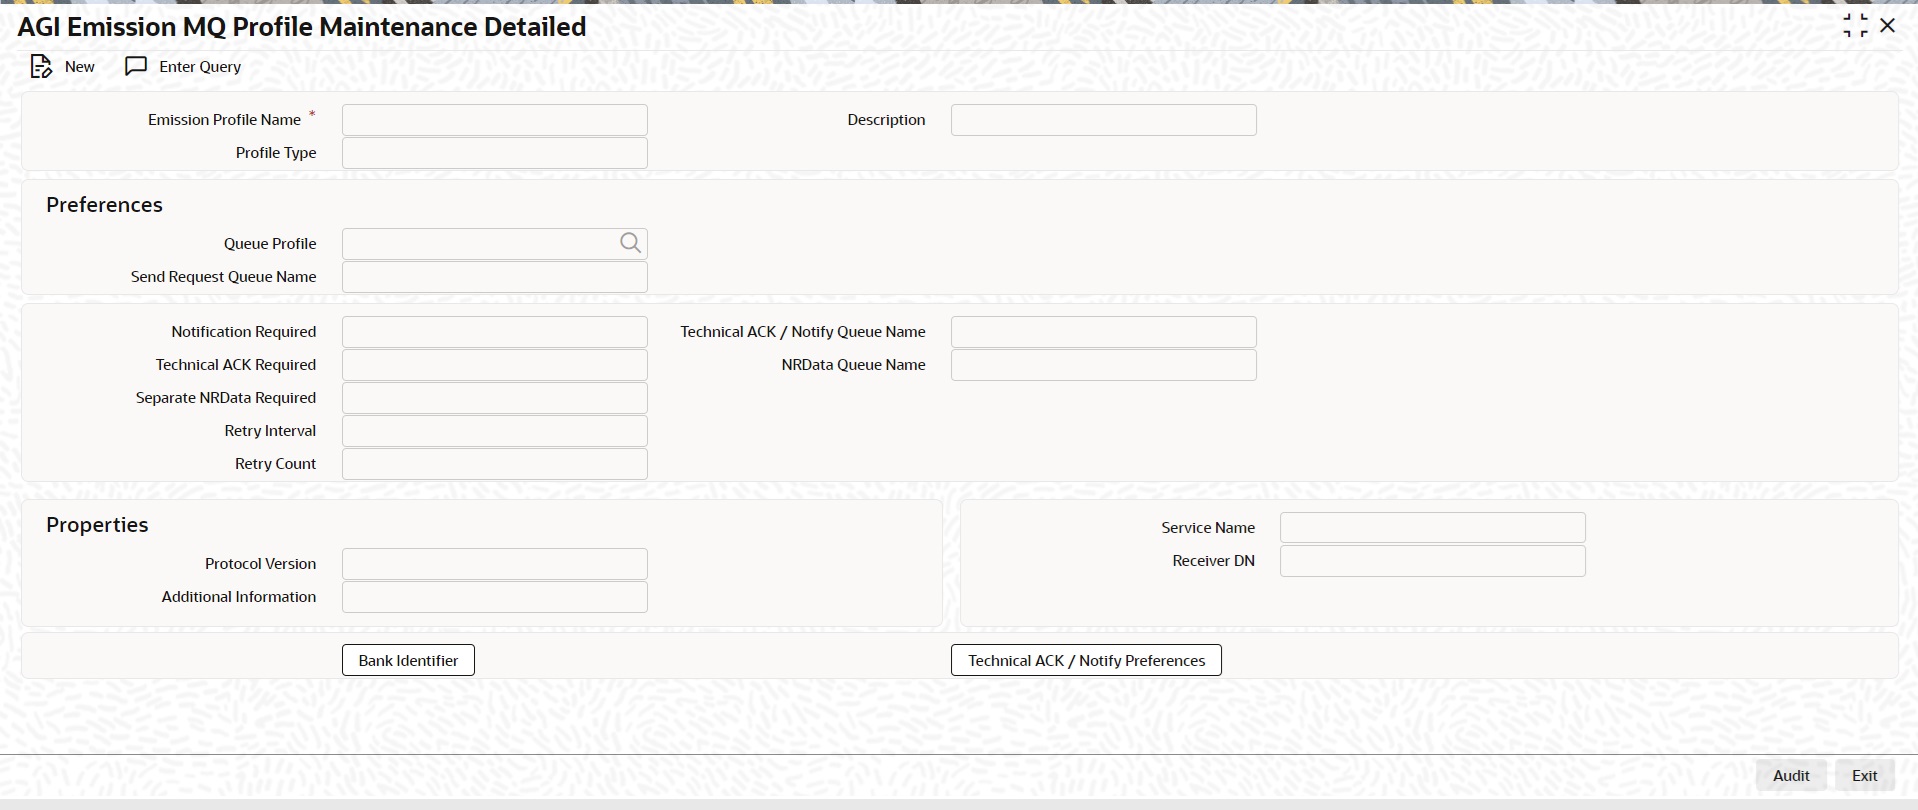
You can specify the following details:
Emission Profile Name
Specify the Name of the Emission Profile.
Description
Specify the Emission Profile Description.
Profile Type
Select the Profile Type from the following values:
l TEST
l PROD
Preferences
Queue Profile
Specify the Identification of a Queue Profile from the list of values.
SendRequest Queue Name
Specify the Queue name to write the SendRequest message.
Notification Required
This field indicates if a Notify can be returned by AGI. Select the Notification Required from the following values:
l Always
l Not Required
l On Error
TechnicalACK Required
This field indicates if a TechnicalAck can be returned by AGI. Select the TechnicalACK Required from the following values:
l Always
l Not Required
l On Error
Separate NRData Required
This field indicates if NRData is returned as a separate message by AGI. Select the Separate NRData Required from the following values:
l Yes
l No
TechnicalACK / Notify Queue Name
Specify the TechnicalACK / Notify Queue Name.
NRData Queue Name
Specify the NRData Queue Name.
Properties
Protocol Version
Specify the current Protocol Version.
Additional Information
Specify the Additional Information provided to the receiver.
Service Name
Specify the Service for which the message is sent.
Receiver DN
Specify the name of the party that receives the message.
Bank Identifier
On clicking the “Bank Identifier” button in the main screen, the ‘Emission Bank Identifier’ sub screen is launched. The BIC8 and the Sender DN to be used in the SendRequest message can be defined in this screen. For more information, refer to Section 2.7.4.1, "Emission Bank Identifier".
TechnicalACK / Notify Preferences
On clicking the “TechnicalACK/ Notify preferences” button in the main screen, the ‘TechnicalACK / Notify Preferences’ sub screen is launched. The preferences for TechnicalACK and Notifications can be defined for each Message Type in this screen. The entries in the “TechnicalACK/ Notify preferences” screen overrides the preferences in the main screen. For more information, please refer to Section 2.7.4.2, "TechnicalACK / Notify Preferences".
2.7.4.1 Bank Identifier
Sending Bank Identifier
Specify the BIC8 of the Sending Bank from the list values. All valid BICs are listed here.
Sender DN
Specify the Name of the party sending the message, in the format of a DN.
2.7.4.2 TechnicalACK / Notify Preferences
Specify the following field details:
Preferences
Message Type
Specify the Message Type from the list of values. Valid ISO 20022 message type like pacs.008, pacs.004 etc are listed.
Notification Required
This field indicates if a Notify is returned by AGI. Select the Notification Required from the following values:
l Always
l Not Required
l On Error
TechnicalACK Required
This field indicates if a TechnicalAck is returned by AGI. Select the TechnicalACK Required from the following values:
l Always
l Not Required
l On Error
TechnicalACK / Notify Queue Name
Specify the TechnicalACK / Notify Queue Name.
Separate NRData Required
This field indicates if NRData is returned as a separate message by AGI. Select the Separate NRData Required from the following values:
l Yes
l No
NRData Queue Name
Specify the NRData Queue Name.
2.7.4.3 AGI Emission MQ Profile Maintenance Summary
You can invoke the ‘AGI Emission MQ Profile Maintenance Summary’ screen by typing ‘PFSAGEQM’ in the field at the top right corner of the application toolbar and clicking the adjoining arrow button.
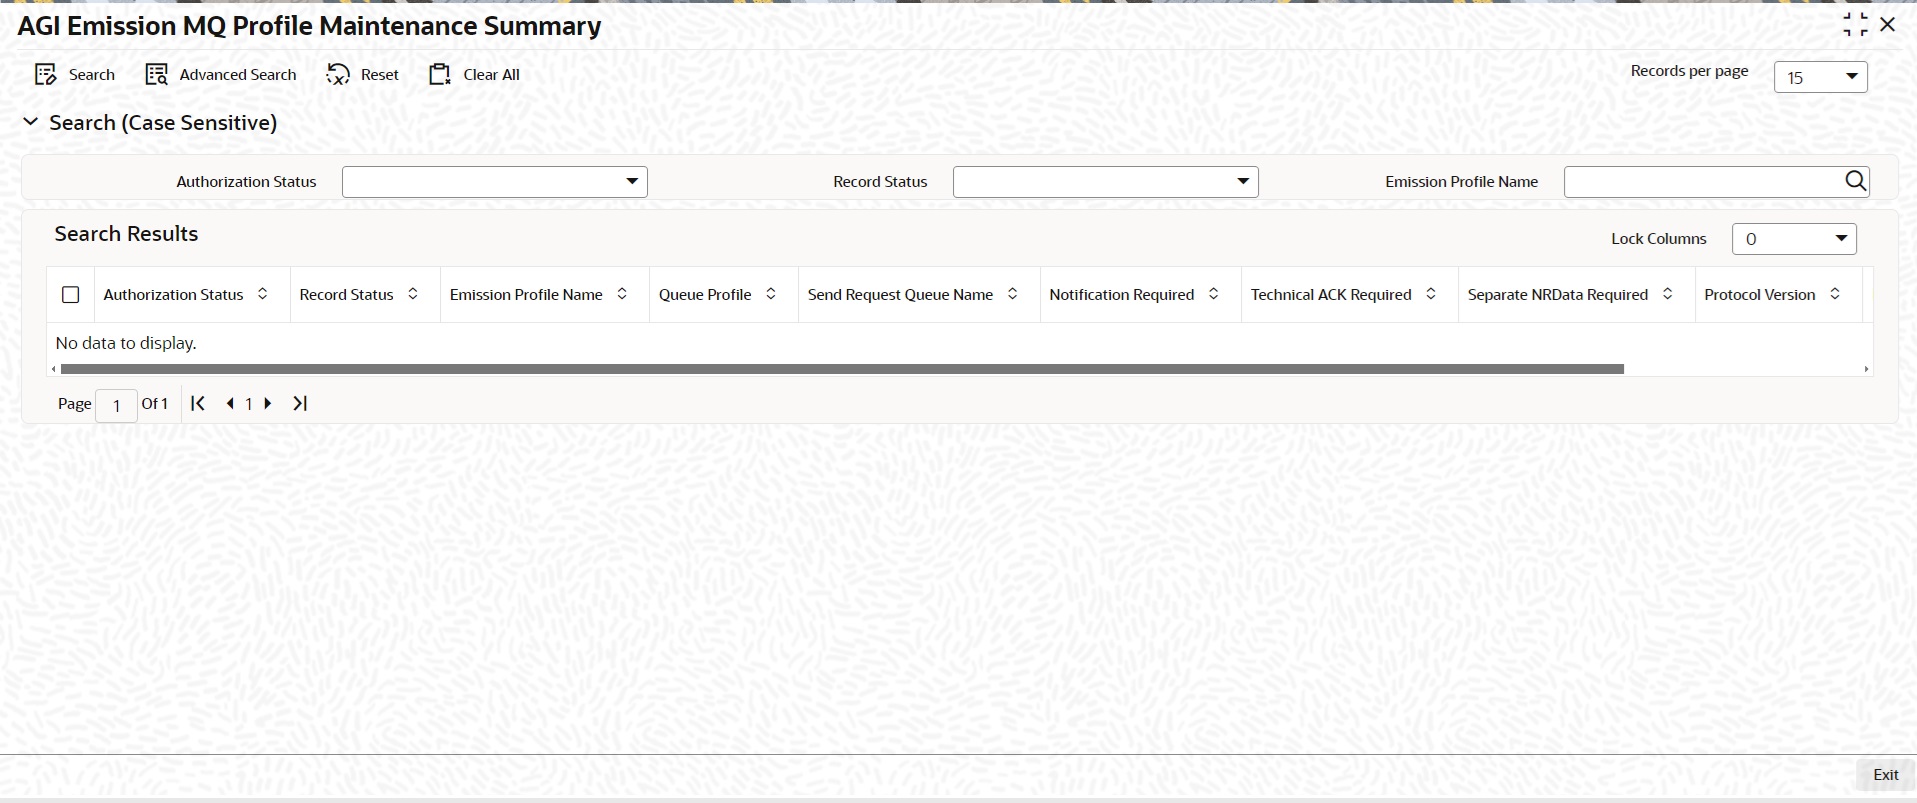
You can search for the records using one or more of the following parameters:
l Authorization Status
l Record Status
l Emission Profile Name
Once you have specified the search parameters, click ‘Search’ button. The system displays the records that match the search criteria. Double click a record to view the detailed maintenance screen.
2.7.5 AGI Reception MQ Profile Maintenance
You can access the ‘AGI Reception MQ Profile Maintenance Detailed’ Screen by typing ‘PFDAGRIP’ in the field in the top right corner of the application tool bar and clicking on the adjoining arrow button.

You can specify the following details:
Reception Profile Name
Specify the Name of the Reception Profile.
Description
Specify the Emission Profile Description.
Profile Type
Select the Profile Type from the following values:
l TEST
l PROD
Preferences
Queue Profile
Specify the Identification of a Queue Profile from the list of values.
Receive Indication Queue Name
Specify the Queue name to write the ReceiveIndication message.
Separate NRData Required
This field indicates if NRData is returned as a separate message by AGI. Select the Separate NRData Required from the following values:
l Yes
l No
NRData Queue Name
Specify the NRData Queue Name.
Detailed Preference
On clicking the “TechnicalACK/ Notify preferences” button in the main screen, the below sub screen is launched. The preferences for TechnicalACK and Notifications can be defined for each Message Type in this screen. The entries in the “TechnicalACK/ Notify preferences” screen will override preferences in the main screen.
2.7.5.1 Detailed Preferences
Specify the following field details:
Preferences
Message Type
Select the Message Type from the following values:
l pacs.008
l pacs.004
Receive Indication Queue Name
Specify the Receive Indication Queue Name.
Separate NRData Required
This field indicates if NRData is returned as a separate message by AGI. Select the Separate NRData Required from the following values:
l Yes
l No
NRData Queue Name
Specify the NRData Queue Name.
2.7.5.2 AGI Reception MQ Profile Maintenance Summary
You can invoke the ‘AGI Reception MQ Profile Maintenance Summary’ screen by typing ‘PFSAGRIP’ in the field at the top right corner of the application toolbar and clicking the adjoining arrow button.

You can search for the records using one or more of the following parameters:
l Authorization Status
l Record Status
l Reception Profile Name
Once you have specified the search parameters, click ‘Search’ button. The system displays the records that match the search criteria. Double click a record to view the detailed maintenance screen.
SIAnet XS Service is a secure messaging solution providing multiple messaging services, that includes the Instant Messaging eXtended (IMX) service for the “near real time” exchange of data (instant messages). SIAnet secure messaging solution provides its services through the FEMS XS, a Network Gateway fully developed and managed by SIA in order to fulfill specific service needs.
You can access the ‘XS Gateway Maintenance Detailed’ Screen by typing ‘PSDXSMNT’ in the field in the top right corner of the application tool bar and clicking on the adjoining arrow button.
You can specify the following details:
XS Id
Specify the XS Id as identified in SIAnet.
Description
Specify the XS description.
Heart beat Interval
Specify the Time interval (in seconds) configured between two BuHeartbeatReq primitives.
Heart beat Retry Count
Specify the Heartbeat Retry Count. The number of times a BuHeartbeatReq should be send In case a BuHeartbeatResp is not received.
Maximum payload size
Specify the Maximum size of the payload that can be included in a ImxSendReq for a XS.
2.8.1.1 XS Gateway Maintenance Summary
You can invoke the ‘XS Gateway Maintenance Summary’ screen by typing ‘PSSXSMNT’ in the field at the top right corner of the application toolbar and clicking the adjoining arrow button.
You can search for the records using one or more of the following parameters:
l Authorization Status
l Record Status
l XS Id
Once you have specified the search parameters, click ‘Search’ button. The system displays the records that match the search criteria. Double click a record to view the detailed maintenance screen.
2.8.2 XP Gateway Pool Maintenance
You can access the ‘XP Gateway Pool Maintenance Detailed’ Screen by typing ‘PSDXPMNT’ in the field in the top right corner of the application tool bar and clicking on the adjoining arrow button.
You can specify the following details:
Pool Id
Specify the XS Pool Identifier.
Description
Specify the XS Pool description.
2.8.2.1 XP Gateway Pool Maintenance Summary
You can invoke the ‘XP Gateway Pool Maintenance Summary’ screen by typing ‘PSSXPMNT’ in the field at the top right corner of the application toolbar and clicking the adjoining arrow button.
You can search for the records using one or more of the following parameters:
l Authorization Status
l Record Status
l Pool Id
Once you have specified the search parameters, click ‘Search’ button. The system displays the records that match the search criteria. Double click a record to view the detailed maintenance screen.
You can access the ‘XS Pool Mapping Detailed’ Screen by typing ‘PSDXPMAP’ in the field in the top right corner of the application tool bar and clicking on the adjoining arrow button.
You can specify the following details:
Pool Id
Specify the Identifier of the XS Pool from the list of values. All the XS Pools maintained in screen PSDXPMNT are listed.
Gateway
Pool Id
Specify the XS Id as identified in SIAnet from the list of values. All the XS maintained in screen PSDXSMNT are listed.
Description
Specify the XS Description.
Default XS
Select the value between Yes or No. This field indicates whether a XS is default or not.
2.8.3.1 XS Pool Mapping Summary
You can invoke the ‘XS Pool Mapping Summary’ screen by typing ‘PSSXPMAP’ in the field at the top right corner of the application toolbar and clicking the adjoining arrow button.
You can search for the records using one or more of the following parameters:
l Authorization Status
l Record Status
l Pool Id
Once you have specified the search parameters, click ‘Search’ button. The system displays the records that match the search criteria. Double click a record to view the detailed maintenance screen.
You can access the ‘Laukey Maintenance’ Screen by typing ‘PSDLKMNT’ in the field in the top right corner of the application tool bar and clicking on the adjoining arrow button.
You can specify the following details:
Lau Key Identification
Specify the Identifier of Lau Key used for HMAC computation.
Lau Key
Specify the Lau Key used for HMAC computation.
Description
Specify the Description of the Lau Key.
2.8.4.1 Laukey Maintenance Summary
You can invoke the ‘Laukey Maintenance Summary’ screen by typing ‘PSSLKMNT’ in the field at the top right corner of the application toolbar and clicking the adjoining arrow button.
You can search for the records using one or more of the following parameters:
l Authorization Status
l Record Status
l Lau Key Identification
l LAU Key
Once you have specified the search parameters, click ‘Search’ button. The system displays the records that match the search criteria. Double click a record to view the detailed maintenance screen.
2.8.5 Command Queue Profile Maintenance
You can access the ‘Command Queue Profile Maintenance Detailed’ Screen by typing ‘PSDCQMNT’ in the field in the top right corner of the application tool bar and clicking on the adjoining arrow button.
You can specify the following details:
Profile Id
Specify the Identifier for the Command connection profile.
Description
Specify the Description of the Command connection profile.
Preference
Request Queue JNDI
Specify the JNDI queue name for the Request primitives.
Request Queue Connection
Specify the Queue profile corresponding to the Command Queues from the list of values. All the Queue Connection Profiles maintained in screen PMDQPROF are listed.
Response Queue JNDI
Specify the JNDI queue name for the Response primitives.
Response Queue Connection
Specify the Queue profile corresponding to the Response Queues from the list of values.
IND Queue JNDI
Specify the JNDI queue name for the Indication primitives.
IND Queue Connection
Specify the Queue profile corresponding to the Queues from the list of values.
2.8.5.1 Command Queue Profile Maintenance Summary
You can invoke the ‘Command Queue Profile Maintenance Summary’ screen by typing ‘PSSCQMNT’ in the field at the top right corner of the application toolbar and clicking the adjoining arrow button.
You can search for the records using one or more of the following parameters:
l Authorization Status
l Record Status
l Profile Id
l Description
Once you have specified the search parameters, click ‘Search’ button. The system displays the records that match the search criteria. Double click a record to view the detailed maintenance screen.
2.8.6 Data Queue Profile Maintenance
You can access the ‘Data Queue Profile Maintenance Detailed’ Screen by typing ‘PSDDQMNT’ in the field in the top right corner of the application tool bar and clicking on the adjoining arrow button.
You can specify the following details:
Profile Id
Specify the Identifier for the Data connection profile.
Description
Specify the Description of the Data connection profile.
Preferences
Queue Connection Profile
Specify the Queue profile corresponding to the Command Queues from the list of values. All the Queue Connection Profiles maintained in screen PMDQPROF are listed.
Send Queue JNDI
Specify the JNDI queue name for the ImxSendReq primitive.
Result Queue JNDI
Specify the JNDI queue name for the Response primitives.
Receive Queue JNDI
Specify the JNDI queue name for the ImxReceiveInd primitive.
2.8.6.1 Data Queue Profile Maintenance Summary
You can invoke the ‘Data Queue Profile Maintenance Summary’ screen by typing ‘PSSDQMNT’ in the field at the top right corner of the application toolbar and clicking the adjoining arrow button.
You can search for the records using one or more of the following parameters:
l Authorization Status
l Record Status
l Profile Id
Once you have specified the search parameters, click ‘Search’ button. The system displays the records that match the search criteria. Double click a record to view the detailed maintenance screen.
You can access the ‘Service Master Maintenance’ Screen by typing ‘PSDSVMNT’ in the field in the top right corner of the application tool bar and clicking on the adjoining arrow button.
You can specify the following details:
Service ID
Specify the Identifier of a service.
Description
Specify the Service Description.
2.8.7.1 Service Master Maintenance Summary
You can invoke the ‘Service Master Maintenance Summary’ screen by typing ‘PSSSVMNT’ in the field at the top right corner of the application toolbar and clicking the adjoining arrow button.
You can search for the records using one or more of the following parameters:
l Authorization Status
l Record Status
l Service ID
Once you have specified the search parameters, click ‘Search’ button. The system displays the records that match the search criteria. Double click a record to view the detailed maintenance screen.
You can access the ‘EP Maintenance Detailed’ Screen by typing ‘PSDEPMNT’ in the field in the top right corner of the application tool bar and clicking on the adjoining arrow button.
You can specify the following details:
Network Code
Specify the Network Code corresponding to the Instant Payment network from the list of values. All the Network Codes maintained in screen PMDNWMNT are listed.
Host Code
Specify the Host code of the transaction Branch.
Service Id
Specify the Identifier of the service used from the list values. All the Service Identifiers maintained in screen PSDSVMNT are listed.
End Point Id
Specify the EP Id as identified by SIAnet.
Description
Specify the End Point Description.
You can access the ‘Role Maintenance’ Screen by typing ‘PSDRLMNT’ in the field in the top right corner of the application tool bar and clicking on the adjoining arrow button.
You can specify the following details:
Role
Specify the Role Id as identified by SIAnet.
Role Name
Specify the Name of the Role in SIAnet.
Description
Specify the Description of the Role.
2.8.10 Domain Master Maintenance
You can access the ‘Domain Master Maintenance Detailed’ Screen by typing ‘PSDDMMNT’ in the field in the top right corner of the application tool bar and clicking on the adjoining arrow button.
You can specify the following details:
Domain Id
Specify the Domain Id as identified by SIAnet.
Description
Specify the Description of the Domain.
Role Id
Specify the Role that can be assigned to a BU joining the Domain from the list of values. All the Role Ids maintained in screen PSDRLMNT are listed.
2.8.10.1 Domain Master Maintenance Summary
You can invoke the ‘Domain Master Maintenance Summary’ screen by typing ‘PSSDMMNT’ in the field at the top right corner of the application toolbar and clicking the adjoining arrow button.
You can search for the records using one or more of the following parameters:
l Authorization Status
l Record Status
l Profile Id
Once you have specified the search parameters, click ‘Search’ button. The system displays the records that match the search criteria. Double click a record to view the detailed maintenance screen.
2.8.11 Application Master Maintenance
You can access the ‘Application Master Maintenance Detailed’ Screen by typing ‘PSDAPMNT’ in the field in the top right corner of the application tool bar and clicking on the adjoining arrow button.
You can specify the following details:
Application Id
Specify the Identifier of an Application.
Application Name
Specify the Application Id as defined in SIAnet.
2.8.11.1 Application Master Maintenance Summary
You can invoke the ‘Application Master Maintenance Summary’ screen by typing ‘PSSAPMNT’ in the field at the top right corner of the application toolbar and clicking the adjoining arrow button.
You can search for the records using one or more of the following parameters:
l Authorization Status
l Record Status
l Application Id
Once you have specified the search parameters, click ‘Search’ button. The system displays the records that match the search criteria. Double click a record to view the detailed maintenance screen.
2.8.12 Domain Application Service Maintenance
You can access the ‘Domain Application Service Maintenance’ Screen by typing ‘PSDASMNT’ in the field in the top right corner of the application tool bar and clicking on the adjoining arrow button.
You can specify the following details:
Domain Id
Specify the Domain Id as identified by SIAnet from the list of values. All the Domains maintained in screen PSDDMMNT are listed.
Description
Specify the Description of the Domain.
Application Name
Specify the Application Id as defined in SIAnet from the list of values. All the Applications maintained in screen PSDAPMNT are listed.
Service Id
Specify the Identifier of a Service from the list of values. All the Service identifiers maintained in screen PSDSVMNT are listed.
You can access the ‘BU Maintenance Detailed’ Screen by typing ‘PSDBUMNT’ in the field in the top right corner of the application tool bar and clicking on the adjoining arrow button.
You can specify the following details:
Business User Id
Specify the BU Id as identified by SIAnet.
Domain Id
Specify the Domain Id as defined in SIAnet from the list of values. All the Network Codes maintained in screen PSDAPMNT are listed.
Description
Specify the BU Description.
Receiver Business User Id
Specify the Receiving BU Id provided by SIAnet.
2.8.13.1 BU Maintenance Detailed Summary
You can invoke the ‘BU Maintenance Detailed Summary’ screen by typing ‘PSSBUMNT’ in the field at the top right corner of the application toolbar and clicking the adjoining arrow button.
You can search for the records using one or more of the following parameters:
l Authorization Status
l Record Status
l Bus Id
Once you have specified the search parameters, click ‘Search’ button. The system displays the records that match the search criteria. Double click a record to view the detailed maintenance screen.
You can access the ‘Protocol Version Maintenance’ Screen by typing ‘PSDPVMNT’ in the field in the top right corner of the application tool bar and clicking on the adjoining arrow button.
You can specify the following details:
Protocol Identification
Specify the Identifier for the Protocol Version.
Protocol
Select the Protocol from the following list of values:
l EP-XS
l BU-XS
l IMX
Version
Specify the Protocol Version.
2.8.14.1 Protocol Version Maintenance Summary
You can invoke the ‘Protocol Version Maintenance Summary’ screen by typing ‘PSSPVMNT’ in the field at the top right corner of the application toolbar and clicking the adjoining arrow button.
You can search for the records using one or more of the following parameters:
l Authorization Status
l Record Status
l Protocol Identification
Once you have specified the search parameters, click ‘Search’ button. The system displays the records that match the search criteria. Double click a record to view the detailed maintenance screen.
You can access the ‘EP-XP Link Detailed’ Screen by typing ‘PSDEXLNK’ in the field in the top right corner of the application tool bar and clicking on the adjoining arrow button.
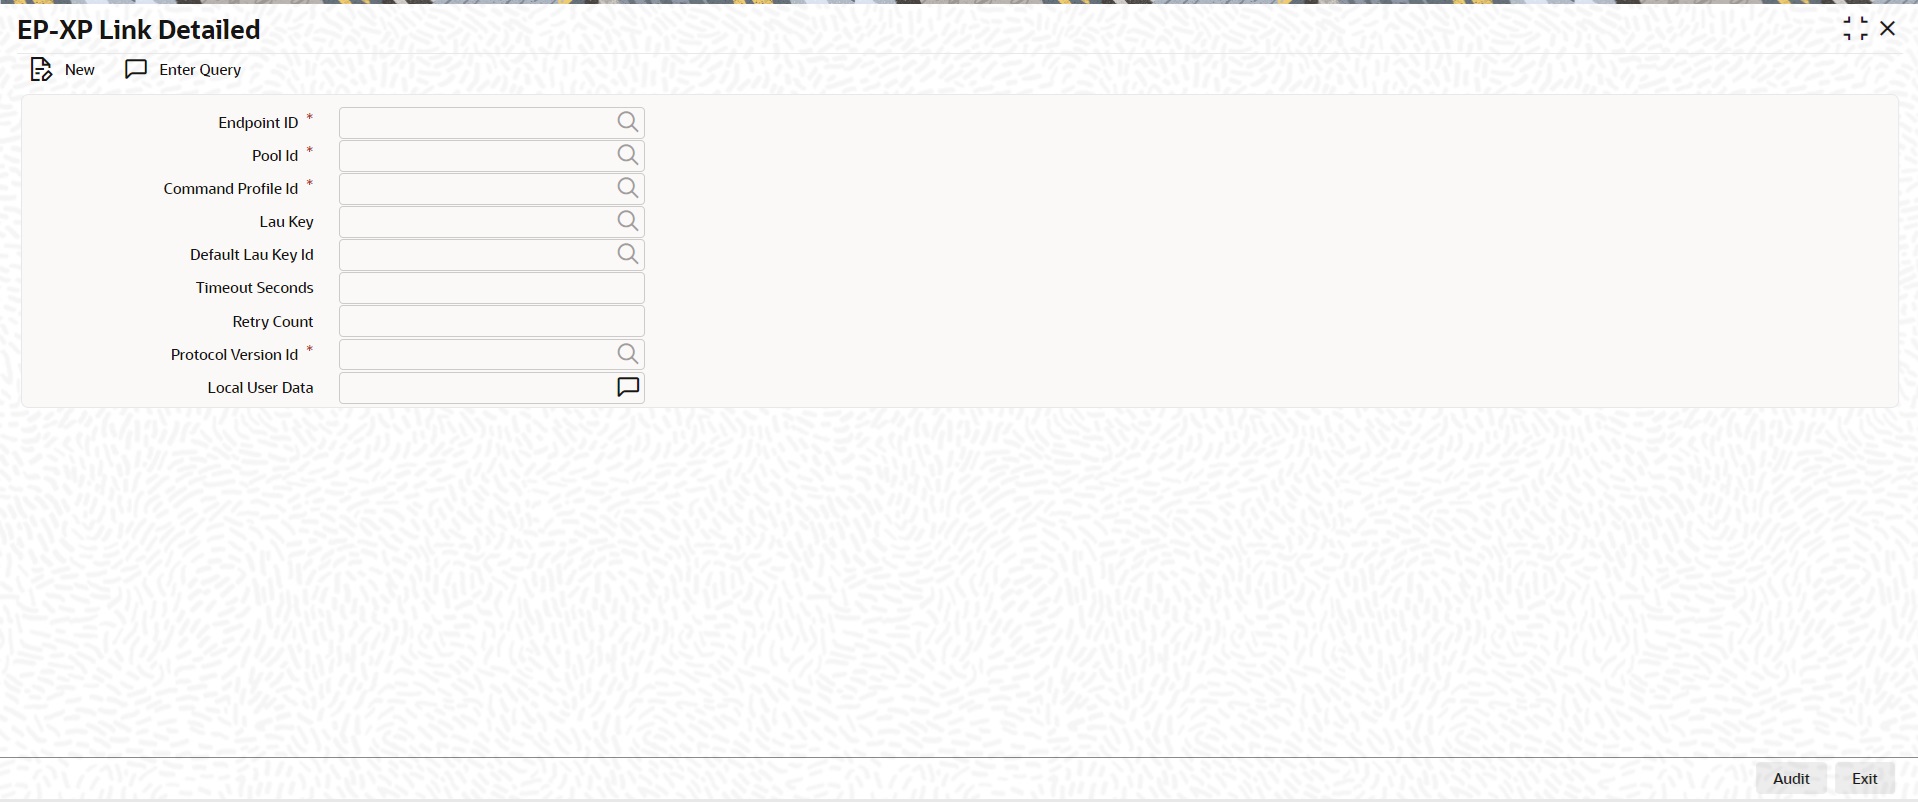
You can specify the following details:
EP Id
Specify the End Point Id as identified by SIAnet from the list of values. All the EP maintained in screen PSDEPMNT are listed.
XP Identification
Specify the XS Pool Identifier from the list of values. All the XS Pools maintained in screen PSDXPMNT are listed.
CMD Profile Identification
Specify the Identifier for the Command connection profile from the list of values. All the Command Profiles maintained in screen PSDCQMNT are listed.
LAU Key Identification
Specify the Identifier for the Identifier of Lau Key used for HMAC computation from the list of values. All the Lau Keys maintained in screen PSDLKMNT are listed.
Default LAU Key Identification
Specify the Identifier of Lau Key used for HMAC computation, that is the default Lau Key from the list of values. All the Lau Keys maintained in screen PSDLKMNT are listed.
Timeout Seconds
Specify the No. of seconds to wait for a response primitive to arrive. Suggested value is 60 seconds
Retry Count
Specify the number of times a request primitive to be resubmitted in the event of a timeout or an error (where a resubmit is applicable).
Retry Interval
Specify the Retry Interval.
Ex Protocol Identification
Specify the Identifier of the EP-XS Protocol Version from the list of values. All the Protocol Versions maintained in screen PSDPVMNT are listed.
2.8.15.1 EP-XP Link Detailed Summary
You can invoke the ‘EP-XP Link Detailed Summary’ screen by typing ‘PSSEXLNK’ in the field at the top right corner of the application toolbar and clicking the adjoining arrow button.
You can search for the records using one or more of the following parameters:
l Authorization Status
l Record Status
l EP Id
l XP Identification
Once you have specified the search parameters, click ‘Search’ button. The system displays the records that match the search criteria. Double click a record to view the detailed maintenance screen.
2.8.16 Certificate Maintenance
You can access the ‘Certificate Maintenance Detailed’ Screen by typing ‘PSDCTMNT’ in the field in the top right corner of the application tool bar and clicking on the adjoining arrow button.
You can specify the following details:
Certificate Id
Specify the ID of the Participant PKI credential available to the XS.
PIN
Specify the PIN of the PKI Credential.
2.8.16.1 Certificate Maintenance Summary
You can invoke the ‘Certificate Maintenance Summary’ screen by typing ‘PSSCTMNT’ in the field at the top right corner of the application toolbar and clicking the adjoining arrow button.
You can search for the records using one or more of the following parameters:
l Authorization Status
l Record Status
l Certificate Id
Once you have specified the search parameters, click ‘Search’ button. The system displays the records that match the search criteria. Double click a record to view the detailed maintenance screen.
You can access the ‘BU-EP Link Detailed’ Screen by typing ‘PSDBXLNK’ in the field in the top right corner of the application tool bar and clicking on the adjoining arrow button.
You can specify the following details:
Business User Id
Specify the BU Id as identified by SIAnet from the list of values. All the BU maintained in screen PSDBUMNT are listed.
Endpoint ID
Specify the EP Id as identified by SIAnet from the list of values. All the EP maintained in screen PSDEPMNT are listed.
Data Profile Id
Specify the Identifier for the Data connection profile from the list of values. All the Data Profiles maintained in screen PSDDQMNT are listed.
Timeout Seconds
Specify the No. of seconds to wait for a response primitive to arrive. Suggested value is 60 seconds.
Retry Count
Specify the number of times a request primitive to be resubmitted in the event of a timeout or an error (where a resubmit is applicable).
Retry Interval
Specify the Retry Interval.
BU-XS Protocol Version Id
Specify the Identifier of the BU-XS Protocol Version from the list of values. All the Protocol Versions maintained in screen PSDPVMNT are listed.
IMX Protocol Version Id
Specify the Identifier for the IMX Protocol Version from the list of values. All the Protocol Versions maintained in screen PSDPVMNT are listed.
Certificate Id
Specify the Identifier of the digital certificate to be used by the Participant in the Domain from the list of values. All the Certificates maintained in screen PSDCTMNT are listed.
2.8.17.1 BU-EP Link Summary
You can invoke the ‘BU-EP Link Summary’ screen by typing ‘PSSEXLNK’ in the field at the top right corner of the application toolbar and clicking the adjoining arrow button.

You can search for the records using one or more of the following parameters:
l Authorization Status
l Record Status
l BU Id
l EP Id
Once you have specified the search parameters, click ‘Search’ button. The system displays the records that match the search criteria. Double click a record to view the detailed maintenance screen.
You can access the ‘Flow Master Detailed’ Screen by typing ‘PSDFWMNT’ in the field in the top right corner of the application tool bar and clicking on the adjoining arrow button.
You can specify the following details:
Flow Id
Specify the Flow Id as identified by SIAnet.
Flow Name
Specify the Description of the Domain.
Message Type
Specify the Business Message Type as defined by the CSM (pacs.008, pacs.004 etc) from the list of values. All valid ISO 20022 payment message types relevant for Instant Payments are displayed.
Domain Id
Specify the Identifier of the Domain from the list of values. All the Network Codes maintained in screen PSDDMMNT are listed.
2.8.18.1 Flow Master Summary
You can invoke the ‘Flow Master Summary’ screen by typing ‘PSSFWMNT’ in the field at the top right corner of the application toolbar and clicking the adjoining arrow button.
You can search for the records using one or more of the following parameters:
l Authorization Status
l Record Status
l Flow Id
Once you have specified the search parameters, click ‘Search’ button. The system displays the records that match the search criteria. Double click a record to view the detailed maintenance screen.
You can access the ‘Role to Flow Mapping’ Screen by typing ‘PSDRFMAP’ in the field in the top right corner of the application tool bar and clicking on the adjoining arrow button.
You can specify the following details:
Role Id
Specify the Role Id as identified by SIAnet from the list of values. Lists the Roles maintained in PSDRLMNT.
Flows
Flow Id
Specify the Flow Id as identified by SIAnet from the list of values. Lists the Roles maintained in PSDRLMNT.
2.8.19.1 Role to Flow Mapping Summary
You can invoke the ‘Role to Flow Mapping Summary’ screen by typing ‘PSSRFMAP’ in the field at the top right corner of the application toolbar and clicking the adjoining arrow button.
You can search for the records using one or more of the following parameters:
l Authorization Status
l Record Status
l Flow Id
l Role
Once you have specified the search parameters, click ‘Search’ button. The system displays the records that match the search criteria. Double click a record to view the detailed maintenance screen.
You can access the ‘EP-XS Link Status’ Screen by typing ‘PSDEXSTS’ in the field in the top right corner of the application tool bar and clicking on the adjoining arrow button.
You can specify the following details:
Endpoint Id
Specify the Identifier for the BU as identified by SIAnet.
Pool Id
Specify the Identifier of the XS Pool.
XS Id
Specify the Identifier of the XS Pool.
Current Status
Specify the Current status of the EP-XS Link.
Action
Specify the Application states for the EP-XS Link from the following values:
l Log On
l Log Off
2.8.20.1 EP-XS Link Status Summary
You can invoke the ‘EP-XS Link Status Summary’ screen by typing ‘PSSEXSTS’ in the field at the top right corner of the application toolbar and clicking the adjoining arrow button.
You can search for the records using one or more of the following parameters:
l Authorization Status
l Record Status
l EP Id
l XS Id
Once you have specified the search parameters, click ‘Search’ button. The system displays the records that match the search criteria. Double click a record to view the detailed maintenance screen.
You can access the ‘BU-XS Link Status Detailed’ Screen by typing ‘PSDBXSTS’ in the field in the top right corner of the application tool bar and clicking on the adjoining arrow button.
You can specify the following details:
Endpoint ID
Specify the EP Id as identified by SIAnet from the list of values.
Business User Id
Specify the BU Id as identified by SIAnet from the list of values.
Pool Id
Specify the Identifier of the XS Pool.
XS Id
Specify the Description of the Domain.
Current Status
Specify the Current status of the BU-XS Link.
Action
Specify the Application states for the BU-XS Link from the following values:
l Subscribe
l Unsubscribe
l Open
Apply to XS Pool
Check the Apply to XS Pool.
2.8.21.1 BU-XS Link Status Summary
You can invoke the ‘BU-XS Link Status Summary’ screen by typing ‘PSSBXSTS’ in the field at the top right corner of the application toolbar and clicking the adjoining arrow button.
You can search for the records using one or more of the following parameters:
l Authorization Status
l Record Status
l End Point Id
l XS Id
l Business User Id
Once you have specified the search parameters, click ‘Search’ button. The system displays the records that match the search criteria. Double click a record to view the detailed maintenance screen.