Working With Workspace Reports
PeopleSoft provides online comparison reports in PeopleSoft Application Designer. These reports appear in the project workspace area after you run a compare report.
To access reports:
Select from the PeopleSoft Application Designer toolbar.
Select one of these options:
From Database
To File
Sign in to the target database.
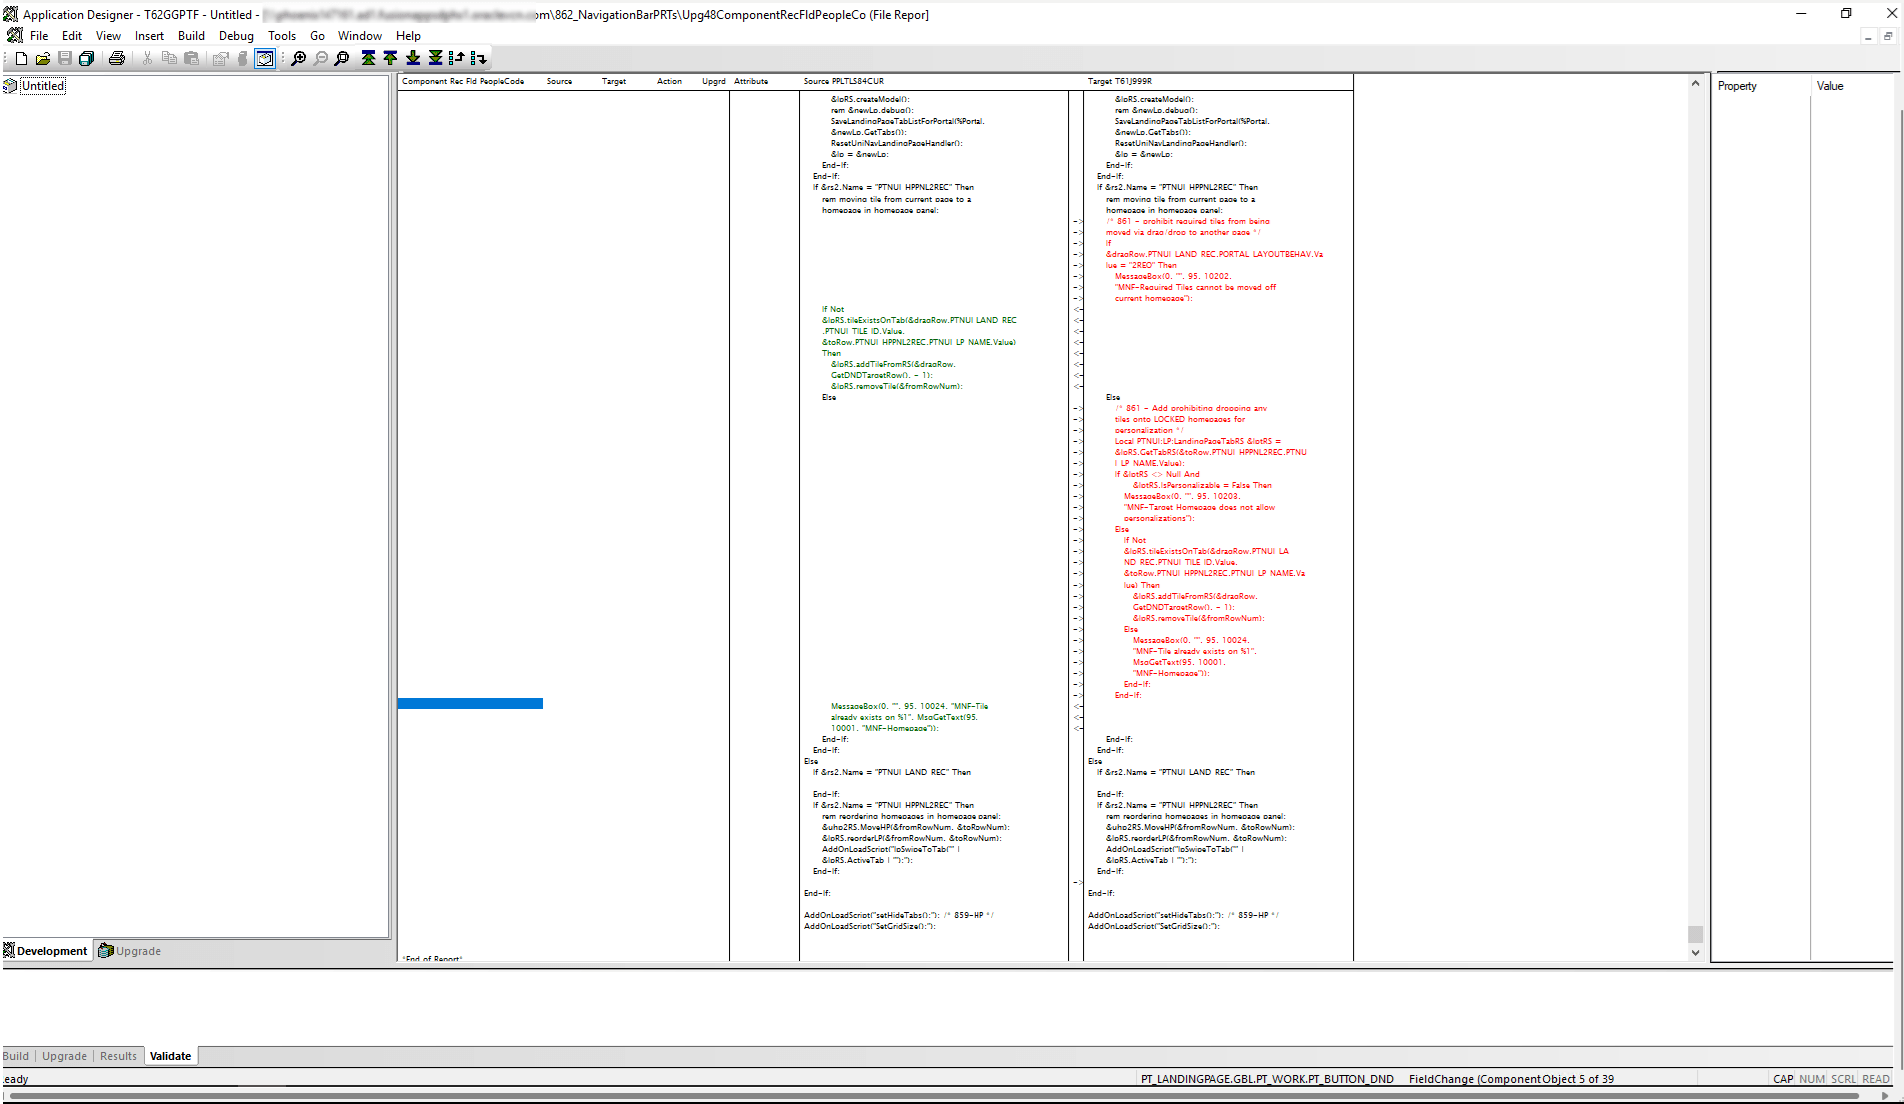
The system automatically displays a comparison report for each definition that you selected to be copied. If the current definition type has a PeopleSoft Application Designer based editor, you can double-click the definition name in the report to open it. If the comparison report is large, you can search for specific definition names.
For long compare reports, it is useful to perform a search to locate specific items. The Find in Report feature searches by column. To search for an object in a comparison report highlight or place your cursor in the column that you want to search and select
Use the different options to navigate through the differences and objects in a compare report. Especially in a larger compare report, finding the differences becomes easier with these options.
To open an existing compare report, select File> Report from File> View Report.
This example illustrates the fields and controls in Application Designer 's toolbar that is used to navigate through the compare report.
|
Field or Control |
Description |
|---|---|
 |
Displays the very first difference in the compare report. Keyboard shortcut is Alt + Home. |
 |
Displays the previous difference in the compare report. Keyboard shortcut is Alt + Up Arrow. |
 |
Displays the next difference in the compare report. Keyboard shortcut is Alt + Down Arrow. |
 |
Displays the last difference in the compare report. Keyboard shortcut is Alt + End. |
 |
Navigates to the previous object. On the status bar, the details of the object is displayed. Also, the count of current focused object and count of total number of objects are displayed. For example, object 5 of 39. Keyboard shortcut is Shift + Up. |
 |
Navigates to the next object. On the status bar the details of the object is displayed. Also, the count of current focused object and count of total number of objects are displayed. For example, object 6 of 39. Keyboard shortcut is Shift + Down. |
All the options listed above can be accessed through the View menu also.
Initially when the compare report is opened, the View First Difference, View Next Difference, and View Last Difference options are enabled if any differences are present in the report.
If there are no differences in the report, none of the options will be enabled.
Based on the option you have selected, some of the options get disabled or enabled. For example, when you are viewing the very first difference, the options View First Difference and View Previous Difference get disabled.
Printing the Comparison Report
This example illustrates the fields and controls on the Print preview comparison report.
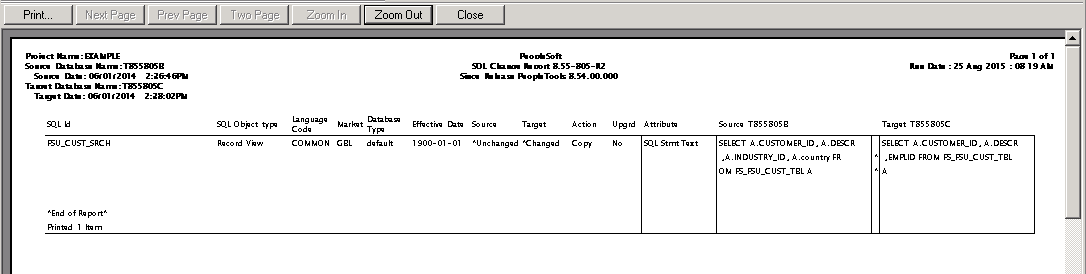
To print the comparison report select The standard Print dialog box appears, enabling you to select the printer, number of copies, and so on.
Printing a Comparison Report From a File
To print a comparison report from a file:
To print a saved comparison report, select
Select Print Preview, Print, or View Report.
These options require that you specify the report name and its location in a standard Open dialog box. View Reportdisplays the specified report in the project workspace.
Moving Print Files
You might want to move the comparison report files to another directory or send them as email attachments. Each comparison report file is saved as two files with the following format:
Upg<number>DefinitionType.prt
Upg<number>DefinitionType.idx
Both files (filename.prt and filename.idx) are required to view or print the report.
While the report is open in the workspace, you can save the workspace report as a text file. This enables you to import the report results into applications of your choice, such as Microsoft Excel.
To save the workspace report as a text file:
Select File, Save Report As.
On the Save Report As dialog box insert a file name into the File Name edit box, and select a file type from the Save as type drop-down list.
You can select Tab Delimited (.txt) or Comma Delimited (.csv).
Click Save.