Setting up OGL
Delivered JavaScript and PeopleCode definitions simplify configuration of Oracle Guided Learning on a PeopleSoft system.
To configure OGL on your PeopleSoft system, you will:
Implement OGL JavaScript.
Implement OGL PeopleCode.
(Optional) Add OGL to custom branding.
Configure the system and enable OGL.
Important! If you previously implemented OGL on a release prior to PeopleTools 8.62, see Considerations When Upgrading OGL from a Previous Release to disable your current configuration before proceeding.
To implement your OGL JavaScript, copy and modify sample HTML definitions delivered in PeopleTools.
There is one HTML definition for fluid and another for classic. In both definitions, you are required to set three items:
Your OGL appId.
The OGL environment type (dev or prod).
The player URL for your OGL domain.
Other custom JavaScript modifications—such as passing additional parameters—are optional.
To implement your OGL JavaScript:
In Application Designer, open the PT_OGL_FLUID_JS_SAMPLE HTML definition.
Save the definition with a new name—for example, MY_OGL_FLUID_JS.
In Application Designer, open the PT_OGL_CLASSIC_JS_SAMPLE HTML definition.
Save the definition with a new name—for example, MY_OGL_CLASSIC_JS.
In both versions of the JavaScript:
Remove the inline commenting and then the global beginning and end comments as instructed in the file.
Change the appId to the value provided to you by your OGL Administrator. The appId is a unique identifier for your provisioned OGL account.
Note: In a clustered environment, you may have a separate appId for each system in the cluster.
Set the env value to dev or prod as is appropriate for this PeopleSoft system.
This value determines the OGL content that will be displayed on this system. The dev setting displays all guides, including drafts and unpublished revisions; prod displays published content only.
Set the player URL to match the domain you use to access the OGL console and editor:
NAMER –
https://guidedlearning.oracle.com/player/latest/static/js/iridizeLoader.min.jsEMEA –
https://guidedlearning-emea.oracle.com/player/latest/static/js/iridizeLoader.min.jsAPAC –
https://guidedlearning-apac.oracle.com/player/latest/static/js/iridizeLoader.min.js
Review the variables being passed to the iridize API for use in guide activation settings and determine whether they are appropriate for your implementation. Match any changes to the bind variables being passed into the JavaScript via PeopleCode with updates to these variables.
Save your changes.
The following example shows the fluid JavaScript code configured for a production environment in the NAMER region:
setTimeout(function () {
top.iridize=top.iridize||function(e,t,n){return top.iridize.api.call(e,t,n);};
top.iridize.api=top.iridize.api||{q:[],call:function(e,t,n){top.iridize.api.q.push({method:e,data:t,callback:n});}};
/* Do not modify the code above this comment. */

/* Use the appId provided to you by your OGL administrator. */
top.iridize.appId="nnnnnnnnn";

/* Set to dev for development environments. Set to prod for published guides only. */
top.iridize.env="prod";

/* Bind variables passed in by PeopleCode */
top.userID = "%Bind(:1)";
top.roles = "%Bind(:2)";
top.show_guide = "%Bind(:3)";

/* Pass PeopleSoft data to the iridize API as required for guide activation conditions.
* user_id used internally by OGL and not available as an activation condition.
* user_roles demonstrates the availability of a subset of a user's PeopleSoft roles.
* show_welcome_msg demonstrates using a Boolean value as an activation condition. */
top.ir_fields = {user_id:userID,user_roles:roles,show_welcome_msg:show_guide};
top.iridize("api.fields.set", top.ir_fields);

/* Set the player URL for your OGL domain here. */
playerURL="https://guidedlearning.oracle.com/player/latest/static/js/iridizeLoader.min.js";
// playerURL="https://guidedlearning-emea.oracle.com/player/latest/static/js/iridizeLoader.min.js";
// playerURL="https://guidedlearning-apac.oracle.com/player/latest/static/js/iridizeLoader.min.js";

/* Do not modify the code below this comment. */
var e=top.document.createElement("script");
e.src=playerURL;
e.type="text/javascript";
e.async=true;
top.document.head.appendChild(e);
}, 0);To implement your OGL PeopleCode, copy and modify the sample PT_OGL_TEMPLATE application class delivered in PeopleTools.
To implement your OGL PeopleCode:
Create and save a new application package—for example, MY_OGL.
Add a new application class to the application package—for example, MY_OGL.
Open the delivered PT_OGL_HOOK application package. Open the sample PT_OGL_TEMPLATE application class within that package.
Copy the sample code and paste it into your new application class.
Make the following updates:
Change the class and constructor name to your new class name.
In the execute method, specify the name of your fluid JavaScript definition.
In the get_HTML method, specify the name of your classic JavaScript definition.
Remove the beginning and end comments.
Save and validate your PeopleCode program.
Optionally, review the custom activation conditions. If you require additional PeopleSoft data for activation conditions, match any updates to bind variables that you make in the PeopleCode with similar updates in both JavaScript definitions.
The following example shows an implementation of the MY_OGL:MY_OGL class with no additional bind variables.
import PT_RCF:ServiceInterface;

class MY_OGL implements PT_RCF:ServiceInterface
   method MY_OGL();
   method custom_activation_conditions();
   method execute();
   method get_HTML() Returns string;

private
   instance string &user_id;
   instance string &str_roles;
   instance boolean &show_welcome_msg;
end-class;

method MY_OGL
   %Super = create PT_RCF:ServiceInterface();
   &user_id = EscapeJavascriptString(%UserId);
   %This.custom_activation_conditions();
end-method;

method custom_activation_conditions
   /*
   rem Example code demonstrating passing a subset of the roles;
   rem Create a comma-delimited string of the user roles;
   &str_roles = "";
   Local array of string &roles = %Roles;
   Local integer &i;
   rem Truncate to 3 roles due to the 300-character limit of the iridize API;
   For &i = 1 To 3
      If &i = 1 Then
         &str_roles = &str_roles | EscapeJavascriptString(&roles [&i]);
      Else
         &str_roles = &str_roles | "," | EscapeJavascriptString(&roles [&i]);
      End-If;
   End-For;


   rem Example code demonstrating a boolean condition;
   rem Display the welcome message to specific users only;
   If &user_id = "CADAMS" Then
      &show_welcome_msg = True;
   End-If;
   */
end-method;

method execute
   /+ Extends/implements PT_RCF:ServiceInterface.execute +/

   /* Method to add JavaScript for fluid only. */
   /* When in a CI, do not execute this code. */
   If IsFluidMode(%Component, %Market) Then
      If %CompIntfcName = "" Then
         If %Request <> Null Then
            If Not (IsModeless() Or
                  IsGroupletRequest() Or
                  IsAGRequest() Or
                  IsMDRequest() Or
                  IsModalComponent()) Then

               AddOnLoadScript(GetHTMLText(HTML.MY_OGL_FLUID_JS, &user_id, &str_roles, &show_welcome_msg));
            End-If;
         End-If;
      End-If;
   End-If;
end-method;

method get_HTML
   /+ Returns String +/

   rem Method to add JavaScript for classic only;
   If %Request <> Null Then
      Return GetHTMLText(HTML.MY_OGL_CLASSIC_JS, &user_id, &str_roles, &show_welcome_msg);
   End-If;
end-method;
If you have custom branding and you are not upgrading OGL from a release prior to PeopleTools 8.62, then you must follow the procedure documented in this topic. If you have custom branding and you are upgrading OGL from a release prior to PeopleTools 8.62, see Considerations When Upgrading OGL from a Previous Release.
To operate on classic pages, the OGL JavaScript must be injected into a HTML element in the branding header definition.
To add OGL JavaScript to your custom branding:
Go to PeopleTools, Portal, Branding, Branding Headers and Footers.
Note: Access to the Branding Headers and Footers component requires the Secure Branding Administrator role.
Open your custom header definition.
Add a new child element of type Basic HTML to the pthdr2container element—for example, named PT_OGL_CL_JS.
In this example, the child element is named PT_OGL_CL_JS.
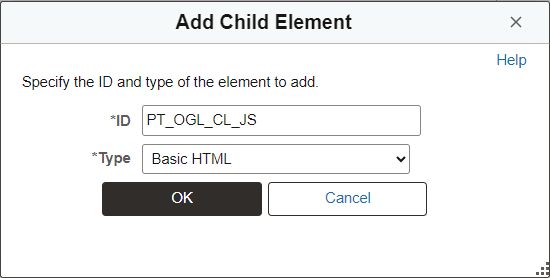
Click OK.
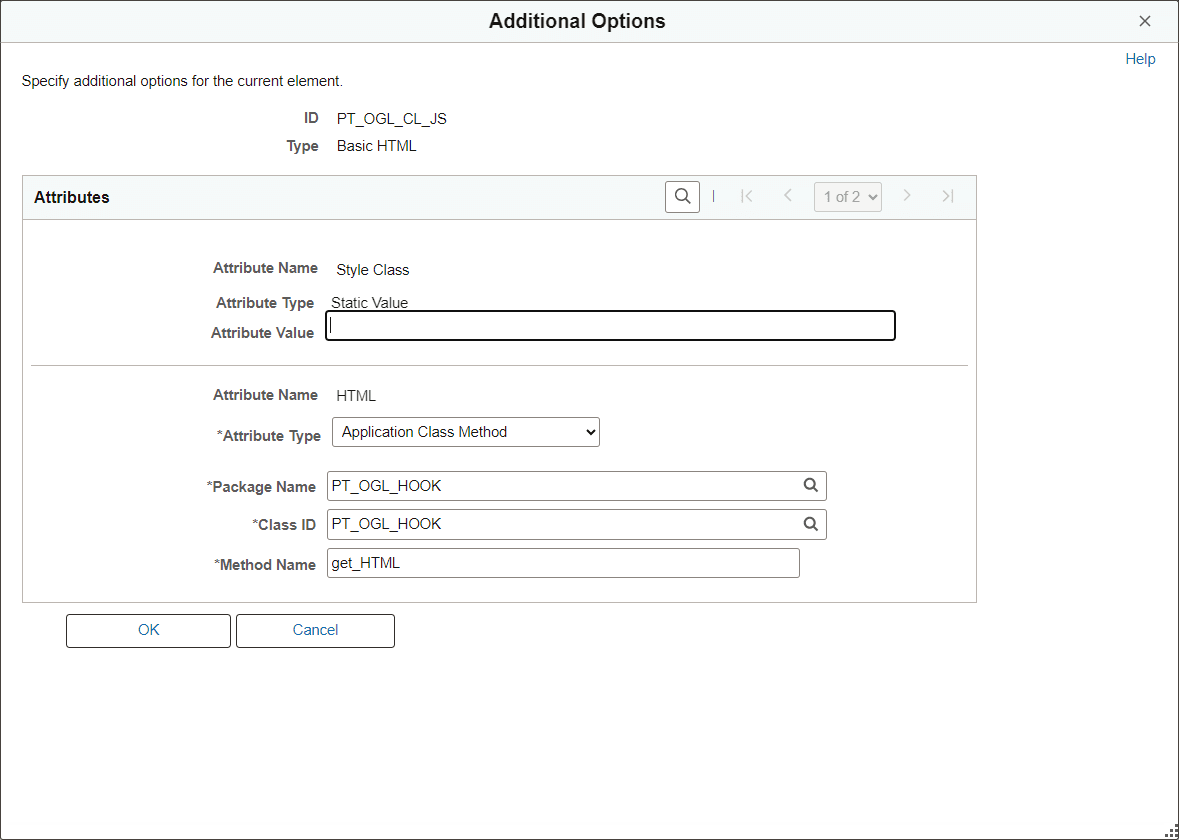
In the additional options for this HTML element, specify Application Class Method and then:
Field
Value
Package Name
PT_OGL_HOOK
Class ID
PT_OGL_HOOK
Method Name
get_HTML
In this example of the Additional Options page, the appropriate values have been specified for OGL configuration.
Save the changes to your custom header definition.
Sign out and sign back in for your changes to take effect. Then, complete the OGL configuration in the next topic.
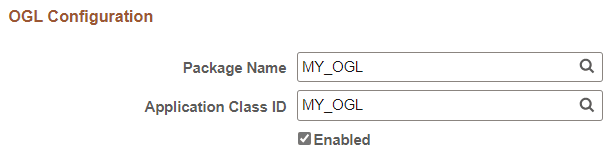
Use the OGL Configuration page to identify your custom OGL application class and to enable OGL system wide.
Navigation:
This example illustrates the fields and controls on the OGL Configuration page.
|
Field or Control |
Description |
|---|---|
|
Package Name |
Select the name of your OGL application package. |
|
Application Class ID |
Select the name of your OGL application class. |
|
Enabled |
Select this check box to enable OGL on this system. Note: To disable OGL, deselect this check box. |
To enable OGL:
Specify your custom application package and class.
Select the Enabled check box.
Click Save.
A message is displayed confirming that OGL has been enabled.
After you have configured and enabled OGL, test to ensure that is working on both classic and fluid pages:
Refresh the OGL configuration page to ensure that the OGL widget is now displayed on the page.
Navigate to a fluid page such as the homepage to ensure that the OGL widget is now displayed on that page.
Note: By default, the Help Center widget is not displayed when there are no guides to be displayed for the specified OGL appId. You can change this setting in the OGL Editor. Go to Settings, Help Panel.
OGL Editor help widget settings

For more information on moving the OGL widget, see Using OGL.