Using Work Management in the Billing WorkCenter
The PeopleSoft Fluid Billing WorkCenter can optionally use the Work Management Framework, which is an Enterprise Components feature.
This topic discusses how to setup up Work Management for the Billing WorkCenter and provides examples for addressing: Invoices Not Finalized.
The purpose of the Work Management Framework is to view and manage transactions when they appear in the My Work section of the WorkCenter.
It is important to understand the Work Management Framework from a high-level perspective before applying it to PeopleSoft Expenses. Please review Understanding the Work Management Framework prior to reading the following information.
The Work Management framework is designed for to assist someone who has the best knowledge of your organization's most current billing policies. This person handles billing exceptions or violations. In addition, this person has visibility to all billing activity across your organization.
Some examples of Billing exceptions where Work Management can be useful are:
There are invoices in New and Ready status that have not been finalized.
There are invoices that are finalized but pending items have not been created.
One or more people can work on Work Management transactions in your organization. If another user acts on a transaction, you can view the transactions assigned to that person by changing your view to All Assigned. This view displays all transactions regardless of who it is assigned to. Select the Exception History action and view the name in the User Name column to discover who is working on a transaction.
Follow these steps to setup the optional Work Management feature for the Billing WorkCenter:
Use the EOXC_USER role to access the Work Management setup pages.
Access the Work Management Link ID's Page.
Search for the corresponding Link ID (component ID) for each type of transaction where you want to use the Work Management feature.
Some examples of Billing transactions and their corresponding Link ID are:
Link ID
Description
BI_ADJ_WITHVOUCHER
Credit Invoices with AP Vouchers
BI_BILLS_ENTERED_TODAY
Invoices Entered Today
BI_BILLS_MY_APPROVAL
Invoices Pending My Approval
BI_BILLS_NOT_INVOICED
Invoices Not Finalized
Select the View button to access the Enable Work Management Exception Page.
Select the Enable option to activate the Work Management feature for that transaction.
Follow instructions in the Enterprise Components documentation for the Enable Work Management Exception Page to complete your setup.
Use the Billing Specialist and Billing Analyst role to access the Billing WorkCenter.
This has not changed with the Work Management feature.
|
Page Name |
Definition Name |
Usage |
|---|---|---|
|
NA |
Access and manage outstanding transactions in various views. |
Use the Billing WorkCenter page when Work Management is enabled to access and manage outstanding transactions in various views.
Navigation:
Access the Fluid Billing WorkCenter, select a transaction such as Invoices Not Finalized from the My Work section.
This example illustrates the fields and controls on the Billing WorkCenter - Invoices Not Finalized page when Work Management Enabled
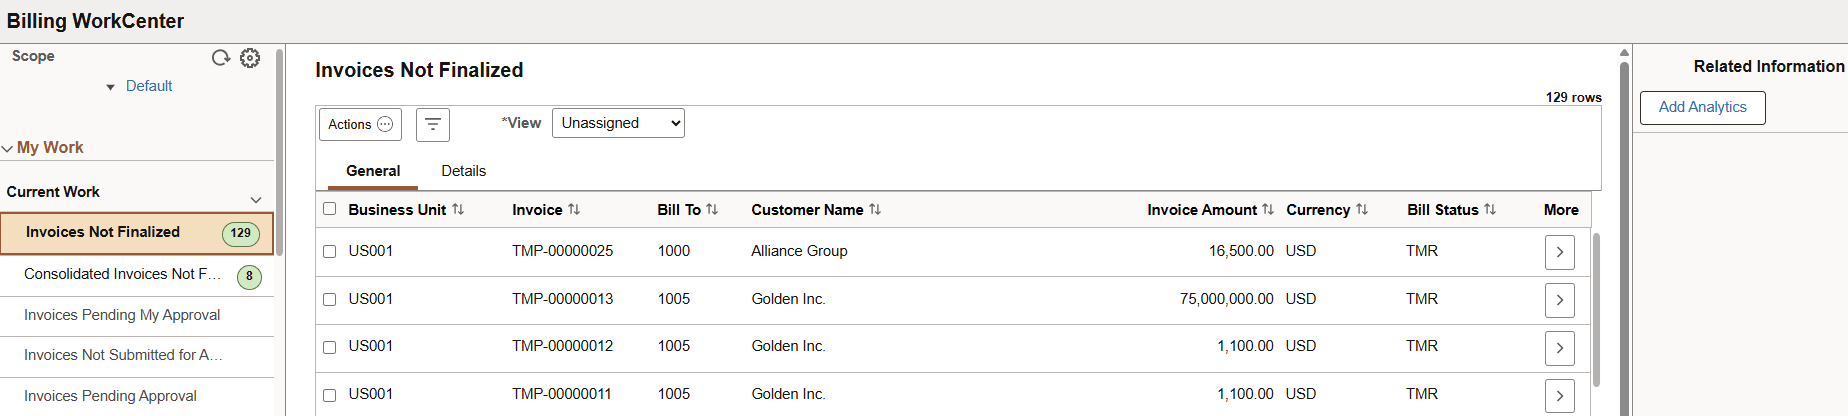
When Work Management is enabled for an exception, there are two changes on the WorkCenter page:
The View drop-down box appears above the grid.
Additional action options are added to the Actions button.
The original action options remain. The additional (Work Management) action options depend on the View option selected.
When Work Management is enabled, additional actions are available depending on the option selected in the View field: See Understanding the Work Management Framework, Actions by View section.
The following example explains how you might approach a long list of transactions that appear when you select Recent Invoices.
Your first step might be to inactivate invoices that are created in error and do not need to be worked on. For example, you notice that four invoices that match this description.
To do this:
Select the Update Selected Rows icon.
Select the check box for the four invoices.
Select the Actions icon from the Unassigned view.
Select Mark as Inactive.
In the Exception Comments window, enter text to indicate why you are inactivating the exception, such as, "Invoice created in error."
Select Done.
When you change the View to Inactive, you see this exception.
There are five transactions that you want to assign to yourself because you have been conversing with the customers.
To do this:
Select the Update Selected Rows icon.
Select the check box for the five rows.
Select the Actions button.
Select Assign to me.
In the Exception Comments window, verify the Follow Up Date, which defaults from the Work Management page.
Enter a comment that describes your action, such as, Working with customer and will follow up in 7 days.
Select Done.
Click OK to the verification message.
These transactions are removed from the Unassigned view and appear in the Assigned to Me view until the follow up date is reached. When the follow up date is reached, the system moves the transactions back to the Unassigned view.
You now want to work on the five Recent Invoices that are assigned to you. You determine that four of the five invoices can proceed to the finalize and print process.
To do this:
Select the Assigned to Me view.
Select the Update Selected Rows icon.
Select the 4 invoices that should move to the Finalize and Print process.
Select the Actions button.
Select Finalize and Print.
These transactions are removed from the Assigned to Me view.