Setting Up and Personalizing PeopleSoft Fluid WorkCenters
This section discusses the user level personalization options available in PeopleSoft Fluid WorkCenters.
|
Page Name |
Definition Name |
Usage |
|---|---|---|
|
FSPC_ADMIN_MAIN |
Define configuration IDs for Classic WorkCenters and Dashboards, and Fluid WorkCenters. |
|
|
FSPC_ADMIN_MYWORK |
Set up My Work links for end users. |
|
|
EOWC_PERSONAL_FL |
Personalize the display options for the group boxes in the WorkCenter. |
|
|
EOWC_EDITVIEWLK_FL |
Change scope detail options for collapsible sections in the My Work group box. |
|
|
EOWC_EDITVIEWVA_FL |
Modify filter values for your link. |
|
|
EOWC_EDITVIEWBY_FL |
Personalize scope for the WorkCenter based on their specific requirements. |
|
|
EOWC_EDITVIEWN_SCF |
Create new scopes. |
|
|
EOWC_EDITVIEWVA_FL |
Select one or more criteria to narrow the search result. |
|
|
HWC_CONFIG_SCF |
Modify the position of columns and to select the columns to be displayed as default for each work item. |
Most WorkCenters have a similar look and are configured the same. Some icons are developed in PeopleTools and appear on WorkCenter pages.
|
Field or Control |
Description |
|---|---|
|
Scope |
Click the Scope drop down to change your scope option. Only users who have been given permission to access the Scope field have access to this drop down option. Use the Configure Pagelets - My Work Page. Enable the Scope check box to grant access to this field. |
|
(personalize) |
Click the Personalize icon to access these options:
|
|
(filter) |
Select to access the Refine Filter Criteria Page where you
can select filter values for the list of results.
Note: This option is only available when the Scope field is not enabled for the user. |
|
(personalized output) |
Select to modify the display settings for the grid on the Personalized Output Page. |
|
(show all columns) |
Select to display all grid columns, including the ones that are set not to be displayed in the personalized grid setting. It appears after the Display on Default View option of a column is updated on the Personalized Output Page. |
|
(back to default view) |
Select to display the grid based on the personalized grid setting on the Personalized Output Page. It appears after the Show All Columns icon is selected. |
|
(download to excel) |
Select to load the grid information to a spreadsheet. |
|
(related actions) |
Select an action to apply to the selected rows. Actions are specific to the selected section or exception. Action options for each user can be different based on their privileges. |
|
(sort) |
Select to access a modal window that lists all column headings. You can sort the entire grid on a column heading and optionally save that sort option as your default. |


Use the Personalize page (EOWC_PERSONAL_FL) to personalize your display options for the group boxes in fluid WorkCenter.
Navigation:
Select your WorkCenter tile (Fluid). Click the Personalize icon on the left panel and then select the Personalize option.
This example illustrates the fields and controls on the Personalize page.
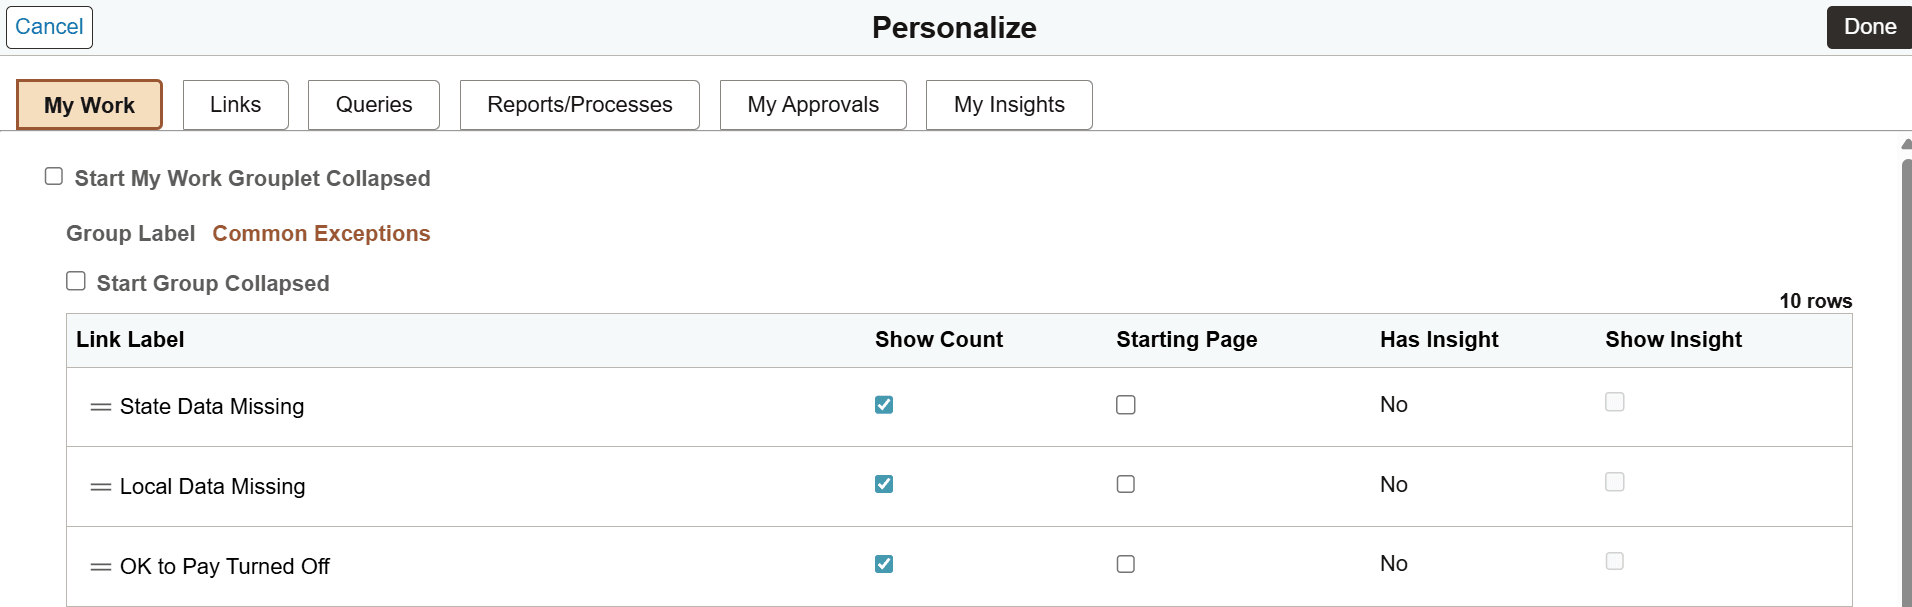
The configured group boxes are displayed as tabs. As a user you can personalize each group box based on your requirement.
|
Field or Control |
Description |
|---|---|
|
Start [tab name] Grouplet Collapsed |
Select this check box to have the corresponding group box (name shown on the tab) display as collapsed initially when you access the WorkCenter. By default, this check box is unchecked. |
|
Start Group Collapsed |
Select this check box to have the corresponding group (name shown in the Group Label field) of the group box display as collapsed initially when you access the WorkCenter. By default, this check box is unchecked. |
|
Show Count |
Select this check box for the links for which you want the system to generate to show count indicators. By default, this check box is selected. |
|
Starting Page |
Select this check box for the corresponding link to display as the start page on the right panel. |
|
Has Insight |
Displays Yes if the Has Insight field is selected for the corresponding link on the Configure Pagelets - My Work Page, which means that the link is set up to display an embedded insights dashboard. Displays No if the Has Insight field is cleared on the Configure Pagelets - My Work page. |
|
Show Insight |
Select this check box to display the embedded insights dashboard, followed by the data grid, when you select the link in the WorkCenter. Clear this check box to not display the insights dashboard. Only the data grid is shown when you select the link in the WorkCenter. |
For more information on adding links to group boxes, see Configuring Pagelets.
Use the Maintain Scope Detail page (EOWC_EDITVIEWLK_FL) to change scope detail options for collapsible sections in the My Work group box.
Navigation:
Select your WorkCenter tile (Fluid). Click the Personalize icon on the left panel and then select the Maintain Scope Detail option.
This example illustrates the fields and controls on the Maintain Scope Detail page.
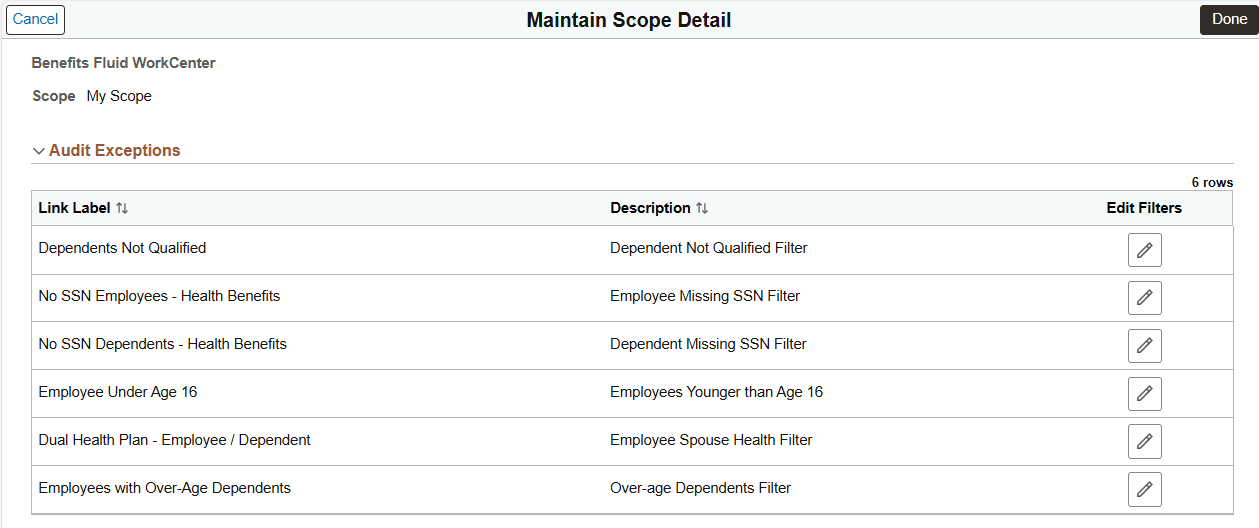
Note: This page is only available when the user has access to the Scope field.
|
Field or Control |
Description |
|---|---|
|
Edit Filters |
Select to modify filter values for the corresponding link on the Configure Scope Values Page. |
Use the Configure Scope Values page (EOWC_EDITVIEWVA_FL) to modify filter values for your link.
Navigation:
Select the Edit Filters button on the Maintain Scope Detail page.
This example illustrates the fields and controls on the Maintain Scope Detail page.
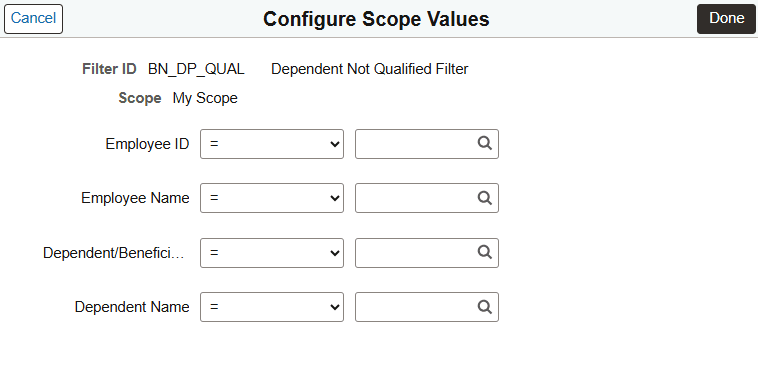
When you access a link in the My Work group box of a WorkCenter, the system displays data based on the filter values you set up on this page for that link.
Use the Configure Scope page (EOWC_EDITVIEWBY_FL) to define personalized scope for the WorkCenter based on the specific requirements.
Navigation:
Select your WorkCenter tile (Fluid). Click the Personalize icon on the left panel and select the Configure Scope option.
This example illustrates the Configure Scope page.
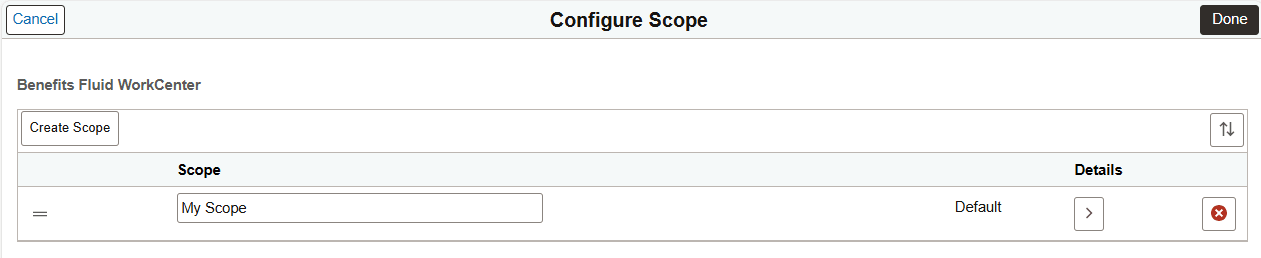
This page lists the available scopes for the WorkCenter. You can view details of the existing scopes, delete and create new scopes. Use the Details icon to view or manage scope details on the Maintain Scope Detail Page.
To create a new scope, click the Create Scope button.
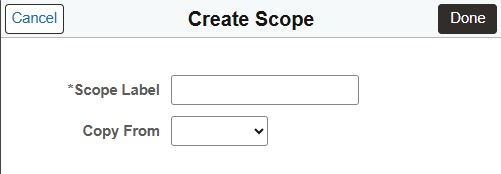
Use the Create Scope modal page (EOWC_EDITVIEWN_SCF) to create new scopes.
Navigation:
Select the Create Scope button on the Configure Scope page.
This example illustrates the Create Scope page.
|
Field or Control |
Description |
|---|---|
|
Scope Label |
Enter a name for the new scope. |
|
Copy From |
You can copy the properties of an existing scope by selecting the required scope from the list. |
Use the Refine Filter Criteria page (EOWC_EDITVIEWVA_FL) to select one or more criteria to narrow the search result. The Filter icon appears green when filters have been applied to your search.
Navigation:
Select your WorkCenter tile (Fluid). Click the Filter icon on the right panel.
This example illustrates the Refine Filter Criteria page.
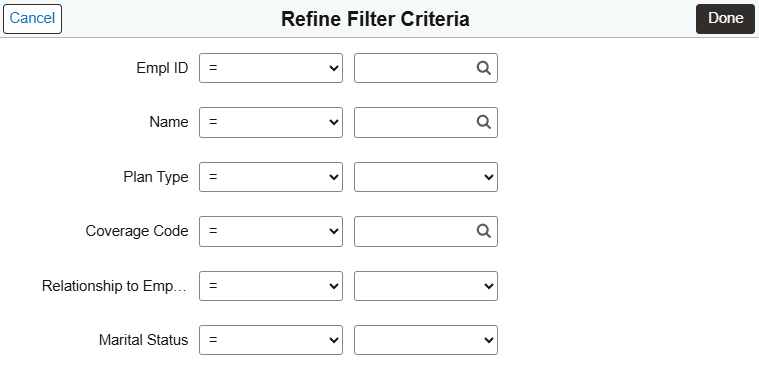
Note: Filters are not applicable for the left panel. The count displayed on the left panel remains the same irrespective of the filter applied.
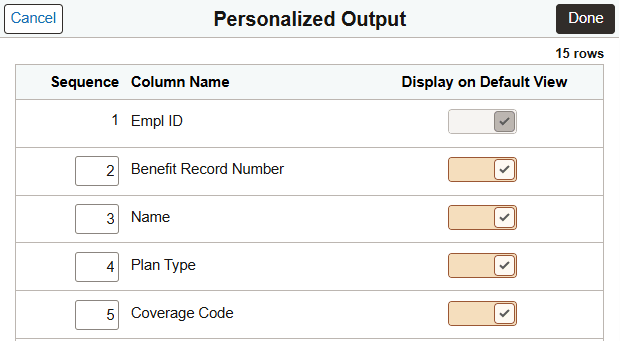
Use the Personalized Output page (HWC_CONFIG_SCF) to modify the position of columns and to select the columns to be displayed as default for each work item. This feature provides user the flexibility to personalize the columns and order of columns in right panel.
Navigation:
Select your WorkCenter tile (Fluid). Click the Personalized Output icon on the right panel.
This example illustrates the Personalized Output page.