Setting Up Geo Fencing for Time Entry
You can configure geo-fencing in PeopleSoft Time and Labor, which allows organizations to restrict employee time entry based on physical location. Geo fencing establishes a virtual boundary around worksites or other specified sites, requiring employees to be within a designated area to clock their time. This enhances time tracking accuracy and compliance.
Administrators can configure geofences by:
Defining allowed addresses or geo-coordinates for the allowed location, for example worksite.
Establishing a tolerance range (the allowable distance from the defined location in meters).
Specify the actions to be taken in case of a violation.
Associating the geofence with the appropriate group of employees (workgroups).
Enabling Geo Fencing
To enable geo fencing, perform the following:
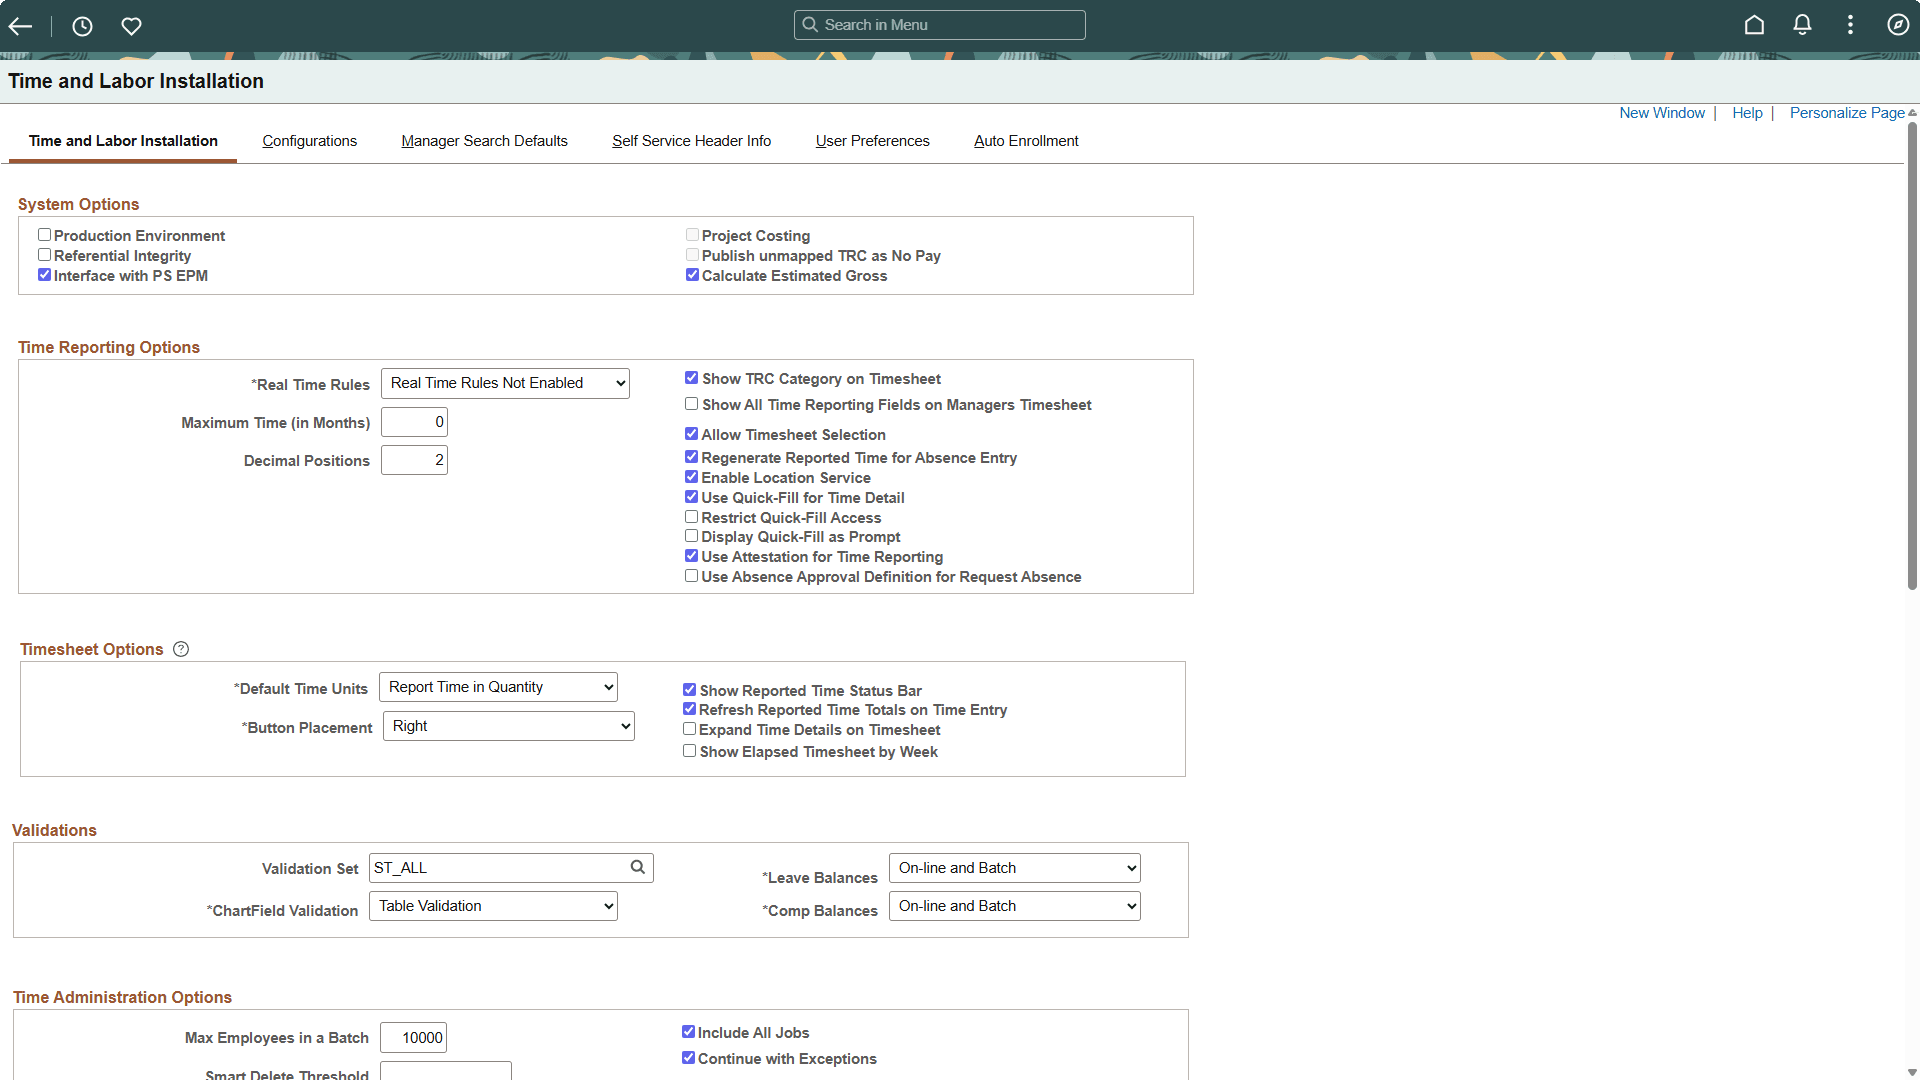
Navigate to the Time and Labor Installation page.
Ensure the Enable Location Service check box under Time Reporting Options section is selected.
Ensure the Enable Geo Fencing check box under Geo Fence Configuration section in Time and Labor Configurations tab is selected.
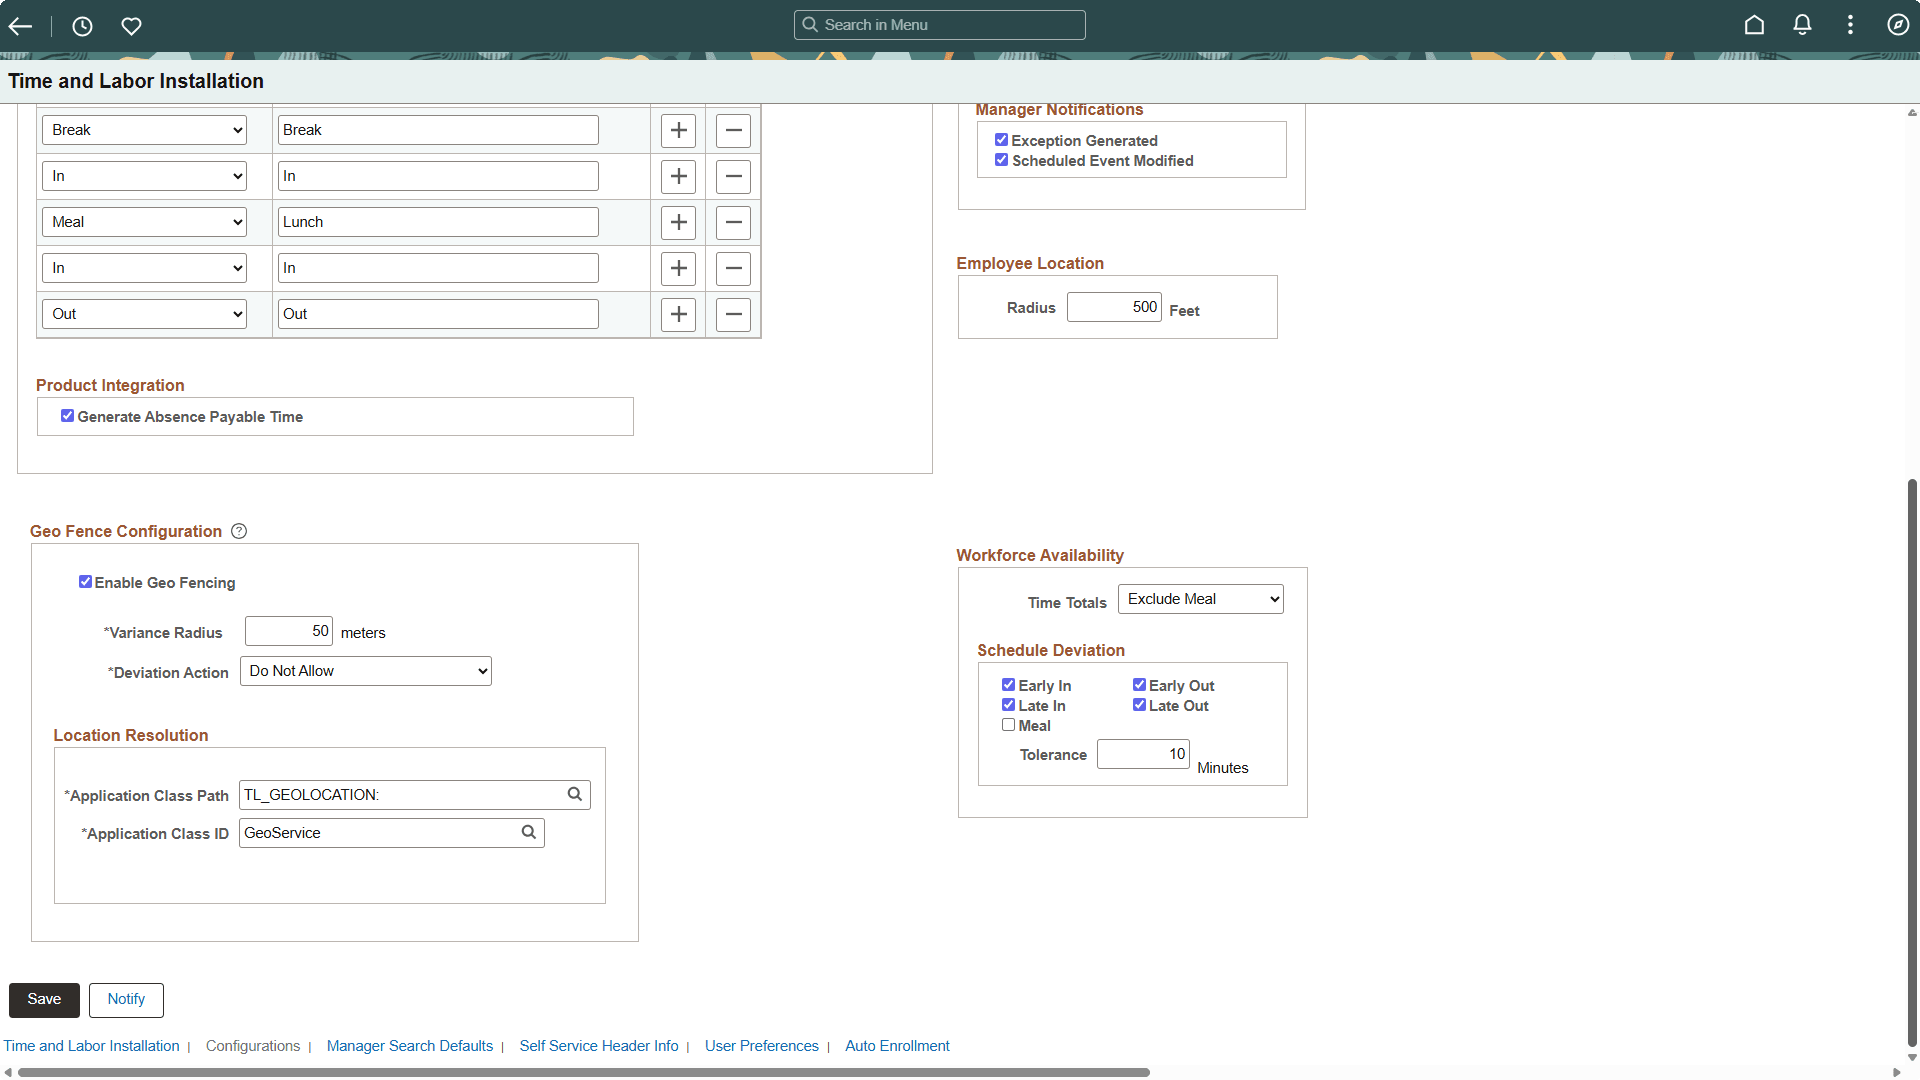
After enabling geo fencing, configure the following options:
Variance Radius
Deviation Action
Location Resolution
For details on time and labor installation settings, see Setting Up System Defaults and Loading Dates.
You can define geo fencing overrides for specific workgroups. If you want to tailor the geo-fencing setup for specific groups, you can use the Overrides page to define workgroup-specific configurations. For workgroups that are not defined on the Overrides page, the installation-level setup settings will apply.
|
Page Name |
Definition Name |
Usage |
|---|---|---|
|
TL_MNG_GEO_OVRD_FL |
Enables administrators to set geo fence overrides for specific workgroups. |
The Manage Geo Fence Locations page lets you set geo fence overrides for specific workgroups. These overrides take priority over installation settings.
Navigation:
This example illustrates the Manage Geo Fence Overrides page.
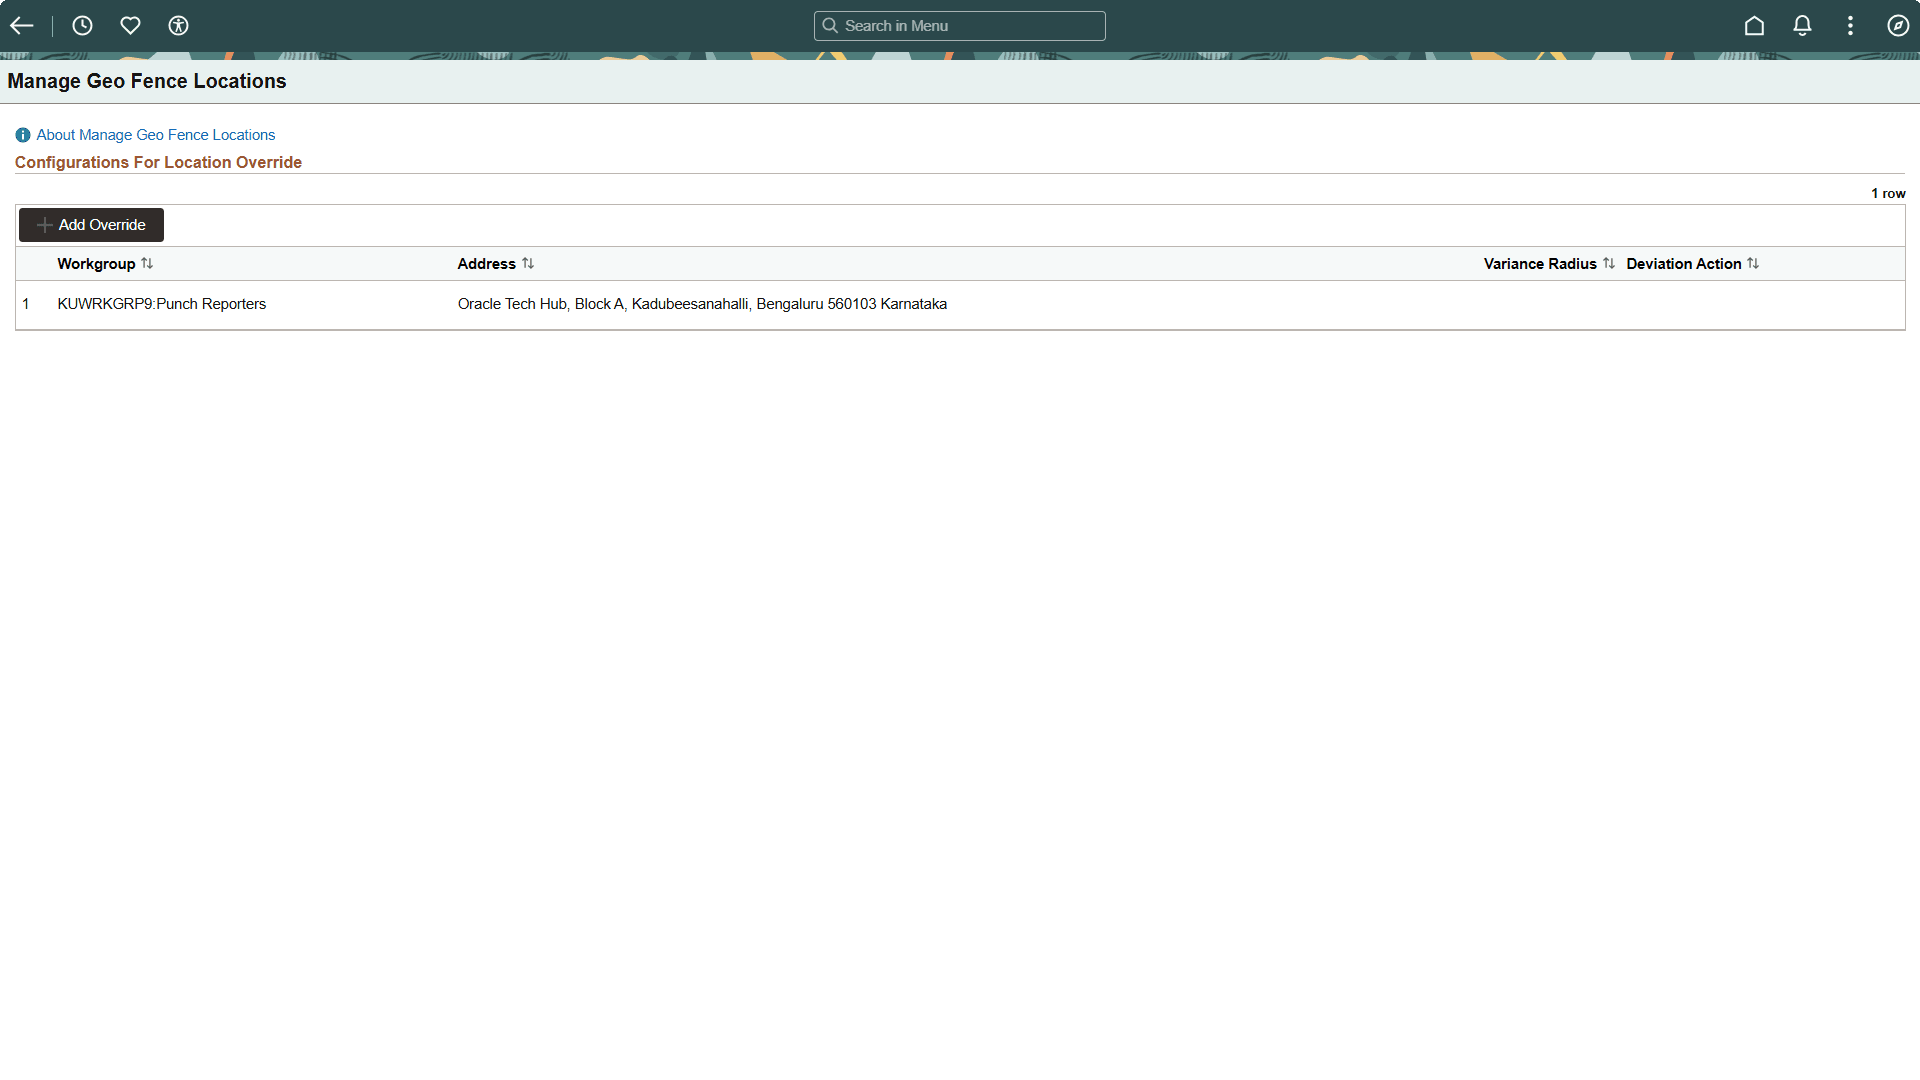
To add location overrides, click the Add Override button. This displays the Override Details modal.
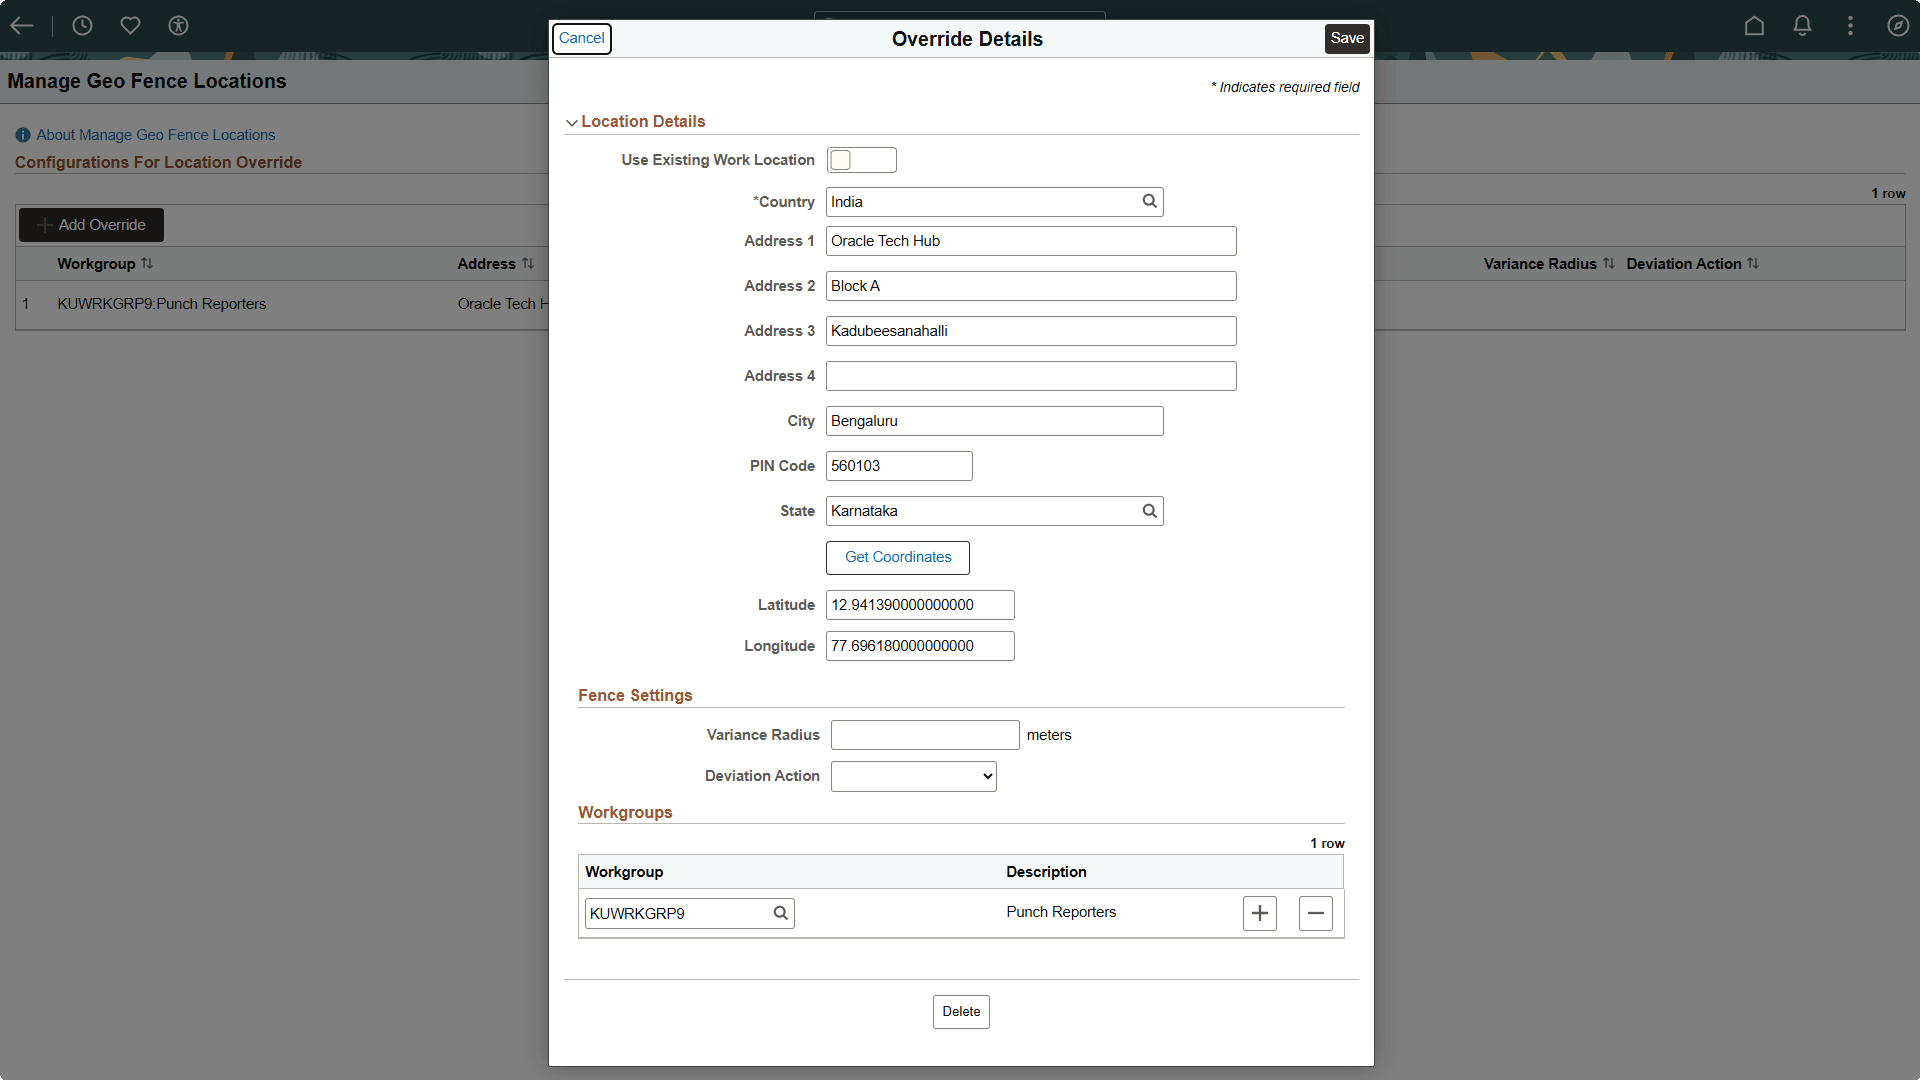
Override Details Modal
You can define a geo fence location override for a workgroup by specifying an address or directly entering latitude and longitude coordinates. Overrides allow different workgroups to have customized geo fencing policies according to business needs.
Note: Workgroup overrides take precedence over the global installation settings.
Override Details Modal
|
Field or Control |
Description |
|---|---|
|
Use Existing Work Location |
Selecting this option lets you choose a predefined location instead of manually entering location details. |
|
Address fields |
The fields are displayed as per the HR Address Setup. For details on address fields, see Specifying Address Formats. |
|
Get Coordinates |
Click the Get Coordinates button to get latitude and longitude. Alternatively, you can manually enter the location coordinates. Note: Coordinates are required. |
|
Latitude |
|
|
Longitude |
|
|
Variance Radius |
Enter the number of meters the employee can be from the work location. Leave blank to require employees to be exactly at the specified location. |
|
Deviation Action |
Specify the deviation action whether to allow the time reporter to proceed with the punch (generating an exception) or to refuse the punch. |
|
Workgroup |
Select one or more Workgroups to which these overrides must be applied. |
To establish an override, you must specify at least one of the following for the workgroup: a location (address or coordinates), a deviation action, or a variance radius. Any override defined for a workgroup takes precedence over the general installation settings and remote worker configurations. This ensures the selected workgroup adheres to the custom geo fencing rules you have specified.
Note: For any fields left blank, the system uses the installation-level settings.