Setting Up and Administering Quick Keys
To set up and administer quick keys, use the Category (RB_TT_CATEGORY) and Public Quick Keys (RB_TT_QKEYS) components.
This section lists a prerequisite and discusses how to create quick key categories.
|
Page Name |
Definition Name |
Usage |
|---|---|---|
|
RB_TT_CATEGORY |
Create and manage categories for text tray entries. |
|
|
RB_TT_QKEYS |
Define system-level settings for text trays and manage public quick keys. |
|
|
RB_TT_SELECT_TERM |
Map term aliases to terms for dynamic quick keys. |
To create a dynamic text tray entry (one that incorporates a variable that gets resolved when applied), you must first create the variable as a term in the Active Analytics Framework.
See Understanding AAF.
Use the Category page (RB_TT_CATEGORY) to create and manage categories for text tray entries.
Navigation
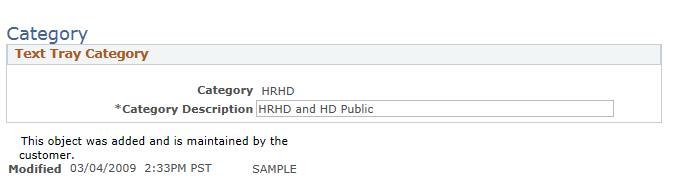
Image: Category page
This example illustrates the fields and controls on the Category page.
|
Field or Control |
Definition |
|---|---|
| Category Description |
Category descriptions appear with each entry in a user's text tray and as a value in the Filter by Category drop-down list box on the pages for creating public quick keys and for selecting public quick keys to add to an individual text tray. |
Note: PeopleSoft delivers a category called Personal that is automatically assigned to all private text tray entries.
Use the Public Quick Keys page (RB_TT_QKEYS) to define system-level settings for text trays and manage public quick keys.
Navigation
Image: Public Quick Keys page (1 of 2)
This example illustrates the fields and controls on the Public Quick Keys page (1 of 2).
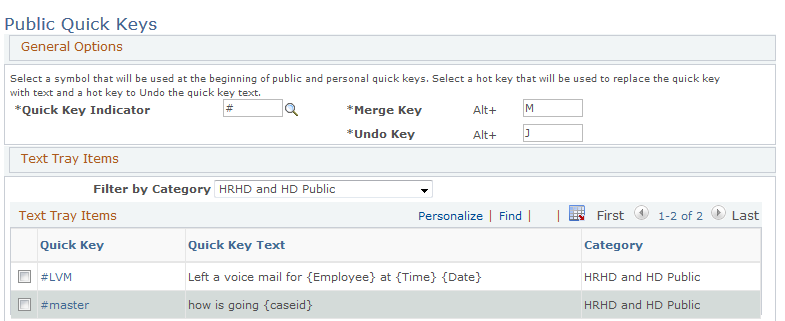
Image: Public Quick Keys page (2 of 2)
This example illustrates the fields and controls on the Public Quick Keys page (2 of 2).
General Options
|
Field or Control |
Definition |
|---|---|
| Quick Key Indicator |
Enter one of these symbols to indicate the beginning of a quick key: # (the delivered value), ##, or @. Users include this symbol at the beginning of a quick key word when they type quick keys directly into a field. Because quick key words might appear coincidentally in the field, the use of this symbol enables the system to distinguish when the word is intended as a quick key. To indicate the end of the quick key, use one of these characters: space, carriage return, question mark. semicolon, exclamation point, or comma. |
| Merge Key and Undo Key |
Enter a single character that, when used with the Alt key, will be the hot key to trigger a text tray-specific action. The Merge Key triggers the replacement of a quick key with the static or dynamic text that it represents. The delivered value is M. The Undo Key reverses a merge. This is not an all-purpose undo key for data entry. The delivered value is J. Note: Use the Undo key to reverse or delete the last text that you entered using a quick key. If you used quick keys three times to merge information into the Case Notes field, the Undo key will only undo the last of the three, not all three. The other delivered text tray-related hot key is Alt-T, which invokes the text tray for use on a text tray-enabled page. This is associated with the Text Tray toolbar button and is configurable through the toolbar definition, except that when it is used in a rich text editor interface, in which case the Alt-T combination is hardcoded and cannot change. See Understanding the Configurable Toolbar. Important! The components that support the text tray already have hot keys for component-specific toolbar buttons and for navigation within the component. You should use text tray hot keys that are not already in use in those components to avoid conflicts with other applications on your system, and PeopleSoft recommends using the delivered values. |
Text Tray Items
|
Field or Control |
Definition |
|---|---|
| Filter by Category |
Select a quick key category to make the Text Tray Items grid display only quick keys in the selected category, or select All to display all public quick keys. The descriptions of all text tray categories that you create appear in the drop-down list box, but the delivered Private category does not appear because private quick keys never appear on this page. |
| Text Tray Items |
This grid lists the public quick keys that meet the filter criteria. The value in the Quick Key column includes the prefix that you selected as the quick key indicator and is a link that you can click to view the details for the quick key. The value in the Quick Key Text column will be truncated if the text is too long to display; the full text is visible only in the quick key details. Use the check box at the left of the row to select text tray items for deletion. |
| Add Quick Key |
Click to display a blank form in the Quick Key Details group box, and then use the blank form to enter information for a new quick key. |
| Delete |
Click to delete the text tray items that you selected in the Text Tray Items grid. |
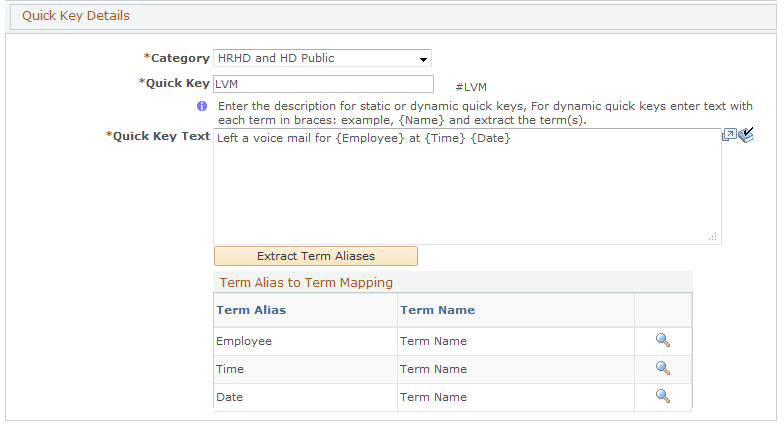
Quick Key Details
|
Field or Control |
Definition |
|---|---|
| Category |
Select a category for the quick key. You can select any category that you create, but not the Private category, which is reserved for private quick keys. |
| Quick Key |
Enter the quick key that represents the text tray entry. The read-only text next to the entry field shows the quick key prefixed with the indicator symbol. Quick keys are case-sensitive. Note: Spaces are not allowed within a quick key since they are used to identify the end of a quick key. |
| Quick Key Text |
Enter the full text for the text tray entry. You can enter static text or you can include tokens that will be dynamically resolved at runtime. To create a token, place curly brackets around a word that represents the token. For example, in the text I am contacting you regarding {Case_ID}, the text Case_ID is treated as a token. You can use this token multiple times in this text tray entry, but token definitions are not shared between text tray entries. You cannot use these symbols in the Quick Key Text field:
This also applies to token text. The system prevents users from entering these characters by displaying an error message. |
| Extract Term Aliases |
If you have added or removed tokens in your quick key text, click this button to display the Term Aliases to Term Mapping grid with a current list of the tokens for this quick key entry. |
Term Aliases to Term Mapping and Term Configuration
|
Field or Control |
Definition |
|---|---|
| Term Alias |
When you click the Extract Term Aliases button, the system populates this column with one entry for each token in the quick key text. |
| Term Name |
If you have already selected the term that is used to resolve the token at runtime, the term name appears here. If this column is blank, you need to click the Get Term button to select a term. |
 |
Click the Get Term button to access the Text Tray - Select Context page, where you select the term that is used to resolve the token. |
Configure Term and Enter Configuration Values
Sometimes terms require additional configuration. For example, to configure the delivered term Current Date Plus <n> Days, you need to specify the number of days to add to the current date. When a term requires additional configuration, use these fields to complete the configuration.
|
Field or Control |
Definition |
|---|---|
| Display |
Displays the term name, but substitutes the values that you enter for any variables in the term name. |
| Enter Configuration Values |
This grid lists any parameters that you need to define and provides data entry fields where you assign a value to each parameter. Click the Done button to save the values that you enter. |
Use the Text Tray - Select Context page (RB_TT_SELECT_TERM) to map term aliases to terms for dynamic quick keys.
Navigation
Click the Get Term button in the Term Aliases to Term Mapping grid on the Public Quick Keys page.
This grid appears only if the Quick Key Text field includes tokens and you have clicked the Extract Term Aliases button.
Image: Text Tray - Select Context page (1 of 2)
This example illustrates the fields and controls on the Text Tray - Select Context page (1 of 2).
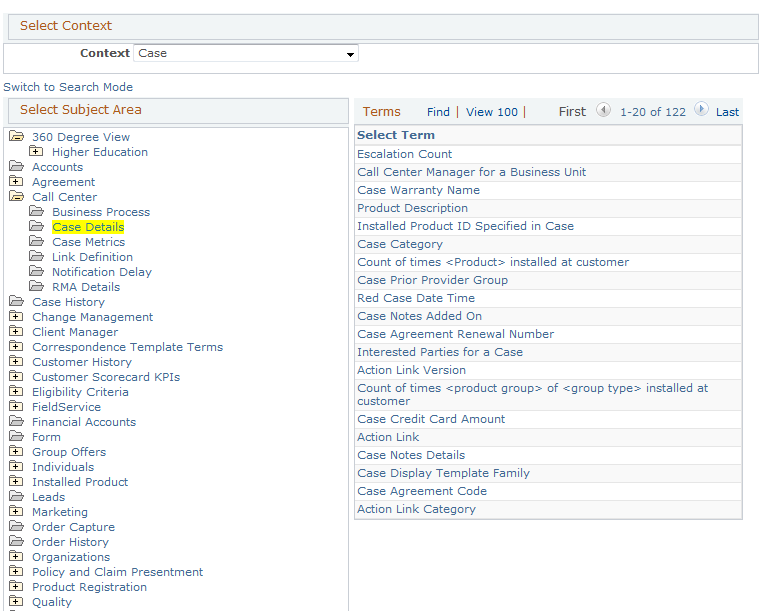
Image: Text Tray - Select Context page (2 of 2)
This example illustrates the fields and controls on the Text Tray - Select Context page (2 of 2).
|
Field or Control |
Definition |
|---|---|
| Context |
Select Case as the context of the term to use. Case is the only text tray-enabled context that supports AAF terms. After you select Case, the term selection interface appears on the page. This is the standard term selection interface that is described in the AAF documentation. |