Setting Up Automatic Case Creation
We deliver the CRM system with the automatic case creation facility disabled. To enable the automatic creation of cases in CRM when a person updates his or her personal or job data in HCM, follow the steps below:
Configure the default HCM source value that you should populate in the cases.
Set up the Integration Broker to execute the Create Case and Quick Code EIPs.
Publish the quick codes from CRM to HCM using EIPs for an initial full synchronization.
-
Enable the Enable Runtime option on the Install Options page of the AAF setup in the HCM system.
Configure AAF policies that decide when you need to initiate automatic case creation.
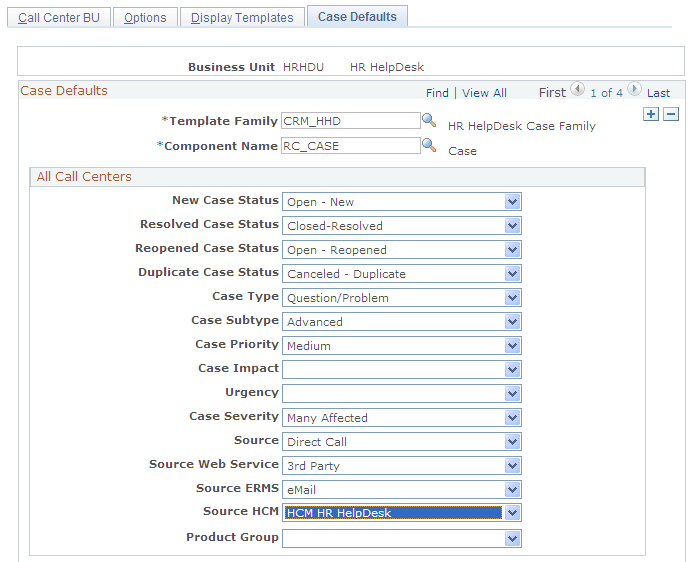
Use the Case Defaults page to configure a default case source for the business unit for which you want to enable the automatic case creation.
For example, if you are enabling automatic case creation for the business unit HRHDU, edit the record for HRHDU business unit to set the value of Source HCM field to HCM HR HelpDesk
Navigation
Image: Case Defaults page
This example illustrates the fields and controls on the Case Defaults page. You can find definitions for the fields and controls later on this page.
Follow the steps below to set up the Integration Broker for automatic case creation:
Edit the CASE_EIP queue to set the Queue Status to Run in both HCM and CRM systems.
Check if the Domain Status is set to Active in HCM and CRM systems.
In HCM, check the following settings against the remote node PS CRM - Local Node:
If PSFT_CR is not the PS CRM local node in the system, rename the PSFT_CR node to match the name of the existing CRM local node.
In the Authentication Option field, select Password. Also ensure that the node password is the same as the one used in the local node. E.g.: PSOFT.
In the Default User ID field, select the HRHD Administrator role.
In HCM, check the following settings against the local node in the system:
In the Authentication Option field, select Password.
Make sure that the node password is the same as the one used in the remote node. E.g.: PSOFT.
In HCM, add the remote node (the CRM node) to the LOCAL gateway and make sure that you are able to ping the node successfully. Repeat this step in CRM to add the remote node (the HCM node) to the LOCAL gateway, and ping the node.
In CRM, check the following settings against the remote node PS HRMS - Local Node:
If PSFT_HR is not the PS HRMS local node in the system, rename the PSFT_HR node to match the name of the existing HCM local node.
In the Authentication Option field, select Password. Also ensure that the node password is the same as the one used in the local node. E.g.: PSOFT.
In the Default User ID field, select the HRHD Self Service role.
In CRM, check the following settings against the local node in the system:
In the Authentication Optionfield, select Password.
Make sure that the node password is the same as the one used in the remote node. E.g.: PSOFT.
Note: To read more about the Integration Broker setup, see the product documentation for PeopleTools: Integration Broker andPeopleTools: Integration Broker Administration.
To publish quick codes from CRM to HCM for automatic case creation, system uses two asynchronous one-way EIPs:
HD_QUICK_CODE_FULLSYNC: You need to Invoke the publish process in the Full Data Publish utility of Enterprise Components for initial full synchronization.
HD_QUICK_CODE_SYNC: The incremental synchronization is published automatically when a Quick Code is added or modified.
Ideally, during the initial setup, you need to use the full synchronization EIP(HD_QUICK_CODE_FULLSYNC) to export all CRM quick codes to the HCM system. Once you export all quick codes, turn off this EIP. Later on, whenever you want to export the newly created or modified quick codes, use the incremental synchronization EIP(HD_QUICK_CODE_SYN). If you think the codes are corrupted in HCM, you need to run the quick code full synchronization, as the EIP removes all existing quick codes from HCM and reloads it from CRM.
Initial Full Synchronization
Follow the procedure below to publish the quick codes from CRM to HCM:
Log on to CRM as an administrator user.
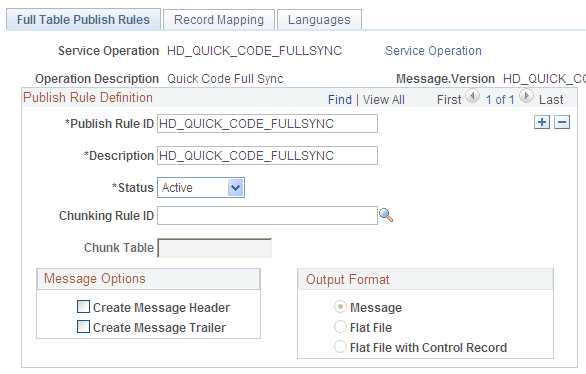
Access the Full Data Publish Rules page and edit the full data publish rule configured for the HD_QUICK_CODE_FULLSYNC service operation and make the changes listed below:
Enter HD_QUICK_CODE_FULLSYNC in the Publish Rule ID and Description fields.
Select Active in the Status field.
Clear the Create Message Reader and Create Message Trailer check boxes.
Navigation
Image: Full Data Publish Rules page
This example illustrates the Full data publish rules configuration for automatic case creation.
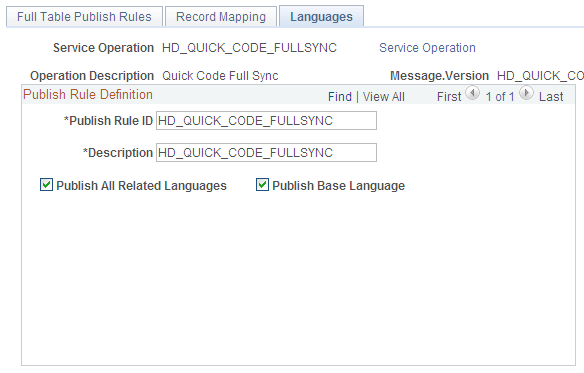
Click the Languages tab of the Full Data Publish Rules page and select the following check boxes:
Publish All Related Languages
Publish Base Language
Image: Full Data Publish Rules - Languages page
This example illustrates the Full data publish rules - Languages configuration for automatic case creation.
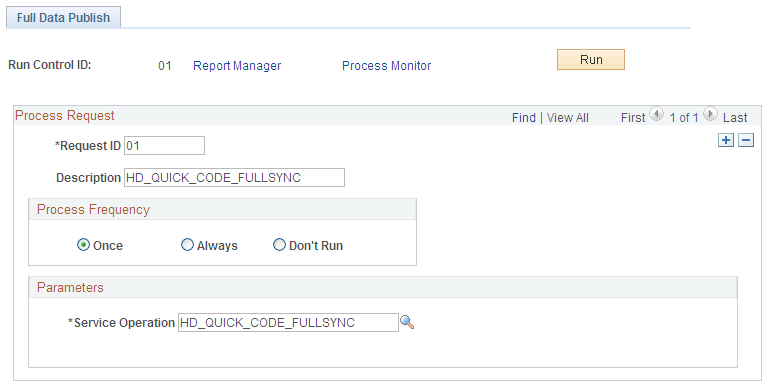
Access the Full Data Publish page and add a new run control for the HD_QUICK_CODE_FULLSYNC service operation.
Enter an identifier in the Request ID field.
Select Once in the Process Frequency check box.
Search and select HD_QUICK_CODE_FULLSYNC in the Service Operation field.
Navigation
Image: Full Data Publish page
This example illustrates the Full Data Publish page.
Click the Run button and check the Process Monitor to see if the Full Data Publish process (EOP_PUBLISHT) is completed successfully.
Subsequent Incremental Synchronization
Follow the steps below to publish the newly added quick codes to HCM:
Log on to CRM as an administrator user.
Access the Quick Code page and search for a quick code with HRHDU in the Business Unit field.
Navigation
Update one of the existing quick code, or create a new quick code and save the changes.
Verify the New Quick Codes
Log on to HCM as an HRHD Administrator user.
Open the AAF policy for the automatic case creation in design mode.
Navigation
Click the Edit Actions button in the Actions section. This opens up the Edit Actions page.
Image: Build a Policy - Edit Actions page
This example illustrates configuring the actions on the Edit Actions page.
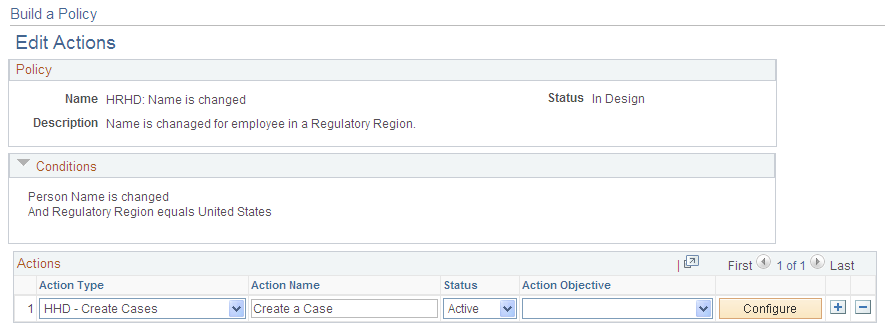
On the Edit Actions page, click the Configure button in the Actions section. This opens the Create Case Configuration page.
Image: Create Case Configuration page
This example illustrates the Create Case Configuration page. You can search and select quick codes on this page.
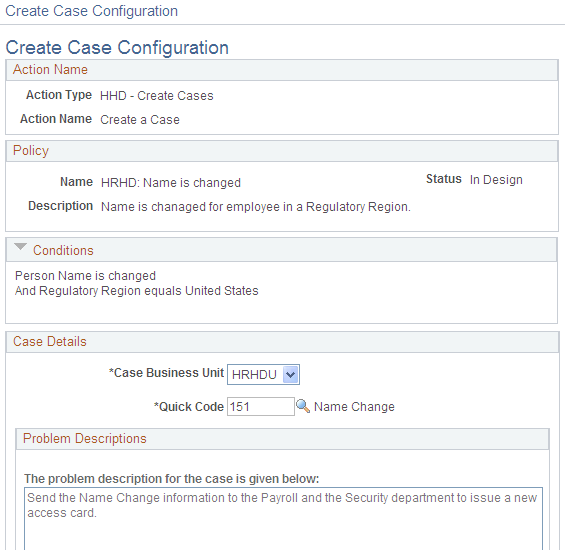
Select HRHDU in the Case Business Unit field and search for quick codes in the Quick Code field. Verify whether all configured quick codes in CRM are listed.
Verifying the Configuration for Automatic Case Creation
To verify the automatic case creation setup, follow the steps below:
Log on to the HCM system as an HRHD Administrator user.
Access the Build a Policy page and activate the AAF setup for the feature. This involves checking if the policies and the triggers are enabled. You should also turn ON the AAF setting Enable Runtime to enable case creation.
Open the policy in Edit mode and modify either the case business unit or the quick code used for creating cases and save the changes. Make sure that the policy is activated.
Access the Workflow Configurations page and make sure that the Allow DB Update option is selected for the required self service transactions, for example, Name Change.
At runtime, access the Name Change self service transaction and change a person’s last name in HCM. Submit the request. This event triggers the AAF policy created for name change.
The system publishes the case related information to CRM and creates an HR HelpDesk case through the Create Case EIP (HD_HRHD_CASE). Verify that the new case is created for the right employee (for whom the HR data was updated) and displays the correct default values (as selected in the policy action).
A list of common issues seen during automatic case creation, and their possible resolutions are listed below:
|
Issue |
Solution |
|---|---|
|
Unable to view transaction details; links on the Integration Broker Monitor are disabled. |
To view transaction details on the monitor, the logged on user needs to be associated with a role that has the HRHD EIP service permission. E.g.: HRHD Administrator. |
|
The transaction status of the service operation stays at New and would not update. |
Make sure that the domain status is set to Active and the channel status for HDHR EIP services is set to RUN. |
|
Unable to ping the remote node successfully and receives this error: “Asynchronous Message Handler: Access denied. Target and source message node passwords do not match.” |
Use the same password for both local and remote nodes in CRM and HCM. E.g.: PSOFT |
|
Receives the following error while publishing EIP message: “PublicationContractManager::ProcessError/RetryResponse(): 'PSFT Authentication token failed for Node <local node name>. (158,454)'”. |
Use Password as the authentication option for local and remote nodes in both systems. |
|
Receives error regarding Integration Broker Authentication: No node Authentication Option set for node <remove node name> on Target system. |
Make sure that he remote node name on the local system is the same as the local node name on the remote system. |
|
Receives error “PublicationContractManager:ProcessError/RetryResponse(): 'User XXX not authorized to invoke Service Operation HD_XXXXXXX. (158,536)'”. |
Make sure user XXX has the HRHD Administrator role in the target system. |
|
No transaction was created in the Integration Broker Monitor after the EIP message for quick codes was supposed to be published. |
Make sure that when the quick code sync process is set to run on the Full Data Publish page, the process frequency is set to Once. |
Troubleshooting Quick Codes Issues
If the newly created quick codes are not displayed as expected in HCM, follow the steps below to see if the issue is EIP-related:
Log on to CRM and check the Process Monitor component of Process Scheduler to see if the process EOP_PUBLISHT is running successfully.
Navigation
Access the Monitor Overview page and check if the Integration Broker request result for full sync (HD_QUICK_CODE_FULLSYNC) or incremental sync (HD_QUICK_CODE_SYNC) is Done.
Navigation
Access the Operation Instances page to check if theTransaction Status of the service operation (HD_QUICK_CODE_FULLSYNC or HD_QUICK_CODE_SYNC) is Done.
If the process results in an error, click the Error link to get the error details
Note: If the above steps were completed without errors, it means that there are no issues with Integration Broker connectivity from the CRM side. You need to repeat the same steps in HCM also. Log on to HCM as an HRHD Administrator user and check for any Integration Broker issues on the HCM side.