Enabling Single Signon for DES
The Single Signon feature is configurable; you can turn it on or off for DES. A new DES parameter named useSingleSignOn is available to the Setting page (Set Up CRM, Product Related, Online Marketing, Settings).
The default value for this parameter is false. When useSingleSignOn=false, the Single Signon feature is not enabled for Online Marketing.
|
Page Name |
Definition Name |
Usage |
|---|---|---|
|
IB_NODE |
Specify information about nodes. |
|
|
SINGLE_SIGNON |
Use this page to specify single signon authentication information. |
|
|
WEB_PROF_GENERAL |
Use this page to specify information about your web profile. |
|
|
IB_NODECONN |
Use this page to specify the integration gateway and target connector the node uses for integrations. |
|
|
RY_DES_SETTING |
Use this page to define configuration parameters for the Dialog Execution Server. |
|
|
PSOPTIONS |
Use this page to set a number of options that affect multiple PeopleTools and applications, such as language options and change control settings. |
|
|
USER_GENERAL |
Use this page to define user profiles and then link them to one or more roles. |
In order to enable the PeopleSoft Single Sign-On feature, some configuration tasks are required by PeopleTools:
Integration Broker setup.
Single Signon trust node setup.
Authentication domain setup.
Enable the Switch User privilege to the JOLT user.
Use the Node Definitions page (IB_NODE ) to specify information about nodes.
Navigation
Image: Node Definitions page
This example illustrates the fields and controls on the Node Definitions page.
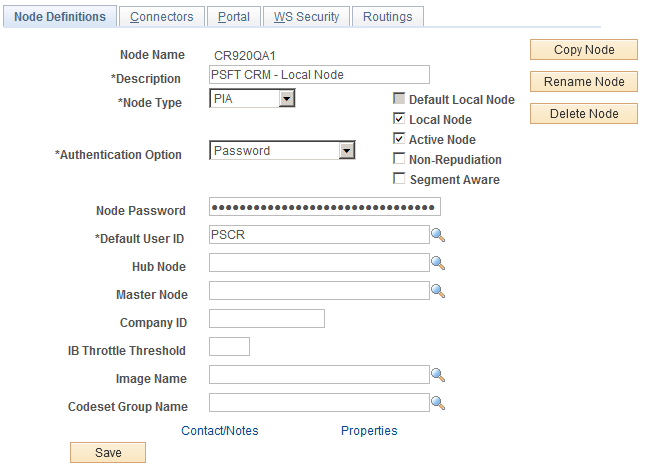
Ensure that the Authentication Option field in the Integration Broker local node has a Password or Certificate option.
|
Field or Control |
Definition |
|---|---|
| Authentication Option |
Select Password or Certificate from the drop-down list. |
Use the Single Signon page (SINGLE_SIGNON) to use this page to specify single signon authentication information.
Navigation
Image: Single Signon page
This example illustrates the fields and controls on the Single Signon page.
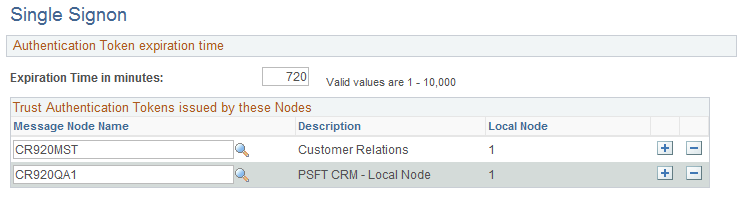
Define the local node to trust its own tokens by including it in the Trust Authentication Tokens issued by these Nodes list.
|
Field or Control |
Definition |
|---|---|
| Message Node Name |
Shows the name of the Message Node. In order to share authentication tokens between nodes, the nodes need to trust each other. By adding a node to this grid, you indicate that a particular node is known to the system and trusted. When a node is trusted, the local node accepts tokens issued by it. By default, no nodes appear in the trusted nodes list. If you want to implement single signon, you need to explicitly configure your system to support it by adding trusted nodes. First, you need to add the local node to the grid as a node must be able to trust its own tokens. When you sign in to the portal, the system authenticates users with a single signon token issued by the local system. The portal won’t be able to sign in unless the local node is trusted. Then you add the names of other nodes in the system that should be trusted. Note: After you update the list of trusted nodes, the system automatically recognizes the new list. Restarting the application server is not required. |
Authentication Domain Setup
Both the PIA and DES servers must be assigned to the same authentication domain. The server name in the URLs used to access PIA or DES must contain the same domain name. This is because a browser sends a cookie back only to the same domain from which it received the cookie.
Both the PIA and DES servers must be assigned to the same authentication domain. The server name in the URLs used to access PIA or DES must contain the same domain name. This is because a browser sends a cookie back only to the same domain from which it received the cookie.
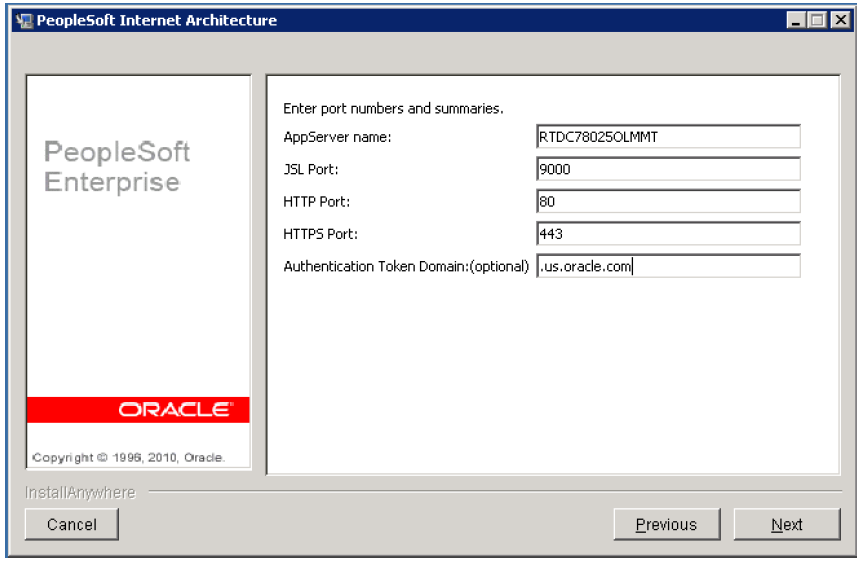
You can perform this task in the PIA server by specifying the domain in the Authentication Token Domain field.
Image: PeopleSoft Internet Architecture - Authentication Token Domain page
This example illustrates the fields and controls on the PeopleSoft Internet Architecture - Authentication Token Domain page.
|
Field or Control |
Definition |
|---|---|
| Authentication Token Domain |
Set this value to .us.oracle.com. Note: The leading period before us is required. |
Use the Web Profile Configuration page (WEB_PROF_GENERAL) to specify information about your web profile by setting the Authentication Token Domain property.
Navigation
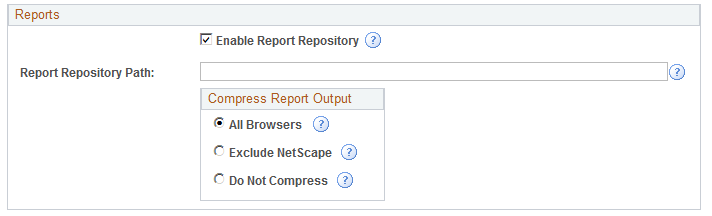
Image: Web Profile Configuration page (1 of 2)
This example illustrates the fields and controls on the Web Profile Configuration page (1 of 2).

Image: Web Profile Configuration page (2 of 2)
This example illustrates the fields and controls on the Web Profile Configuration page (2 of 2).
|
Field or Control |
Definition |
|---|---|
| Authentication Domain |
Set this value to .us.oracle.com. Note: The leading period before us is required. |
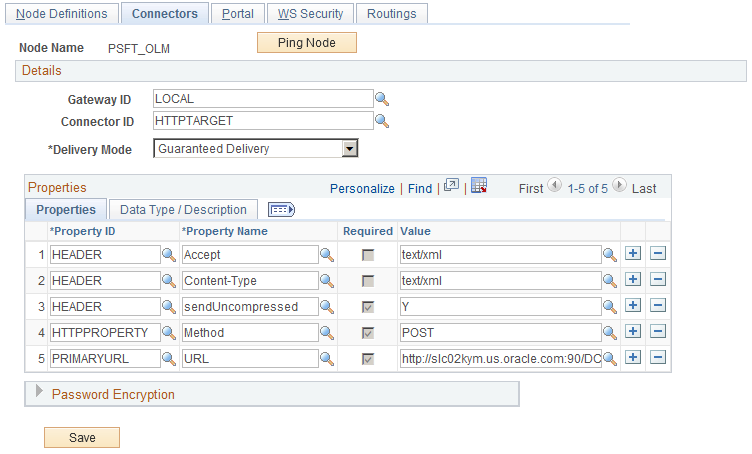
Use the Nodes-Connectors page (IB_NODECONN) to define the DES URL in the PSFT_OLM node. You must include the full domain name in the URL.
Navigation
Image: Nodes - Connectors page
This example illustrates the fields and controls on the Nodes - Connectors page.
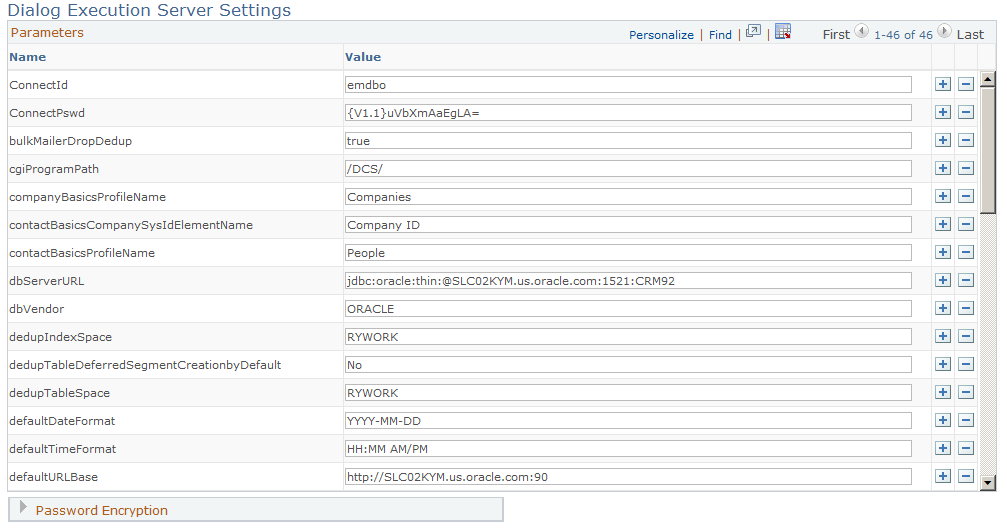
Use the Dialog Execution Server Settings page (RY_DES_SETTING) to provide the URL with the full domain name in the parameter defaultURLBase.
Navigation
Image: Dialog Execution Server Settings page
This example illustrates the fields and controls on the Dialog Execution Server Settings page.
Enable the Switch User Privilege to the JOLT User
DES uses the Tools Single Signon API to identify the user, so DES must send the PS_TOKEN using JOLT. The JOLT user must have the Switch User privilege so that the Tools Single Signon API can identify the PS_TOKEN data.
You can assign this privilege in one of two ways:
Assign the privilege to all users.
Assign the privilege to some users.
Use the PeopleTools Options page (PSOPTIONS) to use this page to set a number of options that affect multiple PeopleTools and applications, such as language options and change control settings.
Navigation
Image: PeopleTools Options page (1 of 2)
This example illustrates the fields and controls on the PeopleTools Options page (1 of 2).
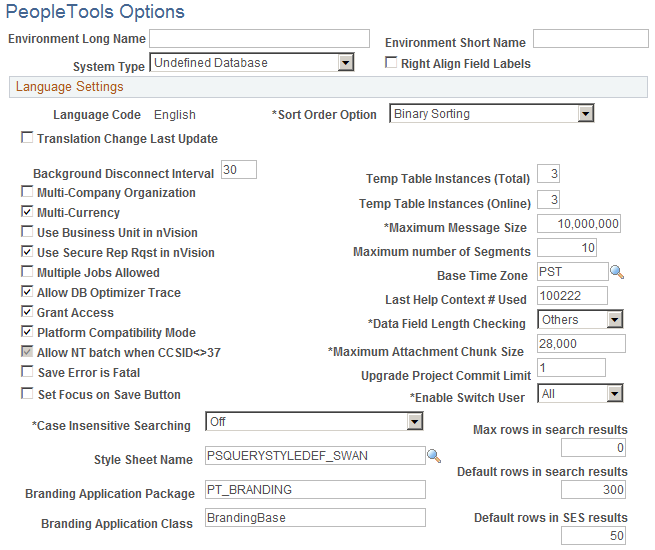
Image: PeopleTools Options page (2 of 2)
This example illustrates the fields and controls on the PeopleTools Options page (2 of 2).
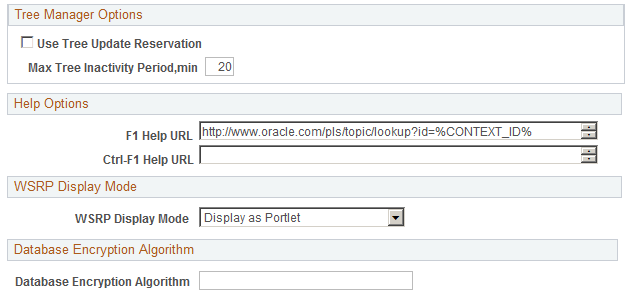
To assign the Switch User privilege to all users, select All in the Enable Switch User field.
|
Field or Control |
Definition |
|---|---|
| Enable Switch User |
Select All from the drop-down list to assign the Switch User privilege to all users. Select Some to allow the privilege to be assigned to selected users only. |
To assign the Switch User privilege to selected users, you must have selected Some in the Enable Switch User field on the PeopleTools Options page. You must also select the Allow Switch User check box on the User Profile page (PeopleTools, Security, User Profiles) for the user to which you want to assign the privilege (this user should be a JOLT user for DES). In this example, ASIERRA is the value of the psOperationUser parameter in the DES Settings page (Set Up CRM, Product Related, Online Marketing, Settings).
Use the User Profiles page (USER_GENERAL) to define user profiles and then link them to one or more roles.
Navigation
Image: User Profiles - General page
This example illustrates the fields and controls on the User Profiles - General page.
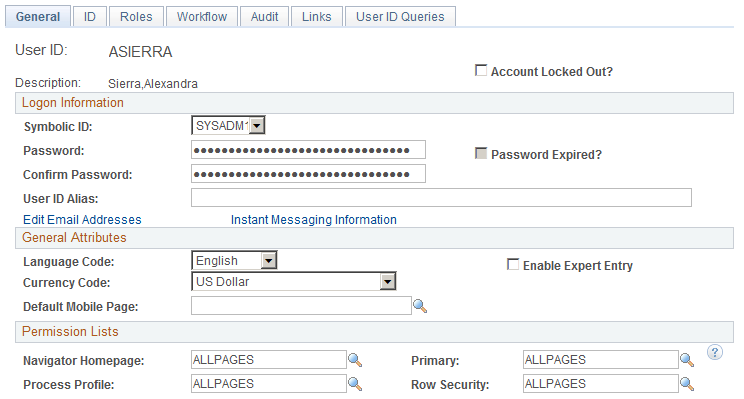
Note: The Allow Switch User check box only appears when you have selected Some in the Enable Switch User field on the PeopleTools Options page. If you change this value, you must restart the PIA server and the Application Server before the changes (including the both addition of the Allow Switch User check box on the User Profiles page and the Enable Switch User property changes for users) take effect.
Qualification to Use SSO For a Dialog
In order to qualify Single Signon from PIA to DES, the user who is currently signed in to PIA must also be associated with a CDM person who has the same role defined in the dialog. If a person exists in CDM but has a different role than the role defined on the dialog, this person will be treated as an unknown user and Single Signon will not be activated. The dialog role is specified in the New Individuals’ Role field in the Dialog Designer.
For example, consider a Consumer Survey dialog. Single Signon will not work for either of the following cases, which means that all of the fields on the survey landing page will be blank and the regular matching rule logic will apply for the remainder of the dialog flow.
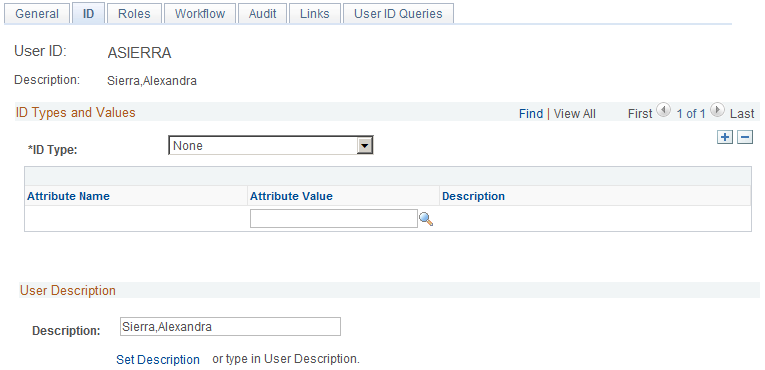
In the first case, the user signed in to PIA as ASIERRA has no Person ID assigned to that user.
Image: User with no Person ID assigned
This is an example of a user with no Person ID assigned.
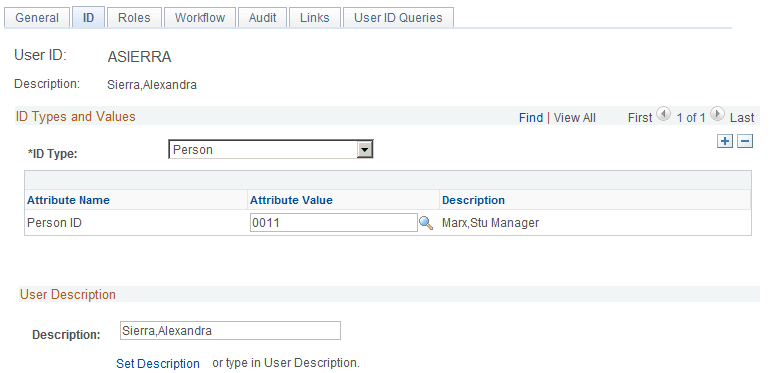
In the second case, the Person Stu Marx has been assigned to user ASIERRA, but the person has no Consumer role to match the Consumer role specified in the survey dialog’s New Individuals’ Role setting.
Image: Person with no Consumer role
This is an example of a person with no Consumer role.