Exporting Dialog Responses
In addition to viewing CRM Online Marketing survey information using the delivered Individual Response Report functionality, you can also export the data into an XML format so that users can easily extract it into a Microsoft Excel spreadsheet or any other data analysis software.
Before you can use Dialog Response Export, the administrator must perform some setup tasks. These include ensuring that:
The PS_FILEDIR environment variable is set on the server where Process Scheduler is running.
SMTP is configured to get email from the Process Scheduler.
The export FTP server is available.
The setup URL points to the FTP server.
Setting the PS_FILEDIR Environment Variable
The administrator must set the PS_FILEDIR environment variable on the server where the Process Scheduler is running. This variable is usually set to PS_CFG_HOME\appserv\prcs\<db_name>\files\. This is required in order to be able to write files to the application server/process scheduler server.
Refer to your operating system documentation for information about how to set environment variables.
Configuring SMTP
The Process Scheduler must be running with Report Node configured and must have proper SMTP settings in order to receive an email confirmation upon execution of the Dialog Response Export process.
See the product documentation for PeopleTools: Process Scheduler.
Setting Up the URL
To set up the URL to point to the proper FTP server where the exported file will be attached, use the URL Maintenance page (PeopleTools, Utilities, Administration, URLs).
Image: URL Maintenance page
This example illustrates the fields and controls on the URL Maintenance page.
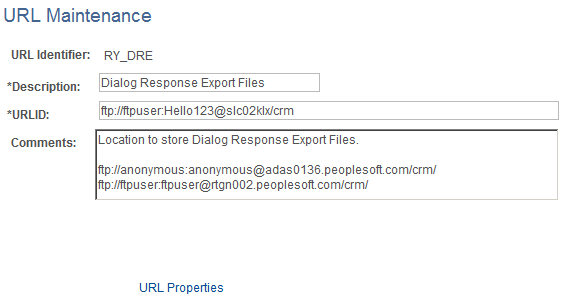
Open the URL definition RY_DRE and replace the delivered URL with the a valid URL pointing to the FTP server where you want the export file to be located.
To export dialog responses, you use the Dialog Response Export page (Marketing, Operational Reports, Document Responses, Dialog Response Export).
Image: Dialog Response Export page
This example illustrates the fields and controls on the Dialog Response Export page.
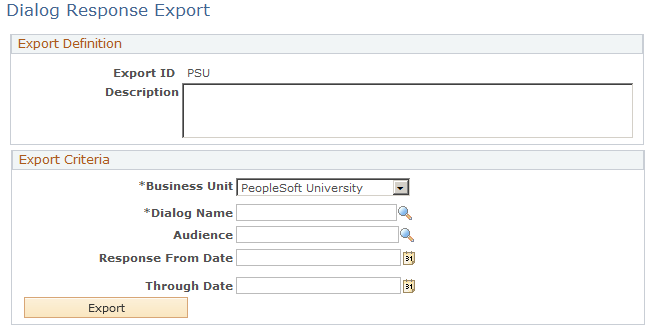
Click Add a new value and enter a new report ID, then click Add.
|
Field or Control |
Definition |
|---|---|
| Export ID |
A meaningful report ID that defines the type of report being generated. For security reasons, the export ID is unique by user (that is, different users could each generate a report with the same name). Export IDs must contain only characters and numbers, and no spaces are allowed. Note: The Export ID is entered on the Add a New Value page that displays when you choose to enter new export details. |
| Description |
Enter a meaningful description of the report. |
| Business Unit |
The business unit for which the dialog to be exported was created. |
| Dialog Name |
The name of the dialog to be exported. Only Live dialogs are included. The dialog name is secured by the Marketing Center, so only those dialogs that the user has permission to view will appear in the list. Further, the dialog name is secured based on Individual and Aggregate report security. Users must be authorized to view both Individual and Aggregate reports in order to export the dialog data. |
| Audience |
(Optional) Enter an audience name if you only want to export responses from people belonging to that audience. To export responses from all respondents, leave the field blank. This prompt is secured—only audiences the user has permission to view will appear on the list. The audience does not have to be associated with the selected dialog. Note that if the selected audience is of the Dynamic type, the audience is regenerated before the data is exported. |
| Response From Date, Through Date |
(Optional) The dates between which the responses you want to export were received. If both dates are specified, then responses between the specified dates are exported. If only Response From Date is specified, then any responses after the specified response date are exported. If only Through Date is specified, then any responses up to the specified date are exported. Note: Dates are not inclusive. Values exported are greater than the Response From date and less than the Response To date. |
| Export |
Click this button to execute a batch program that extracts the dialog responses base on the export criteria specified. If a Dynamic audience was specified, it is generated at this time. |
Export Considerations
You should be aware of the following considerations when exporting dialog information:
The dialog must be live.
Only completed responses are exported.
Only the following types of questions can be exported:
Profile Field
Text
Single Choice
Choose One with Rating
Yes/No
Multiple Choice
Date
Number
Comment
Export Validation
The following validations are performed when a dialog is exported:
The Export ID should contain only letters and numbers without any spaces.
If they are included, the Through Date value should be later than the Response From Date value.
The dialog prompt should be secured based on the dialog's security, and users and roles should be authorized for both Individual and Aggregate reports.
The audience prompt should be secured based on the audience's security and on the users' and roles' authorization for the audience.
Exporting the Dialog
After you enter the correct information and click the Export button, the system starts a batch process to perform the export. A message is displayed informing you that the export is in process. The Dialog Response Export page displays the process instance and the run status; you can click the Refresh Status button to view the current status of the export. You can also click the Process Monitor link if you want to display more detail about the process.
If an email address is associated with the User ID that ran the process, then an email message is sent to that address when the export is complete. Because the exported file is large, the email will not contain the file itself; rather, the email is a confirmation that the process has been completed. The user must log in to the application to download the exported file.
Saving the XML File
When the export is complete, the system creates a zipped XML file, which it stores in the FTP location specified on the URL Maintenance page. To use the file, open it by clicking the Download Export Results link and save it to your computer.
Importing the XML File to Excel
To import the XML file to an Excel spreadsheet:
Unzip the zipped file.
Open Excel.
Select Data, Import External Data.
Select the XML file from the local directory where you have stored it.
Click Open.
Click OK to let Excel auto-create the schema.
Highlight the cell where you want the data to be imported.
Click OK.
Dialog Responses in the Spreadsheet
When the XML file has been imported into Excel, it looks similar to the following illustration.
Image: Example of dialog results in XML file imported into Excel
This example illustrates the fields and controls on the Example of dialog results in XML file imported into Excel.
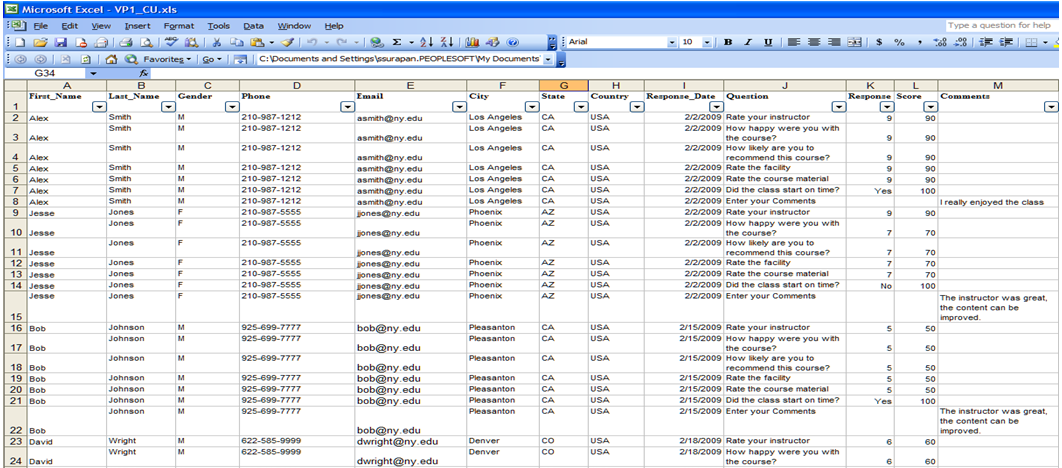
The First Name, Last Name, Gender, Phone, Email, City, State, Country, Response Date, Question, Response, Score, and Comments values are shown as columns.
Questions show up as rows.
If the dialog documents are not of type Survey, the Score column will contain no data.
The data format (font, color, and so on) can vary, and you will need to define it in Excel.
If the dialog was set up for anonymous responses, the First Name and Last Name columns will display “Anonymous.”