Setting Up File Transfers
This section discusses how to set up file transfers.
|
Page Name |
Definition Name |
Usage |
|---|---|---|
|
EODI_XFR_REG |
Set up file transfer registration. |
|
|
EODI_XFR |
Review what you previously defined as defaults in your file transfers. |
Use the File Transfer Queue page (EODI_XFR) to review what you previously defined as defaults in your file transfers.
Navigation
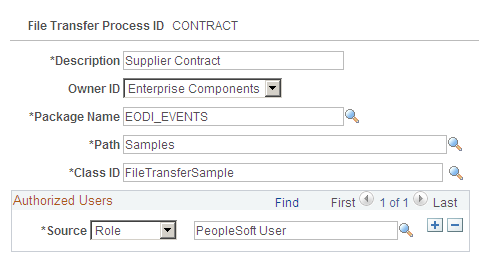
Image: File Transfer Registration page
This example illustrates the fields and controls on the File Transfer Registration page. You can find definitions for the fields and controls later on this page.
|
Field or Control |
Definition |
|---|---|
| File Transfer Process ID |
The ID is supplied beforehand. |
| Description |
Description of the File Process. Enter a unique description. |
| Object Owner ID |
The application class that owns the object (for example, Enterprise Components). Select a value from the drop-down list box that contains all of the available applications. |
| Package Name |
The name of the package that defines the PeopleSoft Application Layer for this process. This is unique for each process. The Application Class information and data here is where you point to the code that will be called for your specific PeopleSoft Application Layer functions. This is needed only if you are modifying or adding new integrations. PeopleSoft Applications deliver these defined for their delivered integrations. The package name, path and class ID are specific to the registration. For delivered registrations, the fields are populated with application specific data. When creating new registrations, these classes are defined beforehand in PeopleSoft Application Designer. This applies to all registrations. |
| Path |
(Samples) Enter the path where Samples can be found. |
| Class ID |
(Task Samples) Enter a unique ID for the class. |
Authorized Users
|
Field or Control |
Definition |
|---|---|
| Source |
The source of the authorized user. Select from the drop-down list box. Values are:
You do not need to create a user ID for each; you can simply use the email address. The user ID does not need to match the email or PeopleSoft user ID. You can also create generic user IDs. The field to the right is automatically populated based on the source that you specify. |
| (the blank field to the right of the Source field) |
Depending on the Source that you select in the Authorized User section (User ID, Role Name, SQL User List), a corresponding list of options becomes available for selection. |
Use the File Transfer Queue page (EODI_XFR) to review what you previously defined as defaults in your file transfers.
Navigation
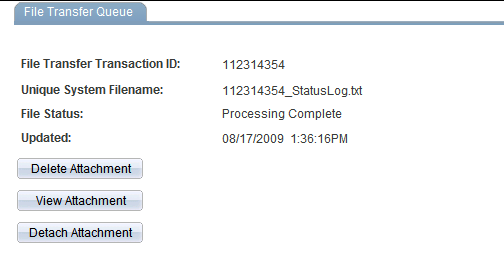
Image: File Transfer Queue page
This example illustrates the fields and controls on the File Transfer Queue page. You can find definitions for the fields and controls later on this page.
|
Field or Control |
Definition |
|---|---|
| File Transfer Transaction ID |
The numeric transaction ID that the PeopleSoft system assigns when you create the file transfer. |
| Unique System Filename |
Upon processing of the file transfer, this field updates with the unique system file name assigned by the PeopleSoft system. |
| File Status |
Displays the current status of this file transfer. Values are:
|
| Updated |
The date that this file transfer is updated with new or edited information. |
| Delete Attachment |
Click to delete the attached file. |
| View Attachment |
Click to view the attached file. |
| Detach Attachment |
Click to detach the attached file. |