Creating a Connection
The first step in creating an integration is to create the connections to the applications with which you want to share data.
- In the Integration Cloud Service toolbar, click Designer.
- On the Designer Portal, click Connections.
- Click New Connection.
The Create Connection — Select Adapter dialog is displayed.
- Select an adapter from the dialog. You can also search for the type of adapter to use by entering a partial or full name in the Search field, and clicking Search.
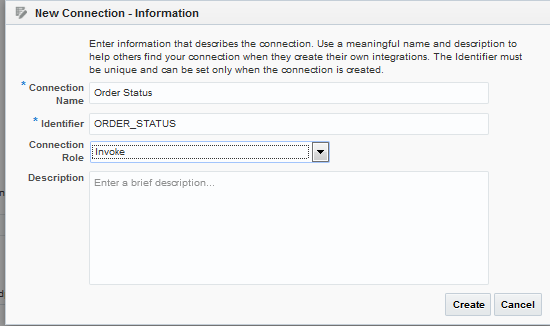
The New Connection — Information dialog is displayed.
- Enter the information to describe the connection.
-
Enter a meaningful name to help others find your connection when they begin to create their own integrations. The name you enter is automatically added in capital letters to the Identifier field. If you modify the identifier name, do not include a blank space (for example,
OSC Inbound). -
Select the role (direction) in which to use this connection (trigger, invoke, or both). Only the roles supported by this adapter are displayed for selection. When you select a role, only the connection properties and security policies appropriate to that role are displayed on the Connections page. If you select an adapter that supports both invoke and trigger, but select only one of those roles, then try to drag the adapter into the section you did not select, you receive an error (for example, configure an Oracle RightNow Cloud Adapter as only an invoke, but drag the adapter to the trigger section).
-
Enter an optional description of the connection.

Description of the illustration GUID-CBC87EE9-55CA-4320-A131-5426E3ECB478-default.png -
- Click Create.
Your connection is created and you are now ready to configure connection details, such as email contact, connection properties, security policies, and connection login credentials.