About Mapping Data Between Applications

Once you create an integration and have the source and target connections in place, you can define how data is mapped between the two data structures.

The mapper appears with the source data structure on the left and the target data structure on the right.
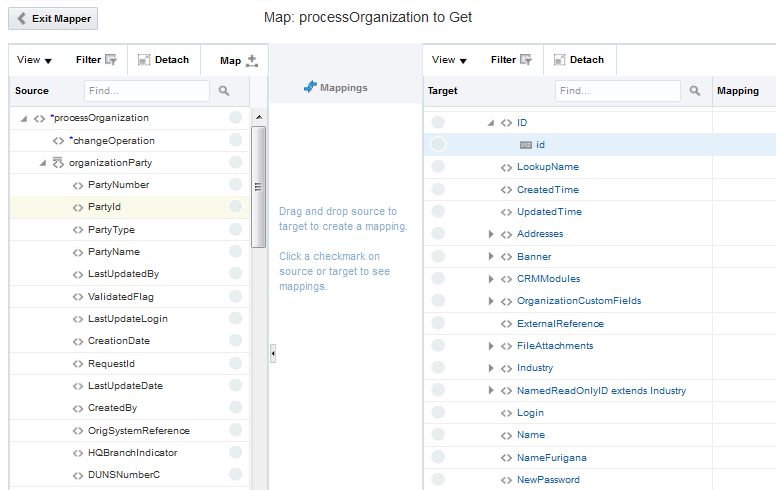
Description of GUID-2A80EEFB-6539-4EEF-BA50-1DFD0A92ED3F-default.png follows
Description of the illustration GUID-2A80EEFB-6539-4EEF-BA50-1DFD0A92ED3F-default.png
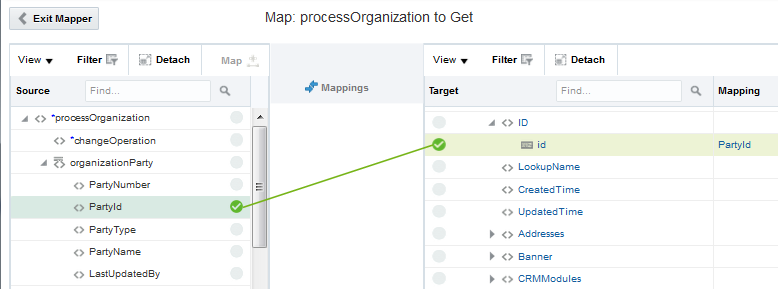
  1. To map fields directly, click a field in the source and drag it to the corresponding field in the target.
    The name of the source field appears in the target Mapping column, and a green check mark icon appears next to both fields. The most recently mapped fields are connected by a green line. Click the green check mark of other sources and targets to see their current mappings.
    Description of GUID-F3F56B11-171F-4A9C-9C69-4407520D77B6-default.png follows
    Description of the illustration GUID-F3F56B11-171F-4A9C-9C69-4407520D77B6-default.png
  2. To use XPath functions in your mapping, see Using XPath Functions for instructions.
  3. To use lookups in your mapping, see Referencing Lookups for instructions.
  4. When you are done mapping data, click Save, then click Exit Mapper.
  5. On the toolbar, click Save.
  6. Click the map icon between the response operations, and repeat the above steps to map the response. Make sure to save the integration when you are done.