159/380
Exporting project data
You can export data from a project view or a Results Table to either HDFS or your computer.
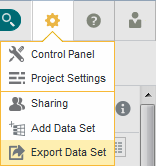
- If you are exporting from a project view, click the Control Panel icon and select Export Data Set:
 If you are exporting from a Results Table, select Actions > Export.The Export Data dialog opens.
 - If you are exporting from a project view, select the data set to export from the Data Selection drop down list.
The Preview displays the first three records of the selected data set.
- In the Filename field, enter a name for the file the data will be exported to.
By default, this is the name of the selected data set followed by the current date; for example,
Vehicle_Warranty_Claims_03022015. - From the Export to list, select the location you want to export the file to:
- HDFS
- My Computer
- If you are exporting to HDFS, do the following:
- In the File Path field, enter the path to the HDFS directory you want to export to.
By default, this path begins with
/user/bdd/exports. - If you want to create a new Hive table based on the exported data, select the Create Hive table check box and enter a name for the table in the Table name field.
By default, this is the name of the data set followed by the current date; for example,
Vehicle_Wattanty_Claims_030215.Optionally, enter a description for the table in the Add description field.
- In the File Path field, enter the path to the HDFS directory you want to export to.
- From the Type list, select the type of file to export to:
- Delimited
- Avro
Note that if you select Avro, you will not be able to transpose any of your data's multi-value attributes. - If you are exporting to a delimited file, select delimiters for fields and multi-value attributes.
If you select Other..., you must also provide a new delimiter. This must be a single unicode character with a value of 127 or less.
- If you want to transpose your data's multi-value attributes:
Note:
This option is not available for Avro files.- Click Multi-value attribute handling and select Transpose unique values.
- Select the attribute(s) you want to transpose.
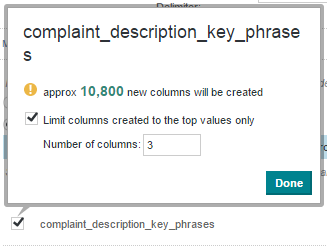
You can select all attributes by selecting the Apply to all multi-value attributes check box. However, if you want to limit the number of new columns created for each transposed attribute, you must select them one at a time.
- In each selected attribute's pop up, optionally check the Limit columns created to the top values only check box and enter a column limit.
 This prevents your data from becoming cluttered with columns from attributes that have large numbers of possible values.
- Click Export.