Joining data sets

You can join one or more data sets by specifying primary and secondary sources, a join key, a join type, and then running the transform script.

Before performing a join, both data sets must be added to the project. If you are performing a self join, only one data set is required.

To join data sets:

  1. In the Catalog, select a project.
  2. Select Transform.
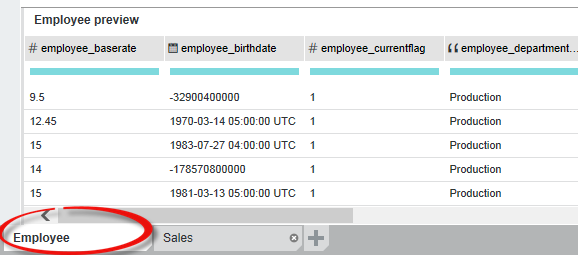
  3. Select a data set tab that you want to be the primary data set.

    For example, this project has an employee data set and a sales data set. Selecting Employee makes it the primary data set:
    Shows two data set tabs at the bottom of a project with Employee circled.

  4. From the transform menu, select Shaping > Join.
  5. Confirm that the secondary data set that you want to join is selected.
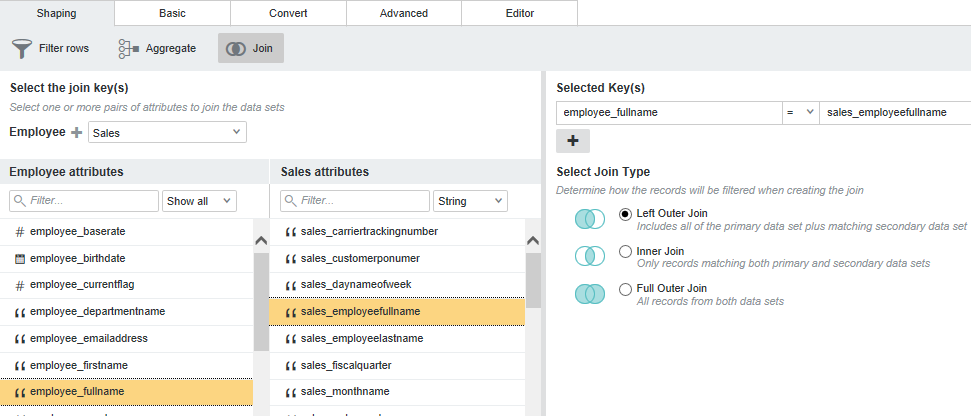
    For example, this project joins an employee data set to a sales data set:
    Shows a drop down list with the right side of the join.

  6. Create a unique join key from attributes that are the same data type.
    1. Click an attribute name from the primary side of the join to highlight it.
      The attribute is added to the left side of the Select Keys list. Also note that Studio restricts available attributes on the right side to those of the same data type.
    2. Select a key operator (equals, less than, greater than, etc) to determine how the key is built.
      For example, employee_fullname on the primary side might equal sales_employeefullname on the secondary side.
    3. Click an attribute name from the secondary side of the join to highlight it
      The attribute is added to the right side of the Select Keys list. For example, this key is employee_fullname equals sales_employeefullname:
      A join with a single key based on full name.

    4. If a single attribute is not sufficient to guarantee uniqueness across the joined record set, click the + icon and repeat the above steps a - c to build a compound key using a second set of attributes.
  7. Select the join type of Left Outer, Inner, or Full Outer.
  8. Optionally, click Preview to see the results of the join.
  9. Click Next.
  10. Specify which attributes you want in the joined data set by checking the corresponding attribute names. You can filter attributes, sort by data type, and select or deselect all.
    The available attribute list contains all attributes from both the primary and secondary data sets. At the top of the list, there is also a Source data set attribute. If this attribute is enabled, Studio creates a new multi-assign attribute with values that specify which data sources, by name, contributed to the new records.
  11. Optionally, click an attribute name to edit the name if necessary.
  12. Click Add to Script to save the join to the script.

If you are done making changes to the project data set, you can commit the changes. See Running the transformation script against a project data set.

You can monitor the progress of the join from the Notifications panel.