Creating a label assignment program using the workflow canvas
As an administrator, you can set up a program to automatically assign labels to contacts in the label assignment workflow canvas. A program will consist of various steps linked together to form a program path. Contacts are pulled into the program by a data source step, fed along a path and filtered through decision steps, and then arrive at an action step where labels are applied (or removed, depending on your configuration). All program steps are configured directly on the canvas.
Learn more by watching the video!
Before you begin:
- Create labels based on your business needs, including a default label that you want to apply to all new contacts.
- Assign created labels to your security groups, including the administrator security group.
- Configure the default label settings so that all new contacts are automatically assigned at least one label upon creation. Ensure that administrator security groups are assigned the same label.
- Plan a simple, straightforward label structure at first. You can edit the structure and add additional labels as needed.
Important: Before activating the program, ensure your security group has access to all security labels. Only contacts that you have access to can enter a program that you activate.
To create a label assignment program:
-
Click Settings
 .
. -
Click Security in the Users and Security area.
-
Click Label Assignment Workflow.
The Label Assignment Workflow program canvas opens.
You can edit the name of the program by clicking the title next to the DRAFT status in the upper-left corner, but this isn't required.
-
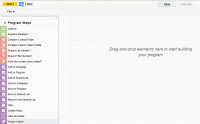
Add program steps from the left panel to the canvas through one of two ways:
- Double-click a step. The step automatically populates on the canvas. Drag and reposition it as needed.
- Drag the step from the left panel manually, and drop it onto the canvas.
-
Configure each step as you add them to the canvas.
See label assignment workflow canvas steps for information on how each step works, and how to configure them.
Note: Every time you add a listener step to the canvas, you must save your program before you can configure it.
-
Link the steps on the canvas together to form a program path. To do this, click the circular point(s) on the bottom of a step, and drag it to the circular point at the top the next step.

-
Repeat steps 4 through 6 until you achieve the desired program.
- Click Save at any point.
Your program configuration is saved. You can activate the program at any time by clicking Activate. Once activated, you can click Pause to halt the program, or click Deactivate to stop the program altogetherr.
Important: Once you have activated your program, labels are applied to contacts the program flow. If you pause or deactivate the program, all labels will remain applied to contacts. The only way to remove those labels will be to edit the program to clear all labels from the selected contacts, or to delete the label from your system altogether.
Program steps for the label assignment workflow canvas
