Creating Insight agents
Agents enable you to schedule content publishing in Insight. Agents use automation to trigger delivery of information to others, such as sending weekly reports to subscribers or notifying the individuals depending on the results of a report. Agents can perform tasks such as sending reports directly to your inbox on a set schedule.
Using agents, you can choose:
- A schedule that the agent runs on
- Content (that is a report or custom analysis) to be distributed
- A condition that determines whether the agent delivers the content
- Actions that automatically run depending on whether the condition is met
Learn more by watching the video!
Learn more by watching the video!
Before you begin:
- Insight does not support all the agent features available with Oracle Business Intelligence Enterprise Edition. The steps below make note of those areas not supported by Insight.
- If after saving an agent, you decide to move it or copy it to another location, make sure to disable the agent first. Once the agent has been moved or copied, you'll need to enable then save it.
- You can share the content generated by an agent with email recipients. Those recipients do not need to be Oracle Eloqua users. Depending on the format of the content, it can be embedded into an email or included as an attachment.
Tip: If you configure your Insight agent to send results in an email, it is best practice to include your name in the email body.
- Agents deliver up to 200,000 rows of data.
- You can only export a single page of a dashboard using an agent. Prompted filters cannot be used to customize a dashboard page, and dashboard prompts also can't be used. If you need the customization, use the underlying report on the dashboard with prompted filters.
- You cannot modify another user's agents if the agent is set up to run as the owner's credentials. For example, even if an agent's permissions are modified, users will not be able to change or delete the agent.
- When using agents to export reports with pivot tables, note the following about file types:
- CSV is supported and will display the raw data
- Excel, HTML, and PDF are supported and will return the pivot table with formatting
- Plain Text is not supported
To create an agent:
- In Insight, click New > Agent.
The Agent editor appears.
Tip: For details on the editor, click Help
 .
. -
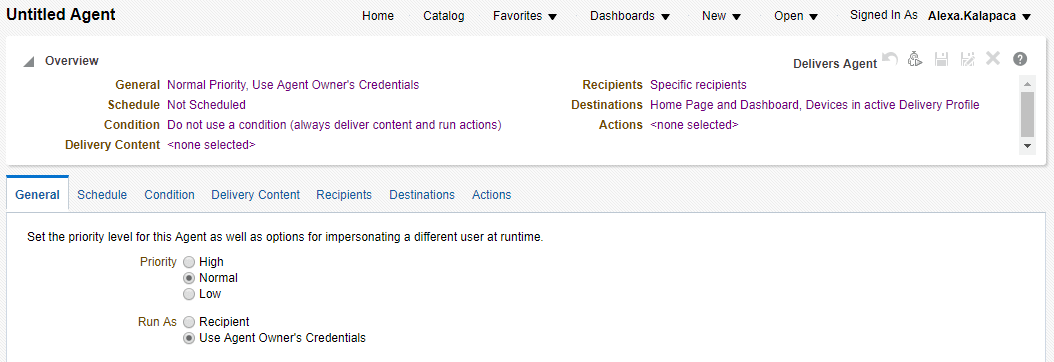
On the General tab, specify the priority of the content that the agent is to deliver and what user to use to run the agent as. If you are emailing the agent results, set the email priority using the Priority settings. In most cases, you will want to run the agent using your own credentials.
Note: If you use the Use Agent Owner Credentials, only the agent owner can modify the agent.
- Click the Schedule tab and specify the schedule for the agent. You can define a start date and time for the agent, a schedule, and an end date.
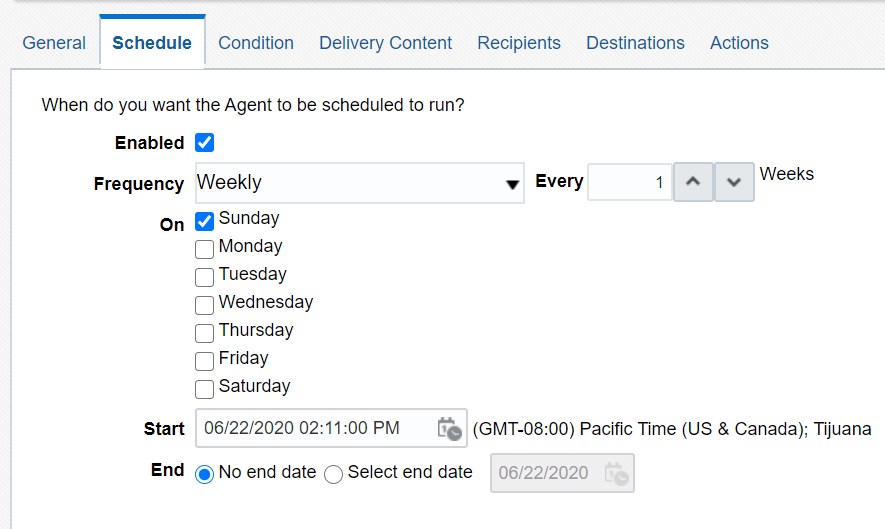
You can create an unscheduled agent by setting the frequency to Never. This is useful when you want to create an agent that runs only as part of an agent chain (that is agents that initiate other agents).
- Click the Condition tab and specify any conditions to determine whether the agent delivers the content. See Creating Insight conditions for more information.
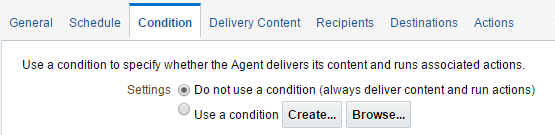
Note: Insight supports creating conditions using an analysis. Insight does not support the use of Key Performance Indicator (KPI) conditions that are included with Oracle BI EE.
- Click the Delivery Content tab and specify the content to deliver, such as a report, an analysis, or dashboard page, the format of the content, and other details about the delivery. Insight limits the number of rows delivered to 200 000.
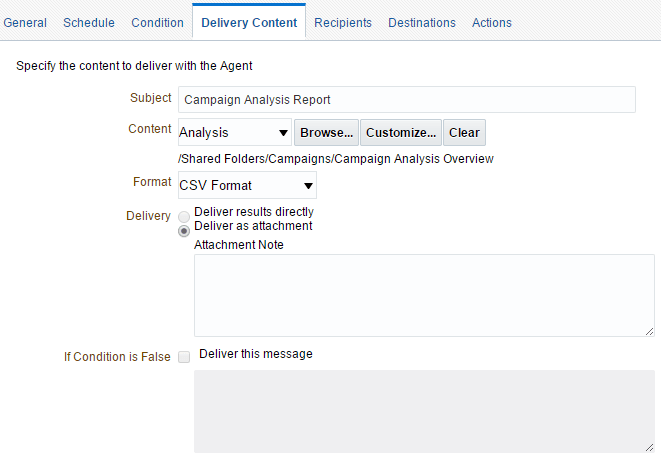
- If the analysis uses prompted filters, you can customize the filter values after you select the analysis.
Note: A prompted filter is a filter whose operator is set to is prompted. Only prompted filters can be used to customize the reports filter criteria. Learn more about how analyzers can create prompted filters.
- If you want to embed the content into the body of the email message, select the Deliver results directly option. Only HTML, Plain Text, or Narrative Text formats can be delivered directly. Otherwise, the content is delivered as an attachment.
- If you are using a condition on the agent, you can use the If Condition is False area to deliver a text message to recipients when the condition is false.
- If the analysis uses prompted filters, you can customize the filter values after you select the analysis.
- Click the Recipients tab and specify who to deliver the content to and whether Insight users can subscribe to the agent.
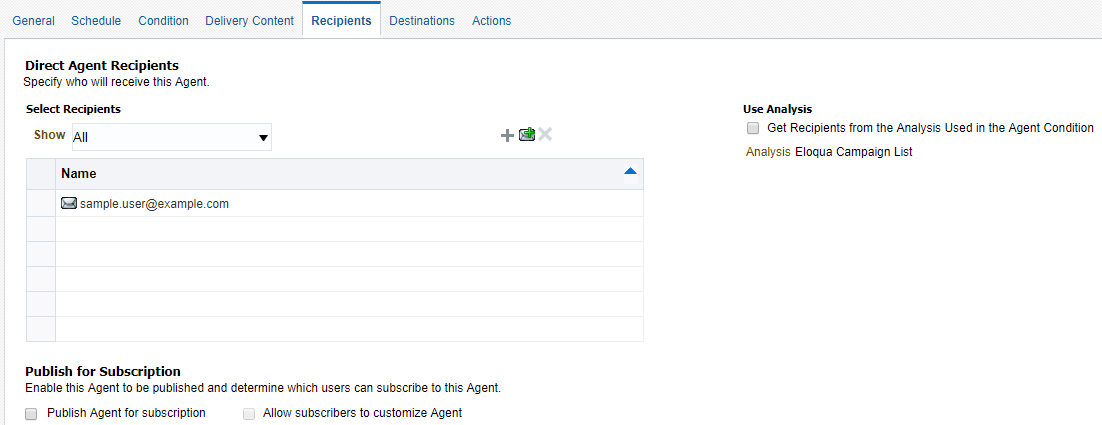
- To send the delivery content by email, click
 to add the recipient email address to the list.
 - To allow Insight analyzers to subscribe to the agent, click the Publish Agent for subscription check box.
- To send the delivery content by email, click
- Click the Destinations tab and specify where the content is delivered.
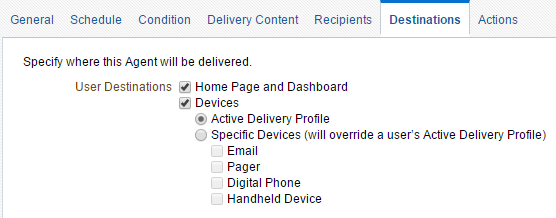
The destination you choose depends on the recipients.
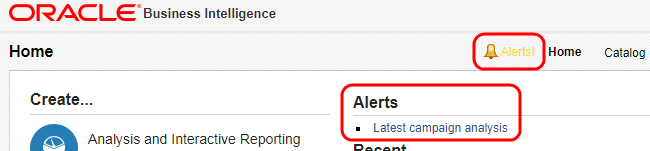
- If you added an Insight user to the recipient list, select the Home Page and Dashboard check box to alert them after the agent runs. Notifications appear on the Insight home page and in the Insight menu bar.
- If you added email recipients, leave the Devices check box selected. Currently, Insight does not support the device options but you must select the Devices check box to deliver the analysis to the email recipients.
- If you added an Insight user to the recipient list, select the Home Page and Dashboard check box to alert them after the agent runs. Notifications appear on the Insight home page and in the Insight menu bar.
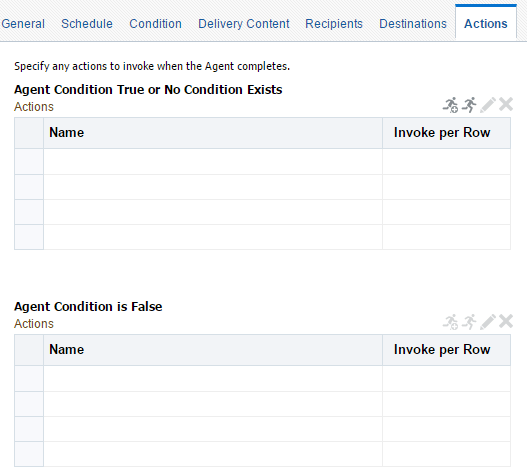
- Click the Actions tab and specify one or more actions to execute when an agent finishes. Currently, Insight only supports actions that invoke another agent.
Insight does not support actions that invoke operations, functions or processes in external systems.
-
Click Save
 to save the agent:
- If the agent is available for subscription, or you want others in your organization to be able to view the agent, save the agent to a folder in Company Shared. Learn more about creating Insight folders.
- If you do not want others to view your agent, save it to My Folders. Remember that this is a personal folder only visible to you.