Embedding Profiler in Salesforce Lightning
Note: If you are using Salesforce Classic, see Embedding Profiler in Salesforce Classic.
The users that can see Eloqua Profiler in your CRM system are dependent on the views/layouts you have set up in your CRM system and on which of those views/layouts you insert the Eloqua Profiler component.
Note: If you want to test Eloqua Profiler without making it available to your entire sales or marketing team, you should assign yourself a contact/lead view to which nobody else has access and then add Eloqua Profiler to that view.
Prerequisites:
-
In Oracle Eloqua, build an allowlist of the domains that will be hosting embedded Profiler pages. Learn how to configure Profiler.
- Determine the Oracle Eloqua login URL you want to use. You can use the simplified login URL or a specific legacy URL based on the desired login method. Learn more.
There are three main steps you must follow when installing Profiler using Visualforce:
- Create a Visualforce page for contacts and leads
- Adjust security for Visualforce pages
- Add Visualforce pages to contact and lead layouts
Tip: If you encounter any issues, see Troubleshooting.
Step 1: Creating a Visualforce page for contacts and leads
You will need to create two (2) Visualforce pages – one for leads and one for contacts. Then you will be editing your existing Contact and Lead views by inserting the appropriate Visualforce pages into their corresponding views. Below, we will cover the installation for a Lead view, however, the steps required for a Contact view are mostly the same but for a few minor text items noted below.
To create a Visualforce page:
- Log into your Salesforce account using your administrator credentials, then navigate to Setup in the upper right-hand corner of the screen.
- Locate the Quick Find search box, and search for Visualforce Pages
Alternatively, you can click Custom Code > Visualforce Pages.
- Click New.
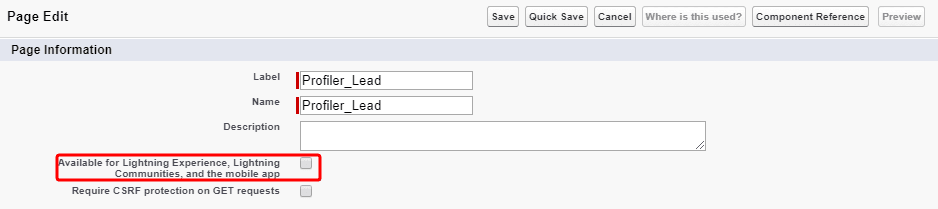
- Provide a Label and a Name for the Visualforce page.
Note: These two fields will only be used when managing layouts and sections and will not be visible to users simply reviewing a lead record. The name can be whatever you want but it must contain only alpha-numeric characters and must not have any spaces.
- In the Visualforce Markup tab, enter the URL depending on your login method:
- Simplified login:
<apex:page standardController="Lead"><apex:iframe scrolling="true" src="https://login.eloqua.com/siteLogin?SiteName={CompanyName}&ReturnUrl=/apps/embed/salesTools/profiler?emailAddress={!lead.email}"/> </apex:page> To use the legacy URLs, replace the URL value above with the Legacy login URLs.
- Simplified login:
- If you wish to enable this on the mobile app, select the check box next to Available for Salesforce mobile apps.
- Click Save.
- Repeat for the contact object.
Tip: For your contacts Visualforce page, replace
{!lead.email}with{!contact.email}.
Step 2: Adjusting security for Visualforce pages
Salesforce has default security that prevents certain users from viewing Visualforce pages unless the security on those individual pages is customized.
To adjust the security for a Visualforce page:
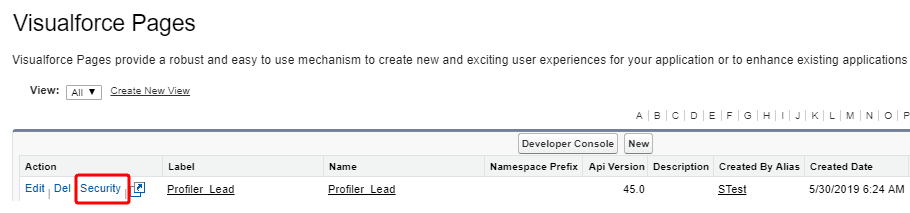
- Locate the Quick Find search box, and search for Visualforce Pages
Alternatively, you can click Custom Code > Visualforce Pages.
- Click Security next to the pages you created.
- Add the user types that should be able to view Eloqua Profiler to the Enabled Profiles list.
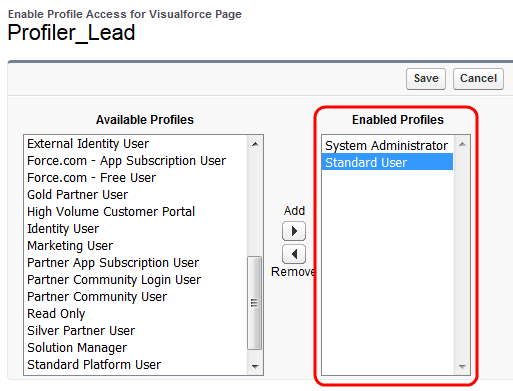
- Click Save.
Step 3: Adding Visualforce pages to contact and lead layouts
The steps below describe the procedure for adding the Leads Visualforce page to a layout. The same steps can be followed for the Visualforce Contacts page you created.
To add a Visualforce page to layouts:
- Locate the Quick Find search box, and search for Object Manager.
Alternatively, you can click Objects and Fields > Object Manager.
- Click Lead > Page Layouts.
- Click on the layout in which you would like to insert Eloqua Profiler (either the one you are testing or the one that your sales team uses to review Lead records).
- Drag the
 button near the top of your screen to create a new section in your layout to contain Eloqua Profiler.
 - Place the new section into the area of the layout in which you would like Eloqua Profiler displayed.
- Name the section. Ensure that the two check boxes are selected, and select a 1-Column Layout.
Note: The section name is what will be displayed above the section within the Lead view. Ensure that the name is something that will be relevant and intuitive to your sales users.
- Go back to the Contact Layout section at the top of the page, and click on Visualforce Pages in the list of options.
- Drag the button for the new Visualforce page you made into the new section you just created.
You have now included Eloqua Profiler in your layout. Now let's adjust the settings for this new section.
- Hover over the top right corner of the Visualforce page (inside the Section) until a wrench icon appears. Make sure it is the one for the Visualforce page and not the entire section.
-
Click on the wrench icon. In the Visualforce Page Properties dialog, ensure that the width is set to 100% and the height is set to 610.
- Click OK.
- Click Save to save this layout.
Important: Repeat the above steps for the layout of your Contact object.
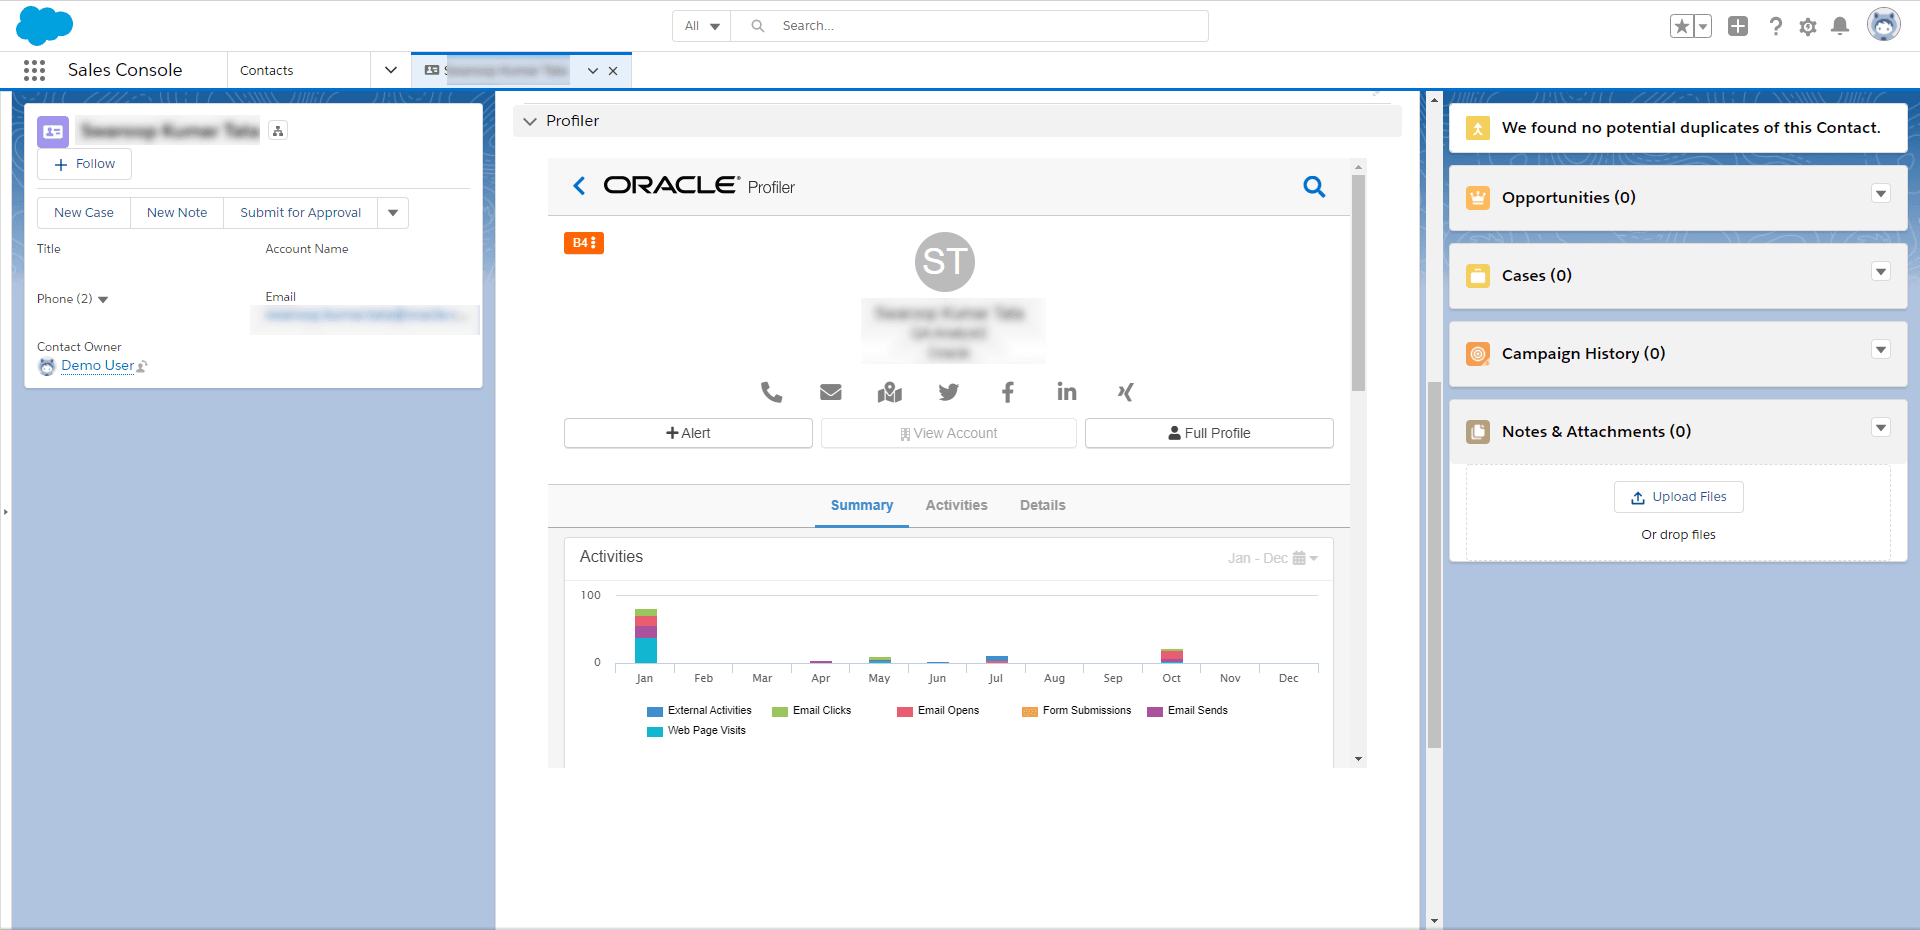
- When you return to the Leads tab in Salesforce and click on a lead, the new Visualforce page containing Profiler is displayed in the new section you added.
Troubleshooting
- If the iframe is not connecting, copy the URL you were trying to use in the Visualforce Markup tab (this will be the text between src=" and the next "), and enter it into a browser to test that it works on its own. Depending on the URL type, you might need to already be logged into Profiler.
- If you see a content security policy directive message in the iframe, check that your Profiler allowlist includes the required URLs for embedding in Salesforce. Make sure to also confirm that the URL you are using is correct and includes
/embed/.
- If you're experiencing trouble with your SSO, see Troubleshooting for other troubleshooting tips.
- If you have several IDPs setup with your SSO configuration, adjust the URL to use the specific IDP you want. Otherwise, the default IDP will be used.
Here is an example URL with the IDP parameter:
https://login.eloqua.com/siteLogin?SiteName=ExampleSiteName&Idp=69627DAC73E04DE79CDFC90D132B65EA&ReturnUrl=/apps/embed/salesTools/profiler
- If the Profiler iframe is trying to open a contact whose email address includes a + symbol, you'll encounter a Whitelabel Error Page error. To fix this, add
URLENCODEto the URL in the Visualforce Markup tab:...profiler?emailAddress={!URLENCODE(lead.email)}. Make sure to remove the ! from!lead.emailand place one beforeURLENCODE, and to add parentheses aroundlead.email.
- For Firefox users, if you’re using the legacy Autologin or SAML access methods, and you cannot progress past the Eloqua authenticate now login screen, you may have to disable Firefox enhance tracking protection. To do this, in Firefox, navigate to Options in the Firefox browser > Privacy & Security > Enhanced Tracking Protection > select Custom > uncheck the box for Cookies.
- If none of the above troubleshooting tips have solved your issue, please log in to My Oracle Support and create a service request.