Using audiences published from CX Audience
Important: This feature is only available if it is enabled for your account and if you have CX Audience.
Oracle CX Audience enables you to bring in marketing customer data, create filters, and then design audiences based on those filters. For more information about the capabilities of CX Audience, see the CX Audience Help Center.
You can publish audiences from CX Audience into Responsys, and then use them in the following ways:
- Targeting audiences in campaigns
- Targeting audiences in programs
- Routing by audience attributes in a program data switch
Before you begin:
- If you have not integrated your Responsys account with CX Audience yet, see Enabling Integrations for instructions.
- Ensure you have already published an audience into Responsys. Refer to the CX Audience Help Center for instructions.
Managing CX Audiences in Responsys
You can manage audiences imported from CX Audience in Responsys by navigating to Audiences > Manage Audiences. Any audiences published from CX Audience will display CX Audience as the Creator. Filter by Created by to group these audiences.

If there are audiences you no longer need, you can delete them from Responsys. This will not delete the Audience from CX Audience. You can re-publish the audience from CX Audience to Responsys if you need it again.
Targeting audiences in campaigns
You can target audiences from CX Audience in your Email and SMS campaigns.
To target an audience in a campaign:
- Navigate to Campaigns > Manage Campaigns in the side navigation bar, then click Create Campaign (Not seeing this choice? Refer to the Side navigation bar changes topic.). See Creating an Email Campaign and Creating an SMS Campaign for more information on how to create campaigns. Ensure to select the CX Audience List during creation.
- Click Workbook. (Not seeing this choice? Refer to the Email Campaign Designer changes, mobile Campaign Designer changes (In-app, Push, or Message Center), or SMS Campaign Designer changes.)
- Under Targeting, click Edit.
-
Select Everyone in the selected audience and click Select.

-
Select the audience and click OK.
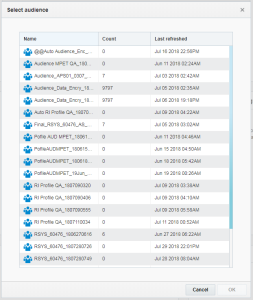
- Count represents the number of profiles that are in the Audience when the Audience was last imported into Responsys.
- Last refreshed represents the date and time the Audience was imported to Responsys.
- Click Save to save your Targeting settings.


Targeting audiences in programs
You can target audiences from CX Audience in your programs.
To target an audience in a program:
- Click Programs in the side navigation bar, then click Create Program. (Not seeing this choice? Refer to the Side navigation bar changes topic.)
See Designing programs for more information on how to design a program. Ensure that you select the CX Audience-integrated profile list during creation.
- Drag a Get an audience event onto the canvas.
- Double-click the event to open the configuration options.
-
Click Select.

-
Select the audience and click OK.
- Count represents the number of profiles that are in the audience when the audience was last imported into Responsys.
- Last refreshed represents the date and time the audience was imported to Responsys.
- Configure the audience settings.
- Click Done.

Routing by audience attributes in a program data switch
Important: This feature is currently released under our Controlled Availability program. To use this feature, you must be a CX Audience customer and have enabled CX Audience for your account. You must also have Audience Designer and the new Filter Designer user interface features enabled. To enable the feature and its prerequisites, please log in to My Oracle Support and create a service request.
When creating program orchestrations, you can use attributes of a selected audience from CX Audience to route enactments through paths in data switches.
Example: An audience called "Purchased_In_Last_Year" (imported from CX Audience) has an attribute called customer_value. This attribute can have values of HIGH, MEDIUM, or LOW. The data switch can be configured to use these values to send recipients to 3 different paths.
To use CX Audience conditions as filter criteria in a data switch:
-
From a program you are designing, drag a Data switch switch onto the canvas.
See Designing programs for more information on how to use a data switch in a program.
- Double-click the switch to open the configuration options.
-
In the Data conditions section, locate the path for which you want to use CX Audience attributes, and choose CX Audience conditions are matched. For example, if you have CX Audience conditions that you want evaluated first, select the CX Audience option for the If path.

- The routing based on CX Audience attributes dialog is displayed. First, choose an audience from the selection list.
- Next, drag and drop attributes to the CX Audience attributes area, and use the controls to create the conditions of the filter.

- Click Save when you are done.
- Repeat as needed for other paths in the data switch. Note that you can use different filter criteria for each path. For example, your If path is set up to match CX Audience attribute-based conditions, and your Else If path can use one of the other filtering criteria.


- You don't have to start your program with a CX Audience-based audience when using CX Audience attributes in the data switch.
- When a recipient is not part of an audience (that is, the CX Audience attribute is not found for the recipient), then the recipient is routed to one of the subsequent Else paths.